
Grow Sweet Potatoes Monthly? Yes, you read that right! Imagine harvesting fresh, vibrant sweet potatoes from your very own garden, not just once a year, but practically every month. Sounds like a dream, doesn’t it? Well, it doesn’t have to be! For centuries, cultures around the globe, particularly in the Americas and Asia, have cherished sweet potatoes not only for their delicious flavor but also for their nutritional powerhouse. From traditional dishes to modern culinary creations, this versatile root vegetable has earned its place as a staple.
But let’s be honest, the traditional method of growing sweet potatoes can feel like a long waiting game. That’s where these DIY tricks and hacks come in. I’m going to share some simple, yet effective techniques that will help you extend your sweet potato harvest and enjoy these delectable treats more frequently. Whether you’re a seasoned gardener or just starting out, these tips will empower you to grow sweet potatoes monthly, maximizing your yield and minimizing the wait.
Why do you need these DIY tricks? Because who wouldn’t want a constant supply of homegrown goodness? Plus, these methods are not only efficient but also sustainable, allowing you to make the most of your garden space and resources. Get ready to transform your gardening game and enjoy the sweet taste of success, month after month!

DIY: The Ultimate Grease-Busting Oven Cleaner (No Harsh Chemicals!)
Okay, let’s be honest, cleaning the oven is probably on everyone’s list of least favorite chores. That baked-on grease and grime? Ugh! But fear not, fellow home warriors! I’m going to share my secret weapon: a powerful, all-natural oven cleaner that’s surprisingly easy to make and incredibly effective. Plus, it avoids those harsh chemicals that can leave your kitchen smelling like a science lab.
What You’ll Need: Your Arsenal Against Grease
Before we dive in, let’s gather our supplies. This is a pretty straightforward recipe, so you likely have most of these items already:
* Baking Soda: This is our main cleaning agent. It’s a mild alkali that helps to dissolve grease and grime.
* White Vinegar: The acid in vinegar reacts with the baking soda to create a fizzing action that helps lift away stubborn messes.
* Water: We’ll use water to create a paste and to rinse the oven.
* Spray Bottle: For applying the vinegar.
* Spatula or Scraper: To help remove the loosened grime. A plastic one is best to avoid scratching your oven.
* Rubber Gloves: Protect your hands!
* Old Rags or Sponges: For wiping and cleaning.
* Small Bowl: For mixing the baking soda paste.
* Optional: Essential Oils (Lemon, Orange, or Tea Tree): For a fresh, clean scent. (A few drops will do!)
Phase 1: Prepping Your Oven for Battle
Before we unleash our cleaning power, we need to get the oven ready. This involves a little prep work, but it’s crucial for the best results.
1. Remove the Racks: Take out all the oven racks and set them aside. We’ll clean them separately later. You can soak them in hot, soapy water in your sink or bathtub.
2. Clear Out Loose Debris: Use a dry cloth or paper towel to wipe away any loose crumbs or debris from the bottom of the oven. This will prevent them from turning into a muddy mess when we apply the cleaning paste.
3. Protect Your Floor: Place some old newspapers or a drop cloth under the oven to catch any drips or spills. Trust me, you’ll thank me later!
Phase 2: Creating and Applying the Grease-Fighting Paste
Now for the fun part! We’re going to mix up our magical cleaning paste and apply it to the oven’s interior.
1. Mix the Baking Soda Paste: In your small bowl, combine 1/2 cup of baking soda with enough water to form a thick, spreadable paste. You’ll probably need around 3-4 tablespoons of water, but add it gradually until you reach the right consistency. If you’re using essential oils, add a few drops now and mix well.
2. Coat the Oven Interior: Using your hands (with gloves on, of course!) or a spatula, spread the baking soda paste evenly over all the interior surfaces of the oven, avoiding the heating elements. Pay special attention to areas with heavy grease buildup. Don’t be shy – really slather it on!
3. Let it Sit (The Waiting Game): This is the most important step! Let the baking soda paste sit in the oven for at least 12 hours, or even better, overnight. This gives the baking soda time to work its magic and loosen the baked-on grease. The longer it sits, the easier the cleaning will be.
Phase 3: The Vinegar Activation and Grime Removal
Time to activate our cleaning power with vinegar and start scrubbing away that stubborn grime!
1. Spray with Vinegar: Fill your spray bottle with white vinegar. Lightly spray the baking soda paste with vinegar. You’ll notice it starts to fizz and bubble – that’s the chemical reaction working to lift the grease. Don’t over-saturate it, just a light misting is enough.
2. Scrub Away the Grime: Using your spatula or scraper, gently scrape away the loosened grease and grime. You should find that it comes off much easier than before. For stubborn spots, use a sponge or rag to scrub a little harder.
3. Wipe Clean: Once you’ve removed as much grime as possible, use a damp rag or sponge to wipe away the remaining baking soda paste and vinegar residue. Rinse the rag frequently with clean water.
4. Repeat if Necessary: If there are still some stubborn spots, repeat the vinegar spraying and scrubbing process. You might need to do this a few times to get your oven sparkling clean.
Phase 4: Cleaning the Oven Racks
Don’t forget about those oven racks! They’ve been soaking, so now it’s time to give them a good scrub.
1. Scrub the Racks: Using a sponge or scrub brush, scrub the oven racks to remove any remaining grease and grime. You might need to use a little elbow grease for this step, especially if they were heavily soiled.
2. Rinse Thoroughly: Rinse the racks thoroughly with clean water to remove any soap residue.
3. Dry Completely: Dry the racks completely with a clean towel before placing them back in the oven.
Phase 5: The Final Touches and Sparkle Check
We’re almost there! Just a few final steps to ensure a sparkling clean oven.
1. Final Wipe Down: Give the inside of the oven one last wipe down with a clean, damp rag to remove any remaining residue.
2. Dry the Oven: Leave the oven door open for a few hours to allow it to air dry completely. This will help prevent any lingering odors.
3. Replace the Racks: Once the oven is completely dry, replace the oven racks.
4. The Sparkle Check: Take a step back and admire your handiwork! Your oven should be looking much cleaner and brighter.
Tips and Tricks for Oven Cleaning Success
Here are a few extra tips to help you achieve oven-cleaning perfection:
* For Extra Stubborn Grease: If you have areas with extremely stubborn grease, you can try making a thicker baking soda paste and letting it sit for even longer. You can also try using a paste made of baking soda and dish soap for extra cleaning power.
* Preventative Measures: To prevent future grease buildup, try wiping up spills as soon as they happen. You can also place a baking sheet on the bottom rack to catch drips.
* Regular Cleaning: Cleaning your oven regularly (every few months) will prevent grease from building up and make the cleaning process much easier.
* Self-Cleaning Ovens: While self-cleaning ovens are convenient, they can produce strong odors and use a lot of energy. This DIY method is a great alternative for those who want to avoid harsh chemicals and save energy.
* Ventilation is Key: Make sure your kitchen is well-ventilated while you’re cleaning the oven. Open windows and turn on the exhaust fan to help dissipate any odors.
* Don’t Forget the Door: Pay attention to the oven door, especially the glass. You can use the same baking soda paste to clean the glass, or you can use a glass cleaner.
* Safety First: Always wear rubber gloves when cleaning the oven to protect your hands from the baking soda and vinegar. Avoid getting the cleaning paste on the heating elements.
And there you have it! A sparkling clean oven without the harsh chemicals. This DIY method is not only effective but also environmentally friendly and budget-friendly. So, ditch those expensive, chemical-laden oven cleaners and give this natural solution a try. You’ll be amazed at the results! Happy cleaning!
Conclusion
So, there you have it! Growing sweet potatoes monthly, while it might sound ambitious, is entirely achievable with a little planning and this simple DIY trick. We’ve unlocked a method that allows you to enjoy a continuous harvest of these nutritious and delicious root vegetables, extending your growing season and maximizing your yield. Forget relying solely on the traditional once-a-year harvest; this approach offers a steady supply of fresh sweet potatoes right from your own backyard (or even your balcony!).
This isn’t just about having more sweet potatoes; it’s about taking control of your food supply, reducing your reliance on store-bought produce, and experiencing the immense satisfaction of nurturing your own food from start to finish. The vibrant orange flesh, packed with vitamins and antioxidants, is a testament to your hard work and dedication. Plus, imagine the bragging rights you’ll have when you serve a dish made with sweet potatoes you grew yourself, month after month!
But the beauty of this DIY trick lies in its adaptability. Feel free to experiment with different varieties of sweet potatoes. Perhaps you’d like to try growing the Beauregard, known for its classic flavor and texture, or maybe you’re feeling adventurous and want to explore the Stokes Purple sweet potato, with its striking color and unique nutritional profile. You can also adjust the timing of your slips to align with your local climate and growing conditions. If you live in a particularly warm region, you might even be able to extend your monthly harvest even further!
Consider also experimenting with different growing mediums. While we’ve focused on traditional soil-based methods, hydroponics or container gardening could also be adapted to this monthly sweet potato growing strategy. The possibilities are truly endless!
This DIY trick for growing sweet potatoes monthly is a game-changer for any home gardener. It’s a sustainable, rewarding, and delicious way to enjoy the fruits (or rather, the roots!) of your labor.
We wholeheartedly encourage you to give this method a try. Don’t be intimidated by the prospect of a continuous harvest; with a little preparation and dedication, you’ll be amazed at how easy and rewarding it can be. And most importantly, we want to hear about your experiences! Share your successes, your challenges, and any variations you’ve tried in the comments below. Let’s build a community of sweet potato enthusiasts and learn from each other’s journeys. Happy growing!
Frequently Asked Questions (FAQ)
Q: What exactly does “growing sweet potatoes monthly” mean?
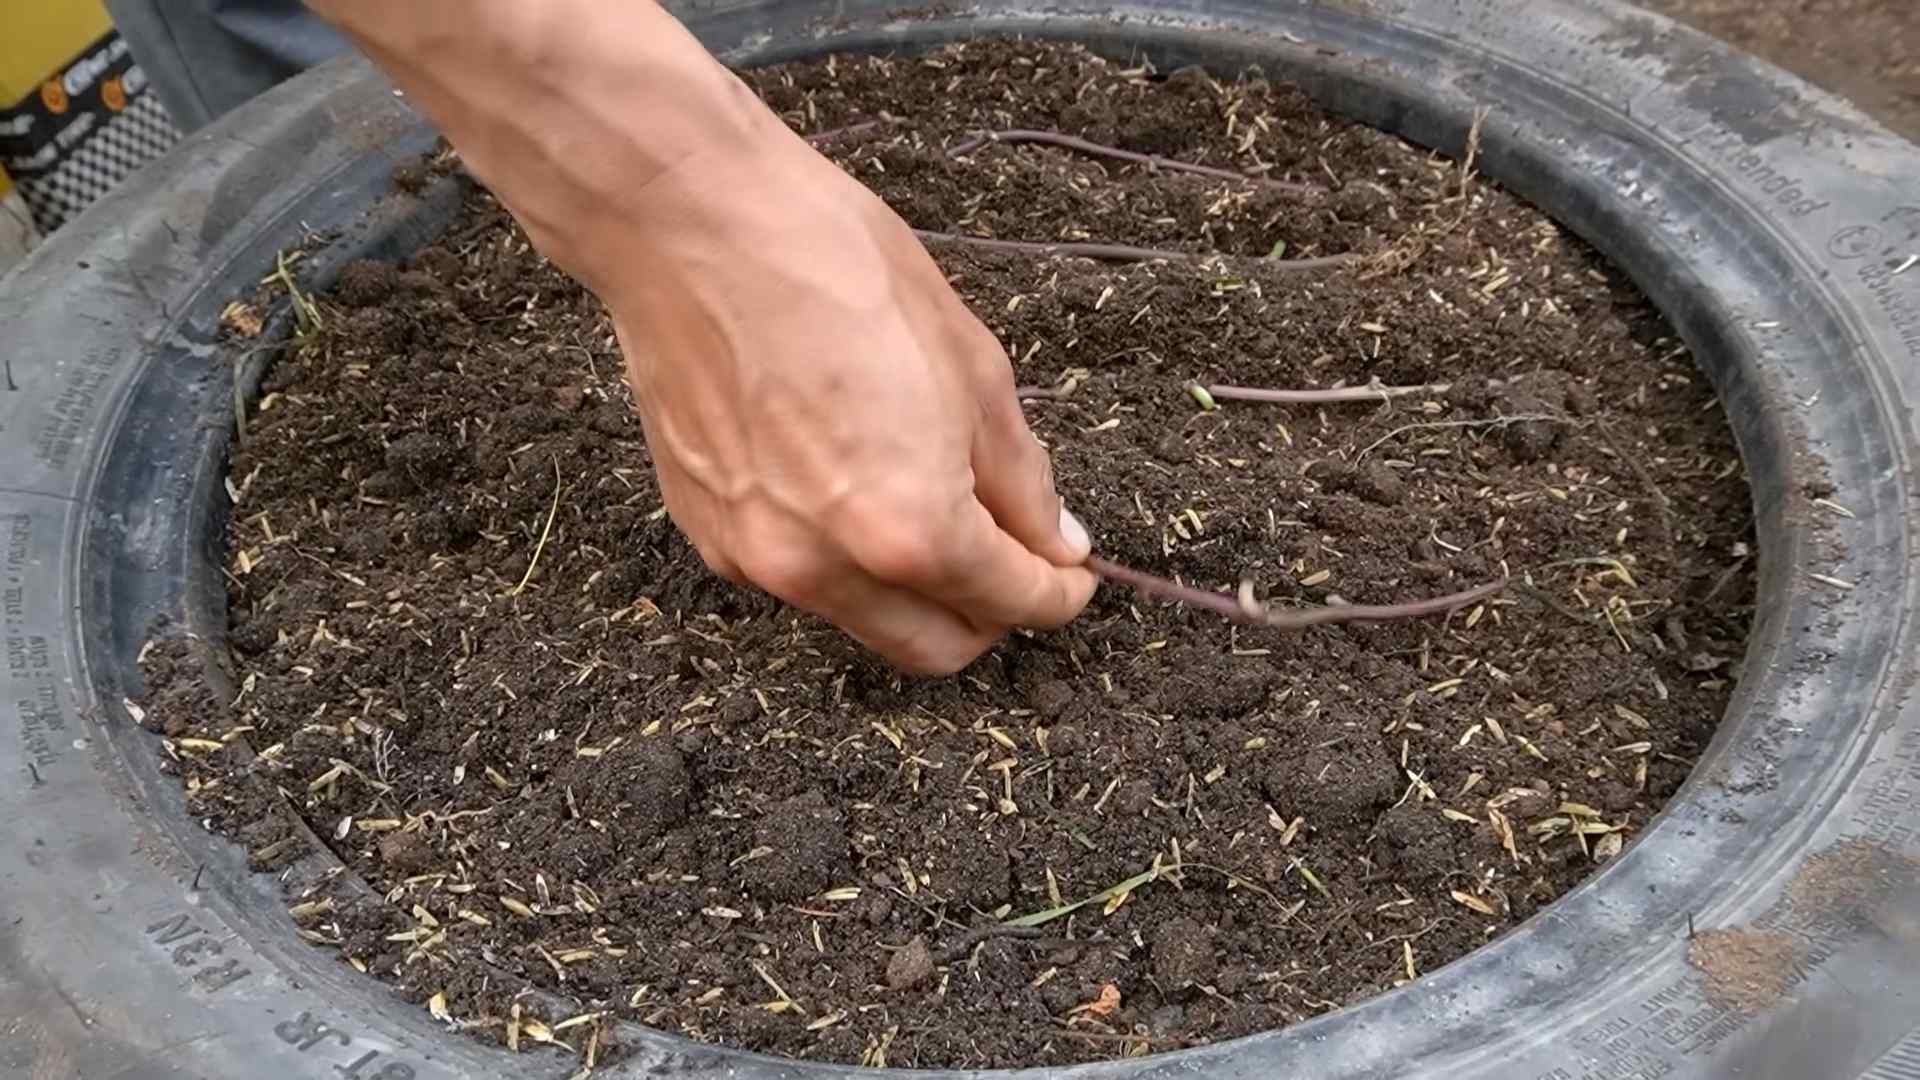
A: Growing sweet potatoes monthly refers to a strategy where you stagger the planting and harvesting of sweet potato slips (the sprouts that grow from a sweet potato) to ensure a continuous supply of fresh sweet potatoes throughout the growing season, rather than harvesting everything at once. This involves starting new slips regularly and planting them in succession, allowing you to harvest a portion of your crop each month.
Q: Is it really possible to harvest sweet potatoes every month?
A: Yes, it is possible, especially in regions with long growing seasons (at least 4-5 months of warm weather). The key is to start new slips regularly (every 3-4 weeks) and plant them in succession. This ensures that you always have plants at different stages of development, allowing for a continuous harvest. Even in shorter growing seasons, you can extend the harvest window by starting slips indoors earlier and using techniques like row covers to protect plants from frost.
Q: How do I start sweet potato slips?
A: Starting sweet potato slips is relatively easy. You can suspend a sweet potato in a jar of water, partially submerged, using toothpicks. Place the jar in a warm, sunny location. Alternatively, you can bury the sweet potato horizontally in a bed of moist sand or potting mix. Keep the soil consistently moist and warm. After a few weeks, sprouts (slips) will emerge from the sweet potato. Once the slips are 6-8 inches long, gently twist them off the sweet potato and root them in water before planting.
Q: How many sweet potato slips should I start each month?
A: The number of slips you start each month depends on how many sweet potatoes you want to harvest monthly and the size of your growing space. A good starting point is to aim for enough slips to plant 4-6 plants per month. This will provide a reasonable harvest for a small family. Adjust the number based on your needs and available space. Remember that each sweet potato can produce multiple slips.
Q: What are the best conditions for growing sweet potatoes?
A: Sweet potatoes thrive in warm weather (soil temperature above 65°F) and full sun (at least 6-8 hours of direct sunlight per day). They prefer well-drained, sandy loam soil that is rich in organic matter. Avoid heavy clay soils, as they can hinder root development. Sweet potatoes also need consistent moisture, especially during the early stages of growth.
Q: How long does it take for sweet potatoes to mature?
A: Sweet potatoes typically take 90-120 days to mature, depending on the variety and growing conditions. This is why staggering the planting of slips is crucial for achieving a monthly harvest.
Q: How do I know when my sweet potatoes are ready to harvest?
A: You can start harvesting sweet potatoes when the vines begin to yellow and die back, typically around 90-120 days after planting. You can also gently dig around a plant to check the size of the potatoes. If they are a good size and have a firm skin, they are ready to harvest.
Q: What’s the best way to harvest sweet potatoes?
A: Use a garden fork or shovel to carefully loosen the soil around the plants. Gently lift the vines and dig up the sweet potatoes, being careful not to damage them. Brush off any excess soil and allow the sweet potatoes to cure in a warm, dry place for 1-2 weeks. This curing process helps to heal any minor cuts or bruises and improves the flavor and storage life of the sweet potatoes.
Q: Can I grow sweet potatoes in containers?
A: Yes, you can grow sweet potatoes in containers, but you’ll need a large container (at least 20 gallons) with good drainage. Fill the container with a well-draining potting mix and plant the slips as you would in the ground. Container-grown sweet potatoes may not produce as large of a yield as those grown in the ground, but it’s a great option for those with limited space.
Q: What are some common problems when growing sweet potatoes?
A: Some common problems when growing sweet potatoes include pests like sweet potato weevils and diseases like fusarium wilt. Proper soil preparation, crop rotation, and the use of disease-resistant varieties can help to prevent these problems. Regularly inspect your plants for signs of pests or diseases and take appropriate action if necessary.
Q: How do I store sweet potatoes after harvesting?
A: After curing, store sweet potatoes in a cool, dry, and well-ventilated place (around 55-60°F). Avoid storing them in the refrigerator, as this can cause them to develop a hard core. Properly cured and stored sweet potatoes can last for several months.
Q: Can I save slips from my harvested sweet potatoes to plant next year?
A: Yes, you can save slips from your harvested sweet potatoes to plant next year. Select healthy, disease-free sweet potatoes and store them in a cool, dry place over the winter. In the spring, you can start new slips from these sweet potatoes using the same method described earlier. This allows you to perpetuate your sweet potato crop year after year.
Q: What are some creative ways to use my monthly sweet potato harvest?
A: The possibilities are endless! Beyond the classic roasted sweet potatoes and sweet potato fries, try adding them to soups, stews, and salads. Use them to make sweet potato pie, muffins, or bread. You can even grill them or mash them into a delicious side dish. Get creative and experiment with different flavors and spices to discover your favorite sweet potato recipes.
Q: What if I don’t have a lot of space for a garden? Can I still try this DIY trick?
A: Absolutely! Even if you don’t have a traditional garden, you can still try growing sweet potatoes monthly using containers or raised beds. This allows you to maximize your growing space and enjoy a continuous harvest even in a small area. Vertical gardening techniques can also be used to further optimize space.


Leave a Comment