
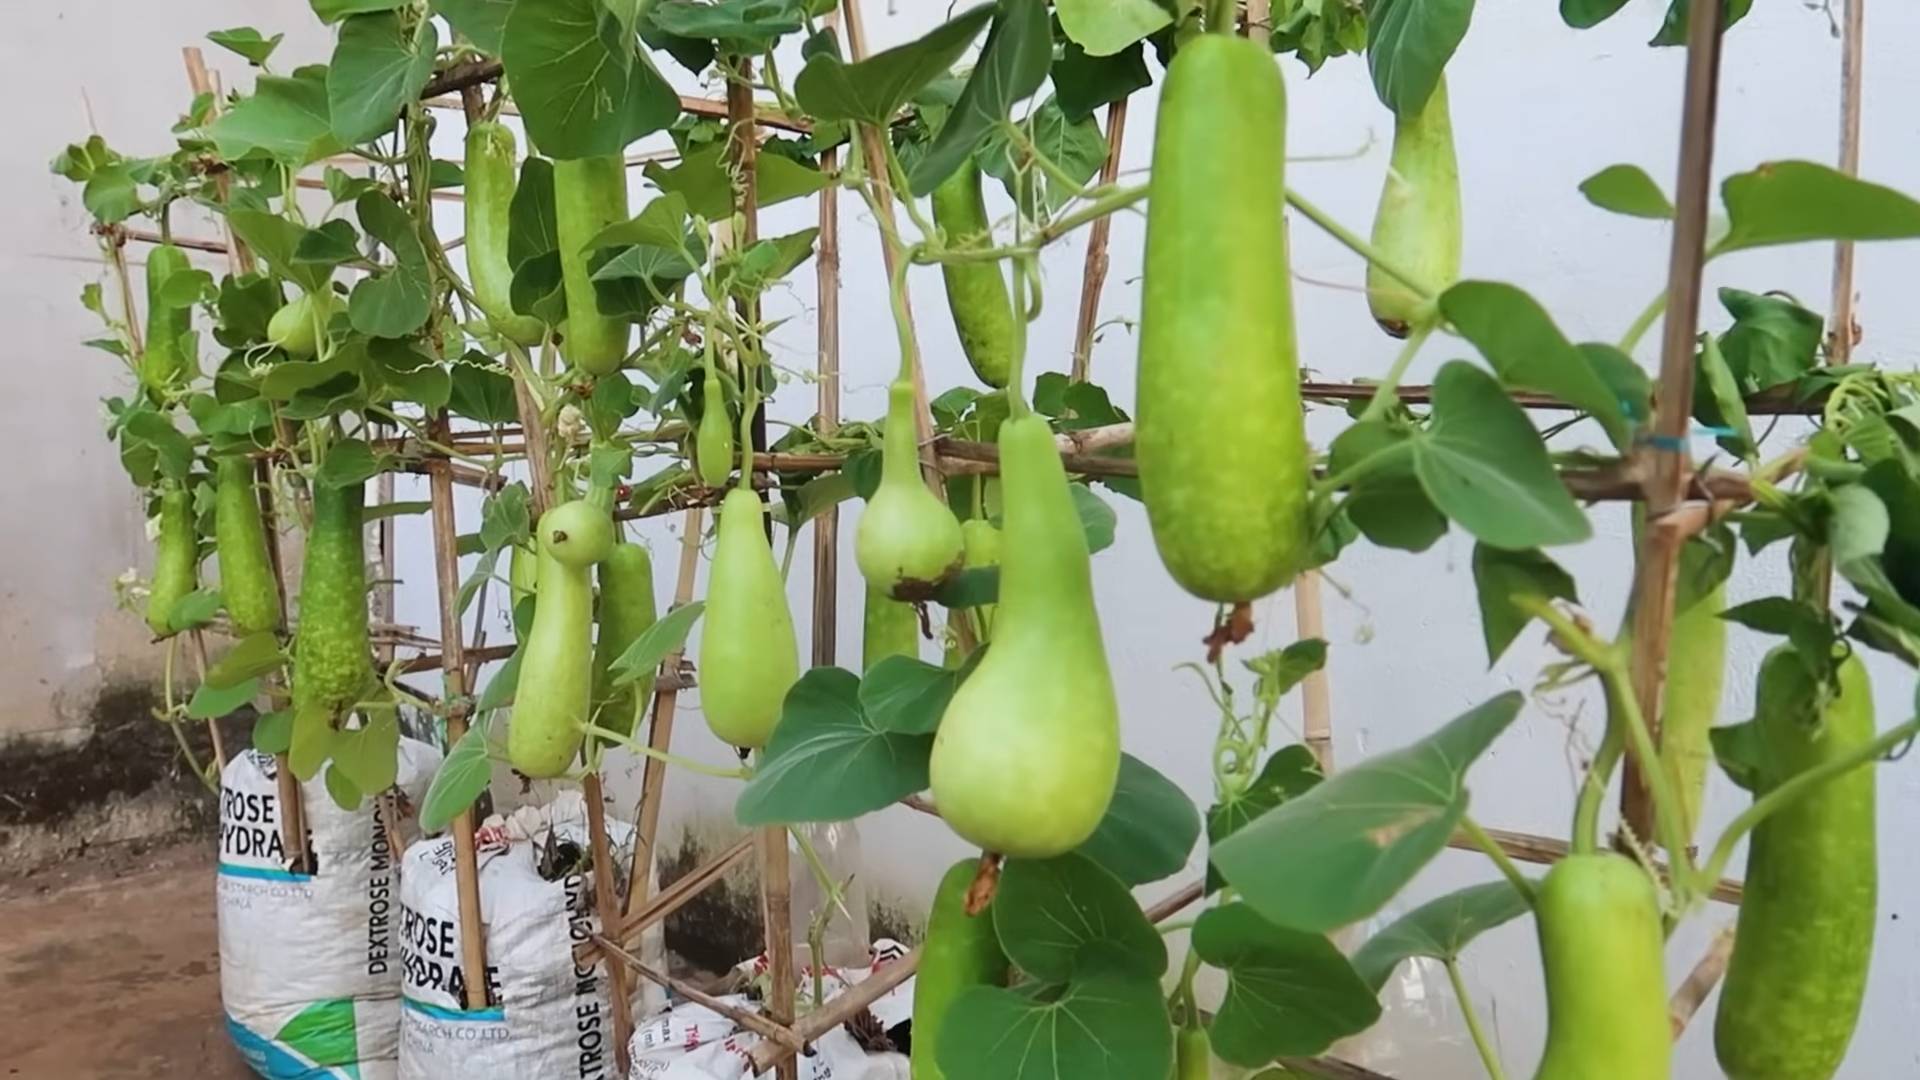
Bagging gourds might sound like a quirky craft project, but trust me, it’s a game-changer for any gardener dreaming of picture-perfect, blemish-free gourds! For centuries, gourds have held a special place in cultures around the world, used for everything from musical instruments and utensils to decorative art. Think of the vibrant maracas of Latin America or the intricately carved calabashes of Africa – gourds are more than just fall decorations; they’re living history.
But let’s be honest, growing gourds can be a bit of a challenge. Pests, diseases, and even just the elements can leave your precious gourds looking less than ideal. That’s where this DIY trick comes in! I’m going to show you how bagging gourds can protect them from all sorts of garden woes, resulting in healthier, more beautiful gourds that you’ll be proud to display or craft with. Imagine harvesting gourds without those unsightly blemishes – it’s totally achievable, and I’m here to guide you every step of the way. So, grab your supplies, and let’s get started on this simple yet effective gardening hack!
DIY: Protecting Your Gourds with Mesh Bags for a Bountiful Harvest
Hey fellow gardeners! Are you tired of losing your precious gourds to pests, diseases, or just plain old rot before they even reach maturity? I know I was! That’s why I started bagging my gourds, and let me tell you, it’s been a game-changer. This simple DIY project can significantly increase your yield and ensure you have beautiful, healthy gourds ready for crafting or decorating come fall. Let’s dive into how you can do it too!
Why Bag Your Gourds?
Before we get started, let’s talk about why bagging gourds is so beneficial. It’s not just a quirky gardening trend; it’s a practical solution to several common problems:
* Pest Control: Squash bugs, squash vine borers, and other pesky insects can wreak havoc on your gourds. Bags create a physical barrier, preventing them from laying eggs or feeding on the developing fruit.
* Disease Prevention: Moisture and humidity can lead to fungal diseases like powdery mildew and rot. Bags, especially those made of breathable mesh, allow for air circulation, reducing the risk of these problems.
* Protection from Sun Scald: Intense sunlight can scorch the delicate skin of young gourds, causing unsightly blemishes. Bags provide a bit of shade, preventing sun scald.
* Improved Aesthetics: Bagging can help produce gourds with smoother, more uniform surfaces, free from blemishes and insect damage. This is especially important if you plan to use your gourds for crafting or decoration.
* Reduced Rot: By keeping the gourds off the ground and promoting air circulation, bagging helps prevent bottom rot, a common issue with gourds.
Materials You’ll Need
Okay, so you’re convinced that bagging is the way to go? Great! Here’s what you’ll need to get started:
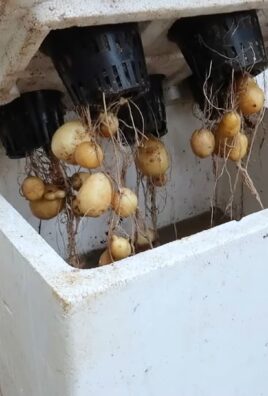
* Mesh Bags: These are the stars of the show! I prefer using organza bags or nylon mesh bags. Organza bags are readily available in various sizes and colors, making them aesthetically pleasing. Nylon mesh bags are durable and offer excellent breathability. The size of the bag will depend on the type of gourd you’re growing. For smaller gourds like birdhouse gourds, smaller bags will suffice. For larger gourds like bottle gourds, you’ll need bigger bags. You can find these online, at craft stores, or even repurpose onion or potato bags (just make sure they’re clean!).
* Twist Ties or Zip Ties: These will be used to secure the bags around the gourd stems. I like using garden twist ties because they’re gentle on the plants and easy to adjust.
* Scissors or Pruning Shears: For trimming any excess stem or leaves that might interfere with the bag.
* Optional: Insecticide (if needed): If you’re dealing with a severe pest infestation, you might want to apply a light dusting of insecticide before bagging. I prefer using organic options like neem oil or insecticidal soap.
Step-by-Step Guide to Bagging Your Gourds
Alright, let’s get down to the nitty-gritty. Here’s how I bag my gourds for maximum protection and a beautiful harvest:
1. Choose the Right Time: Timing is key! You want to bag your gourds when they’re still relatively small, about 4-6 inches in diameter. This is usually a few weeks after the flowers have been pollinated and the gourds have started to develop. Bagging too early can interfere with pollination, while bagging too late might allow pests to get a head start.
2. Inspect the Gourds: Before bagging, carefully inspect each gourd for any signs of pests or diseases. Look for small holes, discoloration, or any other abnormalities. If you find any problems, address them before bagging. You can gently wipe the gourd with a damp cloth or apply a light dusting of insecticide or fungicide if necessary.
3. Prepare the Bags: Open up your mesh bags and make sure they’re clean and free of any debris. If you’re using repurposed bags, wash them thoroughly with soap and water and let them dry completely before using them.
4. Position the Bag: Carefully slip the mesh bag over the gourd, making sure to enclose the entire fruit. Gently maneuver the bag so that it’s snug but not too tight. You want to allow enough room for the gourd to grow without being constricted.
5. Secure the Bag: Gather the open end of the bag around the stem of the gourd. Use a twist tie or zip tie to secure the bag tightly around the stem. Make sure the tie is snug enough to prevent pests from entering but not so tight that it damages the stem. Leave a little bit of room for the stem to grow.
6. Trim Excess Bag (Optional): If the bag is excessively long, you can trim off the excess material with scissors. Be careful not to cut the bag too short, as you want to ensure that the gourd remains fully enclosed as it grows.
7. Monitor Regularly: Once you’ve bagged your gourds, it’s important to monitor them regularly. Check the bags for any signs of damage or pests. If you notice any problems, address them immediately. You may need to replace the bags if they become torn or damaged.
Tips and Tricks for Successful Gourd Bagging
Here are a few extra tips and tricks I’ve learned over the years that can help you get the most out of bagging your gourds:
* Choose the Right Bag Size: As I mentioned earlier, the size of the bag is crucial. Make sure you choose a bag that’s large enough to accommodate the gourd as it grows. It’s better to err on the side of too big than too small.
* Use Breathable Bags: Breathability is essential for preventing moisture buildup and fungal diseases. Mesh bags are ideal because they allow for excellent air circulation. Avoid using plastic bags, as they can trap moisture and create a breeding ground for mold and mildew.
* Consider Bag Color: While clear bags allow you to easily monitor the gourd’s progress, colored bags can offer additional benefits. Dark-colored bags can provide extra shade, protecting the gourds from sun scald. Light-colored bags can reflect sunlight, helping to keep the gourds cool in hot weather.
* Adjust as Needed: As the gourds grow, you may need to adjust the bags to accommodate their increasing size. Loosen the twist ties or zip ties if they become too tight, and consider replacing the bags with larger ones if necessary.
* Don’t Forget to Water: Even though the gourds are bagged, they still need water. Make sure to water your gourd plants regularly, especially during dry spells.
* Be Patient: Growing gourds takes time and patience. Don’t get discouraged if you don’t see results immediately. With proper care and attention, you’ll be rewarded with a bountiful harvest of beautiful, healthy gourds.
* Experiment: Don’t be afraid to experiment with different types of bags and techniques to see what works best for you. Every garden is different, so what works for me might not work for you. The key is to find a system that you’re comfortable with and that provides the best protection for your gourds.
* Clean Up: Once you’ve harvested your gourds, be sure to clean up any fallen leaves or debris around the plants. This will help prevent the spread of diseases and pests. You can also compost the used bags if they’re made of biodegradable materials.
Troubleshooting Common Problems
Even with the best of intentions, you might encounter some problems while bagging your gourds. Here are a few common issues and how to address them:
* Bags Tearing: If your bags are tearing, it could be due to several factors, such as strong winds, sharp stems, or overly tight ties. Try using more durable bags, trimming any sharp stems, and loosening the ties.
* Pests Inside the Bags: Occasionally, pests might find their way inside the bags. This could be because the bags weren’t properly sealed or because the pests were already present on the gourds before bagging. If you find pests inside the bags, remove the bags and treat the gourds with an appropriate insecticide before re-bagging.
* Rotting Gourds: If your gourds are rotting inside the bags, it could be due to excessive moisture or poor air circulation. Make sure you’re using breathable bags and that the gourds are not touching the ground. You can also try opening the bags during dry weather to allow for better air circulation.
* Slow Growth: If your gourds are growing slowly, it could be due to a lack of nutrients or water. Make sure you’re fertilizing your gourd plants regularly and providing them with plenty of water. You can also try removing some of the leaves around the gourds to allow for more sunlight.
Harvesting and Curing Your Bagged Gourds
Once your gourds have reached their mature size and the vines have started to dry out, it’s time to harvest them. Here’s how I do
Conclusion
So, there you have it! Bagging gourds isn’t just some quirky gardening fad; it’s a game-changer for anyone serious about growing healthy, blemish-free, and truly spectacular gourds. We’ve walked you through the process, highlighting the benefits and addressing potential concerns. Now, it’s time to take the plunge and experience the difference for yourself.
Why is this DIY trick a must-try? Because it’s a proactive defense against the relentless onslaught of pests and diseases that can plague your precious gourds. Imagine harvesting a bumper crop of gourds, each one boasting a smooth, unblemished surface, ready to be transformed into stunning works of art or charming autumnal decorations. That’s the power of bagging. It’s about taking control of your gourd-growing destiny and ensuring a harvest you can be truly proud of.
But the beauty of this method lies in its adaptability. Feel free to experiment with different types of bags. While organza bags offer excellent visibility and breathability, you might find that paper bags provide superior protection against direct sunlight, preventing sunscald in particularly hot climates. Consider using different sizes of bags to accommodate the varying sizes of your gourds as they mature. You could even try adding a small sachet of diatomaceous earth inside the bag for an extra layer of pest control, especially if you’re dealing with persistent squash bugs or vine borers.
Another variation to consider is the timing of the bagging process. While we recommend bagging as soon as the gourds are about the size of a tennis ball, you might find that bagging slightly earlier, when they are the size of a golf ball, offers even greater protection against early-season pests. Just be extra careful not to damage the delicate gourds during the bagging process.
Don’t be afraid to get creative and tailor the bagging method to your specific growing conditions and the types of gourds you’re cultivating. The key is to observe your plants closely, monitor for any signs of pests or diseases, and adjust your approach accordingly.
We are confident that once you try bagging your gourds, you’ll be amazed by the results. The increased yield, the improved quality, and the sheer satisfaction of harvesting perfect gourds will make you a believer.
So, grab your bags, head out to your garden, and give it a try! We’re eager to hear about your experiences. Share your photos, tips, and tricks in the comments below. Let’s build a community of gourd-growing enthusiasts who are passionate about protecting their precious plants and maximizing their harvests. Together, we can unlock the full potential of our gourd gardens and create a world filled with beautiful, blemish-free gourds. Happy growing!
Frequently Asked Questions (FAQs)
What types of bags are best for bagging gourds?
The best type of bag depends on your specific needs and growing conditions. Organza bags are a popular choice because they are breathable, allowing for good air circulation, and transparent, allowing you to monitor the gourd’s development without removing the bag. However, they may not offer as much protection against direct sunlight or heavy rain. Paper bags, on the other hand, provide excellent protection from the elements but can trap moisture if not properly ventilated. Cheesecloth bags are another option, offering a balance of breathability and protection. Experiment with different types of bags to see what works best for you. Consider the climate, the prevalence of pests in your area, and the specific type of gourd you are growing.
When is the best time to bag my gourds?
The ideal time to bag your gourds is when they are about the size of a tennis ball. This is early enough to protect them from most pests and diseases, but late enough that the gourd has already developed a strong stem and is less susceptible to damage during the bagging process. You can bag slightly earlier, when the gourds are the size of a golf ball, for even greater protection, but be extra careful when handling the delicate gourds. Avoid bagging during periods of high humidity or after rain, as this can trap moisture inside the bag and promote fungal growth.
How do I prevent moisture buildup inside the bags?
Moisture buildup can be a problem, especially in humid climates. To prevent this, ensure that the bags you are using are breathable. Organza and cheesecloth bags are good choices for this reason. You can also poke small holes in paper bags to improve ventilation. Avoid bagging gourds when they are wet or when the humidity is high. If you notice moisture buildup inside the bags, remove them temporarily to allow the gourds to dry out. Consider using a desiccant packet inside the bag to absorb excess moisture.
Will bagging affect the pollination of my gourds?
Bagging gourds after they have already been pollinated will not affect pollination. The flowers need to be pollinated before the gourd starts to form. The bagging process is done after the gourd has already started to grow. If you are concerned about pollination, you can hand-pollinate the female flowers before bagging them. This involves transferring pollen from the male flowers to the female flowers using a small brush.
How often should I check the gourds inside the bags?
It’s a good idea to check the gourds inside the bags at least once a week. This allows you to monitor their growth, check for any signs of pests or diseases, and ensure that the bags are still securely attached. If you notice any problems, such as moisture buildup or pest infestations, you can take corrective action immediately.
Can I reuse the bags for multiple seasons?
Yes, you can reuse the bags for multiple seasons, provided they are still in good condition. Wash the bags thoroughly with soap and water after each season to remove any dirt, debris, or pest eggs. Allow the bags to dry completely before storing them in a cool, dry place. Inspect the bags before each use and discard any that are torn, damaged, or heavily soiled.
What if I see pests inside the bag?
If you find pests inside the bag, remove the bag immediately and inspect the gourd for damage. If the infestation is minor, you can try removing the pests by hand or using a mild insecticidal soap. If the infestation is severe, you may need to use a stronger insecticide. Before re-bagging the gourd, make sure to thoroughly clean the bag or use a new one. Consider adding a small sachet of diatomaceous earth inside the bag to help prevent future infestations.
Will bagging affect the color or shape of my gourds?
Bagging should not significantly affect the color or shape of your gourds. However, if you are using opaque bags, the gourds may be slightly lighter in color than those grown in direct sunlight. The shape of the gourd is primarily determined by its genetics and growing conditions, not by the bagging process.
Is bagging gourds worth the effort?
Absolutely! While it may seem like a lot of work, bagging gourds is well worth the effort. The benefits of bagging, including increased yield, improved quality, and protection from pests and diseases, far outweigh the time and effort involved. You’ll be rewarded with a harvest of beautiful, blemish-free gourds that you can be proud of. Plus, the satisfaction of knowing that you’ve taken proactive steps to protect your plants is priceless. The DIY trick of bagging gourds is a simple yet effective way to ensure a successful and rewarding gourd-growing experience.
Leave a Comment