
Grow Celery Water Conservation: Are you dreaming of crisp, refreshing celery sticks straight from your backyard, but worried about your water bill and the environmental impact? I get it! We all want a thriving garden without feeling guilty about excessive water usage. That’s why I’m so excited to share some fantastic DIY tricks and hacks that will help you cultivate delicious celery while championing water conservation.
Celery, with its satisfying crunch and subtle flavor, has been enjoyed for centuries. Originating in the Mediterranean region, it was initially valued for its medicinal properties before becoming a culinary staple. Today, it’s a key ingredient in countless dishes, from soups and salads to healthy snacks. But growing celery can be water-intensive, which is where our DIY solutions come in!
In this article, I’ll guide you through simple, effective methods to grow celery water conservation techniques that will minimize water waste and maximize your harvest. Imagine enjoying fresh, homegrown celery knowing you’re doing your part for the planet. From clever watering strategies to soil amendments that retain moisture, these tips are designed to make your gardening experience both rewarding and sustainable. Let’s dive in and discover how to have a lush celery patch without draining our precious resources!
Regrow Celery from Kitchen Scraps: A Water-Wise Guide
Hey there, fellow DIY enthusiasts! Ever feel guilty about tossing those celery ends after chopping up the stalks for a snack or soup? Well, fret no more! I’m going to show you how to regrow celery from those very scraps, saving you money and reducing food waste. Plus, this method is surprisingly water-efficient, making it a win-win for your wallet and the planet. Let’s get started!
What You’ll Need
Before we dive in, let’s gather our supplies. This project is super simple, so you probably already have everything you need:
* Celery base (the part you usually cut off and discard)
* Shallow dish or bowl
* Water
* Spray bottle (optional, but helpful)
* Potting soil
* A pot or container with drainage holes (at least 6 inches in diameter)
* Sunny windowsill or grow light
Phase 1: Rooting Your Celery Base
This is where the magic begins! We’re going to coax those celery cells into sprouting new roots.
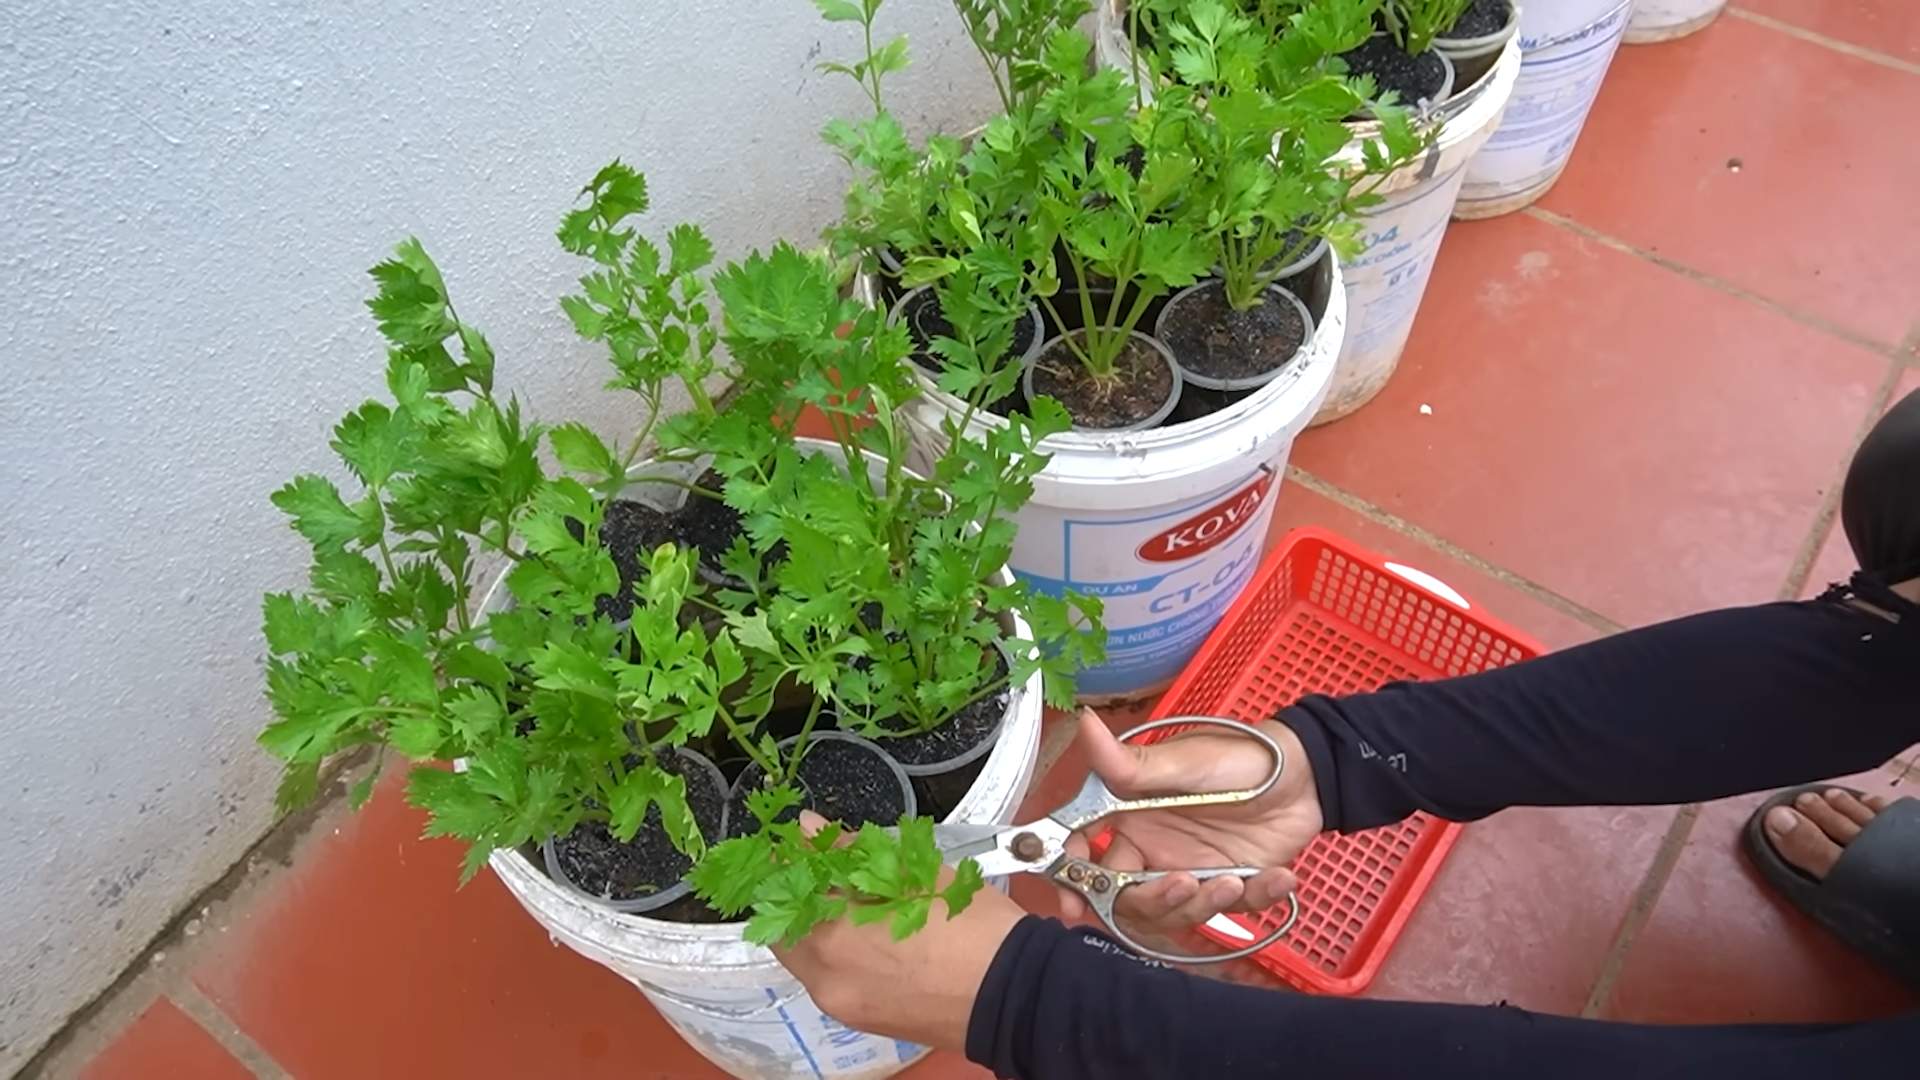
1. Prepare the Celery Base: After you’ve used the celery stalks, don’t throw away the base! Make sure it’s at least 2 inches tall. Trim the top of the base so it’s relatively even. This will encourage new growth from the center.
2. Place in Water: Fill your shallow dish or bowl with about an inch of water. Place the celery base, cut-side up, in the water. The water level should cover the bottom of the base, but not submerge the entire thing.
3. Find a Sunny Spot: Place the dish with the celery base on a sunny windowsill or under a grow light. Celery needs plenty of light to thrive.
4. Change the Water Regularly: This is crucial! Change the water every 1-2 days to prevent mold and bacteria growth. Fresh water keeps things clean and encourages root development.
5. Observe and Wait: Over the next few days, you should start to see small roots emerging from the bottom of the celery base. You’ll also notice new leaves sprouting from the center. Be patient! This process can take anywhere from 5-7 days, sometimes longer depending on the celery and your environment.
6. Keep it Moist: If you notice the top of the celery base drying out, use a spray bottle to mist it lightly with water. This will help keep it hydrated and encourage growth.
Phase 2: Planting Your Celery
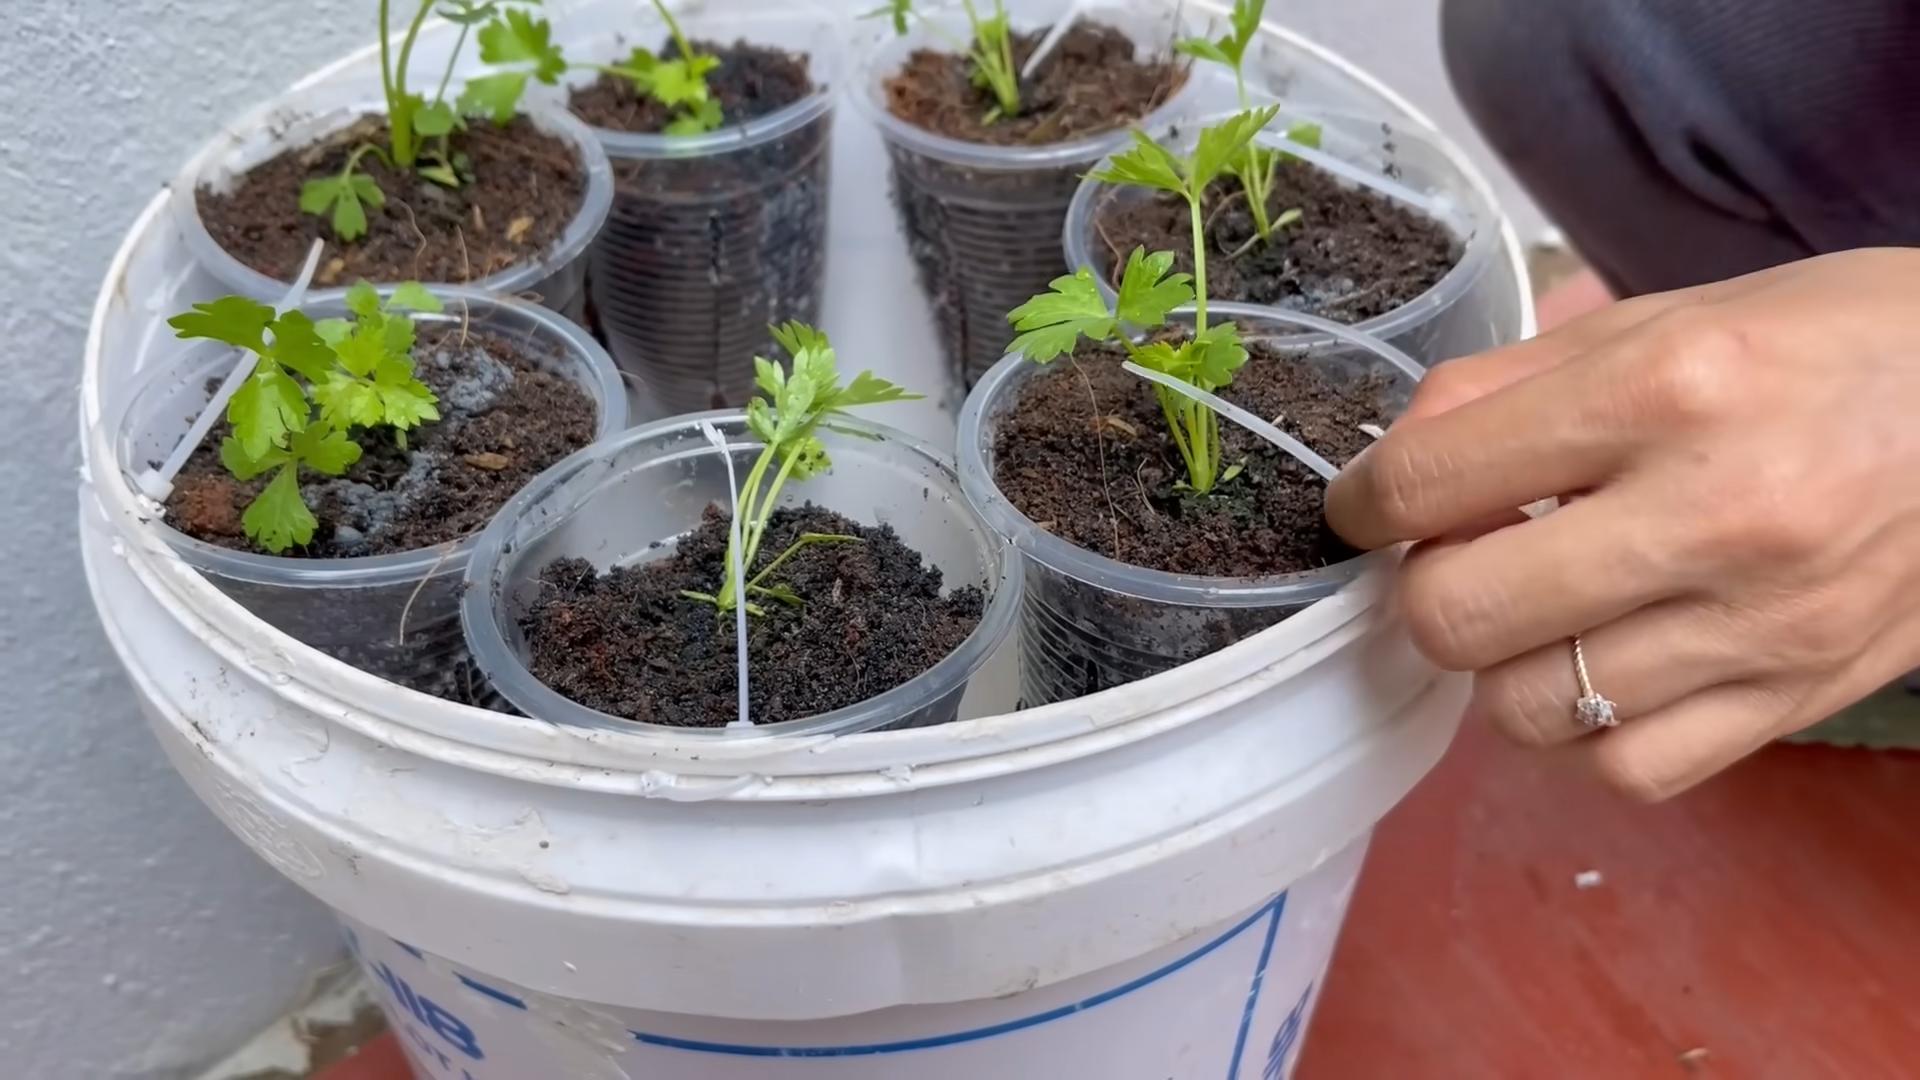
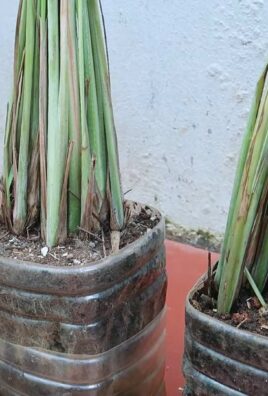
Once your celery base has developed a good root system (about an inch or two long), it’s time to move it to soil.
1. Prepare Your Pot: Fill your pot or container with potting soil, leaving about an inch of space at the top. Make sure the pot has drainage holes to prevent waterlogging.
2. Create a Hole: Use your finger or a small trowel to create a hole in the center of the soil, large enough to accommodate the celery base and its roots.
3. Carefully Plant: Gently remove the celery base from the water and carefully place it in the hole. Make sure the roots are spread out and not bunched together.
4. Cover the Roots: Fill the hole with soil, gently pressing down around the celery base to secure it in place. The top of the celery base should be just above the soil line.
5. Water Thoroughly: Water the soil thoroughly until water drains out of the drainage holes. This will help settle the soil and ensure the roots are well-hydrated.
6. Return to Sunny Spot: Place the pot back on the sunny windowsill or under the grow light.
Phase 3: Caring for Your Regrown Celery
Now that your celery is planted, it’s time to provide it with the care it needs to thrive.
1. Watering: Celery needs consistent moisture, but it doesn’t like to be waterlogged. Water the plant when the top inch of soil feels dry to the touch. Avoid overwatering, as this can lead to root rot.
2. Sunlight: Celery needs at least 6 hours of sunlight per day. If you don’t have a sunny windowsill, consider using a grow light.
3. Fertilizing (Optional): If you want to give your celery a boost, you can fertilize it every few weeks with a balanced liquid fertilizer. Follow the instructions on the fertilizer label.
4. Pest Control: Keep an eye out for pests like aphids or spider mites. If you notice any pests, you can try spraying the plant with insecticidal soap or neem oil.
5. Harvesting: You can start harvesting celery stalks when they are about 6-8 inches tall. Simply cut the stalks off at the base of the plant. The plant will continue to produce new stalks.
6. Mulching (Optional): Adding a layer of mulch around the base of the plant can help retain moisture and suppress weeds.
Water Conservation Tips for Growing Celery
Growing celery from scraps is already a water-wise choice, but here are some additional tips to conserve even more water:
* Water deeply but less frequently: Instead of watering a little bit every day, water deeply when the top inch of soil feels dry. This encourages the roots to grow deeper, making the plant more drought-tolerant.
* Use a watering can or hose with a gentle spray nozzle: This will help prevent water from splashing and running off.
* Water in the morning: Watering in the morning allows the plant to absorb the water before it evaporates in the heat of the day.
* Collect rainwater: Use a rain barrel to collect rainwater and use it to water your celery.
* Mulch around the plant: Mulch helps retain moisture in the soil, reducing the need for watering.
* Group plants with similar water needs: If you’re growing other plants, group them together based on their water requirements. This will make it easier to water efficiently.
* Check the soil moisture before watering: Don’t just water on a schedule. Stick your finger into the soil to check the moisture level before watering.
* Consider using self-watering containers: Self-watering containers can help regulate the amount of water the plant receives, preventing overwatering and underwatering.
Troubleshooting
Sometimes things don’t go exactly as planned. Here are some common problems you might encounter and how to fix them:
* Celery base isn’t rooting: Make sure the water is fresh and the celery base is getting enough sunlight. You can also try adding a small amount of rooting hormone to the water.
* Celery leaves are turning yellow: This could be a sign of overwatering or underwatering. Check the soil moisture and adjust your watering accordingly. Yellowing leaves can also indicate a nutrient deficiency. Try fertilizing the plant with a balanced liquid fertilizer.
* Celery plant is wilting: This could be a sign of underwatering or heat stress. Make sure the plant is getting enough water and is not exposed to extreme temperatures.
* Pests are attacking the plant: Spray the plant with insecticidal soap or neem oil to control pests.
Enjoy Your Homegrown Celery!
And there you have it! You’ve successfully regrown celery from kitchen scraps. Now you can enjoy fresh, homegrown celery in your salads, soups, and snacks. Not only are you saving money and reducing food waste, but you’re also contributing to a more sustainable lifestyle. Happy gardening!
Conclusion
So, there you have it! Growing celery from kitchen scraps is not just a fun experiment; it’s a powerful way to reduce food waste, conserve water, and enjoy fresh, homegrown celery. This simple DIY trick transforms what would normally be tossed into the compost bin into a thriving plant, offering a sustainable and rewarding gardening experience.
Why is this a must-try? Because it’s incredibly easy, cost-effective, and environmentally friendly. You’re essentially getting a free celery plant from something you already have! Plus, you’re actively participating in water conservation by minimizing the need to purchase commercially grown celery, which often relies on extensive irrigation. Think about it: every celery stalk you regrow is one less that needs to be shipped across the country, reducing your carbon footprint and supporting a more sustainable food system.
But the benefits don’t stop there. This method allows you to control the growing environment, ensuring your celery is free from harmful pesticides and herbicides. You know exactly what’s going into your food, giving you peace of mind and a healthier harvest.
Looking for variations? Absolutely! Once your celery has established roots, you can transplant it into a larger pot or directly into your garden. Experiment with different soil types to see what works best in your climate. You can also try growing different varieties of celery, such as Pascal celery or Chinese celery, from their respective bases. Consider companion planting with herbs like parsley or cilantro to deter pests and enhance the flavor of your celery.
Another fun variation is to use the regrown celery leaves in salads, soups, or as a garnish. They have a more intense flavor than the stalks and add a delightful freshness to any dish. You can even dry the leaves and use them as a seasoning.
Don’t be afraid to experiment and adapt the process to suit your own needs and preferences. The beauty of this DIY project is its flexibility and simplicity.
We wholeheartedly encourage you to give this DIY trick a try. It’s a fantastic way to connect with nature, learn about plant growth, and contribute to a more sustainable lifestyle. Imagine the satisfaction of harvesting your own celery, knowing that you grew it from a simple kitchen scrap!
And most importantly, we want to hear about your experience! Share your photos, tips, and challenges in the comments below. Let’s create a community of celery-growing enthusiasts and inspire others to embrace this simple yet powerful water conservation technique. Did you find a particular type of water worked best? Did you have any issues with pests? What was the tastiest dish you made with your homegrown celery? Your insights can help others succeed and make this DIY trick even more effective. Let’s all learn from each other and celebrate the joys of homegrown celery!
Frequently Asked Questions (FAQ)
1. What part of the celery do I need to regrow it?
You need the base of the celery stalk, the part where all the stalks are connected. Cut off the stalks about 2 inches from the base, leaving the root end intact. This is the part that will sprout new growth. Make sure to use a sharp knife to avoid crushing the base.
2. How long does it take for celery to regrow?
You should start seeing new growth within 5-7 days. The roots will begin to develop first, followed by new leaves sprouting from the center of the base. The exact time frame can vary depending on the temperature, humidity, and the specific variety of celery. Be patient and ensure the base is consistently moist.
3. What kind of water is best for regrowing celery?
Tap water is generally fine for regrowing celery. However, if your tap water is heavily chlorinated, it’s best to let it sit out for 24 hours before using it to allow the chlorine to dissipate. Filtered water or rainwater can also be used. Avoid using distilled water, as it lacks the minerals necessary for plant growth. Change the water every 1-2 days to prevent bacterial growth and keep the celery base healthy.
4. How often should I change the water?
Change the water every 1-2 days. This helps prevent the growth of bacteria and keeps the celery base fresh. You’ll notice the water may become cloudy or slightly discolored over time, which is a sign that it needs to be changed.
5. When should I transplant the celery to soil?
Once the roots are about 2-3 inches long and you see significant new growth from the center, it’s time to transplant the celery to soil. This usually takes about 1-2 weeks. Choose a pot that is at least 6 inches in diameter and fill it with well-draining potting mix.
6. What kind of soil is best for growing celery?
Celery prefers rich, well-draining soil that is high in organic matter. A good potting mix for vegetables will work well. You can also amend your soil with compost or aged manure to improve its fertility and drainage. Celery also prefers a slightly acidic soil pH, around 6.0 to 6.8.
7. How much sunlight does celery need?
Celery needs at least 6 hours of sunlight per day. Choose a sunny location in your garden or place your potted celery near a bright window. If you don’t have enough natural light, you can supplement with grow lights.
8. How often should I water celery after transplanting?
Keep the soil consistently moist, but not waterlogged. Water deeply whenever the top inch of soil feels dry to the touch. Celery is a water-loving plant, so it’s important to provide it with adequate moisture, especially during hot weather. This is where the water conservation aspect of regrowing celery really shines – you’re using water more efficiently than commercial farming.
9. Can I grow celery indoors permanently?
Yes, you can grow celery indoors permanently, but it may require some extra care. Make sure to provide it with plenty of light, either natural or artificial. Rotate the pot regularly to ensure even growth. You may also need to fertilize it regularly with a balanced liquid fertilizer.
10. What are some common problems when growing celery and how can I fix them?
Some common problems include:
* **Yellowing leaves:** This can be caused by overwatering, underwatering, or nutrient deficiencies. Adjust your watering schedule and fertilize as needed.
* **Pests:** Celery can be susceptible to pests like aphids and spider mites. Inspect your plants regularly and treat with insecticidal soap or neem oil if necessary.
* **Bolting:** This occurs when the celery plant prematurely produces a flower stalk, making the stalks bitter. Bolting can be caused by stress, such as extreme temperat
So, there you have it! Growing celery from kitchen scraps is not just a fun experiment; it’s a powerful way to reduce food waste, conserve water, and enjoy fresh, homegrown celery. This simple DIY trick transforms what would normally be tossed into the compost bin into a thriving plant, offering a sustainable and rewarding gardening experience.
Why is this a must-try? Because it’s incredibly easy, cost-effective, and environmentally friendly. You’re essentially getting a free celery plant from something you already have! Plus, you’re actively participating in water conservation by minimizing the need to purchase commercially grown celery, which often relies on extensive irrigation. Think about it: every celery stalk you regrow is one less that needs to be shipped across the country, reducing your carbon footprint and supporting a more sustainable food system.
But the benefits don’t stop there. This method allows you to control the growing environment, ensuring your celery is free from harmful pesticides and herbicides. You know exactly what’s going into your food, giving you peace of mind and a healthier harvest.
Looking for variations? Absolutely! Once your celery has established roots, you can transplant it into a larger pot or directly into your garden. Experiment with different soil types to see what works best in your climate. You can also try growing different varieties of celery, such as Pascal celery or Chinese celery, from their respective bases. Consider companion planting with herbs like parsley or cilantro to deter pests and enhance the flavor of your celery.
Another fun variation is to use the regrown celery leaves in salads, soups, or as a garnish. They have a more intense flavor than the stalks and add a delightful freshness to any dish. You can even dry the leaves and use them as a seasoning.
Don’t be afraid to experiment and adapt the process to suit your own needs and preferences. The beauty of this DIY project is its flexibility and simplicity.
We wholeheartedly encourage you to give this DIY trick a try. It’s a fantastic way to connect with nature, learn about plant growth, and contribute to a more sustainable lifestyle. Imagine the satisfaction of harvesting your own celery, knowing that you grew it from a simple kitchen scrap!
And most importantly, we want to hear about your experience! Share your photos, tips, and challenges in the comments below. Let’s create a community of celery-growing enthusiasts and inspire others to embrace this simple yet powerful water conservation technique. Did you find a particular type of water worked best? Did you have any issues with pests? What was the tastiest dish you made with your homegrown celery? Your insights can help others succeed and make this DIY trick even more effective. Let’s all learn from each other and celebrate the joys of homegrown celery!
Frequently Asked Questions (FAQ)
1. What part of the celery do I need to regrow it?
You need the base of the celery stalk, the part where all the stalks are connected. Cut off the stalks about 2 inches from the base, leaving the root end intact. This is the part that will sprout new growth. Make sure to use a sharp knife to avoid crushing the base.
2. How long does it take for celery to regrow?
You should start seeing new growth within 5-7 days. The roots will begin to develop first, followed by new leaves sprouting from the center of the base. The exact time frame can vary depending on the temperature, humidity, and the specific variety of celery. Be patient and ensure the base is consistently moist.
3. What kind of water is best for regrowing celery?
Tap water is generally fine for regrowing celery. However, if your tap water is heavily chlorinated, it’s best to let it sit out for 24 hours before using it to allow the chlorine to dissipate. Filtered water or rainwater can also be used. Avoid using distilled water, as it lacks the minerals necessary for plant growth. Change the water every 1-2 days to prevent bacterial growth and keep the celery base healthy.
4. How often should I change the water?
Change the water every 1-2 days. This helps prevent the growth of bacteria and keeps the celery base fresh. You’ll notice the water may become cloudy or slightly discolored over time, which is a sign that it needs to be changed.
5. When should I transplant the celery to soil?
Once the roots are about 2-3 inches long and you see significant new growth from the center, it’s time to transplant the celery to soil. This usually takes about 1-2 weeks. Choose a pot that is at least 6 inches in diameter and fill it with well-draining potting mix.
6. What kind of soil is best for growing celery?
Celery prefers rich, well-draining soil that is high in organic matter. A good potting mix for vegetables will work well. You can also amend your soil with compost or aged manure to improve its fertility and drainage. Celery also prefers a slightly acidic soil pH, around 6.0 to 6.8.
7. How much sunlight does celery need?
Celery needs at least 6 hours of sunlight per day. Choose a sunny location in your garden or place your potted celery near a bright window. If you don’t have enough natural light, you can supplement with grow lights.
8. How often should I water celery after transplanting?
Keep the soil consistently moist, but not waterlogged. Water deeply whenever the top inch of soil feels dry to the touch. Celery is a water-loving plant, so it’s important to provide it with adequate moisture, especially during hot weather. This is where the water conservation aspect of regrowing celery really shines – you’re using water more efficiently than commercial farming.
9. Can I grow celery indoors permanently?
Yes, you can grow celery indoors permanently, but it may require some extra care. Make sure to provide it with plenty of light, either natural or artificial. Rotate the pot regularly to ensure even growth. You may also need to fertilize it regularly with a balanced liquid fertilizer.
10. What are some common problems when growing celery and how can I fix them?
Some common problems include:
* **Yellowing leaves:** This can be caused by overwatering, underwatering, or nutrient deficiencies. Adjust your watering schedule and fertilize as needed.
* **Pests:** Celery can be susceptible to pests like aphids and spider mites. Inspect your plants regularly and treat with insecticidal soap or neem oil if necessary.
* **Bolting:** This occurs when the celery plant prematurely produces a flower stalk, making the stalks bitter. Bolting can be caused by stress, such as extreme temperatures or lack of water. Ensure consistent watering and protect your plants from extreme weather.
11. Can I use this method to grow other vegetables?
Yes, this method can be used to regrow other vegetables like lettuce, bok choy, and green onions. The basic principle is the same: place the base of the vegetable in water and wait for it to sprout new roots and leaves.
12. How does regrowing celery help with water conservation?
Regrowing celery at home reduces the demand for commercially grown celery, which often requires significant amounts of water for irrigation. By regrowing your own celery, you’re minimizing the water footprint associated with its production and transportation. You are also reusing water that you would otherwise discard. This small act contributes to a more sustainable food system and helps conserve precious water resources.
Leave a Comment