
DIY floor cleaner for gloss – that’s right, we’re diving into the world of sparkling, streak-free floors with a homemade solution! Forget those expensive, chemical-laden cleaners from the store. I’m going to show you how to whip up a powerful, yet gentle, floor cleaner using ingredients you probably already have in your pantry.
For centuries, people have relied on natural ingredients to keep their homes clean. Think about it – before the advent of modern cleaning products, vinegar, lemon juice, and essential oils were the go-to solutions for everything from disinfecting surfaces to polishing furniture. This tradition of resourcefulness and sustainability is something I truly admire, and it’s what inspired me to create this DIY floor cleaner for gloss.
Why should you bother with a DIY floor cleaner? Well, for starters, it’s incredibly cost-effective. You’ll save a significant amount of money compared to buying commercial cleaners regularly. More importantly, you’ll know exactly what’s going onto your floors, avoiding harsh chemicals that can be harmful to your family and pets. Plus, it’s a fantastic way to reduce your environmental impact by minimizing plastic waste and using eco-friendly ingredients. Ready to ditch the store-bought stuff and embrace a cleaner, greener way to shine your floors? Let’s get started!

DIY Streak-Free Floor Cleaner for Glossy Floors
Hey there, fellow DIY enthusiasts! Are you tired of those annoying streaks and dullness on your beautiful glossy floors after cleaning? I know I was! Store-bought cleaners often leave a residue that attracts dirt and makes your floors look even worse. That’s why I decided to create my own DIY floor cleaner specifically designed for glossy surfaces. And guess what? It works like a charm! It’s budget-friendly, eco-friendly, and leaves your floors sparkling without any streaks. Let me share my secret recipe and step-by-step guide with you.
What You’ll Need
Before we dive in, let’s gather all the necessary ingredients and supplies. This will make the whole process smoother and more efficient.
* White Vinegar: This is the star ingredient! Vinegar’s acidity helps cut through grease and grime without leaving a soapy residue. It’s also a natural disinfectant.
* Rubbing Alcohol (Isopropyl Alcohol): This helps the cleaner evaporate quickly, preventing streaks. Make sure to use a concentration of at least 70%.
* Dish Soap (Mild): A tiny amount of dish soap helps lift dirt and adds a bit of cleaning power. Choose a mild, pH-neutral dish soap to avoid damaging your floor’s finish. Avoid anything with added moisturizers or scents that could leave a film.
* Essential Oil (Optional): For a pleasant scent, add a few drops of your favorite essential oil. Lemon, lavender, or tea tree oil are great choices. Tea tree oil also has antibacterial properties.
* Warm Water: This acts as the base for our cleaner and helps dissolve the other ingredients.
* Spray Bottle: A clean spray bottle is essential for applying the cleaner evenly.
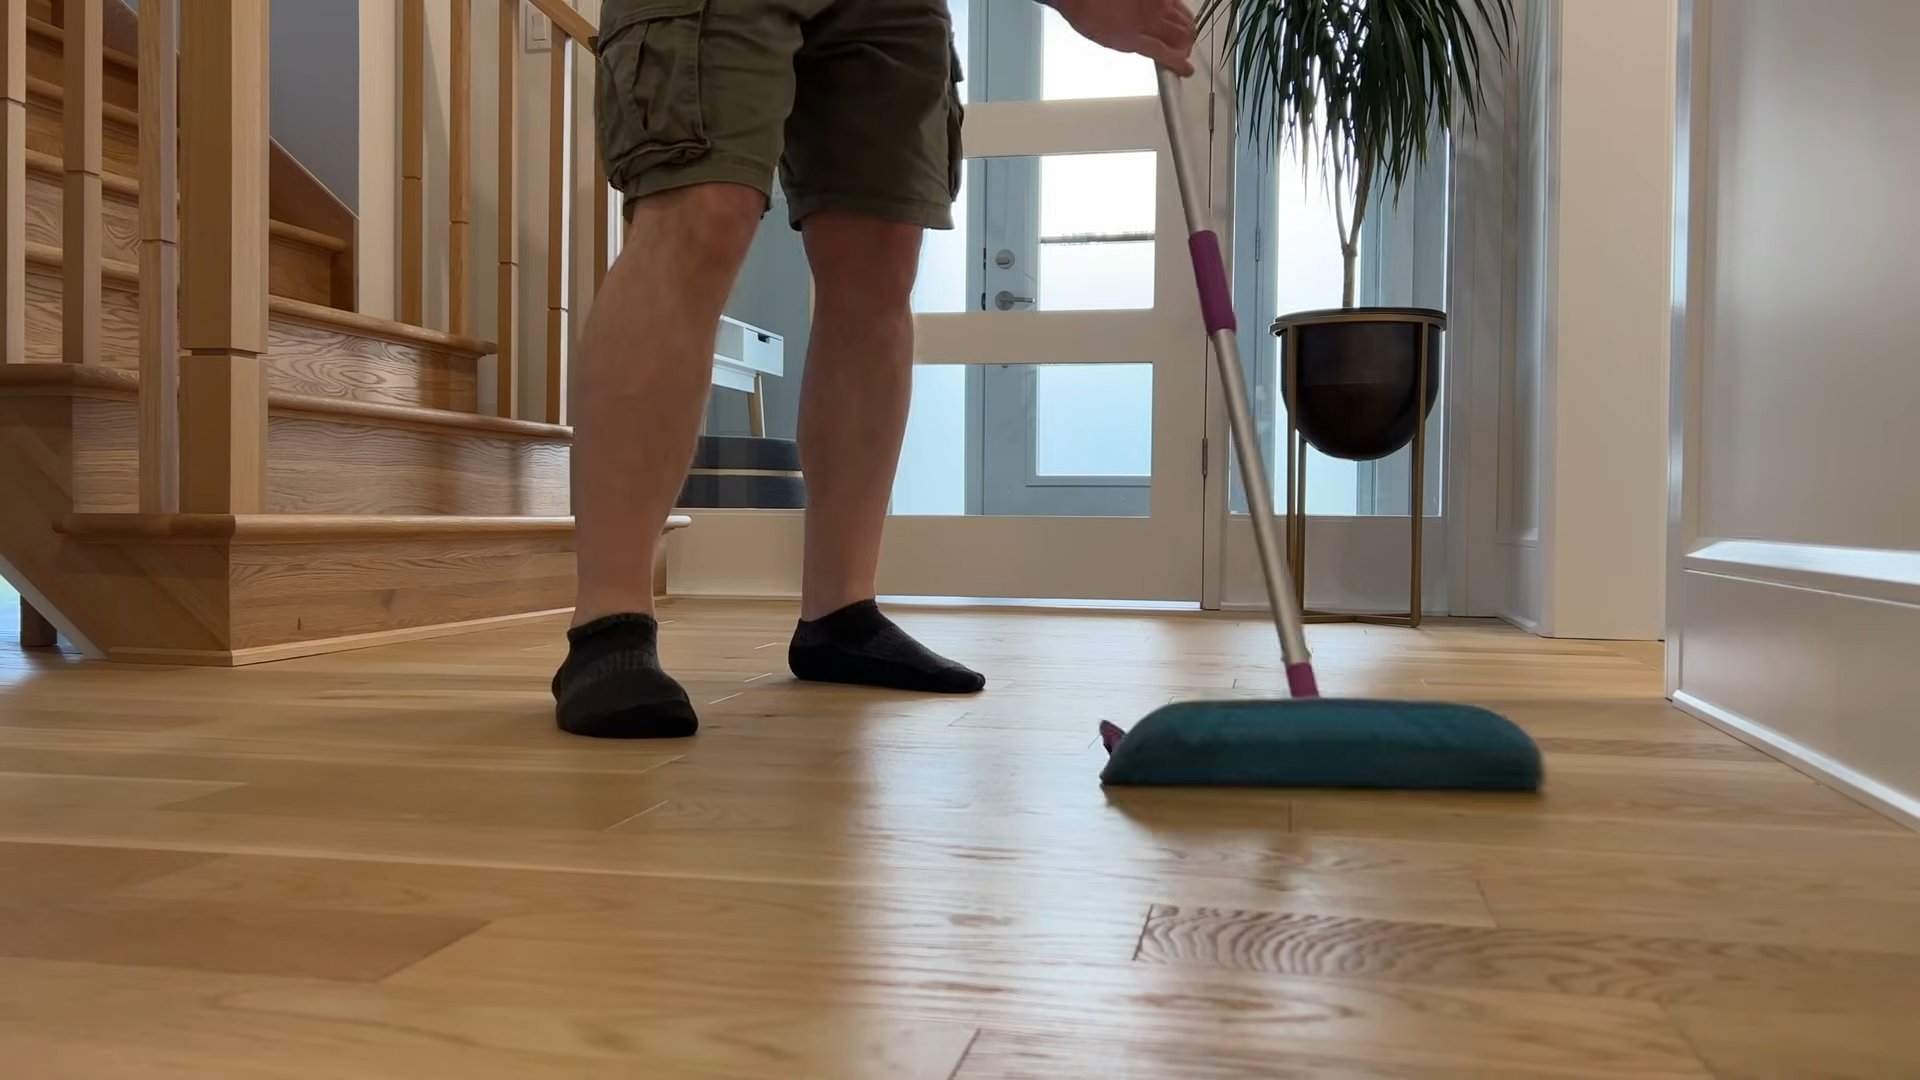
* Microfiber Mop or Cloths: Microfiber is the key to streak-free cleaning. It picks up dirt and grime effectively without scratching the floor.
* Bucket (Optional): If you prefer using a traditional mop, you’ll need a bucket to mix the cleaner.
The Perfect Recipe
Okay, now for the magic formula! This recipe is specifically designed for glossy floors, ensuring a streak-free shine.
* 1/2 cup White Vinegar
* 1/4 cup Rubbing Alcohol (70% or higher)
* 1 teaspoon Mild Dish Soap
* 10-15 drops Essential Oil (Optional)
* 1 gallon Warm Water
Step-by-Step Cleaning Guide
Alright, let’s get those floors sparkling! Follow these steps carefully for the best results.
1. Prepare the Floor: Before you start cleaning, it’s crucial to remove any loose dirt, dust, and debris. Sweep, vacuum, or dust mop the floor thoroughly. This prevents you from just pushing the dirt around during the cleaning process. Pay special attention to corners and edges where dust tends to accumulate.
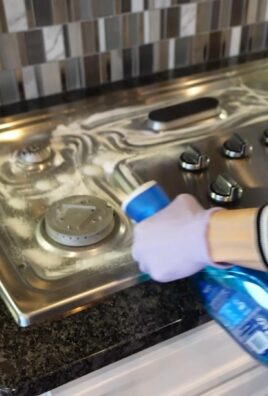
2. Mix the Cleaning Solution: In a clean spray bottle or bucket, combine the warm water, white vinegar, rubbing alcohol, and dish soap. If you’re using essential oil, add it now. Gently swirl the mixture to combine all the ingredients. Avoid shaking vigorously, as this can create excessive suds.
3. Test in an Inconspicuous Area: Before cleaning the entire floor, it’s always a good idea to test the cleaner in a small, hidden area to ensure it doesn’t damage the finish. Apply a small amount of the cleaner to the test area and let it sit for a few minutes. Then, wipe it away with a clean microfiber cloth. Check for any discoloration, dullness, or other adverse reactions. If everything looks good, you can proceed with cleaning the rest of the floor.
4. Apply the Cleaner: If you’re using a spray bottle, lightly mist the floor with the cleaning solution, working in small sections. Avoid oversaturating the floor, as this can lead to streaks. If you’re using a bucket, dip your microfiber mop into the solution, wring it out thoroughly, and then mop the floor in small sections.
5. Mop the Floor: Using a clean microfiber mop or cloth, wipe the floor in the direction of the grain (if applicable). Apply gentle pressure to remove dirt and grime. Rinse the mop or cloth frequently in clean water to prevent spreading dirt around. If you’re using a spray bottle, you may need to use multiple microfiber cloths to ensure you’re always wiping with a clean surface.
6. Dry the Floor (If Necessary): In most cases, the floor will dry quickly on its own due to the rubbing alcohol in the cleaner. However, if you notice any lingering moisture or streaks, you can use a clean, dry microfiber cloth to buff the floor dry. This will help enhance the shine and prevent water spots.
Tips for Extra Shine and Streak Prevention
Want to take your floor cleaning game to the next level? Here are some extra tips and tricks I’ve learned along the way.
* Use Distilled Water: If you have hard water, consider using distilled water in your cleaning solution. Hard water can contain minerals that leave streaks on your floors.
* Change Microfiber Cloths Frequently: Don’t be afraid to switch to a fresh microfiber cloth as soon as the one you’re using becomes dirty. This will ensure you’re always wiping with a clean surface.
* Avoid Over-Wetting: As I mentioned earlier, oversaturating the floor can lead to streaks. Use just enough cleaner to dampen the surface.
* Buff for Extra Shine: After the floor is dry, you can use a clean, dry microfiber cloth to buff it for an extra shine. This will help remove any remaining residue and leave your floors looking their best.
* Regular Cleaning: The more often you clean your floors, the easier it will be to maintain their shine. Aim to clean your glossy floors at least once a week, or more often if needed.
* Proper Mop Technique: When mopping, use overlapping strokes to ensure you cover the entire surface. Avoid leaving any gaps or streaks.
* Don’t Use Too Much Soap: A little dish soap goes a long way. Using too much soap can leave a sticky residue that attracts dirt.
* Consider a Steam Mop: For an even deeper clean, you might consider investing in a steam mop. Steam mops use hot steam to sanitize and clean floors without the need for harsh chemicals. Just make sure your floor is compatible with steam cleaning before using one.
* Check Your Floor’s Warranty: Before using any DIY cleaner, it’s always a good idea to check your floor’s warranty to ensure that it won’t void the warranty. Some manufacturers may have specific cleaning recommendations.
* Proper Storage: Store your cleaning solution in a cool, dark place away from direct sunlight. Label the spray bottle clearly to avoid any confusion.
Troubleshooting Common Issues
Even with the best recipe and technique, you might encounter some common issues. Here’s how to troubleshoot them:
* Streaks: If you’re still seeing streaks, try using less cleaner, switching to a clean microfiber cloth more frequently, or buffing the floor dry with a clean cloth. You might also need to adjust the ratio of vinegar to water in your cleaning solution.
* Dullness: If your floors are looking dull, it could be due to a buildup of residue from previous cleaners. Try cleaning your floors with just warm water and a microfiber mop to remove any existing residue. Then, try the DIY cleaner again.
* Sticky Residue: If you’re experiencing a sticky residue, it’s likely due to using too much dish soap. Try cleaning your floors with just warm water and a microfiber mop to remove the residue. Then, reduce the amount of dish soap in your next batch of DIY cleaner.
* Cloudiness: Cloudiness can be caused by hard water or using too much vinegar. Try using distilled water or reducing the amount of vinegar in your cleaning solution.
* Smell: If you’re not a fan of the vinegar smell, don’t worry! It will dissipate quickly. You can also add more essential oil to mask the scent.
Safety Precautions
While this DIY floor cleaner is relatively safe, it’s still important to take some precautions:
* Keep out of reach of children and pets.
* Avoid contact with eyes. If contact occurs, rinse thoroughly with water.
* Do not ingest. If ingested, seek medical attention.
* Test in an inconspicuous area before cleaning the entire floor.
* Wear gloves if you have sensitive skin.
Why This Works
The effectiveness of this DIY cleaner lies in the synergy of its ingredients. The vinegar cuts through grease and grime, the rubbing alcohol helps it evaporate quickly, the dish soap lifts dirt, and the essential oil provides a pleasant scent. The microfiber mop ensures a streak-free finish by effectively picking up dirt and grime without scratching the floor. By following these steps and tips, you can achieve a professional-quality clean without breaking the bank or using harsh chemicals.
So there you have it! My go-to recipe for
Conclusion
So, there you have it! Ditching those expensive, chemical-laden store-bought cleaners and embracing this simple, effective DIY floor cleaner for gloss is a game-changer for your home. We’ve walked you through the easy steps, highlighted the benefits, and hopefully, convinced you that achieving a sparkling, streak-free shine on your glossy floors doesn’t require a fortune or harsh chemicals.
Why is this DIY trick a must-try? Because it’s not just about saving money (although that’s a definite perk!). It’s about creating a healthier home environment for you, your family, and your pets. You’re eliminating potentially harmful chemicals that can linger in the air and on surfaces, opting instead for natural, readily available ingredients. Plus, the satisfaction of creating something yourself, knowing exactly what’s going into it, is incredibly rewarding.
But the best part? The results speak for themselves. This DIY floor cleaner for gloss delivers a brilliant shine without leaving behind any dulling residue. Your floors will look cleaner, brighter, and more inviting than ever before.
Looking for variations? Absolutely! While the basic recipe is fantastic as is, feel free to experiment with essential oils to add a subtle, refreshing scent to your home. A few drops of lemon, lavender, or tea tree oil can not only enhance the cleaning power but also leave your floors smelling amazing. Just be sure to use essential oils that are safe for your flooring type. For example, avoid using acidic essential oils like lemon on marble floors, as they can etch the surface.
Another variation involves adjusting the vinegar-to-water ratio based on the level of dirt and grime on your floors. For heavily soiled floors, you might want to increase the amount of vinegar slightly. However, always start with the recommended ratio and adjust as needed to avoid any potential damage to your floor’s finish. Remember, a little goes a long way!
We strongly encourage you to give this DIY floor cleaner for gloss a try. You’ll be amazed at how easy it is to make and how effective it is at cleaning your floors. Once you’ve tried it, we’d love to hear about your experience! Share your results, any variations you tried, and any tips you have in the comments below. Let’s build a community of DIY enthusiasts who are passionate about creating clean, healthy, and beautiful homes.
Don’t be afraid to experiment and find what works best for your specific flooring type and cleaning needs. The beauty of DIY is that you have the flexibility to customize the recipe to your liking. So, grab your ingredients, put on some music, and get ready to transform your floors with this simple yet powerful DIY solution. You won’t regret it!
Frequently Asked Questions (FAQ)
1. Can I use this DIY floor cleaner on all types of glossy floors?
This DIY floor cleaner is generally safe and effective for most types of glossy floors, including hardwood, laminate, tile, and vinyl. However, it’s always a good idea to test it on a small, inconspicuous area first to ensure it doesn’t damage the finish. Pay particular attention to delicate surfaces like marble, which can be sensitive to acidic cleaners like vinegar. If you’re unsure about your flooring type, consult the manufacturer’s recommendations before using any cleaning product. For hardwood floors, ensure they are properly sealed before using any water-based cleaner. Excess water can seep into unsealed wood and cause damage.
2. How often should I use this DIY floor cleaner?
The frequency of cleaning depends on the amount of foot traffic and dirt your floors are exposed to. For high-traffic areas, you may need to clean them once or twice a week. For less frequently used areas, cleaning every other week or once a month may be sufficient. Avoid over-cleaning, as excessive moisture can damage certain types of flooring. Always allow your floors to dry completely after cleaning.
3. What type of vinegar should I use?
White distilled vinegar is the best option for this DIY floor cleaner. It’s inexpensive, readily available, and has a mild acidity that effectively cleans and disinfects without leaving behind a strong odor. Avoid using other types of vinegar, such as apple cider vinegar or balsamic vinegar, as they may contain sugars or other additives that can leave a sticky residue on your floors.
4. Can I add other ingredients to this DIY floor cleaner?
Yes, you can customize this recipe to suit your preferences and needs. As mentioned earlier, essential oils are a great addition for fragrance and added cleaning power. You can also add a small amount of dish soap (a few drops) for extra cleaning power, but be careful not to use too much, as it can leave a soapy residue. Borax can also be added in very small quantities for extra cleaning power, but use caution and research its safety before using, especially if you have children or pets.
5. What if my floors are still streaky after cleaning?
Streaky floors can be caused by several factors, including using too much cleaner, not rinsing the floors properly, or using a dirty mop. To avoid streaks, use the recommended amount of cleaner and ensure your mop is clean. After cleaning, you can also wipe the floors with a clean, dry microfiber cloth to remove any remaining residue. If streaks persist, try reducing the amount of vinegar in the solution.
6. Is this DIY floor cleaner safe for pets and children?
Yes, this DIY floor cleaner is generally safe for pets and children, as it uses natural ingredients like vinegar and water. However, it’s always a good idea to keep pets and children away from the area while you’re cleaning and until the floors are completely dry. If you’re using essential oils, make sure they are pet-safe and use them in moderation. Some essential oils can be toxic to pets if ingested or inhaled in large quantities.
7. How should I store the leftover DIY floor cleaner?
You can store the leftover DIY floor cleaner in a clean, airtight container, such as a spray bottle or a glass jar. Label the container clearly and store it in a cool, dark place. The cleaner should last for several weeks, but it’s best to use it within a month for optimal effectiveness.
8. Can I use this cleaner on my hardwood floors if they have a wax finish?
No, this cleaner is not recommended for hardwood floors with a wax finish. The vinegar can strip the wax and damage the finish. For waxed hardwood floors, use a cleaner specifically designed for waxed surfaces.
9. What kind of mop should I use with this DIY floor cleaner?
A microfiber mop is the best option for cleaning glossy floors with this DIY cleaner. Microfiber mops are gentle, absorbent, and effective at removing dirt and grime without scratching the surface. Avoid using abrasive mops or scrub brushes, as they can damage the finish.
10. My floors have a dull film on them. Will this DIY cleaner help remove it?
Yes, this DIY floor cleaner can help remove dull films from your floors. The vinegar in the solution helps to break down and dissolve the buildup of dirt, grime, and cleaning product residue that can cause a dull appearance. For stubborn films, you may need to use a slightly stronger concentration of vinegar or repeat the cleaning process.
11. Can I use this cleaner in a steam mop?
While some people have successfully used vinegar and water solutions in steam mops, it’s generally not recommended by steam mop manufacturers. The vinegar can potentially damage the internal components of the steam mop. Always consult the manufacturer’s instructions before using any cleaning solution in your steam mop.
12. What are the benefits of using a DIY floor cleaner over store-bought cleaners?
The benefits of using a DIY floor cleaner include:
* Cost-effectiveness: DIY cleaners are typically much cheaper than store-bought cleaners.
* Natural ingredients: You know exactly what’s going into your cleaner, avoiding harsh chemicals and toxins.
* Environmentally friendly: DIY cleaners are often more sustainable and reduce plastic waste.
* Customizable: You can adjust the recipe to suit your preferences and needs.
* Healthier home environment: Eliminating harsh chemicals creates a safer and healthier living space for you, your family, and your pets.
By embracing this DIY floor cleaner for gloss, you’re not just cleaning your floors; you’re investing in a healthier, more sustainable, and more beautiful home. So, go ahead, give it a try, and experience the difference for yourself!


Leave a Comment