
Easy to Grow Kitchen Veggies – imagine stepping into your kitchen, not just to cook, but to harvest fresh, flavorful ingredients right from your windowsill! For centuries, humans have cultivated small gardens, from the hanging gardens of Babylon to the humble herb boxes of medieval Europe. This connection to the earth, this ability to nurture life, is deeply ingrained in our souls. But in today’s fast-paced world, who has time for a sprawling garden?
That’s where these DIY tricks come in! I’m going to show you how to bring the joy and bounty of gardening indoors, even if you have limited space or a less-than-green thumb. Forget expensive grocery store produce that’s traveled miles – with a few simple hacks, you can enjoy fresh, organic vegetables grown with your own two hands.
Think about it: snipping fresh basil for your pasta, adding vibrant greens to your salad, or enjoying the sweet taste of homegrown tomatoes, all without leaving your kitchen. This article is your guide to unlocking the secrets of easy to grow kitchen veggies, transforming your kitchen into a thriving, edible oasis. So, grab your gardening gloves (or maybe just a spoon!), and let’s get started!

Propagating Plants in June: A Gardener’s Guide
Hey there, fellow plant enthusiasts! June is absolutely buzzing with life, and it’s the perfect time to expand your green family through propagation. The warmer weather and longer days give your cuttings the best possible start. I’m going to walk you through some easy and effective methods to propagate your favorite plants this month. Let’s get our hands dirty!
Understanding Propagation
Before we dive in, let’s quickly cover the basics. Propagation is simply creating new plants from existing ones. It’s a fantastic way to save money, share your beloved plants with friends, and even preserve varieties that might be difficult to find. June’s ideal conditions make success much more likely.
Choosing Your Propagation Method
There are several ways to propagate plants, but we’ll focus on the most common and beginner-friendly methods:
* Stem Cuttings: This is probably the most popular method, and it works for a wide range of plants, including herbs, shrubs, and some houseplants.
* Leaf Cuttings: Perfect for succulents and some other plants with fleshy leaves.
* Division: Ideal for plants that grow in clumps, like hostas, daylilies, and ferns.
* Layering: A natural propagation method where a stem is rooted while still attached to the parent plant.
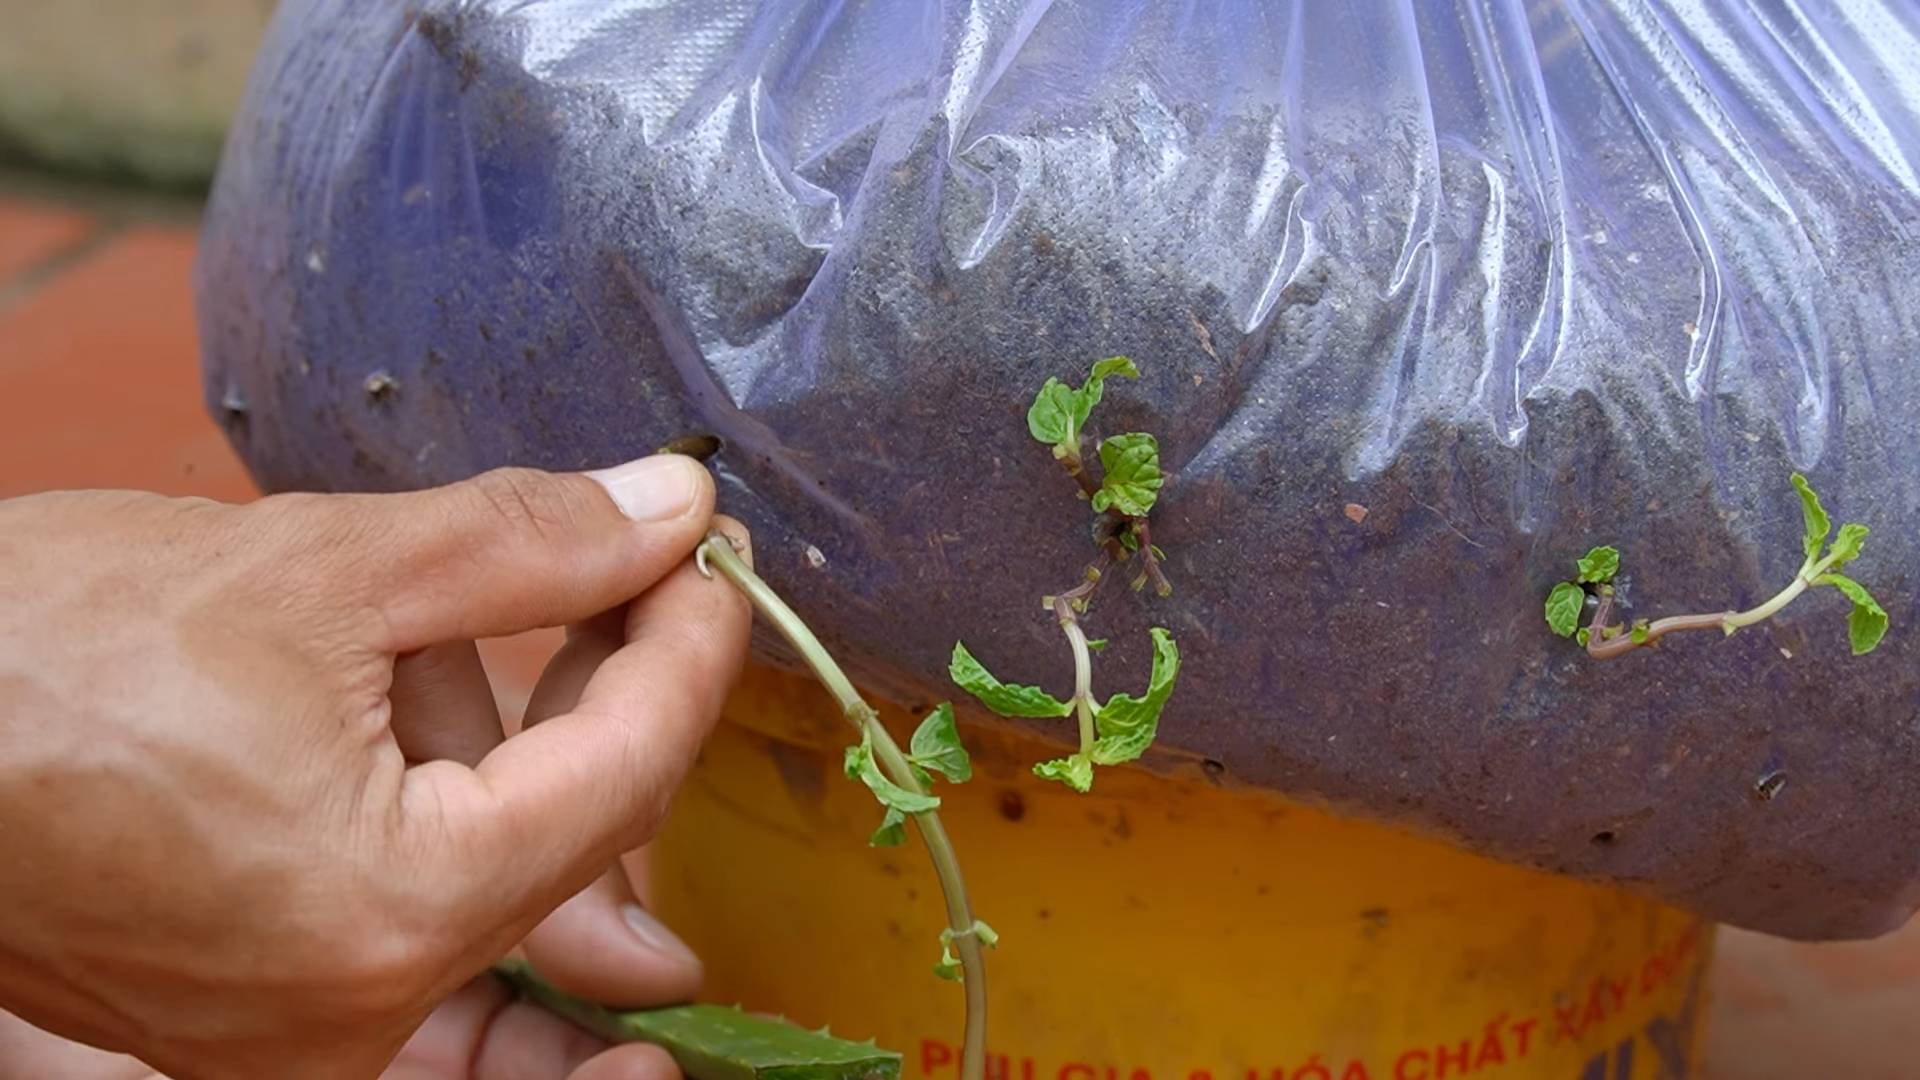
Stem Cuttings: The Most Versatile Method
Stem cuttings are my go-to method for many plants. Here’s how to do it:
Materials You’ll Need:
* Healthy parent plant
* Sharp, clean pruning shears or knife
* Rooting hormone (optional, but recommended)
* Small pots or containers
* Well-draining potting mix (seed starting mix or a mix of perlite and peat moss works well)
* Clear plastic bag or humidity dome (optional, but helpful)
* Spray bottle with water
Step-by-Step Instructions:
1. Select a Healthy Stem: Choose a healthy, non-flowering stem from your parent plant. Look for stems that are actively growing and free from pests or diseases. The ideal stem should be about 4-6 inches long.
2. Make the Cut: Using your sharp, clean pruning shears or knife, make a clean cut just below a node (the point where leaves emerge from the stem). This is where roots will most likely develop.
3. Remove Lower Leaves: Remove the leaves from the bottom 1-2 inches of the stem. This prevents them from rotting when they’re buried in the soil. Leaving a few leaves at the top allows the cutting to photosynthesize.
4. Apply Rooting Hormone (Optional): Dip the cut end of the stem into rooting hormone powder or liquid. This encourages root development and increases your chances of success. Follow the instructions on the rooting hormone package. I find it really boosts the rooting process, especially for plants that are a bit more challenging to propagate.
5. Prepare Your Potting Mix: Fill your small pots or containers with well-draining potting mix. Moisten the mix thoroughly before planting the cuttings.
6. Plant the Cutting: Make a small hole in the potting mix with your finger or a pencil. Insert the cutting into the hole, making sure that the node where you removed the leaves is buried in the soil. Gently firm the soil around the cutting to secure it.
7. Create a Humid Environment: Cover the pot with a clear plastic bag or place it in a humidity dome. This helps to maintain high humidity around the cutting, which is essential for root development. Make sure the bag doesn’t touch the leaves to prevent rot. You can use skewers to prop it up if needed.
8. Provide Light and Moisture: Place the pot in a bright, indirect light location. Avoid direct sunlight, which can scorch the cuttings. Keep the potting mix consistently moist, but not soggy. Check the moisture level daily and mist the cuttings with water if the humidity seems low.
9. Be Patient: Rooting can take anywhere from a few weeks to a few months, depending on the plant species and environmental conditions. Be patient and avoid disturbing the cuttings too much. You’ll know that roots have developed when you see new growth or when you gently tug on the cutting and feel resistance.
10. Transplant: Once the cuttings have developed a good root system, you can transplant them into larger pots or into your garden.
Leaf Cuttings: For Succulents and More
Leaf cuttings are a fun and easy way to propagate succulents like Echeveria, Sedum, and Kalanchoe. Some other plants, like African Violets, can also be propagated this way.
Materials You’ll Need:
* Healthy succulent leaves
* Small pots or trays
* Well-draining succulent potting mix (or a mix of sand and perlite)
* Spray bottle with water
Step-by-Step Instructions:
1. Select Healthy Leaves: Choose healthy, plump leaves from your succulent. Gently twist or snap the leaves off the stem, making sure to get the entire leaf, including the base.
2. Callus the Leaves: Allow the leaves to callus over for a few days. This means letting the cut end dry out and form a protective layer. This prevents rot when you plant them. Place the leaves on a paper towel in a cool, dry place.
3. Prepare Your Potting Mix: Fill your small pots or trays with well-draining succulent potting mix. Moisten the mix lightly.
4. Place the Leaves on the Soil: Lay the calloused leaves on top of the potting mix. You can also gently insert the cut end of the leaf into the soil.
5. Provide Light and Moisture: Place the pots or trays in a bright, indirect light location. Mist the leaves with water every few days, or when the soil feels dry. Avoid overwatering, as this can cause the leaves to rot.
6. Be Patient: Roots and new plantlets will develop from the base of the leaf over time. This can take several weeks or even months.
7. Transplant: Once the new plantlets have developed a good root system and are large enough to handle, you can transplant them into individual pots. The original leaf will eventually wither and die, but the new plant will continue to grow.
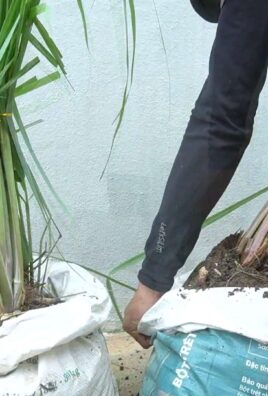
Division: Multiplying Clump-Forming Plants
Division is a great way to propagate plants that grow in clumps, like hostas, daylilies, irises, and ferns. It’s best done in early spring or fall, but June can work if you’re careful.
Materials You’ll Need:
* Mature clump-forming plant
* Shovel or garden fork
* Sharp knife or pruning saw
* Pots or prepared garden beds
Step-by-Step Instructions:
1. Dig Up the Plant: Carefully dig up the entire clump of the plant. Use a shovel or garden fork to loosen the soil around the plant and gently lift it out of the ground.
2. Divide the Clump: Use a sharp knife or pruning saw to divide the clump into smaller sections. Each section should have its own roots and shoots. Make sure to cut cleanly through the roots to minimize damage.
3. Prepare the New Sections: Remove any dead or damaged leaves and roots from the new sections.
4. Plant the New Sections: Plant the new sections in pots or prepared garden beds. Make sure to space them properly to allow for growth.
5. Water Thoroughly: Water the newly planted sections thoroughly to help them establish.
6. Provide Care: Provide the same care as you would for a mature plant, including regular watering, fertilizing, and pest control.
Layering: Rooting Stems While Still Attached
Layering is a natural propagation method that involves rooting a stem while it’s still attached to the parent plant. This is a great option for plants with long, flexible stems, like climbing roses, raspberries, and forsythia.
Materials You’ll Need:
* Flexible stem from the parent plant
* Sharp knife or pruning shears
* Rooting hormone (optional)
* Small shovel or trowel
* Rock or brick
Step-by-Step Instructions:
1. Choose a Flexible Stem: Select a long, flexible stem from the parent plant that can be easily bent to the ground.
2. Prepare the Stem: Remove the leaves from the section of the stem that will be buried in the soil.
3. Make a Small Cut: Make a small cut or scrape on the underside of the stem where it will touch the soil. This encourages root development. You can also apply rooting hormone to the cut area.
4. Bury the Stem: Dig a shallow trench in the soil near the parent plant. Bend the stem down and bury the prepared section in the trench.
5. Secure the Stem: Use a rock or brick to hold the buried stem in place
Conclusion
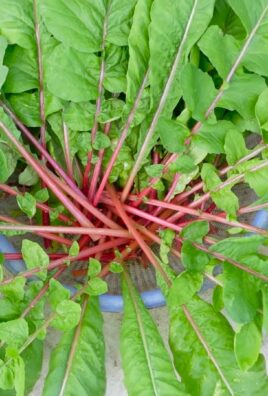
So, there you have it! Cultivating your own kitchen garden with easy-to-grow vegetables is not just a trend; it’s a rewarding and sustainable way to enhance your culinary experiences and connect with nature. We’ve explored some fantastic options that are perfect for beginners and seasoned gardeners alike, from the vibrant colors of rainbow chard to the satisfying crunch of homegrown radishes.
Why is this DIY trick a must-try? Because it empowers you to take control of your food source, ensuring freshness, flavor, and the satisfaction of knowing exactly where your vegetables come from. Imagine stepping outside your door to harvest the perfect amount of basil for your pasta sauce or snipping off a few leaves of spinach for a nutritious smoothie. This isn’t just about saving money at the grocery store; it’s about embracing a healthier, more mindful lifestyle.
Beyond the basics, there are countless ways to personalize your kitchen garden. Consider companion planting to maximize space and deter pests naturally. For example, planting basil near tomatoes can improve their flavor and repel insects. Experiment with different varieties of the same vegetable to discover your favorites. Try growing cherry tomatoes in hanging baskets for a cascading display of sweetness, or opt for different colored bell peppers to add visual appeal to your garden and your plate.
If you’re short on space, don’t despair! Many of these vegetables thrive in containers, making them ideal for balconies, patios, or even sunny windowsills. Just be sure to choose pots that are large enough to accommodate the mature size of the plants and use a high-quality potting mix. Vertical gardening is another excellent option for maximizing space, allowing you to grow herbs and leafy greens on walls or fences.
Growing your own vegetables is a journey of discovery, and there’s no right or wrong way to do it. Don’t be afraid to experiment, make mistakes, and learn from your experiences. The most important thing is to have fun and enjoy the process.
We wholeheartedly encourage you to give this DIY trick a try. Start small, perhaps with just one or two of the vegetables we’ve discussed, and gradually expand your garden as you gain confidence. The rewards are well worth the effort, from the delicious flavors of homegrown produce to the sense of accomplishment that comes from nurturing life from seed to table.
And most importantly, we want to hear about your experiences! Share your successes, your challenges, and your favorite tips for growing easy to grow kitchen veggies in the comments below. Let’s create a community of gardeners who are passionate about fresh, flavorful, and sustainable food. Share pictures of your gardens, recipes you’ve created with your homegrown produce, and any advice you have for fellow beginners. Together, we can inspire each other to cultivate healthier lives and a deeper connection with the natural world. So, grab your gardening gloves, get your hands dirty, and start growing your own delicious, easy to grow kitchen veggies today!
Frequently Asked Questions (FAQ)
What are the absolute easiest vegetables to start with for a complete beginner?
For absolute beginners, we highly recommend starting with leafy greens like spinach, lettuce, and kale. These vegetables are relatively low-maintenance and can be harvested multiple times throughout the growing season. Radishes are another excellent choice, as they germinate quickly and are ready to harvest in just a few weeks. Herbs like basil, mint, and chives are also easy to grow and can be used to add flavor to a variety of dishes. These easy to grow kitchen veggies are very rewarding.
How much sunlight do these vegetables need?
Most vegetables require at least 6-8 hours of direct sunlight per day to thrive. However, some leafy greens, like lettuce and spinach, can tolerate partial shade, especially during the hottest part of the day. If you’re growing vegetables indoors, you may need to supplement with grow lights to ensure they receive enough light. Observe your plants closely and adjust their location or lighting as needed.
What kind of soil is best for growing vegetables?
The ideal soil for growing vegetables is well-draining, fertile, and rich in organic matter. A good quality potting mix is essential if you’re growing in containers. If you’re planting in the ground, amend the soil with compost or other organic matter to improve its structure and fertility. Avoid heavy clay soils, as they can become waterlogged and inhibit root growth. You can also perform a soil test to determine the pH level and nutrient content of your soil and make any necessary adjustments.
How often should I water my vegetables?
The frequency of watering will depend on the type of vegetable, the weather conditions, and the type of soil you’re using. As a general rule, water deeply and less frequently, rather than shallowly and more often. This encourages roots to grow deeper into the soil, making plants more drought-tolerant. Check the soil moisture regularly by sticking your finger into the soil. If the top inch or two feels dry, it’s time to water. Avoid overwatering, as this can lead to root rot.
Do I need to fertilize my vegetables?
Yes, fertilizing is important for providing your vegetables with the nutrients they need to grow and produce a bountiful harvest. Use a balanced fertilizer that is specifically formulated for vegetables. Follow the instructions on the fertilizer package carefully, as over-fertilizing can damage your plants. You can also use organic fertilizers, such as compost tea or fish emulsion, to provide a slow-release source of nutrients.
How do I deal with pests and diseases in my vegetable garden?
Prevention is key when it comes to pests and diseases. Choose disease-resistant varieties of vegetables, practice good sanitation by removing dead leaves and debris, and water plants at the base to avoid wetting the foliage. If you do encounter pests, try using natural methods of control, such as hand-picking, insecticidal soap, or neem oil. For diseases, remove affected leaves or plants and treat with a fungicide if necessary. Companion planting can also help to deter pests and diseases naturally.
Can I grow these vegetables indoors?
Yes, many of the vegetables we’ve discussed can be grown indoors, especially if you have a sunny windowsill or grow lights. Leafy greens, herbs, and cherry tomatoes are particularly well-suited for indoor growing. Be sure to choose containers that are large enough to accommodate the mature size of the plants and use a high-quality potting mix. You may also need to hand-pollinate some vegetables, such as tomatoes and peppers, to ensure fruit production.
How do I harvest my vegetables?
The timing of harvest will depend on the type of vegetable. Leafy greens can be harvested as soon as they reach a usable size. Radishes are ready to harvest when they are about an inch in diameter. Tomatoes are ripe when they are fully colored and slightly soft to the touch. Herbs can be harvested as needed throughout the growing season. Use a sharp knife or scissors to harvest your vegetables, and handle them gently to avoid bruising.
What are some good companion plants for these vegetables?
Companion planting can help to improve the growth and flavor of your vegetables, as well as deter pests and diseases. Some good companion plants for the vegetables we’ve discussed include:
* Basil: Tomatoes, peppers
* Marigolds: Tomatoes, peppers, cabbage
* Garlic: Roses, tomatoes
* Carrots: Onions, lettuce
* Lettuce: Carrots, radishes
How can I extend the growing season for my vegetables?
There are several ways to extend the growing season for your vegetables, including:
* Starting seeds indoors: This allows you to get a head start on the growing season.
* Using cold frames or row covers: These protect plants from frost and cold temperatures.
* Choosing cold-hardy varieties of vegetables: These can tolerate colder temperatures and extend the growing season.
* Succession planting: This involves planting crops at intervals throughout the growing season to ensure a continuous harvest.
Leave a Comment