
Malabar Spinach Growing Tips: Unlock the secrets to cultivating this vibrant, nutritious leafy green right in your own backyard! Have you ever dreamed of harvesting fresh, delicious spinach that thrives even in the scorching summer heat? Well, dream no more! This DIY guide is your passport to a bountiful Malabar spinach harvest, offering simple yet effective tricks that will transform your garden into a thriving oasis.
Malabar spinach, also known as Basella alba, boasts a rich history, particularly in Asian cuisine where it’s been cherished for centuries. Beyond its culinary appeal, it’s packed with vitamins and minerals, making it a healthy and delicious addition to any meal. But let’s be honest, sometimes growing your own food can feel intimidating. That’s where these Malabar Spinach Growing Tips come in. I’m here to share my tried-and-true methods for success, even if you’re a complete beginner.
Why do you need these DIY tricks? Because store-bought spinach simply can’t compare to the flavor and satisfaction of harvesting your own! Plus, growing your own Malabar spinach is incredibly rewarding. Imagine the joy of snipping fresh leaves for salads, stir-fries, or soups, knowing exactly where your food comes from and that it’s free from harmful chemicals. Let’s dive in and discover how easy it is to cultivate this amazing plant with these simple, actionable tips!
DIY: Growing Malabar Spinach Like a Pro (Even if You’re a Beginner!)
Okay, so you want to grow Malabar spinach? Awesome! It’s a fantastic leafy green that thrives in warm weather and adds a unique, slightly citrusy flavor to your dishes. Plus, it’s super easy to grow once you get the hang of it. I’m going to walk you through everything you need to know, from starting seeds to harvesting a bountiful crop. Let’s get started!
Choosing Your Variety and Starting Seeds
First things first, let’s talk about varieties. While technically not a true spinach (it’s in the Basellaceae family), Malabar spinach comes in a few different types. The most common are green-stemmed and red-stemmed. The red-stemmed variety is often considered more ornamental, but both taste pretty similar. I personally prefer the green-stemmed because it blends in better with my other greens in salads.
Here’s how to get your seeds going:
* Soaking Seeds: Malabar spinach seeds have a tough outer coating, which can make germination a bit slow. To speed things up, I highly recommend soaking them in warm water for 24-48 hours before planting. This softens the shell and helps the little sprouts break through.
* Starting Indoors (Optional): If you live in a cooler climate with a shorter growing season, starting your seeds indoors is a great idea. I usually start mine about 4-6 weeks before the last expected frost.
* Direct Sowing: If you live in a warmer climate, you can direct sow your seeds right into the garden after the last frost. Just make sure the soil is warm and the danger of frost has passed.
Now, let’s get to the nitty-gritty:
1. Prepare Your Seed Starting Mix (If Starting Indoors): Use a well-draining seed starting mix. I like to make my own by mixing equal parts peat moss, perlite, and vermiculite. You can also buy pre-made seed starting mixes at most garden centers.
2. Sow the Seeds: Fill your seed starting trays or small pots with the mix. Make a small indentation (about 1/2 inch deep) in the center of each cell or pot. Place one or two soaked seeds in each indentation and cover gently with soil.
3. Water Gently: Water the soil gently using a spray bottle or watering can with a fine rose. You want to moisten the soil without disturbing the seeds.
4. Provide Warmth and Light: Malabar spinach seeds need warmth to germinate. Aim for a soil temperature of around 70-80°F (21-27°C). You can use a heat mat to help maintain the temperature. Place the seed starting trays under grow lights or in a sunny window. If using a window, rotate the trays regularly to prevent the seedlings from leaning towards the light.
5. Keep the Soil Moist: Check the soil moisture daily and water as needed to keep it consistently moist but not soggy.
6. Harden Off Seedlings (If Starting Indoors): Before transplanting your seedlings outdoors, you need to “harden them off.” This process gradually acclimates them to the outdoor environment. Start by placing the seedlings outdoors in a sheltered location for a few hours each day, gradually increasing the amount of time they spend outdoors over the course of a week or two. Protect them from direct sunlight and strong winds during this process.
Preparing the Garden Bed
Malabar spinach loves sunshine and well-drained soil. Here’s how I prep my garden bed for these leafy climbers:
* Sunlight: Choose a location that receives at least 6 hours of direct sunlight per day. More is even better!
* Soil: Malabar spinach prefers well-drained soil that is rich in organic matter. If your soil is heavy clay or sandy, amend it with compost or well-rotted manure before planting. I usually add a generous layer of compost to my garden bed in the spring.
* Soil pH: Aim for a soil pH between 6.5 and 7.0. You can test your soil pH using a soil testing kit or by sending a sample to your local extension office.
* Support Structure: Malabar spinach is a vine, so it needs a support structure to climb on. You can use a trellis, fence, or even a sturdy tomato cage. I’ve found that a trellis works best because it allows the vines to spread out and get plenty of sunlight.
Now, let’s get the garden bed ready:
1. Clear the Area: Remove any weeds, rocks, or debris from the planting area.
2. Amend the Soil: Dig in plenty of compost or well-rotted manure to improve soil drainage and fertility. I usually add about 2-3 inches of compost to my garden bed.
3. Install Support Structure: Install your trellis, fence, or tomato cage before planting. This will prevent you from disturbing the roots later on. Make sure the support is sturdy enough to handle the weight of the mature vines.
4. Water the Soil: Water the soil thoroughly before planting. This will help settle the soil and provide moisture for the seedlings.
Transplanting and Growing
Okay, the fun part! Transplanting your seedlings (if you started them indoors) or planting your seeds directly into the garden.
1. Transplanting Seedlings: Gently remove the seedlings from their seed starting trays or pots. Be careful not to damage the roots. Dig a hole in the garden bed that is slightly larger than the root ball of the seedling. Place the seedling in the hole and backfill with soil. Gently firm the soil around the base of the plant. Space the seedlings about 12-18 inches apart.
2. Direct Sowing Seeds: Sow the seeds about 1/2 inch deep and 12-18 inches apart. Cover gently with soil and water thoroughly.
3. Watering: Water the plants regularly, especially during hot, dry weather. Malabar spinach prefers consistently moist soil. I usually water my plants deeply once or twice a week, depending on the weather.
4. Fertilizing: Fertilize the plants every 2-3 weeks with a balanced organic fertilizer. I like to use fish emulsion or compost tea.
5. Mulching: Apply a layer of mulch around the plants to help retain moisture, suppress weeds, and regulate soil temperature. I use straw or wood chips for mulch.
6. Training the Vines: As the vines grow, train them to climb up the support structure. You can use twine or plant clips to help secure the vines to the trellis or fence.
7. Pest and Disease Control: Malabar spinach is relatively pest and disease resistant. However, it can be susceptible to aphids and spider mites. Check your plants regularly for pests and treat them as needed with insecticidal soap or neem oil. Good air circulation can help prevent fungal diseases.
Harvesting and Using Malabar Spinach
Now for the best part – harvesting your delicious Malabar spinach!
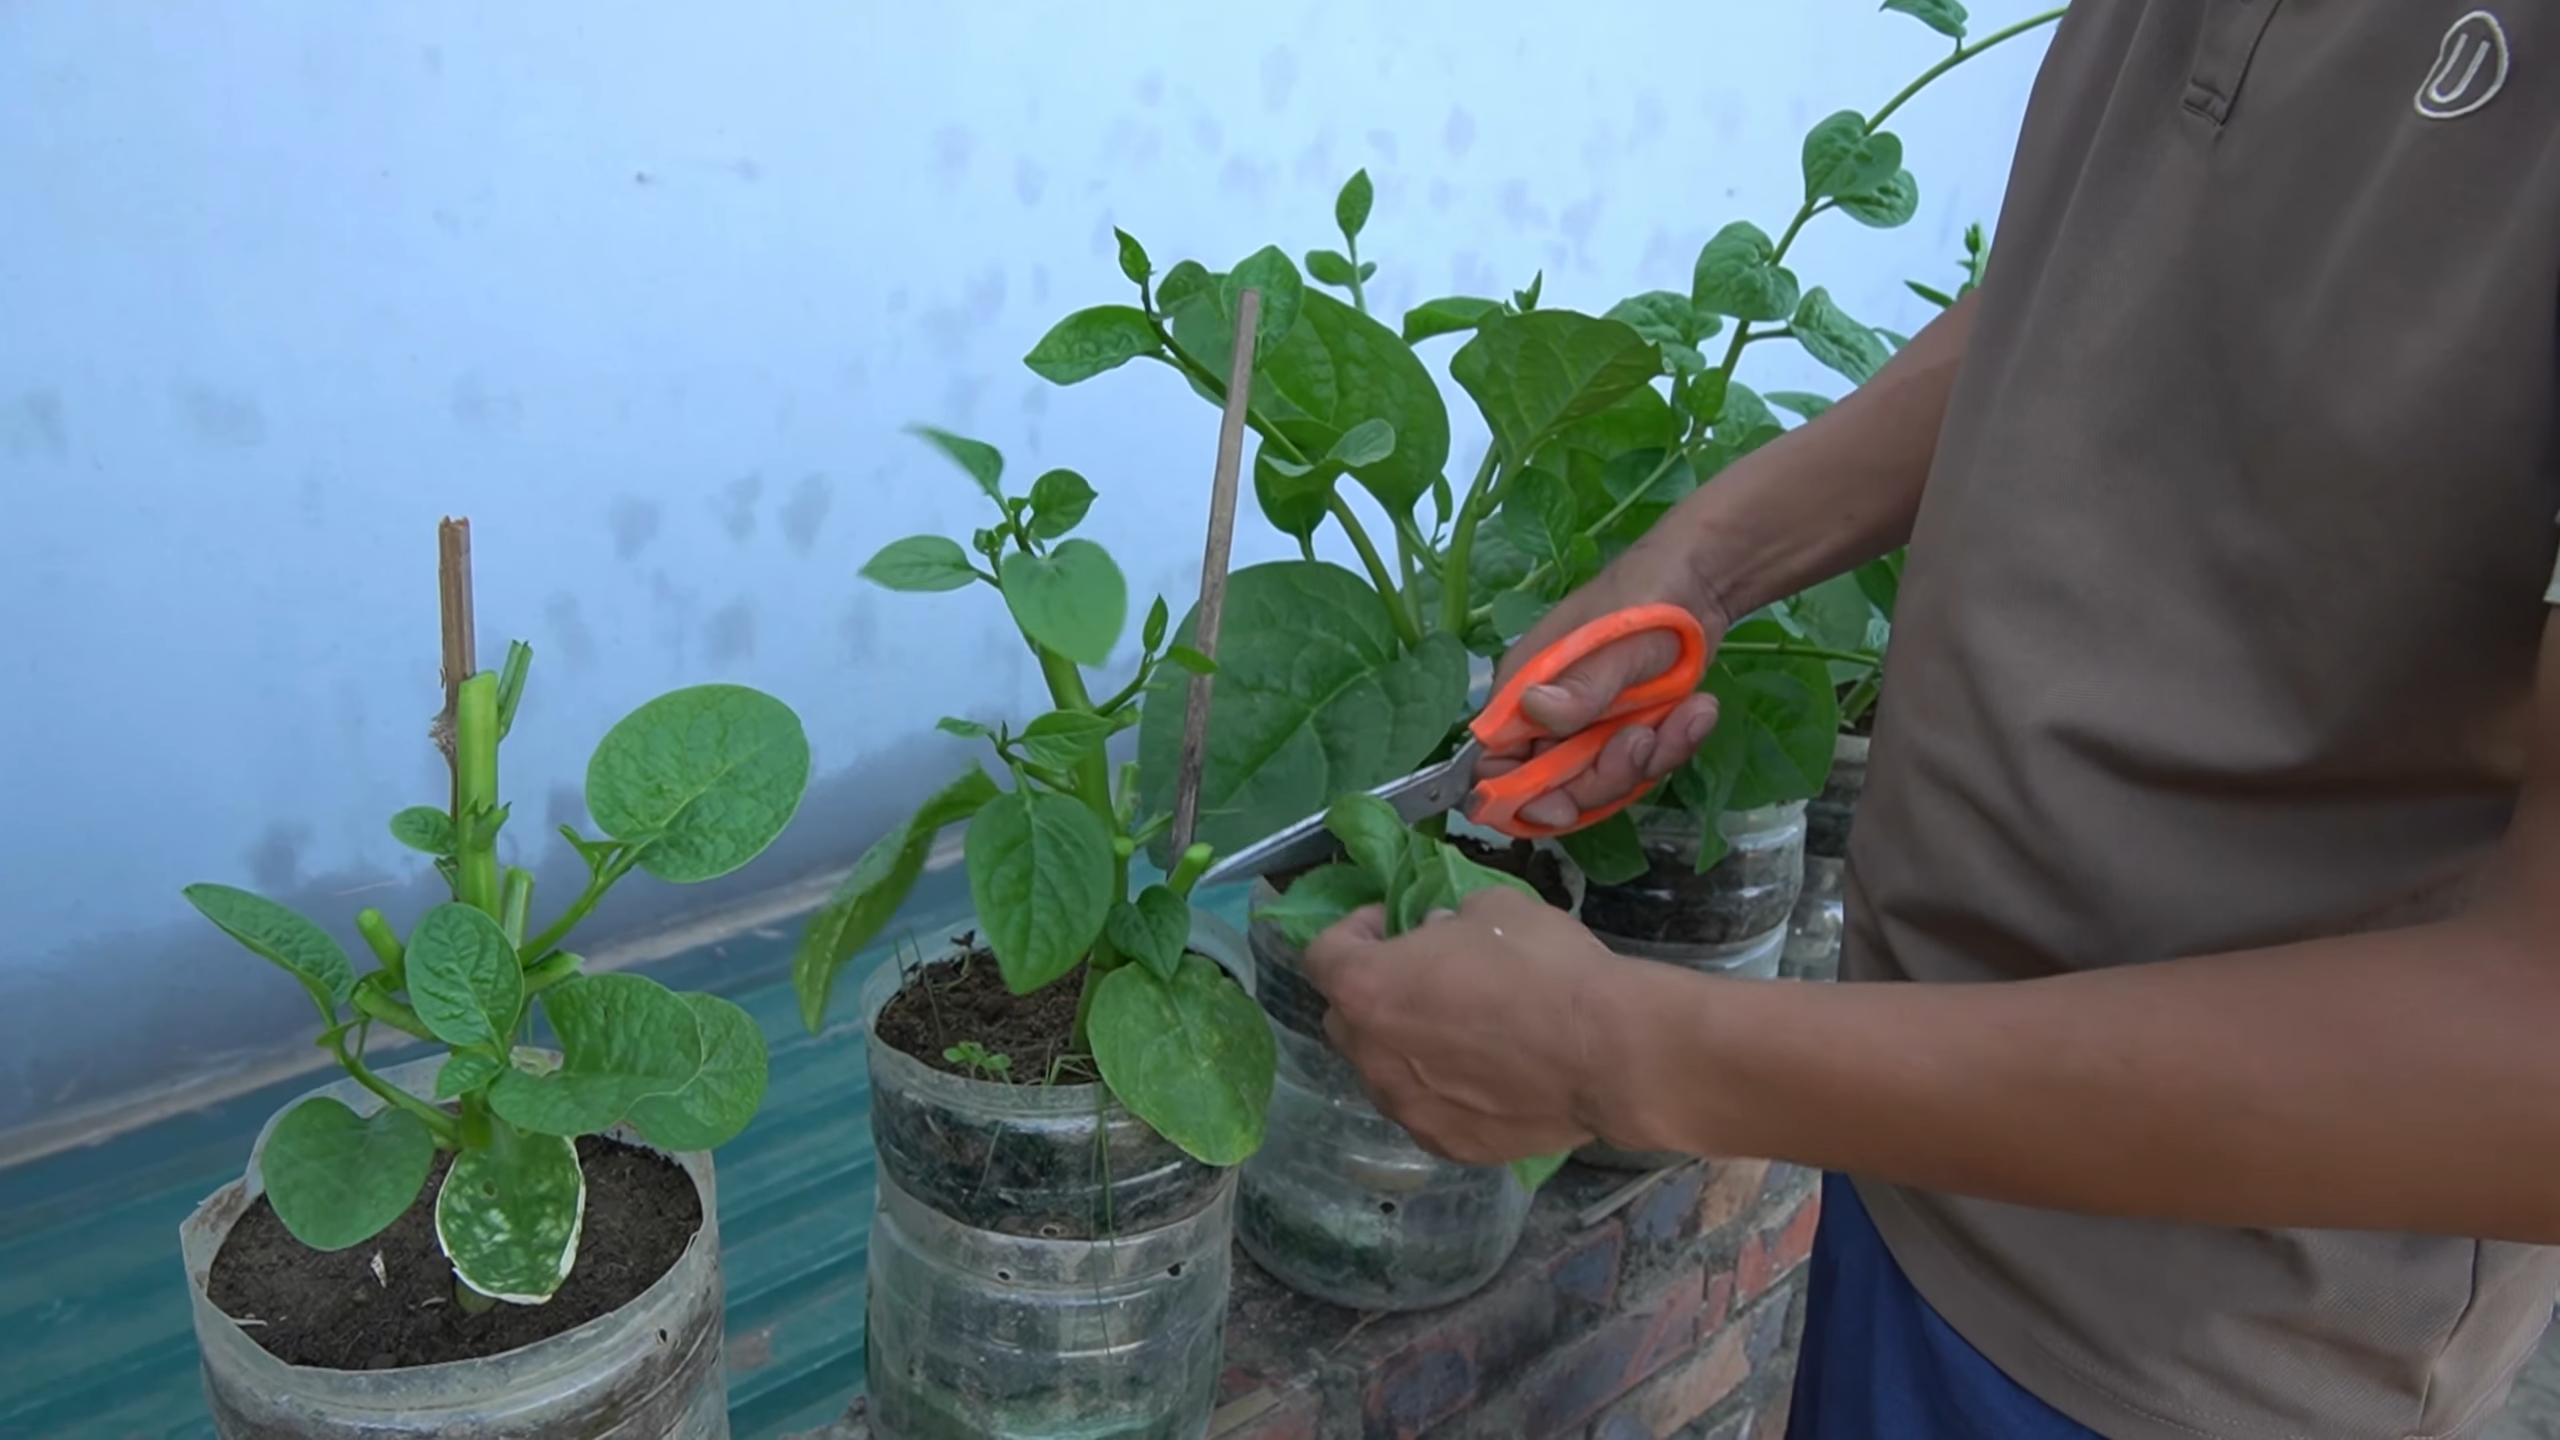
* When to Harvest: You can start harvesting the leaves as soon as the plants are large enough to handle. I usually start harvesting when the vines are about 12 inches long.
* How to Harvest: Simply snip off the leaves and tender stems with scissors or pruning shears. Avoid cutting off more than one-third of the plant at a time, as this can stress the plant and reduce its yield.
* Continuous Harvest: Malabar spinach is a cut-and-come-again crop, meaning you can harvest it repeatedly throughout the growing season. The more you harvest, the more the plant will produce.
* Storage: Freshly harvested Malabar spinach can be stored in the refrigerator for up to a week. Wrap the leaves in a damp paper towel and place them in a plastic bag.
Here are some of my favorite ways to use Malabar spinach:
* Salads: Add the leaves to salads for a slightly citrusy flavor and a boost of nutrients.
* Stir-fries: Use the leaves in stir-fries as a substitute for spinach or other leafy greens.
* Soups and Stews: Add the leaves to soups and stews for a healthy and flavorful addition.
* Smoothies: Blend the leaves into smoothies for a nutritious and refreshing drink.
* Steamed or Sautéed: Steam or sauté the leaves with garlic and olive oil for a simple and delicious side dish.
Troubleshooting
Even with the best planning, sometimes things don’t go exactly as expected. Here are a few common issues you might encounter and how to deal with them:
* Slow Germination: If your seeds are taking a long time to germinate, make sure the soil is warm enough and consistently moist. Soaking the seeds before planting can also help speed up germination.
* Yellowing Leaves: Yellowing leaves can be a sign of nutrient deficiency. Fertilize the plants with a balanced organic fertilizer.
* Pest Infest

Conclusion
So, there you have it! Mastering the art of growing Malabar spinach doesn’t require a green thumb blessed by the gardening gods. It’s about understanding its needs, providing the right environment, and a little bit of patience. This DIY approach to cultivating your own vibrant, leafy greens is more than just a gardening project; it’s an investment in your health, your culinary creativity, and your connection to nature.
Why is this a must-try? Because store-bought spinach, while convenient, simply can’t compare to the freshness and flavor of homegrown Malabar spinach. Imagine plucking those succulent leaves straight from the vine, knowing exactly where they came from and what went into their growth. The taste difference is remarkable – a subtle earthiness with a hint of citrus that elevates any dish. Plus, you’re reducing your carbon footprint by cutting down on transportation and packaging.
But the benefits extend beyond the taste buds. Growing your own Malabar spinach is incredibly rewarding. Watching those tiny seeds sprout and transform into a thriving vine is a testament to the power of nature and your own nurturing abilities. It’s a therapeutic activity that can reduce stress and connect you to the natural world.
Ready to take your Malabar spinach growing to the next level? Consider these variations:
* Vertical Gardening: Malabar spinach is a climber, making it perfect for vertical gardens. Train it up a trellis, fence, or even a repurposed pallet to maximize space and add a touch of greenery to your balcony or patio.
* Companion Planting: Plant your Malabar spinach alongside basil, tomatoes, or peppers. These companion plants can help deter pests and improve the overall health of your garden.
* Container Gardening: If you’re short on space, grow your Malabar spinach in containers. Choose a large pot with good drainage and use a high-quality potting mix.
* Seed Saving: Once your Malabar spinach plants mature, you can save the seeds for future planting. This is a great way to ensure a continuous supply of fresh greens and reduce your reliance on store-bought seeds.
Don’t be afraid to experiment and find what works best for your specific climate and growing conditions. The beauty of gardening is that there’s always something new to learn and discover.
We wholeheartedly encourage you to embark on this DIY journey of growing your own Malabar spinach. It’s a simple, rewarding, and delicious way to connect with nature and nourish your body. Once you’ve experienced the joy of harvesting your own fresh greens, you’ll never look at store-bought spinach the same way again.
So, grab your seeds, prepare your soil, and get ready to witness the magic of Malabar spinach. And most importantly, don’t forget to share your experiences with us! We’d love to hear about your successes, challenges, and any unique tips you’ve discovered along the way. Share your photos and stories on social media using #MalabarSpinachDIY and let’s inspire others to embrace the joys of homegrown goodness. Happy gardening!
Frequently Asked Questions (FAQ)
What exactly is Malabar spinach, and how is it different from regular spinach?
Malabar spinach (Basella alba or Basella rubra) isn’t actually a true spinach, though it shares a similar leafy green appearance and is used in similar culinary applications. It’s a heat-loving vine native to tropical Asia, whereas true spinach (Spinacia oleracea) thrives in cooler temperatures. Malabar spinach has thicker, more succulent leaves and a slightly mucilaginous texture when cooked. Its flavor is milder and slightly peppery compared to regular spinach. It’s also more heat-tolerant and less prone to bolting in warm weather, making it an excellent alternative to spinach in warmer climates.
How long does it take for Malabar spinach to grow from seed to harvest?
Generally, you can expect to harvest Malabar spinach about 60-70 days after sowing the seeds. However, this timeframe can vary depending on factors such as climate, soil quality, and watering practices. Soaking the seeds overnight before planting can help speed up germination. Consistent watering and fertilization will also promote faster growth. You can start harvesting leaves as soon as the plant is large enough, usually when it has several mature leaves.
What are the best growing conditions for Malabar spinach?
Malabar spinach thrives in warm, sunny locations with well-drained soil. It prefers a soil pH between 6.5 and 7.5. It needs at least 6 hours of sunlight per day to grow vigorously. Because it is a vine, it needs a trellis or other support structure to climb on. Regular watering is essential, especially during hot, dry periods. Mulching around the base of the plant can help retain moisture and suppress weeds.
What kind of soil is best for growing Malabar spinach?
Malabar spinach prefers well-draining, fertile soil that is rich in organic matter. Amend your soil with compost or well-rotted manure before planting to improve its fertility and drainage. A slightly acidic to neutral soil pH (6.5-7.5) is ideal. If your soil is heavy clay, consider adding sand or perlite to improve drainage.
How often should I water my Malabar spinach plants?
Water your Malabar spinach plants regularly, especially during hot, dry weather. The soil should be consistently moist but not waterlogged. Check the soil moisture level regularly by sticking your finger into the soil. If the top inch of soil feels dry, it’s time to water. Avoid overhead watering, as this can promote fungal diseases. Instead, water at the base of the plant.
Does Malabar spinach need fertilizer?
Yes, Malabar spinach benefits from regular fertilization. Apply a balanced fertilizer (e.g., 10-10-10) every 2-3 weeks during the growing season. You can also use a liquid seaweed fertilizer or compost tea to provide essential nutrients. Avoid over-fertilizing, as this can lead to excessive foliage growth at the expense of flavor.
What are some common pests and diseases that affect Malabar spinach?
Malabar spinach is generally resistant to pests and diseases, but it can be susceptible to aphids, spider mites, and fungal diseases like leaf spot. Inspect your plants regularly for signs of infestation or disease. If you notice any problems, treat them promptly with an appropriate insecticide or fungicide. Organic options include neem oil, insecticidal soap, and copper fungicide. Good air circulation and proper watering practices can help prevent fungal diseases.
How do I harvest Malabar spinach?
Harvest Malabar spinach by snipping off the leaves and stems as needed. You can harvest individual leaves or entire stems. Regular harvesting encourages the plant to produce more leaves. Avoid harvesting more than one-third of the plant at a time to allow it to recover. The young, tender leaves are the most flavorful.
Can I eat Malabar spinach raw?
While Malabar spinach leaves are edible raw, they have a slightly mucilaginous texture that some people may find unappealing. Cooking the leaves reduces the mucilage and enhances their flavor. They can be used in stir-fries, soups, stews, and salads.
How do I store harvested Malabar spinach?
Store harvested Malabar spinach in the refrigerator in a plastic bag or container. It will keep for several days. Wash the leaves just before using them.
Can I grow Malabar spinach indoors?
Yes, you can grow Malabar spinach indoors, but it requires a sunny location and a large container. Provide adequate support for the vine to climb on. Ensure good air circulation to prevent fungal diseases. You may also need to supplement with artificial light if your indoor space doesn’t receive enough natural sunlight.
Is Malabar spinach a perennial or an annual?
Malabar spinach is a perennial in tropical and subtropical climates (USDA zones 9-11). In colder climates, it is typically grown as an annual. However, you can overwinter it indoors by bringing the plant inside before the first frost.
How can I save seeds from my Malabar spinach plant?
To save seeds from your Malabar spinach plant, allow some of the flowers to mature and form berries. Once the berries turn dark purple or black, they are ready to harvest. Gently squeeze the seeds out of the berries and rinse them with water. Spread the seeds out on a paper towel to dry completely. Store the dried seeds in an airtight container in a cool, dark place.
What are some creative ways to use Malabar spinach in cooking?
Malabar spinach is a versatile ingredient that can be used in a variety of dishes. Try adding it to stir-fries, soups, stews, curries, and omelets. It can also be used as a substitute for spinach in salads, smoothies, and pesto. The slightly mucilaginous texture makes it a good thickener for soups and sauces. You can even use the young shoots as a substitute for asparagus.
Leave a Comment