
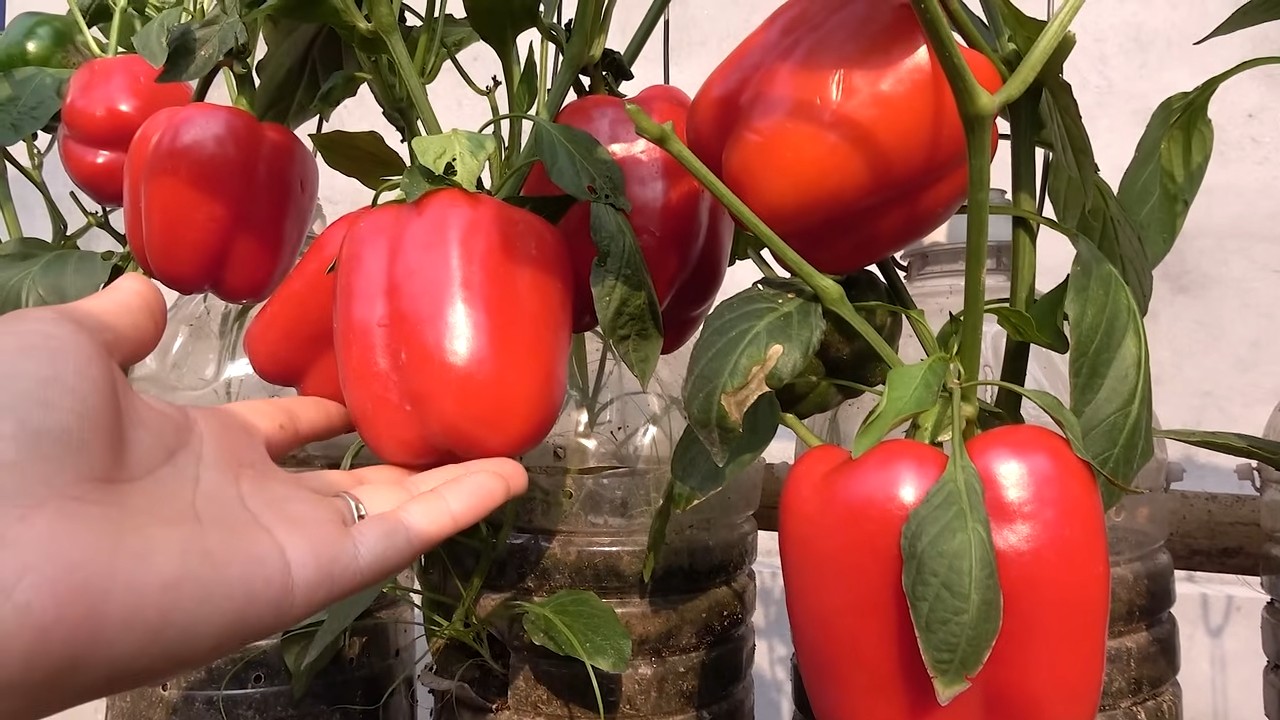
Upcycled bottle bell peppers: who knew turning trash into treasure could be so delicious? I’m so excited to share this incredibly fun and resourceful DIY project that not only adds a touch of whimsy to your garden but also helps you grow your own vibrant bell peppers! For centuries, resourceful gardeners have sought innovative ways to maximize their yields and minimize waste. From ancient terracing techniques to modern hydroponics, the spirit of ingenuity has always been at the heart of successful gardening.
But this project takes that ingenuity to a whole new level. Imagine transforming discarded plastic bottles – those ubiquitous symbols of our disposable culture – into miniature greenhouses, nurturing bell pepper seedlings into thriving plants. It’s a beautiful blend of sustainability and self-sufficiency.
Why do you need this DIY trick? Well, for starters, it’s incredibly budget-friendly! Forget expensive seed starting trays and mini-greenhouses. This method allows you to reuse materials you already have, saving you money and reducing your environmental footprint. Plus, it’s a fantastic way to extend your growing season, giving your bell peppers a head start before the weather fully warms up. And let’s be honest, there’s something incredibly satisfying about watching your upcycled bottle bell peppers flourish, knowing you played a part in both their growth and a more sustainable future. So, grab your scissors, gather your bottles, and let’s get growing!
Upcycled Bottle Bell Peppers: A DIY Garden Delight
Hey there, fellow gardening enthusiasts! Today, I’m super excited to share a fun and eco-friendly project that will not only add a pop of color to your garden but also help you recycle those pesky plastic bottles. We’re going to transform ordinary plastic bottles into adorable bell pepper planters! This project is perfect for beginners, budget-friendly, and a fantastic way to teach kids about recycling and gardening. Let’s get started!
What You’ll Need:
Before we dive in, let’s gather our supplies. Here’s a list of everything you’ll need to create your upcycled bottle bell pepper planters:
* Plastic Bottles: The star of the show! I recommend using 2-liter soda bottles or similar sizes. The number of bottles depends on how many bell pepper plants you want to grow. Make sure they are clean and dry.
* Bell Pepper Seeds or Seedlings: Choose your favorite bell pepper variety! You can start from seeds or buy small seedlings from your local nursery.
* Potting Soil: A good quality potting soil is essential for healthy plant growth.
* Scissors or Utility Knife: For cutting the plastic bottles. Be careful!
* Drill or Nail and Hammer: To create drainage holes.
* Acrylic Paints (Optional): To decorate your bell pepper planters and make them look extra cute.
* Paintbrushes (Optional): For painting.
* Waterproof Sealer (Optional): To protect the paint from the elements.
* Gloves (Optional): To protect your hands.
* Safety Glasses (Recommended): When cutting or drilling.
* Measuring Tape or Ruler: To ensure consistent cuts.
* Permanent Marker: To mark cutting lines.
Preparing the Plastic Bottles
This is where we transform those bottles into something useful! Follow these steps carefully:
1. Clean the Bottles: First things first, make sure your plastic bottles are squeaky clean. Remove any labels and wash them thoroughly with soap and water. Rinse well and let them dry completely. This will help prevent any mold or bacteria growth later on.
2. Mark the Cutting Line: Now, grab your measuring tape and permanent marker. We need to decide how tall we want our planters to be. I usually cut the bottles about halfway down, but you can adjust this based on your preference. Use the marker to draw a line all the way around the bottle at your desired height. Try to make the line as straight as possible for a neat finish.
3. Cut the Bottles: This is where the scissors or utility knife comes in. If you’re using a utility knife, be extra careful! I prefer to start by poking a small hole with the knife and then carefully cutting along the marked line. If you’re using scissors, you might need to use a bit more force, but it’s generally a safer option. Remember to wear safety glasses!
4. Smooth the Edges (Optional): After cutting, the edges of the plastic bottle might be a bit sharp. You can smooth them out using sandpaper or a lighter. If you’re using a lighter, be extremely cautious and only melt the edges slightly to round them off.
5. Create Drainage Holes: This is crucial for preventing waterlogging and ensuring healthy root growth. Use your drill or nail and hammer to create several drainage holes in the bottom of each bottle. I usually make about 4-5 holes, evenly spaced.
Planting Your Bell Peppers
Now for the fun part – planting our bell peppers!
1. Fill with Potting Soil: Grab your potting soil and carefully fill each bottle planter with soil, leaving about an inch of space at the top. Don’t pack the soil too tightly, as this can hinder root growth.
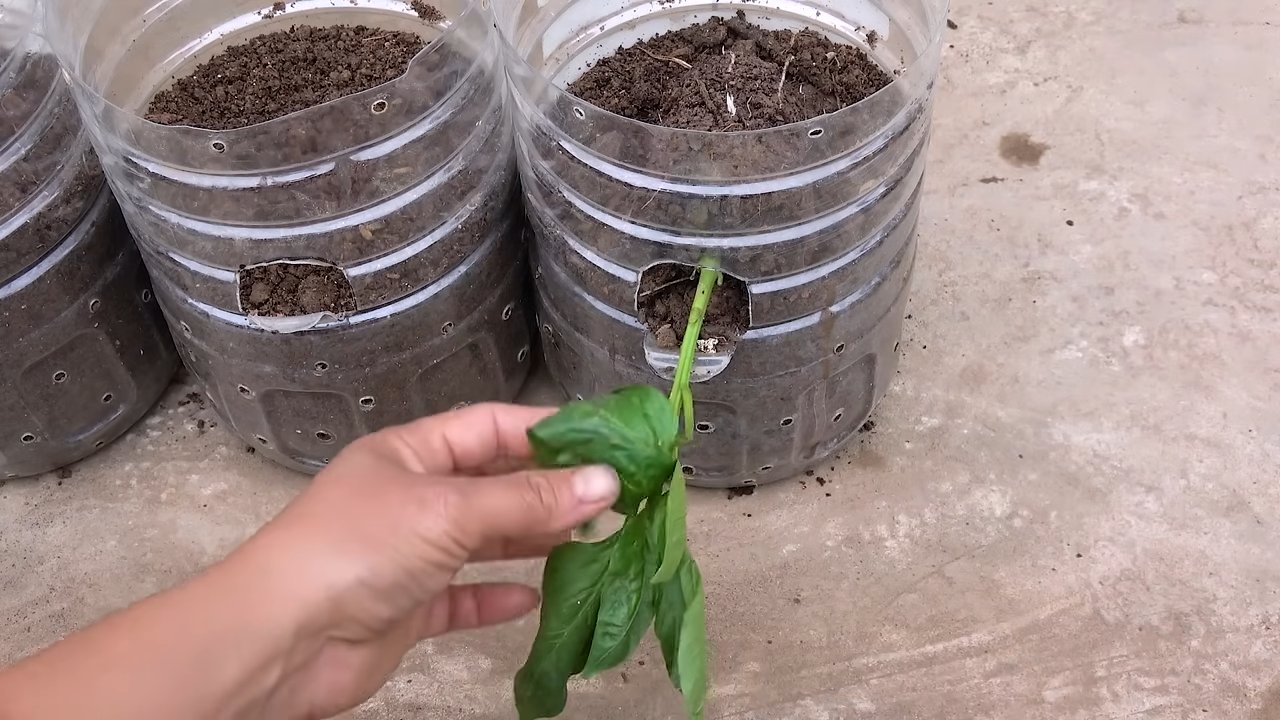
2. Plant the Seeds or Seedlings: If you’re starting from seeds, follow the instructions on the seed packet for planting depth and spacing. If you’re using seedlings, gently remove them from their containers and loosen the roots slightly. Dig a small hole in the soil and carefully place the seedling in the hole. Backfill with soil and gently pat it down.
3. Water Thoroughly: After planting, water your bell pepper plants thoroughly until the water drains out of the drainage holes. This will help settle the soil and ensure that the roots are well-hydrated.
4. Place in a Sunny Location: Bell peppers need plenty of sunlight to thrive. Place your upcycled bottle planters in a sunny location that receives at least 6-8 hours of direct sunlight per day.
Decorating Your Planters (Optional)
This is where you can get creative and personalize your bell pepper planters!
1. Choose Your Colors: Select your favorite acrylic paint colors. I like to use bright and cheerful colors that will add a pop of vibrancy to my garden.
2. Paint the Bottles: Use your paintbrushes to paint the outside of the plastic bottles. You can create any design you like – stripes, polka dots, flowers, or even paint them to look like little bell peppers! Let your imagination run wild.
3. Add Details: Once the base coat of paint is dry, you can add details using smaller brushes or paint markers.
4. Apply Waterproof Sealer (Optional): To protect your paint from the elements and prevent it from fading or peeling, you can apply a waterproof sealer. Follow the instructions on the sealer can for application.
Caring for Your Bell Pepper Plants
Now that your bell pepper plants are happily settled in their upcycled bottle planters, it’s important to provide them with the care they need to thrive.
1. Water Regularly: Bell peppers need consistent watering, especially during hot weather. Check the soil moisture regularly and water when the top inch of soil feels dry to the touch. Avoid overwatering, as this can lead to root rot.
2. Fertilize: Bell peppers are heavy feeders, so it’s important to fertilize them regularly. Use a balanced fertilizer or a fertilizer specifically formulated for vegetables. Follow the instructions on the fertilizer package for application rates and frequency.
3. Provide Support: As your bell pepper plants grow, they may need support to prevent them from toppling over. You can use stakes or cages to provide support.
4. Pest Control: Keep an eye out for pests such as aphids, whiteflies, and spider mites. If you notice any pests, take action immediately to prevent them from damaging your plants. You can use insecticidal soap or neem oil to control pests.
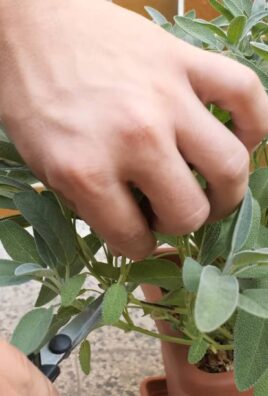
5. Harvesting: Bell peppers are typically ready to harvest about 60-90 days after planting. The peppers should be firm and brightly colored. Use a sharp knife or scissors to cut the peppers from the plant.
Troubleshooting
Even with the best care, you might encounter some challenges along the way. Here are a few common problems and how to address them:
* Yellowing Leaves: This could be a sign of overwatering, underwatering, or nutrient deficiency. Check the soil moisture and adjust your watering schedule accordingly. Fertilize your plants with a balanced fertilizer.
* Blossom End Rot: This is a common problem in bell peppers, characterized by a dark, sunken spot on the bottom of the fruit. It’s usually caused by a calcium deficiency. Add calcium to the soil or use a calcium-rich fertilizer.
* Pest Infestations: As mentioned earlier, keep an eye out for pests and take action immediately if you notice any.
Final Thoughts
And there you have it! You’ve successfully transformed ordinary plastic bottles into adorable and functional bell pepper planters. This project is not only a great way to recycle and reduce waste but also a fun and rewarding gardening experience. I hope you enjoy growing your own delicious bell peppers in your upcycled bottle planters. Happy gardening!
Conclusion
So, there you have it! Transforming discarded plastic bottles into miniature greenhouses for your bell peppers is not just a clever upcycling project; it’s a game-changer for gardeners of all levels. This simple DIY trick offers a multitude of benefits, from extending your growing season and protecting your precious seedlings from harsh weather and pests, to reducing your environmental footprint. It’s a win-win situation for both your garden and the planet.
But why is this upcycled bottle bell peppers method a must-try? Because it’s incredibly effective, surprisingly easy, and remarkably affordable. You’re essentially creating a personalized microclimate for each pepper plant, giving them the best possible start in life. Imagine the satisfaction of nurturing your own vibrant, healthy bell peppers from seed to harvest, knowing that you played a direct role in their success, all while repurposing materials that would otherwise end up in a landfill.
Don’t be afraid to experiment with variations! Try using different sizes of bottles depending on the size of your seedlings. You could even paint the bottles white to reflect more sunlight and prevent overheating in warmer climates. For added protection against slugs and snails, consider placing copper tape around the base of the bottle. If you’re feeling particularly creative, decorate the bottles with colorful paint or markers to add a touch of whimsy to your garden. Think about using bottles with different colored plastic to see if it affects the growth of the bell peppers.
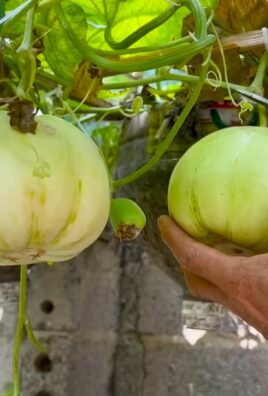
This method isn’t just limited to bell peppers, either. You can adapt this technique for other vegetables like tomatoes, eggplants, and even herbs. The possibilities are endless! The key is to monitor your plants closely and adjust the ventilation as needed to ensure they thrive.
We wholeheartedly encourage you to give this DIY trick a try. It’s a rewarding experience that will not only enhance your gardening skills but also inspire you to find creative solutions for reducing waste and living more sustainably.
Once you’ve tried it, we’d love to hear about your experience! Share your photos, tips, and any modifications you’ve made in the comments below. Let’s create a community of upcycling gardeners who are passionate about growing their own food and protecting the environment. Your insights could inspire others to embark on their own gardening adventures. So, grab those empty plastic bottles, gather your bell pepper seeds, and get ready to witness the magic of upcycling in your garden! Happy gardening!
Frequently Asked Questions (FAQ)
What type of plastic bottles are best for this project?
Ideally, you want to use clear plastic bottles that are relatively sturdy. Soda bottles, water bottles, and juice bottles all work well. Avoid using bottles that are heavily colored or opaque, as they may block too much sunlight. Make sure the bottles are clean and free of any residue before using them. Remove any labels and wash the inside and outside of the bottle thoroughly with soap and water.
How do I ensure proper ventilation for my bell pepper plants inside the bottles?
Ventilation is crucial to prevent overheating and excessive humidity inside the bottles. Start by cutting off the bottom of the bottle completely. You can also create small holes in the sides of the bottle to allow for airflow. As the weather warms up, you may need to increase the size or number of holes. On particularly hot days, consider removing the bottles entirely for a few hours to prevent the plants from getting scorched. Monitor your plants closely and adjust the ventilation as needed based on the temperature and humidity levels.
How often should I water my bell pepper plants when they are inside the upcycled bottles?
The watering frequency will depend on the weather conditions and the type of soil you’re using. Generally, you’ll need to water more frequently when the weather is hot and dry. Check the soil moisture regularly by sticking your finger into the soil. If the top inch of soil feels dry, it’s time to water. When watering, be sure to water at the base of the plant to avoid wetting the leaves, which can increase the risk of fungal diseases. Avoid overwatering, as this can lead to root rot.
Can I use this method for other types of plants besides bell peppers?
Yes, this upcycling method can be adapted for other types of plants, such as tomatoes, eggplants, cucumbers, and herbs. The key is to choose plants that are relatively small and can tolerate the enclosed environment. You may need to adjust the size of the bottle and the ventilation based on the specific needs of the plant. For example, taller plants may require larger bottles, while plants that are more sensitive to humidity may require more ventilation.
How do I protect my bell pepper plants from pests and diseases when they are inside the bottles?
The upcycled bottles can provide some protection against pests and diseases, but it’s still important to take preventative measures. Inspect your plants regularly for any signs of pests or diseases. If you notice any problems, take action immediately. You can use organic pest control methods, such as insecticidal soap or neem oil, to control pests. To prevent fungal diseases, ensure good ventilation and avoid overwatering. You can also apply a fungicide if necessary.
What do I do when my bell pepper plants outgrow the bottles?
Once your bell pepper plants outgrow the bottles, it’s time to transplant them into larger containers or directly into the garden. Choose a sunny location with well-drained soil. Dig a hole that is slightly larger than the root ball of the plant. Gently remove the plant from the bottle and place it in the hole. Backfill the hole with soil and water thoroughly. Be sure to provide adequate support for the plants as they grow, such as stakes or cages.
Will using different colored bottles affect the growth of my bell peppers?
It’s possible that different colored bottles could affect the growth of your bell peppers, although the impact may be subtle. Clear bottles are generally recommended because they allow the most sunlight to reach the plants. Colored bottles may filter out certain wavelengths of light, which could potentially affect photosynthesis and plant growth. For example, blue or red bottles might promote vegetative growth, while green bottles might reduce light intensity. Experimenting with different colored bottles could be an interesting way to see how they affect your plants, but it’s best to start with clear bottles for optimal results.
Is this method suitable for all climates?
This method can be adapted for various climates, but it’s important to consider the specific conditions in your area. In colder climates, the bottles can provide extra insulation and protection from frost. In warmer climates, it’s crucial to ensure adequate ventilation to prevent overheating. You may need to adjust the size and number of ventilation holes based on the temperature and humidity levels. In very hot climates, consider using shade cloth to protect the plants from excessive sunlight.
How long can I keep my bell pepper plants in the bottles?
You can keep your bell pepper plants in the bottles until they outgrow them or until the weather conditions are favorable for transplanting them outdoors. This typically takes a few weeks to a few months, depending on the growth rate of the plants and the size of the bottles. Monitor your plants closely and transplant them when they are ready.
What are the benefits of using this upcycling method compared to traditional gardening methods?
This upcycling method offers several benefits compared to traditional gardening methods, including:
* **Extended growing season:** The bottles provide extra insulation and protection from frost, allowing you to start your plants earlier in the spring and extend the growing season into the fall.
* **Protection from pests and diseases:** The bottles can help protect your plants from pests and diseases, reducing the need for pesticides and other chemicals.
* **Reduced water consumption:** The bottles help retain moisture in the soil, reducing the need for frequent watering.
* **Upcycling and sustainability:** This method allows you to repurpose discarded plastic bottles, reducing waste and promoting sustainability.
* **Cost-effectiveness:** This method is very affordable, as it utilizes readily available materials.
* **Easy to implement:** This method is simple and easy to implement, even for beginner gardeners.
Leave a Comment