
Grow Iceberg Lettuce right in your backyard! Imagine crisp, refreshing salads made with lettuce you nurtured from seed to table. Forget those limp, overpriced heads at the grocery store. This isn’t just about saving money; it’s about connecting with nature and enjoying the unparalleled flavor of homegrown produce. For centuries, cultivating lettuce has been a cornerstone of gardens worldwide, dating back to ancient Egypt where it was prized for its medicinal properties and, of course, its delicious leaves.
But let’s be honest, getting that perfect, tightly packed head of iceberg lettuce can feel like a real challenge. That’s where these DIY tricks and hacks come in! I’m going to share my secrets for successfully grow Iceberg Lettuce, even if you’re a complete beginner. We’ll cover everything from choosing the right soil and providing adequate sunlight to preventing common pests and diseases.
Why do you need these DIY tricks? Because store-bought lettuce simply can’t compare to the taste and satisfaction of harvesting your own. Plus, knowing exactly where your food comes from and how it was grown gives you peace of mind. So, grab your gardening gloves, and let’s get started on this exciting journey to grow your own delicious iceberg lettuce!
Grow Potatoes Like a Pro: Easy DIY Gardening Hacks
Okay, potato lovers, let’s get down to business! I’m going to share some of my favorite DIY gardening hacks that will help you grow a bumper crop of potatoes, even if you’re short on space or time. Forget back-breaking digging and endless weeding – these methods are all about efficiency and maximizing your yield. Get ready to harvest more potatoes than you ever thought possible!
Choosing Your Potato Variety
Before we dive into the hacks, let’s talk potatoes. Not all potatoes are created equal! Selecting the right variety for your climate and growing conditions is crucial.
* Consider your climate: Some varieties thrive in cooler climates, while others prefer warmer temperatures. Check your local extension office or gardening resources for recommendations.
* Think about storage: Do you want potatoes that store well for winter? Late-season varieties like Russet Burbank are excellent for long-term storage.
* Early, mid, or late season? Early-season potatoes mature quickly, giving you a faster harvest. Mid-season varieties offer a good balance of yield and maturity time. Late-season varieties take longer to mature but often produce the largest yields and store the best.
* Seed potatoes are key: Always start with certified seed potatoes. These are potatoes specifically grown for planting and are disease-free. You can find them at your local garden center or online.
Hack #1: Growing Potatoes in a Bag (or Container)
This is my go-to method for growing potatoes in small spaces, like patios or balconies. It’s super easy and allows you to harvest potatoes without digging!
Materials You’ll Need:
* A large grow bag (at least 15-20 gallons) or a similar-sized container. Fabric grow bags are ideal because they allow for good drainage and aeration.
* Seed potatoes (chitted – more on that later!).
* Potting mix (a well-draining mix is essential).
* Water.
* Fertilizer (optional, but recommended for best results). I like to use a balanced organic fertilizer.
Step-by-Step Instructions:
1. Chitting Your Seed Potatoes: This is basically pre-sprouting your potatoes. A few weeks before planting, place your seed potatoes in a cool, bright location (but not direct sunlight). You’ll notice small “eyes” or sprouts starting to form. This gives your potatoes a head start.
2. Prepare Your Grow Bag: Roll down the sides of the grow bag to make it easier to fill. Add about 4-6 inches of potting mix to the bottom of the bag.
3. Plant Your Seed Potatoes: Cut your seed potatoes into pieces, ensuring each piece has at least 2-3 “eyes.” Let the cut pieces dry for a day or two to prevent rotting. Place 2-3 potato pieces on top of the soil, spaced evenly apart.
4. Cover with Soil: Cover the potato pieces with another 4-6 inches of potting mix.
5. Water Thoroughly: Water the soil well, making sure it’s evenly moist but not waterlogged.
6. “Hilling” as They Grow: As the potato plants grow, they’ll start to sprout above the soil. When the stems are about 6-8 inches tall, add more potting mix to the bag, covering the stems up to the top few leaves. This process is called “hilling.” Repeat this process every few weeks as the plants grow, until the bag is almost full. Hilling encourages more potato production along the buried stems.
7. Water and Fertilize: Keep the soil consistently moist, especially during hot weather. Fertilize every few weeks with a balanced fertilizer, following the package instructions.
8. Harvest Time! When the plants start to flower and the foliage begins to die back, it’s time to harvest. Simply tip the bag over and collect your potatoes! You can also reach into the bag and harvest “new potatoes” (smaller, immature potatoes) throughout the growing season.
Hack #2: The “No-Dig” Potato Garden (Lasagna Gardening)
This method is perfect if you have poor soil or want to avoid tilling. It’s all about layering organic materials to create a rich, fertile growing bed.
Materials You’ll Need:
* Cardboard (untreated, without tape or glossy print).
* Organic materials: grass clippings, leaves, straw, compost, manure (optional), shredded paper.
* Seed potatoes (chitted).
* Potting mix or topsoil.
* Water.
Step-by-Step Instructions:
1. Choose Your Location: Select a sunny spot for your potato garden.
2. Lay Down the Cardboard: Cover the area with a layer of cardboard, overlapping the edges to prevent weeds from growing through. Wet the cardboard thoroughly to help it break down.
3. Layer Organic Materials: Start layering your organic materials on top of the cardboard. Alternate between “green” materials (grass clippings, vegetable scraps) and “brown” materials (leaves, straw, shredded paper). Aim for a layer of about 12-18 inches thick.
4. Add Compost or Manure (Optional): If you have compost or manure, add a layer to enrich the soil.
5. Water Thoroughly: Water the entire lasagna garden well.
6. Plant Your Seed Potatoes: After a week or two, when the materials have started to decompose, you can plant your seed potatoes. Create small holes in the lasagna garden, about 4-6 inches deep, and plant your chitted seed potatoes. Space them about 12 inches apart.
7. Cover with Potting Mix: Cover the potato pieces with potting mix or topsoil.
8. Maintain Moisture: Keep the lasagna garden consistently moist, especially during dry periods.
9. Hilling (Optional): As the potato plants grow, you can add more organic materials around the base of the plants to encourage more potato production.
10. Harvest Time! When the plants start to flower and the foliage begins to die back, it’s time to harvest. Simply pull back the layers of organic material and collect your potatoes.
Hack #3: Straw Bale Gardening for Potatoes
This is a fun and unique way to grow potatoes! Straw bales provide excellent drainage and aeration, and they decompose over time, enriching the soil.
Materials You’ll Need:
* Straw bales (not hay bales!).
* Nitrogen fertilizer (ammonium nitrate or urea).
* Potassium and phosphorus fertilizer (optional, but recommended).
* Potting mix or compost.
* Seed potatoes (chitted).
* Water.
Step-by-Step Instructions:
1. Conditioning the Straw Bales: This is the most important step! You need to “condition” the straw bales to start the decomposition process. Water the bales thoroughly every day for 2-3 weeks.
2. Add Nitrogen Fertilizer: On days 1, 3, and 5, sprinkle nitrogen fertilizer (1/2 cup per bale) over the bales and water it in well. This will help the straw decompose.
3. Add Potassium and Phosphorus (Optional): On day 7, sprinkle potassium and phosphorus fertilizer (1/4 cup per bale) over the bales and water it in well.
4. Check the Temperature: The bales will start to heat up as they decompose. After about 2 weeks, the temperature should start to cool down. You can check the temperature with a compost thermometer.
5. Plant Your Seed Potatoes: Once the bales have cooled down, you can plant your seed potatoes. Create small holes in the top of the bales, about 4-6 inches deep, and plant your chitted seed potatoes. Space them about 12 inches apart.
6. Cover with Potting Mix: Cover the potato pieces with potting mix or compost.
7. Water Regularly: Keep the straw bales consistently moist, especially during dry periods.
8. Fertilize (Optional): You can fertilize the potato plants every few weeks with a balanced fertilizer.
9. Harvest Time! When the plants start to flower and the foliage begins to die back, it’s time to harvest. Simply pull apart the straw bales and collect your potatoes.
Common Potato Growing Problems and Solutions
Even with these hacks, you might encounter some common potato growing problems. Here’s how to deal with them:
* Potato Beetles: These pesky beetles can defoliate your potato plants. Hand-pick them off the plants or use an organic insecticide like neem oil.
* Blight: This fungal disease can cause brown spots on the leaves and stems. Prevent blight by ensuring good air circulation and avoiding overhead watering. If blight does occur, remove infected foliage immediately.
* Scab: This disease causes rough, scabby patches on the potato skins. Prevent scab by maintaining a slightly acidic soil pH.
*
Conclusion
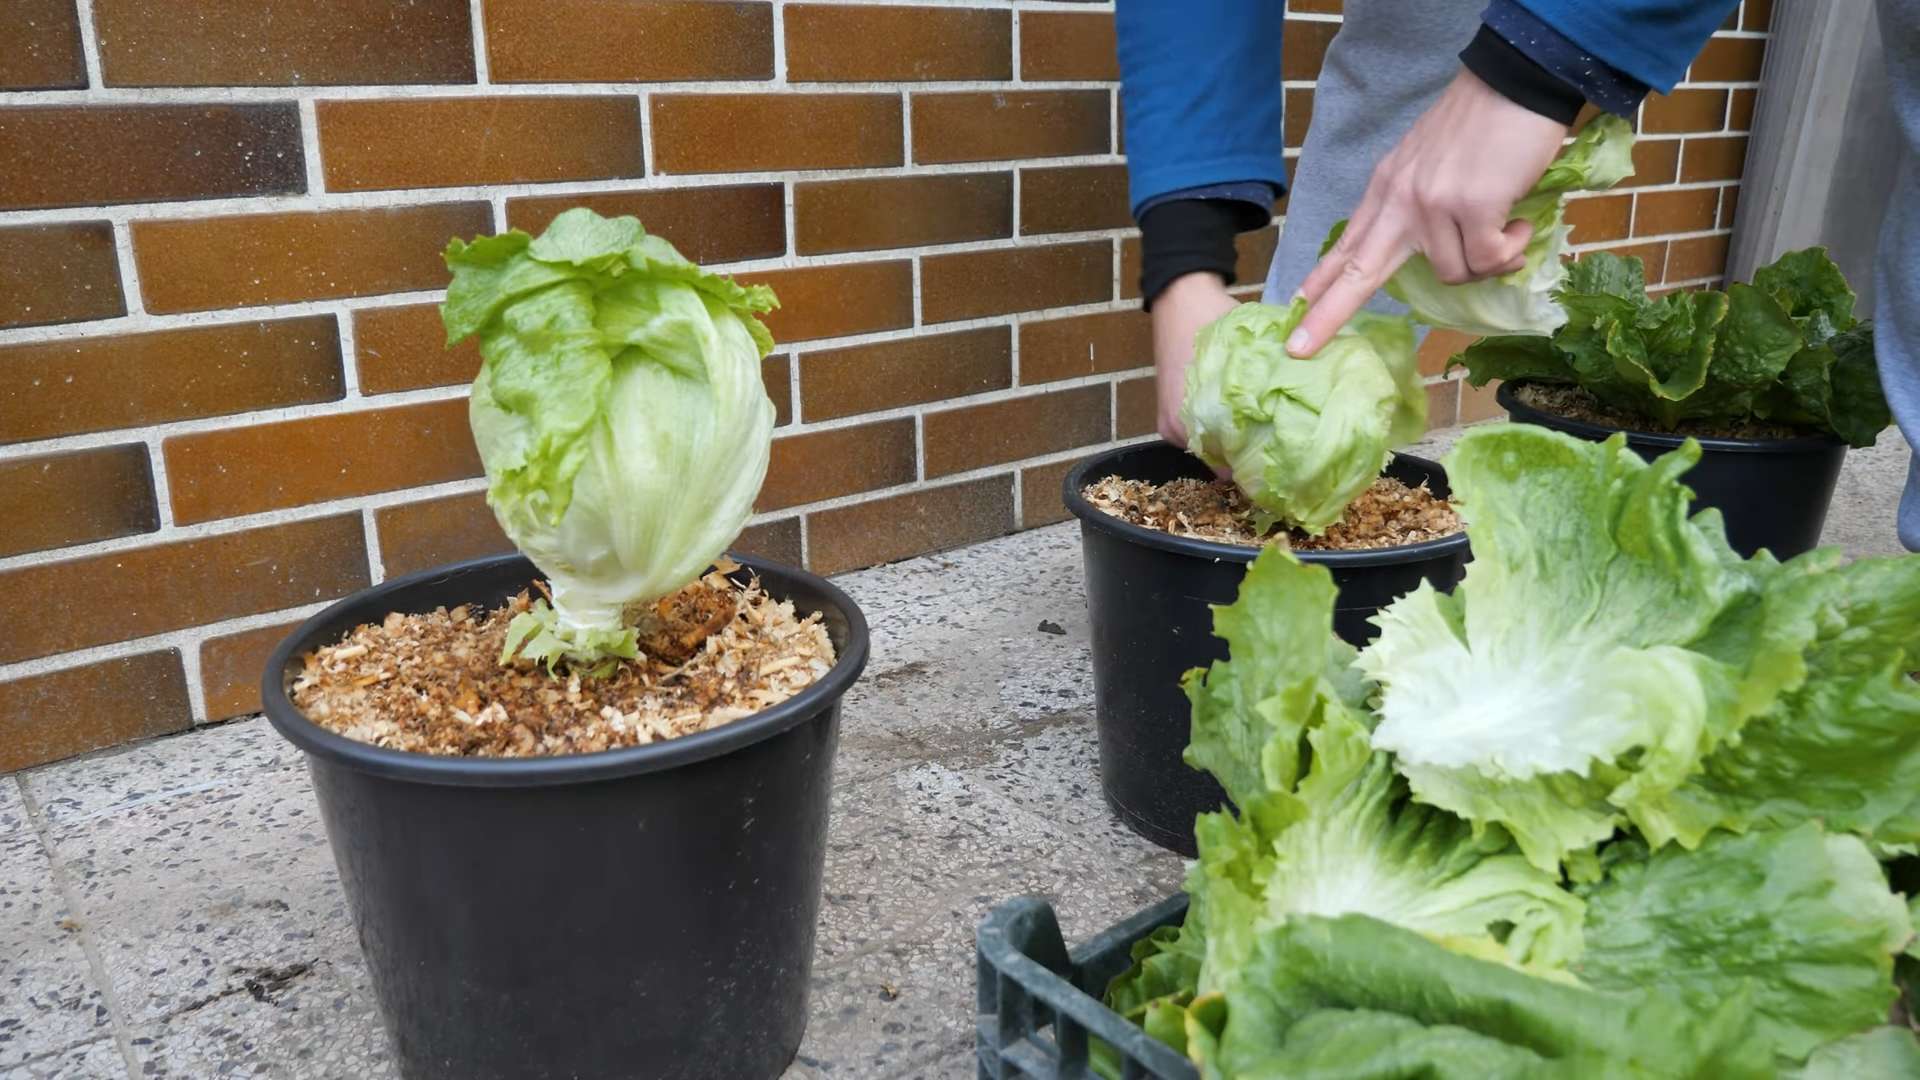
So, there you have it! Growing your own iceberg lettuce at home isn’t just a fun project; it’s a gateway to fresher, crisper salads and a deeper connection with your food. We’ve walked through the entire process, from selecting the right seeds to harvesting your own homegrown heads. But why is this DIY trick a must-try?
Firstly, the taste difference is undeniable. Store-bought iceberg lettuce, while convenient, often lacks the vibrant flavor and satisfying crunch of freshly harvested lettuce. When you grow your own, you’re in control of the entire process, ensuring optimal growing conditions and harvesting at peak ripeness. This translates to a superior taste experience that will elevate your salads, sandwiches, and wraps.
Secondly, it’s incredibly rewarding. There’s something deeply satisfying about nurturing a plant from seed to harvest, especially when that plant provides you with delicious and nutritious food. Watching your iceberg lettuce grow, day by day, is a tangible reminder of your efforts and a source of pride.
Thirdly, it’s a sustainable choice. By growing your own iceberg lettuce, you’re reducing your reliance on commercially grown produce, which often travels long distances and contributes to carbon emissions. You’re also minimizing your exposure to potentially harmful pesticides and herbicides.
But the benefits don’t stop there. Growing your own iceberg lettuce can also be a cost-effective way to enjoy this popular vegetable. While the initial investment in seeds and supplies may seem daunting, you’ll quickly recoup your costs as you harvest multiple heads of lettuce from a single planting.
Now, let’s talk about variations and suggestions. While we’ve focused on the traditional method of growing iceberg lettuce in the ground, you can also experiment with container gardening. This is a great option if you have limited space or live in an apartment. Simply choose a large container with good drainage and follow the same planting and care instructions as you would for in-ground gardening.
Another variation is to try different varieties of iceberg lettuce. While the classic crisphead variety is the most common, there are also other types available, such as ‘Great Lakes’ and ‘Ithaca,’ which offer slightly different flavors and textures.
To further enhance your growing experience, consider companion planting. Planting herbs like basil, chives, or mint near your iceberg lettuce can help deter pests and attract beneficial insects. Marigolds are also a great choice for companion planting, as they repel nematodes and other soil-borne pests.
We encourage you to embrace this DIY trick and experience the joy of growing your own iceberg lettuce. Don’t be afraid to experiment with different techniques and variations to find what works best for you. And most importantly, don’t forget to share your experience with us! We’d love to hear about your successes, challenges, and any tips or tricks you’ve discovered along the way. Share your photos and stories on social media using the hashtag #HomegrownIcebergLettuce. Let’s build a community of passionate gardeners and inspire others to grow their own food! So, get your hands dirty and start growing your own delicious and nutritious iceberg lettuce today! You won’t regret it.
Frequently Asked Questions (FAQ)
1. How long does it take to grow iceberg lettuce?
The time it takes to grow iceberg lettuce from seed to harvest typically ranges from 70 to 80 days. However, this can vary depending on the variety of lettuce, the growing conditions, and the climate. Warmer temperatures can speed up the growth process, while cooler temperatures can slow it down. It’s important to monitor your plants regularly and harvest them when the heads are firm and well-formed.
2. What are the best growing conditions for iceberg lettuce?
Iceberg lettuce thrives in cool weather and requires at least six hours of sunlight per day. The ideal soil temperature for germination is between 60°F and 70°F (15°C and 21°C). The soil should be well-drained and rich in organic matter. Amend the soil with compost or aged manure before planting to improve its fertility and drainage. Consistent watering is also crucial, especially during hot and dry periods. Avoid overwatering, as this can lead to root rot.
3. How often should I water my iceberg lettuce?
Water your iceberg lettuce regularly, especially during hot and dry periods. Aim to keep the soil consistently moist but not waterlogged. Water deeply and less frequently, rather than shallowly and more often. This encourages the roots to grow deeper and makes the plants more drought-tolerant. Check the soil moisture regularly by sticking your finger into the soil. If the top inch of soil feels dry, it’s time to water.
4. What are some common pests and diseases that affect iceberg lettuce?
Iceberg lettuce is susceptible to several pests and diseases, including aphids, slugs, snails, cutworms, and downy mildew. Aphids can be controlled with insecticidal soap or by introducing beneficial insects like ladybugs. Slugs and snails can be deterred with beer traps or copper tape. Cutworms can be prevented by using cutworm collars around the seedlings. Downy mildew is a fungal disease that can be prevented by providing good air circulation and avoiding overhead watering. If downy mildew does occur, treat it with a fungicide.
5. How do I harvest iceberg lettuce?
Harvest iceberg lettuce when the heads are firm and well-formed. To harvest, use a sharp knife to cut the head of lettuce at the base of the plant. Remove any damaged or discolored outer leaves. Store the harvested lettuce in the refrigerator in a plastic bag or container. It will typically last for up to a week.
6. Can I grow iceberg lettuce in containers?
Yes, you can grow iceberg lettuce in containers. Choose a large container with good drainage and fill it with a well-draining potting mix. Follow the same planting and care instructions as you would for in-ground gardening. Container-grown lettuce may require more frequent watering and fertilization than in-ground lettuce.
7. What are some good companion plants for iceberg lettuce?
Good companion plants for iceberg lettuce include basil, chives, mint, marigolds, and radishes. Basil, chives, and mint can help deter pests and attract beneficial insects. Marigolds repel nematodes and other soil-borne pests. Radishes can help break up the soil and improve drainage.
8. Can I grow iceberg lettuce in the winter?
In mild climates, you may be able to grow iceberg lettuce in the winter with protection from frost. In colder climates, you can grow iceberg lettuce indoors under grow lights. Choose a cool, well-lit location and provide consistent watering and fertilization.
9. How do I prevent my iceberg lettuce from bolting?
Bolting is when lettuce plants prematurely flower and produce seeds, which can make the leaves bitter. To prevent bolting, choose bolt-resistant varieties of lettuce, plant in a shady location, and provide consistent watering. Harvest the lettuce as soon as it is mature to prevent it from bolting.
10. Is iceberg lettuce nutritious?
While iceberg lettuce is often criticized for being low in nutrients compared to other types of lettuce, it still provides some essential vitamins and minerals. It’s a good source of vitamin K, vitamin A, and folate. It’s also low in calories and high in water content, making it a hydrating and refreshing addition to your diet. Remember that the darker outer leaves contain more nutrients than the paler inner leaves. Growing your own allows you to harvest at peak freshness, maximizing the nutritional value.


Leave a Comment