
Potato gardening shortcuts – who doesn’t want those? Imagine harvesting a bounty of homegrown potatoes without breaking your back or spending countless hours toiling in the soil. Sounds dreamy, right? Well, it’s absolutely achievable! For centuries, potatoes have been a staple crop, nourishing communities across the globe, from the Andes Mountains where they originated to the bustling kitchens of today. Their versatility and nutritional value have cemented their place in our diets, and now, I’m here to share some clever tricks to make growing them easier than ever.
Let’s face it, traditional potato gardening can be a bit…laborious. All that digging, hilling, and weeding can feel overwhelming, especially for beginners. But what if I told you there are ways to bypass some of the more demanding aspects of potato cultivation? These potato gardening shortcuts are designed to save you time, energy, and even space, allowing you to enjoy the satisfaction of harvesting your own delicious potatoes with minimal effort. Whether you’re a seasoned gardener looking for new techniques or a newbie eager to get started, these DIY hacks will revolutionize your potato-growing experience. Get ready to unlock the secrets to a simpler, more rewarding potato harvest!

DIY Vinegar Cleaning Power: Unleash the Natural Cleaning Beast!
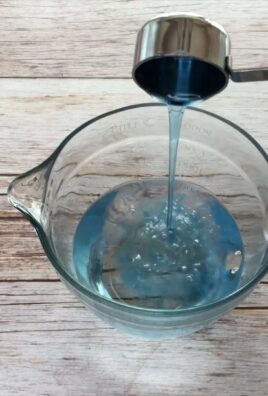
Hey there, fellow cleaning enthusiasts! Are you tired of harsh chemicals and their overpowering smells? Do you crave a more natural and budget-friendly way to keep your home sparkling? Well, buckle up because I’m about to share my ultimate secret weapon: vinegar! Yes, that humble bottle of vinegar in your pantry is a cleaning powerhouse just waiting to be unleashed. I’m going to walk you through some amazing DIY cleaning hacks using vinegar that will leave your home fresh, clean, and smelling fantastic (trust me, we’ll tackle that vinegar smell too!).
Vinegar Cleaning Basics: What You Need to Know
Before we dive into the specific hacks, let’s cover some essential vinegar cleaning knowledge.
* Types of Vinegar: White distilled vinegar is your best friend for cleaning. It’s clear, inexpensive, and has a high acidity level, making it perfect for cutting through grime and killing bacteria. Avoid using other types of vinegar like apple cider vinegar or balsamic vinegar, as they can stain surfaces.
* Dilution is Key: Vinegar is acidic, so it’s important to dilute it with water for most cleaning tasks. A 50/50 solution of vinegar and water is a great starting point.
* Test First: Always test your vinegar solution on an inconspicuous area before cleaning an entire surface. This is especially important for delicate materials like marble, granite, and wood.
* Vinegar and Bleach: Never mix vinegar and bleach! This combination creates toxic chlorine gas, which is extremely dangerous.
* Embrace Essential Oils: If you’re not a fan of the vinegar smell, don’t worry! Adding a few drops of your favorite essential oils to your vinegar solution can mask the odor and leave your home smelling fresh and clean. Lavender, lemon, tea tree, and eucalyptus are all great options.
Cleaning Your Kitchen with Vinegar
The kitchen is often the dirtiest room in the house, but vinegar can make cleaning it a breeze.
Cleaning the Microwave
Microwaves can get incredibly gross with splattered food and lingering odors. Here’s how to clean yours with vinegar:
1. Prepare the Solution: In a microwave-safe bowl, mix 1 cup of water and 1/4 cup of white distilled vinegar.
2. Microwave the Solution: Place the bowl in the microwave and heat it on high for 5-7 minutes, or until the solution boils and the microwave is filled with steam.
3. Let it Sit: Leave the door closed for another 5-10 minutes to allow the steam to loosen any stuck-on food particles.
4. Wipe Clean: Carefully remove the bowl (it will be hot!) and wipe down the inside of the microwave with a clean cloth or sponge. The grime should come off easily.
5. Clean the Turntable: Remove the turntable and wash it with warm, soapy water.
6. Dry and Enjoy: Dry the inside of the microwave and the turntable with a clean towel. Your microwave will be sparkling clean and odor-free!
Cleaning the Coffee Maker
Over time, mineral deposits can build up in your coffee maker, affecting the taste of your coffee. Vinegar can help descale your coffee maker and keep it running smoothly.
1. Prepare the Vinegar Solution: Fill the water reservoir of your coffee maker with a 50/50 solution of white distilled vinegar and water.
2. Run a Brewing Cycle: Turn on your coffee maker and let it run through a full brewing cycle.
3. Rinse with Water: After the vinegar solution has run through, fill the water reservoir with fresh water and run two or three more brewing cycles to rinse out any remaining vinegar.
4. Enjoy Fresh Coffee: Your coffee maker is now descaled and ready to brew delicious coffee!
Cleaning the Dishwasher
Dishwashers can also accumulate mineral deposits and food debris, leading to unpleasant odors and reduced cleaning performance. Vinegar can help keep your dishwasher clean and fresh.
1. Empty the Dishwasher: Make sure your dishwasher is empty.
2. Place Vinegar in a Bowl: Place a dishwasher-safe bowl filled with 1 cup of white distilled vinegar on the top rack of your dishwasher.
3. Run a Hot Cycle: Run a normal hot water cycle. The vinegar will help to dissolve grease, food residue, and mineral deposits.
4. Optional: Baking Soda Boost: For extra cleaning power, sprinkle 1 cup of baking soda on the bottom of the dishwasher after the vinegar cycle and run a short rinse cycle.
Cleaning Cutting Boards
Cutting boards, especially wooden ones, can harbor bacteria. Vinegar is a great natural disinfectant for cleaning your cutting boards.
1. Wash with Soap and Water: First, wash your cutting board with warm, soapy water to remove any visible food particles.
2. Spray with Vinegar: Spray the cutting board with undiluted white distilled vinegar.
3. Let it Sit: Let the vinegar sit on the cutting board for 5-10 minutes to disinfect it.
4. Rinse and Dry: Rinse the cutting board with water and dry it thoroughly with a clean towel.
Cleaning Your Bathroom with Vinegar
The bathroom is another area where vinegar can shine. It’s great for removing soap scum, hard water stains, and mildew.
Cleaning Shower Heads
Shower heads can get clogged with mineral deposits, reducing water pressure. Vinegar can help dissolve these deposits and restore your shower head to its former glory.
1. Prepare the Vinegar Solution: Fill a plastic bag with white distilled vinegar.
2. Submerge the Shower Head: Place the bag over the shower head, ensuring that the shower head is completely submerged in the vinegar. Secure the bag with a rubber band or twist tie.
3. Soak Overnight: Let the shower head soak in the vinegar overnight.
4. Remove and Rinse: Remove the bag and rinse the shower head thoroughly with water.
5. Remove Stubborn Deposits: If there are any stubborn deposits remaining, use an old toothbrush to scrub them away.
Cleaning Toilets
Vinegar is a natural disinfectant and deodorizer, making it perfect for cleaning toilets.
1. Pour Vinegar into the Bowl: Pour 1-2 cups of white distilled vinegar into the toilet bowl.
2. Let it Sit: Let the vinegar sit in the bowl for at least 30 minutes, or preferably overnight.
3. Scrub and Flush: Scrub the toilet bowl with a toilet brush and flush.
4. Clean the Exterior: For the exterior of the toilet, mix a 50/50 solution of vinegar and water in a spray bottle. Spray the solution on the toilet seat, lid, and base, and wipe clean with a cloth.
Cleaning Shower Doors and Walls
Soap scum and hard water stains can make shower doors and walls look dingy. Vinegar can help remove these stains and leave your shower sparkling.
1. Prepare the Vinegar Solution: Mix a 50/50 solution of vinegar and water in a spray bottle.
2. Spray the Surface: Spray the solution on the shower doors and walls.
3. Let it Sit: Let the solution sit for 10-15 minutes to loosen the soap scum and hard water stains.
4. Scrub and Rinse: Scrub the surface with a sponge or brush and rinse thoroughly with water.
5. Dry with a Squeegee: Use a squeegee to dry the shower doors and walls to prevent water spots.
Cleaning Other Areas with Vinegar
Vinegar isn’t just for the kitchen and bathroom. It can be used to clean a variety of other surfaces and items around your home.
Cleaning Windows and Mirrors
Vinegar is a fantastic natural glass cleaner. It leaves windows and mirrors streak-free and sparkling.
1. Prepare the Vinegar Solution: Mix a 50/50 solution of vinegar and water in a spray bottle.
2. Spray the Surface: Spray the solution on the windows or mirrors.
3. Wipe Clean: Wipe the surface clean with a microfiber cloth or paper towel.
Cleaning Floors
Vinegar can be used to clean many types of floors, but it’s important to test it on an inconspicuous area first, especially on hardwood floors.
1. Prepare the Vinegar Solution: Mix 1/2 cup of white distilled vinegar with 1 gallon of warm water.
2. Mop the Floor: Mop the floor with the vinegar solution.
3. Rinse (Optional): If desired, rinse the floor with clean water.
4. Dry the Floor: Allow the floor to air dry or dry it with a clean towel.
Removing Stickers and Labels
Vinegar can help loosen the adhesive on stickers and labels, making them easier to remove.
1. Soak the Sticker: Soak a cotton ball or cloth in white distilled vinegar.

Conclusion
So, there you have it – a collection of potato gardening shortcuts designed to make growing your own spuds easier, faster, and more rewarding than you ever thought possible. We’ve explored everything from chitting techniques to container gardening, and even delved into the magic of straw bale potato growing. But why should you embrace these methods?
Simply put, these shortcuts are game-changers. They address the common challenges faced by home gardeners, such as limited space, pest control, and the sheer time commitment often associated with traditional potato cultivation. By adopting these strategies, you can significantly reduce the workload, increase your yield, and enjoy a bountiful harvest of delicious, homegrown potatoes.
Think about it: no more back-breaking digging in heavy soil, no more endless weeding, and no more worrying about potato beetles decimating your crop. These shortcuts empower you to take control of your potato garden and reap the rewards with minimal effort.
But the benefits extend beyond mere convenience. These methods also promote healthier plants and higher quality potatoes. Container gardening, for example, allows for better drainage and aeration, preventing common potato diseases like blight. Straw bale gardening provides a nutrient-rich environment that encourages robust growth and exceptional flavor.
Ready to take your potato gardening to the next level? Here are a few suggestions and variations to consider:
* Experiment with different potato varieties: From Yukon Gold to Russet, each variety has its own unique flavor and texture. Try growing a mix of potatoes to discover your favorites.
* Add companion plants: Marigolds, basil, and nasturtiums can help deter pests and attract beneficial insects to your potato garden.
* Get creative with your containers: Use old tires, laundry baskets, or even burlap sacks to create unique and eye-catching potato planters.
* Explore different mulching materials: In addition to straw, you can use grass clippings, shredded leaves, or wood chips to suppress weeds and retain moisture.
* Consider vertical gardening: If you’re really short on space, try growing potatoes in stacked containers or hanging baskets.
Ultimately, the best way to discover the benefits of these potato gardening shortcuts is to try them for yourself. Don’t be afraid to experiment, adapt, and find what works best for your unique growing conditions.
We’re confident that you’ll be amazed by the results. So, grab your seed potatoes, gather your supplies, and get ready to embark on a potato-growing adventure. And don’t forget to share your experiences with us! We’d love to hear about your successes, challenges, and any tips you’ve discovered along the way. Share your photos and stories on social media using #PotatoGardeningShortcuts. Let’s inspire others to embrace these innovative techniques and enjoy the satisfaction of growing their own delicious potatoes. Happy gardening!
Frequently Asked Questions (FAQ)
What exactly are “potato gardening shortcuts,” and why should I use them?
Potato gardening shortcuts are time-saving and labor-reducing techniques designed to simplify the process of growing potatoes. They address common challenges such as limited space, pest control, and the physical demands of traditional potato cultivation. By using these shortcuts, you can grow more potatoes with less effort, enjoy a healthier harvest, and overcome obstacles that might otherwise deter you from gardening. They are particularly beneficial for beginner gardeners or those with limited time and resources.
Is chitting really necessary? Can’t I just plant the potatoes directly in the ground?
While you can plant potatoes directly in the ground without chitting, chitting (or pre-sprouting) offers several advantages. It gives your potatoes a head start, resulting in earlier harvests and potentially larger yields. Chitting also allows you to select the healthiest seed potatoes, discarding any that show signs of disease or weakness. This leads to stronger, more vigorous plants. While not strictly necessary, chitting is a simple step that can significantly improve your potato-growing success.
What kind of containers are best for container potato gardening?
The best containers for potato gardening are large, durable, and have good drainage. Aim for a container that is at least 20 gallons in size. Plastic pots, grow bags, and even repurposed containers like old tires or laundry baskets can work well. Ensure that the container has drainage holes to prevent waterlogging, which can lead to root rot. Dark-colored containers can warm the soil more quickly, which can be beneficial in cooler climates.
How often should I water my potatoes in containers?
Potatoes in containers tend to dry out more quickly than those grown in the ground, so regular watering is essential. Water deeply whenever the top inch of soil feels dry to the touch. The frequency of watering will depend on factors such as the weather, the size of the container, and the type of potting mix you’re using. During hot, dry periods, you may need to water daily. Avoid overwatering, as this can lead to root rot.
What is “hilling,” and why is it important?
Hilling is the process of mounding soil around the stems of potato plants as they grow. This encourages the formation of more tubers along the buried stems, resulting in a larger harvest. Hilling also helps to protect the developing tubers from sunlight, which can cause them to turn green and produce solanine, a toxic compound. Aim to hill your potatoes every few weeks as they grow, burying the stems up to the lowest leaves.
What are the best ways to protect my potato plants from pests and diseases?
Several strategies can help protect your potato plants from pests and diseases. Companion planting with marigolds, basil, or nasturtiums can deter pests. Regularly inspect your plants for signs of infestation or disease and take action promptly. Use organic pest control methods such as insecticidal soap or neem oil. Ensure good air circulation around your plants to prevent fungal diseases. Choose disease-resistant potato varieties whenever possible. Crop rotation can also help to prevent the buildup of soilborne diseases.
How do I know when my potatoes are ready to harvest?
The timing of your potato harvest will depend on the variety you’re growing and your desired use. “New potatoes” can be harvested a few weeks after flowering, when they are small and tender. For mature potatoes, wait until the foliage begins to die back. This indicates that the tubers have reached their full size and are ready to be harvested. Gently dig around the plants to check the size and maturity of the potatoes before harvesting the entire crop.
Can I grow potatoes in straw bales? What are the advantages of this method?
Yes, growing potatoes in straw bales is a fantastic shortcut that offers several advantages. Straw bales provide excellent drainage and aeration, preventing common potato diseases. They also create a nutrient-rich environment that promotes robust growth. Straw bale gardening eliminates the need for digging in heavy soil and reduces weeding. The bales also retain moisture, reducing the need for frequent watering.
What kind of fertilizer should I use for my potato plants?
Potatoes benefit from a balanced fertilizer that is rich in phosphorus and potassium. A fertilizer with an NPK ratio of 5-10-10 or 10-20-20 is a good choice. You can also use organic fertilizers such as compost, bone meal, or wood ash. Apply fertilizer at planting time and then again when the plants begin to flower. Avoid over-fertilizing, as this can lead to excessive foliage growth at the expense of tuber development.
Can I save my own seed potatoes for next year?
Yes, you can save your own seed potatoes, but it’s important to select healthy, disease-free tubers. Choose potatoes that are of good size and shape and that have multiple “eyes” (the small buds from which sprouts will emerge). Store your seed potatoes in a cool, dark, and dry place until planting time. Be aware that saving seed potatoes from year to year can increase the risk of disease buildup, so it’s a good idea to purchase certified disease-free seed potatoes every few years.

Leave a Comment