
Growing Pumpkins in Tires: Sounds a little unconventional, right? But trust me, this quirky DIY trick might just be the secret to your most bountiful pumpkin harvest yet! For centuries, pumpkins have been a symbol of autumn, abundance, and, of course, Halloween. From Native American traditions where they were a staple food source to the elaborate jack-o’-lanterns we carve today, pumpkins hold a special place in our hearts and gardens.
But let’s face it, growing these glorious gourds can be a challenge. They need space, the right soil, and a whole lot of sunshine. That’s where this clever hack comes in. Using tires as raised beds offers several advantages. They warm the soil faster in the spring, providing a head start for your pumpkin seedlings. Plus, they offer excellent drainage and help contain the sprawling vines. I’ve found that this method also makes it easier to manage pests and diseases, keeping your precious pumpkins safe and sound.
If you’re tired of battling weeds, struggling with poor soil, or simply looking for a fun and eco-friendly way to grow your own pumpkins, then this DIY project is for you. I’m going to walk you through each step, from preparing the tires to nurturing your pumpkin plants, so you can enjoy a bumper crop of homegrown goodness this fall. Get ready to roll up your sleeves and discover the magic of growing pumpkins in tires!
Growing Giant Pumpkins in Tires: My Secret Weapon!
Hey there, fellow gardening enthusiasts! I’m so excited to share my favorite (and slightly unconventional) method for growing massive pumpkins: using tires! Yes, you read that right. It might sound a little crazy, but trust me, this technique can give you a serious edge in the pumpkin-growing game. I’ve been using this method for years, and I’ve consistently grown pumpkins that are the envy of the neighborhood. So, if you’re ready to take your pumpkin-growing skills to the next level, let’s dive in!
Why Tires? The Benefits Unveiled
Before we get into the nitty-gritty, let’s talk about why tires are actually a fantastic choice for growing pumpkins.
* Improved Drainage: Tires naturally have drainage holes, preventing waterlogging, which pumpkins absolutely hate. Soggy roots are a pumpkin’s worst nightmare!
* Enhanced Warmth: The black rubber absorbs heat from the sun, warming the soil and promoting faster growth, especially crucial in cooler climates. Think of it as a mini-greenhouse for your pumpkin!
* Root Confinement (in a good way!): The tire acts as a container, helping to contain the pumpkin’s sprawling root system and direct its energy towards fruit production. It’s like giving your pumpkin a focused workout routine.
* Easy Pest Control: The raised tire makes it slightly harder for ground-dwelling pests to reach your precious pumpkin vine. Every little bit helps, right?
* Upcycling at its Finest: You’re giving old tires a new life and keeping them out of landfills. Talk about a win-win!
Materials You’ll Need
Okay, let’s gather our supplies. Here’s what you’ll need to get started:
* Tires: The bigger, the better! I prefer using old tractor tires if I can get my hands on them, but car tires work just fine too. Just make sure they’re clean and free of any sharp objects.
* Cardboard or Landscape Fabric: This will act as a weed barrier at the bottom of the tire.
* High-Quality Soil: A mix of compost, topsoil, and well-rotted manure is ideal. Pumpkins are heavy feeders, so give them the good stuff!
* Pumpkin Seeds: Choose a variety known for its size, like Atlantic Giant.
* Water: Essential for, well, everything!
* Fertilizer: A balanced fertilizer specifically formulated for pumpkins will help them reach their full potential.
* Mulch: Straw or wood chips to help retain moisture and suppress weeds.
* Gardening Gloves: To keep your hands clean and protected.
* Shovel or Trowel: For moving soil.
* Optional: A tarp to protect the ground underneath the tire.
Step-by-Step Guide: From Tire to Treasure
Alright, let’s get our hands dirty! Here’s the step-by-step process I use for growing giant pumpkins in tires:
1. Preparing the Tire
1. Choose Your Location: Pick a sunny spot that gets at least 6-8 hours of direct sunlight per day. Pumpkins are sun worshippers!
2. Prepare the Ground: Clear the area of any grass, weeds, or rocks. I like to lay down a tarp to protect the ground and make cleanup easier.
3. Position the Tire: Place the tire in your chosen location. Make sure it’s stable and level.
4. Add a Weed Barrier: Line the bottom of the tire with cardboard or landscape fabric. This will prevent weeds from growing up into your pumpkin patch. I usually use a few layers of cardboard, overlapping them to ensure complete coverage.
5. Optional: Cut the Sidewall: For larger tires, especially tractor tires, I sometimes cut out the inside sidewall. This allows the pumpkin roots to spread out into the surrounding soil, giving them even more room to grow. Be extremely careful if you choose to do this, and use appropriate safety equipment.
2. Filling the Tire with Soil
1. Start with a Base Layer: Add a layer of coarse material, like wood chips or gravel, to the bottom of the tire for extra drainage.
2. Mix Your Soil: In a wheelbarrow or large container, thoroughly mix your compost, topsoil, and well-rotted manure. I aim for a 1:1:1 ratio.
3. Fill the Tire: Carefully fill the tire with your soil mixture, leaving a few inches of space at the top.
4. Water the Soil: Gently water the soil until it’s thoroughly moistened. This will help it settle and prevent air pockets.
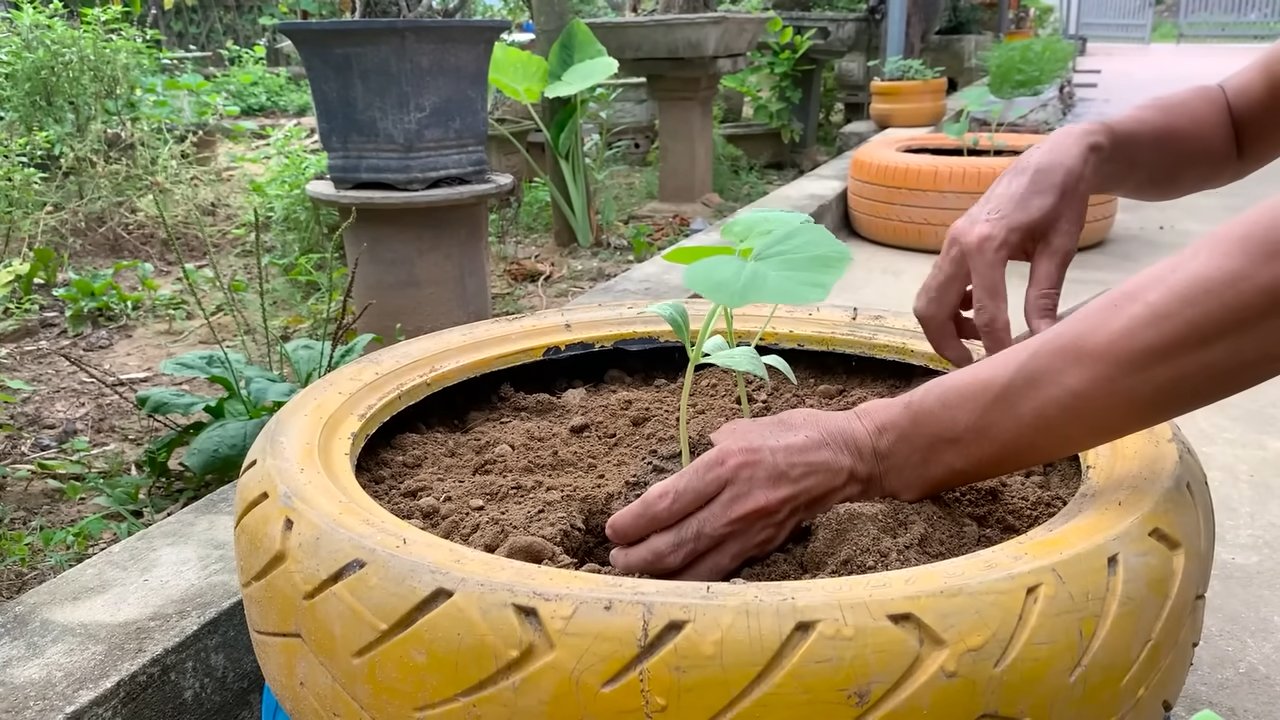
3. Planting Your Pumpkin Seeds
1. Choose Your Seeds: Select high-quality pumpkin seeds from a reputable source. I always go for Atlantic Giant seeds, as they’re known for producing massive pumpkins.
2. Start Seeds Indoors (Optional): To get a head start, you can start your pumpkin seeds indoors about 2-3 weeks before the last expected frost. Plant the seeds in small pots filled with seed-starting mix.
3. Direct Sowing: If you’re planting directly into the tire, wait until the soil has warmed up to at least 60°F (15°C).
4. Planting Depth: Plant the seeds about 1 inch deep.
5. Number of Seeds: Plant 2-3 seeds per tire. Once the seedlings emerge, you can thin them out, leaving only the strongest one.
6. Water Gently: Water the seeds gently after planting.
4. Nurturing Your Pumpkin Vine
1. Watering: Water your pumpkin vine regularly, especially during dry spells. Aim for deep watering, allowing the water to soak down to the roots.
2. Fertilizing: Fertilize your pumpkin vine every 2-3 weeks with a balanced fertilizer specifically formulated for pumpkins. Follow the instructions on the fertilizer package.
3. Weed Control: Keep the area around your pumpkin vine free of weeds. Weeds compete with your pumpkin for nutrients and water.
4. Pest Control: Monitor your pumpkin vine for pests, such as squash bugs and vine borers. Take action promptly to prevent infestations. I prefer using organic pest control methods whenever possible.
5. Pruning: As your pumpkin vine grows, you may need to prune it to encourage fruit production. Remove any unwanted side shoots or leaves that are blocking sunlight from reaching the developing pumpkins.
6. Pollination: Pumpkins require pollination to produce fruit. If you’re not seeing any pumpkins developing, you may need to hand-pollinate the flowers. To do this, use a small paintbrush to transfer pollen from the male flowers to the female flowers.
7. Protecting the Fruit: As your pumpkins grow larger, you may need to protect them from pests and diseases. You can use a piece of cardboard or plywood to elevate the pumpkin off the ground, preventing rot.
5. Harvesting Your Giant Pumpkin
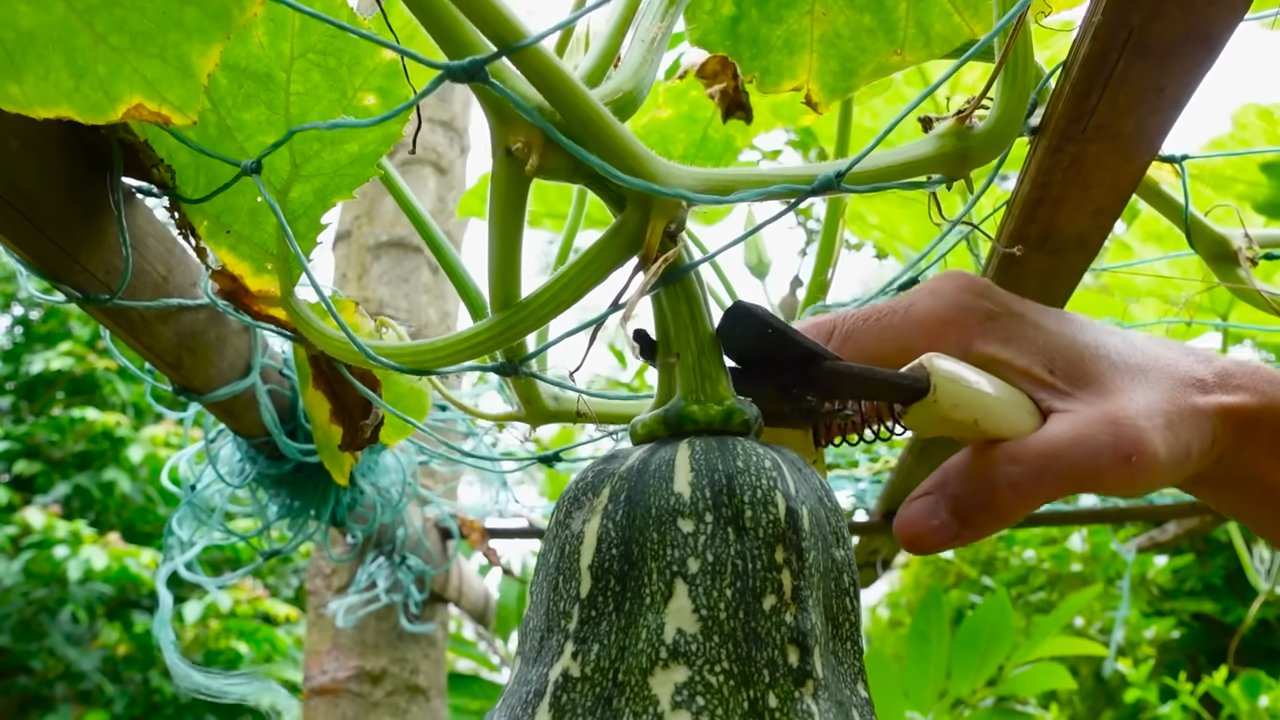
1. Maturity: Your pumpkin is ready to harvest when the stem starts to dry out and the skin becomes hard and resistant to scratching.
2. Harvesting: Carefully cut the pumpkin from the vine, leaving a few inches of stem attached.
3. Handling: Be extremely careful when handling your giant pumpkin. They’re heavy and can be easily damaged.
4. Storage: Store your pumpkin in a cool, dry place.
Tips and Tricks for Maximum Growth
Here are a few extra tips and tricks I’ve learned over the years to help you grow the biggest pumpkin possible:
* Choose the Right Variety: Atlantic Giant is the gold standard for giant pumpkins, but there are other varieties that can also produce impressive results. Do your research and choose a variety that’s well-suited to your climate.
* Soil Testing: Get your soil tested to determine its nutrient levels. This will help you choose the right fertilizer for your pumpkin vine.
* Water Wisely: Avoid overwatering, as this can lead to root rot. Water deeply but infrequently, allowing the soil to dry out slightly between waterings.
* Sunlight is Key: Make sure your pumpkin vine gets plenty of sunlight. At least 6-8 hours of direct sunlight per day is ideal.
* Protect from Frost: If you live in an area with late frosts, protect your pumpkin vine with a blanket or tarp.
* Patience is a Virtue: Growing giant pumpkins takes time and effort. Don’t get discouraged if you don’t see results immediately. Just keep nurturing your vine, and you’ll be rewarded with a massive pumpkin in the end!
* Record Keeping: Keep track of your pumpkin’s growth. Measure its circumference regularly and record the data. This will help you monitor its progress and identify any potential problems.
*
Conclusion
So, there you have it! Growing pumpkins in tires isn’t just a quirky gardening hack; it’s a game-changer for maximizing space, improving drainage, and ultimately, yielding healthier, more robust pumpkins. We’ve walked you through the simple steps, highlighting the benefits at each stage, from soil preparation to the final harvest. This method offers a contained environment, allowing you to better control the soil composition, moisture levels, and even pest access. Think of it as giving your pumpkin plants a VIP experience!
But why is this DIY trick a must-try? Beyond the sheer novelty of it, growing pumpkins in tires addresses several common challenges faced by pumpkin growers. The tires act as mini-raised beds, warming the soil faster in the spring, which is crucial for early growth. They also provide excellent drainage, preventing root rot, a common culprit behind pumpkin plant failure. Furthermore, the dark color of the tires absorbs heat, extending the growing season, especially beneficial in cooler climates. And let’s not forget the aesthetic appeal! A circle of vibrant green vines cascading over a black tire creates a unique and eye-catching display in your garden.
Ready to take your pumpkin patch to the next level? Don’t be afraid to experiment! Consider these variations to personalize your tire-growing experience:
* Stacking Tires: For larger pumpkin varieties like Atlantic Giants, consider stacking two or even three tires to provide ample space for root development. Just ensure the stack is stable and secure.
* Painting the Tires: Add a splash of color to your garden by painting the tires with vibrant, weather-resistant paints. This not only enhances the visual appeal but can also help reflect sunlight, preventing the soil from overheating in extremely hot climates.
* Companion Planting: Maximize the space within the tire by planting companion plants like marigolds or nasturtiums around the base of the pumpkin vine. These flowers attract beneficial insects and deter pests, creating a healthier ecosystem for your pumpkins.
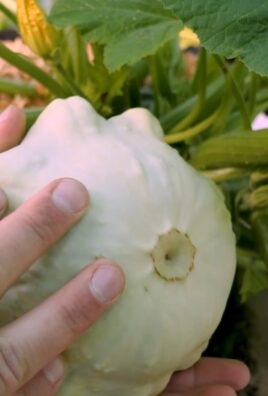
* Different Tire Sizes: Experiment with different tire sizes to accommodate various pumpkin varieties. Smaller tires are perfect for pie pumpkins or gourds, while larger tires are ideal for larger carving pumpkins.
* Organic Amendments: Enhance the soil within the tire with organic amendments like compost, aged manure, or worm castings. These amendments provide essential nutrients and improve soil structure, leading to healthier and more productive pumpkin plants.
We are confident that you will find this method rewarding and fun. The key to successful pumpkin growing, regardless of the method, is consistent care and attention. Monitor your plants regularly for signs of pests or diseases, water deeply and consistently, and provide adequate sunlight.
Now, it’s your turn! We encourage you to try growing pumpkins in tires this season. It’s a simple, effective, and environmentally friendly way to cultivate these iconic autumn fruits. Don’t forget to document your journey and share your experiences with us! We’d love to see your tire-grown pumpkin patches and hear about your successes (and even your challenges!). Share your photos and tips on social media using #TirePumpkinPatch or leave a comment below. Let’s build a community of tire-growing pumpkin enthusiasts! Happy gardening!
Frequently Asked Questions (FAQ)
What type of tires should I use for growing pumpkins?
Ideally, use old car or light truck tires. Avoid using tires from heavy machinery or trucks, as they may contain harmful chemicals. Ensure the tires are clean and free of any debris before using them. It’s also a good idea to check with your local recycling center or tire shop to see if they have any tires they’re willing to give away. Remember to prioritize safety and avoid tires that are visibly damaged or have exposed steel belts.
How do I prepare the tires before planting?
First, thoroughly clean the tires with soap and water to remove any dirt, grime, or oil residue. Drill drainage holes in the bottom of the tire to prevent waterlogging. You can use a drill with a large drill bit or even a utility knife to create these holes. Place the tires in a sunny location in your garden where your pumpkin plants will receive at least 6-8 hours of direct sunlight per day. Fill the tires with a high-quality potting mix or a blend of garden soil, compost, and aged manure.
What kind of soil should I use in the tires?
A well-draining, nutrient-rich soil is essential for growing healthy pumpkins. A mix of equal parts garden soil, compost, and aged manure is ideal. You can also add other organic amendments like worm castings or bone meal to further enrich the soil. Avoid using heavy clay soil, as it can become compacted and restrict root growth. Before planting, test the soil pH to ensure it’s within the optimal range of 6.0 to 7.0.
How often should I water my pumpkin plants growing in tires?
Water deeply and consistently, especially during hot and dry weather. Check the soil moisture regularly by sticking your finger into the soil. If the top inch feels dry, it’s time to water. Avoid overwatering, as this can lead to root rot. Water at the base of the plant to avoid wetting the foliage, which can increase the risk of fungal diseases. Consider using a soaker hose or drip irrigation system to provide consistent and efficient watering.
How do I fertilize my pumpkin plants in tires?
Pumpkin plants are heavy feeders and require regular fertilization to produce large, healthy fruits. Use a balanced fertilizer (e.g., 10-10-10) at planting time and then side-dress with a nitrogen-rich fertilizer every few weeks during the growing season. You can also use organic fertilizers like compost tea or fish emulsion. Avoid over-fertilizing, as this can lead to excessive foliage growth and reduced fruit production.
How do I protect my pumpkin plants from pests and diseases?
Monitor your plants regularly for signs of pests or diseases. Common pumpkin pests include squash bugs, squash vine borers, and aphids. Common diseases include powdery mildew and downy mildew. Use organic pest control methods like insecticidal soap or neem oil to control pests. Improve air circulation around the plants to prevent fungal diseases. You can also use copper-based fungicides to control fungal diseases. Consider using row covers to protect young plants from pests.
Can I grow different varieties of pumpkins in tires?
Yes, you can grow different varieties of pumpkins in tires. Choose varieties that are well-suited to your climate and growing conditions. Smaller varieties like pie pumpkins or gourds are ideal for smaller tires, while larger varieties like carving pumpkins or Atlantic Giants require larger tires. Be sure to provide adequate spacing between plants to allow for proper growth and air circulation.
How do I harvest my pumpkins grown in tires?
Harvest your pumpkins when they are fully mature and the skin is hard and resistant to scratching. The stem should be dry and brown. Cut the stem with a sharp knife, leaving several inches of stem attached to the pumpkin. Handle the pumpkins carefully to avoid bruising or damaging the skin. Cure the pumpkins in a warm, dry place for a week or two to harden the skin and improve their storage life.
What do I do with the tires after the growing season?
After the growing season, you can clean the tires and store them for reuse next year. Alternatively, you can recycle the tires at a local tire recycling center. Some communities also have programs that collect and recycle tires for use in other applications. Avoid burning the tires, as this releases harmful pollutants into the air.
Will the tires leach chemicals into the soil?
While there’s always a potential for some leaching, the risk is generally considered low, especially with older, well-worn tires. Using a good quality potting mix and ensuring proper drainage can further minimize any potential leaching. If you’re concerned, you can line the inside of the tires with a layer of plastic or landscape fabric before adding the soil. However, many gardeners have successfully grown pumpkins in tires for years without any noticeable negative effects. The benefits of improved drainage, soil warming, and pest control often outweigh the minimal risk of chemical leaching.
Leave a Comment