
Tomato cutting propagation: Ever wished you could magically duplicate your favorite tomato plant, the one bursting with the juiciest, most flavorful tomatoes you’ve ever tasted? Or perhaps you’re looking for a budget-friendly way to expand your tomato garden without shelling out for new seedlings? Well, you’re in luck! This DIY guide unlocks the secrets to easily multiplying your tomato plants using a simple, yet incredibly effective, technique: tomato cutting propagation.
The practice of propagating plants from cuttings has been around for centuries, with evidence suggesting its use in ancient civilizations for various crops. While we might not know exactly when someone first discovered the magic of tomato cutting propagation, it’s a technique that has been passed down through generations of gardeners, prized for its simplicity and success rate.
Why should you learn this trick? Because it’s a game-changer! Imagine being able to clone your best-performing tomato plants, ensuring a consistent harvest year after year. Plus, it’s a fantastic way to rescue broken branches or suckers that would otherwise go to waste. I’m going to show you how to take a simple cutting and turn it into a thriving tomato plant, saving you money and expanding your garden with ease. Get ready to dive into the world of tomato cutting propagation and unlock a whole new level of gardening success!
“`html
Tomato Cutting Propagation: A Gardener’s Guide to Cloning Your Favorite Plants
Hey there, fellow gardening enthusiasts! Ever wished you could magically duplicate your prize-winning tomato plant? Well, guess what? You practically can! Tomato cutting propagation is a super easy and rewarding way to clone your favorite tomato varieties, saving you money and ensuring you have a steady supply of delicious tomatoes. I’ve been doing this for years, and I’m excited to share my secrets with you.
Why Propagate Tomatoes from Cuttings?
Before we dive into the how-to, let’s talk about why you might want to propagate tomatoes from cuttings. There are several fantastic reasons:
* It’s Cost-Effective: Forget buying new seedlings every year. Once you have a plant you love, you can create endless copies for free!
* Preserve Your Favorite Varieties: Did you discover an heirloom tomato with an incredible flavor? Cloning it ensures you can enjoy that same taste year after year.
* Faster Production: Cuttings often mature and produce fruit faster than plants grown from seed. You’ll be enjoying homegrown tomatoes sooner!
* Bypass Diseases: If your original plant is healthy and disease-free, the cuttings will inherit those traits, giving them a head start.
* Easy and Fun: Seriously, this is one of the easiest propagation methods out there. It’s a great project for gardeners of all skill levels.
What You’ll Need
Okay, let’s gather our supplies. You probably already have most of these lying around:
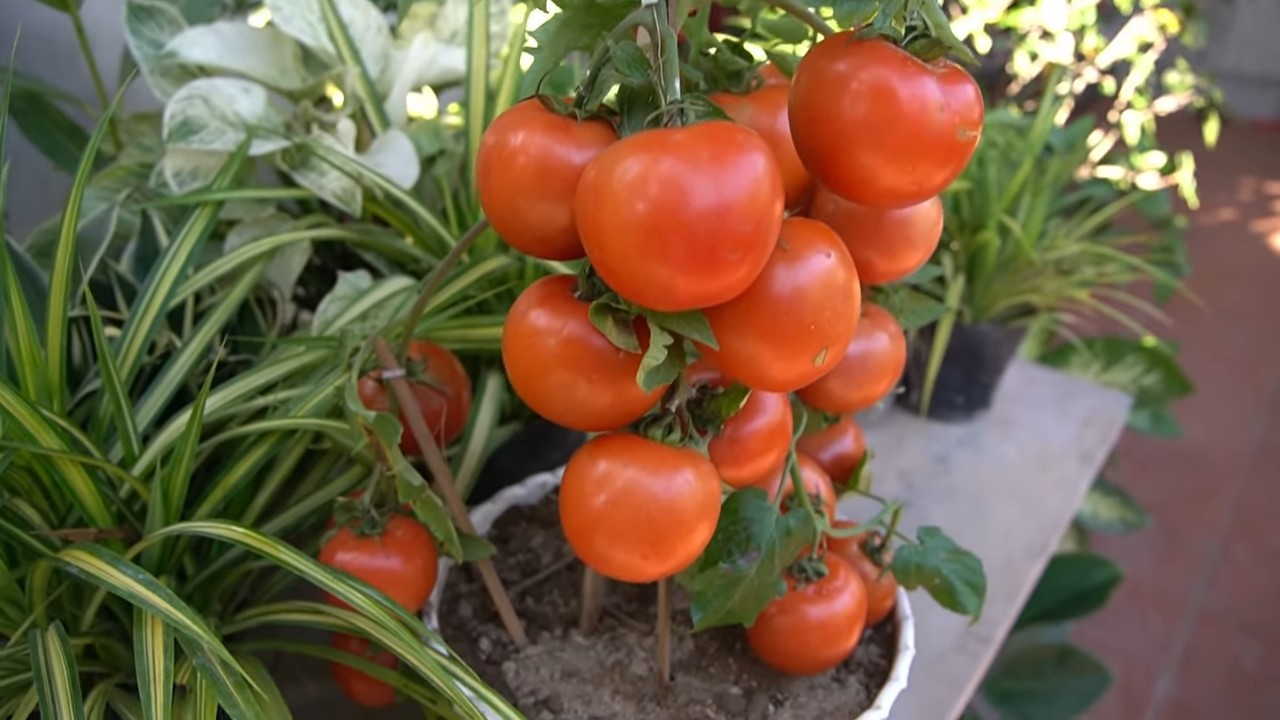
* A Healthy Tomato Plant: This is your “mother plant.” Choose a plant that’s vigorous and free from diseases.
* Sharp, Clean Scissors or Pruning Shears: Sterilize them with rubbing alcohol to prevent the spread of diseases.
* Rooting Hormone (Optional but Recommended): This helps stimulate root growth and increases your success rate. I personally love using a gel-based rooting hormone.
* Small Pots or Containers: 2-4 inch pots are perfect. Make sure they have drainage holes.
* Potting Mix: Use a well-draining potting mix specifically designed for seedlings or cuttings. Avoid using garden soil, as it can be too heavy and may contain diseases.
* Water: Tap water is fine, but rainwater or distilled water is even better.
* Clear Plastic Bag or Humidity Dome (Optional): This helps create a humid environment, which is crucial for successful rooting.
* Spray Bottle: For misting the cuttings.
* A Warm, Bright Location: Indirect sunlight is ideal. Avoid direct sunlight, which can scorch the cuttings.
Taking the Cuttings
This is where the magic begins!
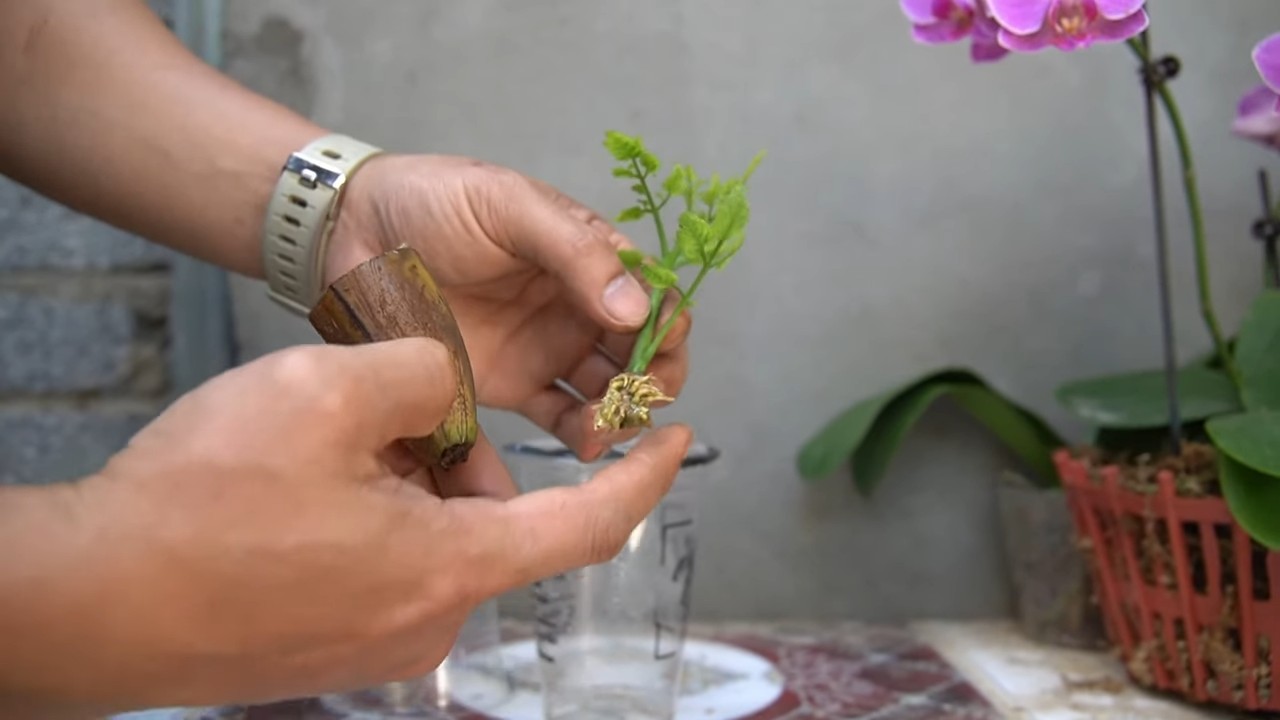
1. Choose Your Cuttings: Look for “suckers” or side shoots growing between the main stem and a branch. These are ideal for cuttings. They should be about 4-6 inches long and have several leaves.
2. Make the Cut: Using your sterilized scissors or pruning shears, make a clean cut just below a leaf node (the point where a leaf grows from the stem).
3. Remove Lower Leaves: Carefully remove the leaves from the bottom 2 inches of the cutting. This is where the roots will emerge.
4. Apply Rooting Hormone (Optional): Dip the cut end of the stem into the rooting hormone, following the instructions on the product label. Tap off any excess powder.
5. Prepare Your Pot: Fill your pot with the potting mix, leaving about an inch of space at the top. Moisten the soil thoroughly.
6. Plant the Cutting: Use a pencil or your finger to create a hole in the center of the potting mix. Gently insert the cutting into the hole, making sure the bottom 2 inches are buried.
7. Gently Firm the Soil: Lightly press the soil around the base of the cutting to secure it.
8. Water Thoroughly: Water the cutting gently until the soil is evenly moist.
9. Create a Humid Environment: Place the pot inside a clear plastic bag or under a humidity dome. This will help retain moisture and prevent the cutting from drying out. If using a plastic bag, make sure it doesn’t touch the leaves. You can use skewers to prop it up.
10. Place in a Warm, Bright Location: Put the cutting in a warm spot with bright, indirect sunlight. Avoid direct sunlight, which can overheat the cutting.
Caring for Your Cuttings
Now comes the waiting game, but don’t worry, it’s not too long!
1. Maintain Humidity: Keep the humidity high by misting the cutting with water several times a day, especially if you’re not using a plastic bag or humidity dome. If you are using a bag or dome, open it for a few minutes each day to allow for air circulation and prevent mold growth.
2. Water Regularly: Keep the soil consistently moist, but not soggy. Water when the top inch of soil feels dry to the touch.
3. Check for Root Growth: After about 7-14 days, you should start to see signs of root growth. Gently tug on the cutting. If it resists, it means roots have formed. You can also carefully remove the cutting from the pot to check the roots, but be very gentle.
4. Gradually Acclimate to Lower Humidity: Once the roots are well-established, gradually acclimate the cutting to lower humidity by removing the plastic bag or humidity dome for increasing periods of time each day. This will help the plant adjust to its new environment.
5. Transplant to a Larger Pot: Once the roots have filled the pot, transplant the cutting to a larger pot or directly into your garden.
Troubleshooting
Sometimes things don’t go exactly as planned. Here are a few common problems and how to fix them:
* Cuttings Wilting: This is usually caused by low humidity. Make sure to keep the cuttings in a humid environment and mist them regularly.
* Cuttings Rotting: This is usually caused by overwatering or poor drainage. Make sure the soil is well-draining and avoid overwatering.
* No Root Growth: This could be due to several factors, including low humidity, cold temperatures, or lack of rooting hormone. Make sure the cuttings are in a warm, humid environment and consider using rooting hormone. Also, ensure your cutting was taken from a healthy part of the mother plant.
* Mold Growth: This is usually caused by poor air circulation. Open the plastic bag or humidity dome for a few minutes each day to allow for air circulation.
Hardening Off Your Tomato Starts
Before transplanting your newly rooted tomato cuttings directly into your garden, it’s crucial to “harden them off.” This process gradually acclimates the plants to outdoor conditions, preventing shock and ensuring a smoother transition.
1. Start Slowly: Begin by placing your tomato starts outdoors in a sheltered location for just an hour or two each day. Choose a spot that’s protected from direct sunlight and strong winds.
2. Increase Exposure Gradually: Over the next week or two, gradually increase the amount of time your tomato starts spend outdoors each day. Also, slowly expose them to more sunlight and wind.
3. Monitor Your Plants: Keep a close eye on your tomato starts for any signs of stress, such as wilting or sunburn. If you notice any problems, bring them back indoors and reduce their exposure to outdoor conditions.
4. Water Regularly: Water your tomato starts regularly, especially during hot or dry weather.
5. Transplant When Ready: After about two weeks of hardening off, your tomato starts should be ready to be transplanted into your garden. Choose a sunny location with well-drained soil.
Tips for Success
Here are a few extra tips to help you succeed with tomato cutting propagation:
* Take Cuttings in the Morning: Cuttings taken in the morning are usually more hydrated and have a better chance of rooting.
* Use a Heat Mat: A heat mat can help speed up root growth, especially in cooler climates.
* Be Patient: Rooting can take time, so don’t get discouraged if you don’t see results immediately.
* Experiment: Try different techniques and see what works best for you.
* Label Your Cuttings: Keep track of which variety each cutting is from, especially if you’re propagating multiple varieties.
Enjoy Your Cloned Tomatoes!
That’s it! With a little patience and care, you’ll be enjoying homegrown tomatoes from your cloned plants in no time. Happy gardening! I hope this guide helps you create a tomato army of your own!
“`
Conclusion
So, there you have it! Transforming tomato cuttings into thriving new plants is not just a clever gardening hack; it’s a rewarding experience that puts you in closer touch with the miracle of nature. This simple, cost-effective method allows you to expand your tomato patch exponentially, all from the scraps you’d normally discard. Think about it: more delicious, homegrown tomatoes for salads, sauces, and sharing with friends and family, all thanks to a little bit of water, patience, and the magic of propagation.
This DIY trick is a must-try for several compelling reasons. First, it’s incredibly economical. Why spend money on new seedlings when you can essentially clone your existing, healthy tomato plants for free? Second, it’s a fantastic way to extend your growing season. By taking cuttings from your established plants, you can get a head start on the next season, ensuring an earlier and more bountiful harvest. Third, it’s a sustainable practice that reduces waste and promotes a deeper understanding of plant life cycles. You’re not just growing tomatoes; you’re actively participating in the process of creation and renewal.
But the benefits don’t stop there. Propagating tomato cuttings allows you to select for desirable traits. If you have a tomato plant that produces particularly flavorful or disease-resistant fruit, you can clone it and ensure that those qualities are passed on to the next generation. This is a powerful tool for gardeners who want to improve the quality and yield of their tomato crops.
Ready to take your tomato gardening to the next level?
Consider these variations to personalize your tomato cutting propagation experience:
* Rooting Hormone: While not strictly necessary, dipping the cut end of your tomato cutting in rooting hormone can significantly speed up the rooting process and increase your success rate.
* Different Growing Mediums: Experiment with different rooting mediums, such as perlite, vermiculite, or a mixture of peat moss and sand. Each medium has its own advantages and disadvantages, so find what works best for you and your local climate.
* Hydroponic Propagation: For a more advanced approach, try propagating your tomato cuttings hydroponically. This involves suspending the cuttings in a nutrient-rich water solution, which can result in faster and more vigorous root growth.
* Grafting: Once your cuttings have developed strong root systems, you can even explore the world of grafting. Grafting involves joining the top part of one plant (the scion) to the root system of another plant (the rootstock). This can be used to combine desirable traits from different tomato varieties, such as disease resistance and fruit flavor.
We’re confident that you’ll find this DIY tomato cutting propagation method to be both easy and rewarding. It’s a fantastic way to save money, extend your growing season, and deepen your connection with the natural world. So, grab your pruning shears, gather your cuttings, and get ready to witness the magic of propagation firsthand.
Don’t be afraid to experiment and adapt the method to suit your own needs and preferences. Gardening is all about learning and growing, and we encourage you to embrace the process with an open mind and a sense of adventure.
We can’t wait to hear about your experiences! Share your successes, challenges, and tips in the comments below. Let’s build a community of tomato-loving gardeners who are passionate about sharing their knowledge and helping each other grow. Happy gardening!
Frequently Asked Questions (FAQ)
What exactly is tomato cutting propagation and why should I do it?
Tomato cutting propagation is a method of creating new tomato plants from stem cuttings taken from existing plants. Instead of starting from seeds, you’re essentially cloning your favorite tomato plants. You should do it because it’s a cost-effective way to expand your tomato garden, extend your growing season, and preserve desirable traits from your best-performing plants. It’s also a fun and rewarding way to connect with nature and learn more about plant biology.
When is the best time to take tomato cuttings for propagation?
The best time to take tomato cuttings is typically in the late spring or early summer, when the plants are actively growing and have plenty of healthy stems. Avoid taking cuttings from plants that are stressed, diseased, or flowering, as these cuttings are less likely to root successfully. You can also take cuttings in late summer to overwinter indoors and get a head start on the next growing season.
What kind of tomato cuttings should I take?
Look for healthy, non-flowering stems that are about 4-6 inches long. The stems should be green and pliable, not woody or brittle. Remove the lower leaves from the cutting, leaving only a few leaves at the top. This will help to prevent rot and encourage root growth. The ideal cutting is a sucker, which is a side shoot that grows between the main stem and a branch. Suckers root very easily.
What is the best rooting medium for tomato cuttings?
There are several options for rooting tomato cuttings, including water, perlite, vermiculite, and a mixture of peat moss and sand. Water is the simplest option, but it can sometimes lead to root rot if not changed regularly. Perlite and vermiculite are lightweight and well-draining, which helps to prevent rot. A mixture of peat moss and sand provides a good balance of moisture retention and drainage. Experiment with different mediums to see what works best for you.
How long does it take for tomato cuttings to root?
Tomato cuttings typically take 1-3 weeks to root, depending on the rooting medium, temperature, and humidity. Keep the cuttings in a warm, bright location, but out of direct sunlight. Mist the cuttings regularly to keep them moist. You’ll know the cuttings have rooted when you see new growth emerging from the top of the cutting or when you gently tug on the cutting and feel resistance.
Do I need to use rooting hormone for tomato cutting propagation?
Rooting hormone is not strictly necessary, but it can significantly speed up the rooting process and increase your success rate. Rooting hormone contains auxins, which are plant hormones that stimulate root growth. If you choose to use rooting hormone, dip the cut end of the tomato cutting in the hormone powder or liquid before placing it in the rooting medium.
How do I care for tomato cuttings after they have rooted?
Once the tomato cuttings have rooted, they can be transplanted into individual pots filled with potting soil. Water the plants regularly and fertilize them with a balanced fertilizer. Gradually acclimate the plants to outdoor conditions before transplanting them into your garden.
Can I propagate all types of tomato plants from cuttings?
Yes, you can propagate most types of tomato plants from cuttings, including determinate, indeterminate, and dwarf varieties. However, some varieties may be easier to propagate than others. Experiment with different varieties to see what works best for you.
What are some common problems with tomato cutting propagation and how can I avoid them?
Some common problems with tomato cutting propagation include root rot, fungal diseases, and insect infestations. To avoid these problems, use a clean rooting medium, keep the cuttings in a well-ventilated area, and avoid overwatering. You can also use a fungicide or insecticide to protect the cuttings from diseases and pests.
Can I propagate tomato cuttings indoors during the winter?
Yes, you can propagate tomato cuttings indoors during the winter, but you’ll need to provide them with adequate light and warmth. Use grow lights to supplement natural light and keep the cuttings in a warm room. You may also need to adjust your watering schedule to prevent root rot.

Leave a Comment