
Bush bean pot growing – it’s easier than you think, and I’m here to show you how! Imagine fresh, crisp bush beans, bursting with flavor, just steps from your kitchen. No sprawling garden needed, no back-breaking labor – just a simple pot and a little know-how.
For centuries, container gardening has allowed people to cultivate food in limited spaces. From the hanging gardens of Babylon to the window boxes of modern apartments, the desire to nurture life and enjoy fresh produce has always found a way. But let’s be honest, not everyone has the time, space, or inclination for a full-blown garden. That’s where the magic of growing bush beans in pots comes in!
Why should you try this DIY trick? Well, for starters, it’s incredibly rewarding to harvest your own food. Plus, store-bought beans simply can’t compare to the taste of freshly picked, homegrown goodness. Bush bean pot growing is also a fantastic way to introduce kids to gardening, teaching them about where their food comes from. And let’s not forget the sheer convenience of having a readily available supply of healthy, delicious beans right outside your door. So, ditch the grocery store and let’s get our hands dirty! I’ll guide you through every step, from choosing the right pot to harvesting your bountiful crop.
DIY Bush Bean Bonanza: Growing Your Own Delicious Harvest in Pots!
Hey there, fellow gardening enthusiasts! I’m so excited to share my experience with growing bush beans in pots. It’s a fantastic way to enjoy fresh, homegrown veggies even if you don’t have a sprawling garden. Trust me, the taste of those beans you’ve nurtured yourself is simply unbeatable. Let’s dive into how you can create your own little bush bean paradise!
Choosing the Right Pot and Soil
First things first, we need to set the stage for our bean babies. The right pot and soil are crucial for their success.
* Pot Size Matters: Bush beans don’t need a ton of space, but they do need enough room for their roots to spread. I recommend a pot that’s at least 12 inches in diameter and 12 inches deep. This gives them ample room to grow without becoming root-bound.
* Drainage is Key: Make sure your pot has drainage holes! Beans hate sitting in soggy soil, which can lead to root rot. If your pot doesn’t have enough holes, you can drill a few more.
* Soil Selection: Forget garden soil for pots! It compacts too easily and doesn’t drain well. Instead, opt for a high-quality potting mix. Look for a mix that’s light, airy, and well-draining. I personally love using a mix that contains peat moss, perlite, and vermiculite. You can also add some compost for extra nutrients.
Planting Your Bush Bean Seeds
Now for the fun part – getting those seeds in the ground!
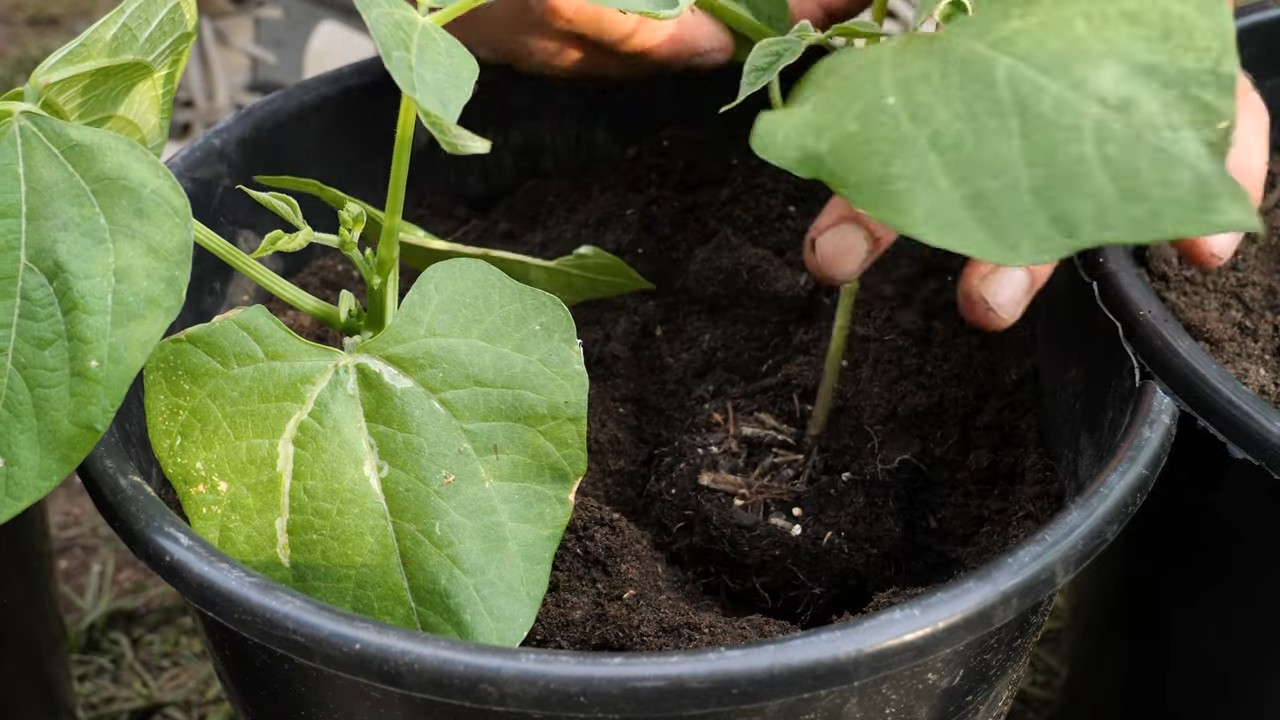
1. Prepare Your Pot: Fill your pot with the potting mix, leaving about an inch or two of space at the top. Gently pat down the soil to remove any large air pockets.
2. Sow the Seeds: Bush beans are pretty easy to germinate. I usually plant the seeds about 1 inch deep and 2-3 inches apart. You can plant several seeds in a single pot, depending on its size.
3. Water Gently: After planting, water the soil thoroughly but gently. You don’t want to wash away the seeds! Use a watering can with a rose head or a gentle spray nozzle.
4. Find a Sunny Spot: Bush beans need at least 6-8 hours of sunlight per day. Place your pot in a sunny location, such as a patio, balcony, or windowsill.
5. Keep the Soil Moist: Keep the soil consistently moist, but not soggy. Check the soil moisture level daily by sticking your finger into the soil. If the top inch feels dry, it’s time to water.
Caring for Your Bush Bean Plants
Once your seeds have sprouted, it’s time to nurture your little bean plants.
1. Watering Regularly: As I mentioned before, consistent moisture is key. Water deeply whenever the top inch of soil feels dry. Avoid overwatering, as this can lead to root rot.
2. Fertilizing: Bush beans are relatively light feeders, but they still benefit from occasional fertilization. I like to use a balanced liquid fertilizer diluted to half strength every 2-3 weeks. You can also use a slow-release fertilizer at planting time.
3. Support (Optional): Bush beans are generally self-supporting, but if your plants get particularly bushy or if you live in a windy area, you might want to provide some support. You can use small stakes or a tomato cage to help keep the plants upright.
4. Pest Control: Keep an eye out for common bean pests, such as aphids, bean beetles, and spider mites. If you spot any pests, you can try spraying them with insecticidal soap or neem oil. I prefer to use organic pest control methods whenever possible.
5. Weeding: Keep your pot free of weeds, as they can compete with your bean plants for nutrients and water. Hand-pull any weeds that pop up.
Harvesting Your Bush Beans
The moment you’ve been waiting for – harvesting your delicious bush beans!
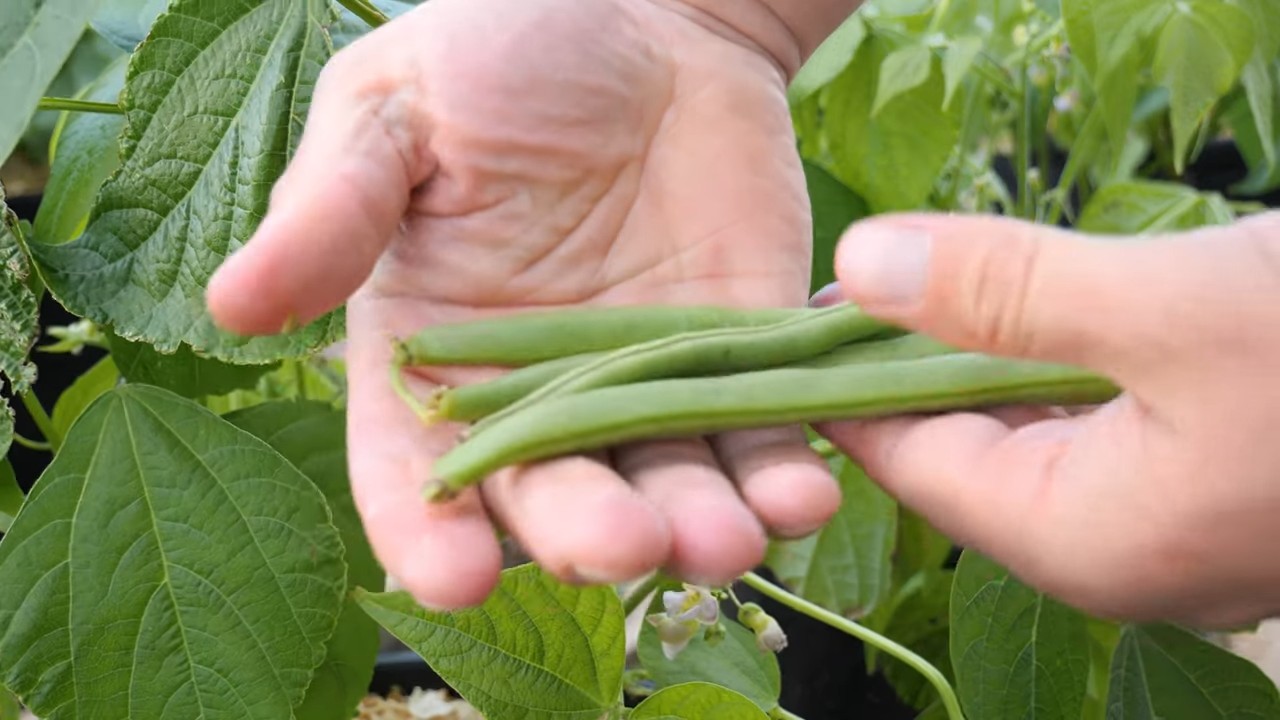
1. Timing is Everything: Bush beans are typically ready to harvest about 50-60 days after planting. The pods should be firm, plump, and snap easily when bent.
2. Harvest Regularly: Harvest your beans regularly, about every 2-3 days. This encourages the plants to produce more beans.
3. Gentle Harvesting: Gently snap the beans off the plant, being careful not to damage the stems or leaves.
4. Enjoy Your Harvest: Freshly harvested bush beans are incredibly delicious! You can eat them raw, steamed, sautéed, or added to soups and stews.
Troubleshooting Common Issues
Even with the best care, you might encounter a few challenges along the way. Here are some common issues and how to address them:
* Yellowing Leaves: This could be a sign of overwatering, underwatering, or nutrient deficiency. Check the soil moisture level and adjust your watering accordingly. If the soil is consistently moist, you might be overwatering. If the soil is dry, you need to water more frequently. You can also try fertilizing with a balanced fertilizer.
* Lack of Flowers or Beans: This could be due to insufficient sunlight, poor pollination, or nutrient deficiency. Make sure your plants are getting at least 6-8 hours of sunlight per day. You can also try hand-pollinating the flowers by gently shaking the plants. Fertilizing with a fertilizer that’s high in phosphorus can also help.
* Pest Infestations: As mentioned earlier, keep an eye out for common bean pests. Treat infestations promptly with insecticidal soap or neem oil.
* Root Rot: This is caused by overwatering and poor drainage. Make sure your pot has drainage holes and avoid overwatering. If you suspect root rot, you can try transplanting your plants into a fresh pot with well-draining soil.
Choosing the Right Bush Bean Variety
There are tons of different bush bean varieties to choose from, each with its own unique flavor and characteristics. Here are a few of my favorites:
* Blue Lake Bush: This is a classic bush bean variety that produces long, slender, dark green pods. It’s known for its excellent flavor and productivity.
* Contender: This is an early-maturing variety that produces stringless, tender pods. It’s a great choice for gardeners who want a quick harvest.
* Provider: This is a very productive variety that produces dark green pods. It’s known for its disease resistance and adaptability.
* Roma II: This is a flat-podded Italian bean that’s known for its rich flavor and creamy texture. It’s a great choice for salads and side dishes.
* Golden Wax: This is a yellow wax bean that’s known for its sweet flavor and tender texture. It’s a great choice for pickling and canning.
Extending Your Harvest
Want to keep those beans coming all season long? Here are a few tips for extending your harvest:
* Succession Planting: Plant a new batch of seeds every 2-3 weeks to ensure a continuous harvest.
* Deadheading: Remove any spent flowers or pods to encourage the plants to produce more beans.
* Proper Watering and Fertilizing: Keep your plants well-watered and fertilized to maximize their productivity.
* Protecting from Frost: If you live in an area with cool temperatures, protect your plants from frost by covering them with a blanket or bringing them indoors.
Saving Seeds for Next Year
If you want to save seeds from your bush bean plants for next year, here’s how:
1. Allow Some Pods to Mature: Let a few pods on your plants mature completely. The pods will turn brown and dry out.
2. Harvest the Pods: Once the pods are dry, harvest them from the plants.
3. Shell the Seeds: Shell the seeds from the pods.
4. Dry the Seeds: Spread the seeds out on a tray and let them dry completely for a few days.
5. Store the Seeds: Store the seeds in an airtight container in a cool, dry place.
Enjoying Your Homegrown Bush Beans
There’s nothing quite like the taste of fresh, homegrown bush beans. Here are a few of my favorite ways to enjoy them:
* Steamed: Steamed bush beans are a simple and healthy side dish.
* Sautéed: Sautéed bush beans with garlic and olive oil are a delicious and flavorful side dish.
* Salads: Add fresh bush beans to your favorite salads for a crunchy and nutritious boost.
* Soups and Stews: Bush beans are a great addition to soups and stews.
* Pickled: Pickled bush beans are a tangy and flavorful snack.
* Canned: Canned bush beans are a great way to preserve your harvest for later use.
I hope this guide has inspired you
Conclusion
Growing bush beans in pots is more than just a gardening trend; it’s a practical and rewarding way to enjoy fresh, homegrown produce, even with limited space. This DIY trick transforms any balcony, patio, or sunny windowsill into a miniature bean farm, offering a delightful connection to nature and a tangible sense of accomplishment.
Why is this a must-try? Because it democratizes gardening. No sprawling acreage is required, no back-breaking labor tilling vast fields. Just a pot, some soil, seeds, and a little sunshine. The satisfaction of harvesting your own crisp, flavorful bush beans, knowing exactly where they came from and how they were grown, is unparalleled. It’s a small act of self-sufficiency that resonates deeply in today’s world.
Beyond the sheer joy of homegrown goodness, growing bush beans in pots is incredibly versatile. Experiment with different varieties! Try planting ‘Blue Lake’ for classic green beans, ‘Golden Wax’ for a vibrant yellow hue, or even ‘Royal Burgundy’ for a striking purple addition to your salads. Consider companion planting. Marigolds deter pests, while nasturtiums attract beneficial insects. These additions not only enhance the health of your bean plants but also add visual appeal to your container garden.
Furthermore, you can tailor the growing environment to your specific needs. If you live in a particularly hot climate, opt for a lighter-colored pot to reflect heat and prevent the soil from overheating. In cooler regions, a darker pot will absorb warmth and extend the growing season. You can also adjust the watering schedule based on the weather conditions, ensuring your beans receive the optimal amount of moisture.
Don’t be afraid to get creative with your container choices. While a standard plastic or terracotta pot works perfectly well, you can also repurpose old buckets, baskets, or even grow bags. Just make sure the container has adequate drainage to prevent waterlogging.
The beauty of this DIY trick lies in its simplicity and adaptability. It’s a project that anyone can undertake, regardless of their gardening experience. And the rewards – fresh, delicious bush beans at your fingertips – are well worth the effort.
So, what are you waiting for? Grab a pot, some soil, and your favorite bush bean seeds, and embark on this rewarding gardening adventure. We are confident that you will find the process both enjoyable and fulfilling.
We encourage you to try this DIY trick for growing bush beans in pots and share your experiences with us! Post photos of your container gardens, tell us about your favorite varieties, and let us know any tips or tricks you discover along the way. Let’s create a community of potted bean growers and inspire others to embrace the joys of homegrown produce. Your insights and experiences will be invaluable to fellow gardeners. Happy growing!
Frequently Asked Questions (FAQ)
What size pot is best for growing bush beans?
A pot that is at least 12 inches in diameter and 12 inches deep is generally recommended for growing bush beans. This size provides enough space for the roots to develop properly and allows for adequate drainage. You can grow several plants in a single large pot, but be sure to space them appropriately to avoid overcrowding. Overcrowding can lead to reduced yields and increased susceptibility to pests and diseases. A good rule of thumb is to allow at least 4-6 inches of space between plants.
What type of soil should I use for growing bush beans in pots?
Use a well-draining potting mix specifically formulated for containers. Avoid using garden soil, as it can become compacted in pots and hinder drainage. A good potting mix will retain moisture while still allowing excess water to drain away, preventing root rot. You can also amend the potting mix with compost or other organic matter to improve its fertility and water-holding capacity. Adding perlite or vermiculite can further enhance drainage.
How often should I water my bush beans in pots?
Water your bush beans regularly, especially during hot, dry weather. The soil should be kept consistently moist but not waterlogged. Check the soil moisture by sticking your finger about an inch into the soil. If it feels dry, it’s time to water. Water deeply, allowing the water to drain out of the bottom of the pot. Avoid overhead watering, as this can promote fungal diseases. Instead, water at the base of the plant.
How much sunlight do bush beans need?
Bush beans need at least 6-8 hours of direct sunlight per day to thrive. Choose a sunny location for your potted beans. If you don’t have a spot that receives full sun, you can supplement with grow lights. Rotate the pot regularly to ensure that all sides of the plant receive adequate sunlight. Insufficient sunlight can lead to leggy growth and reduced yields.
Do I need to fertilize my bush beans in pots?
Yes, bush beans benefit from regular fertilization, especially when grown in pots. Use a balanced fertilizer, such as a 10-10-10 or 5-10-5, according to the package directions. Fertilize every 2-3 weeks during the growing season. You can also use a liquid fertilizer for easier application. Avoid over-fertilizing, as this can burn the roots. Organic fertilizers, such as compost tea or fish emulsion, are also excellent choices.
What are some common pests and diseases that affect bush beans?
Common pests that affect bush beans include aphids, bean beetles, and spider mites. Regularly inspect your plants for signs of infestation and take action promptly. You can often control pests with insecticidal soap or neem oil. Common diseases include powdery mildew and bean rust. Prevent these diseases by providing good air circulation, avoiding overhead watering, and using disease-resistant varieties.
How long does it take for bush beans to mature?
Bush beans typically mature in 50-60 days from planting. You can start harvesting beans when they are about the size of a pencil and still tender. Harvest regularly to encourage continued production. Overripe beans will become tough and stringy.
Can I grow bush beans indoors?
While it’s possible to grow bush beans indoors, it can be challenging to provide them with the necessary sunlight and pollination. If you choose to grow them indoors, use grow lights and consider hand-pollinating the flowers to ensure fruit set.
What are some good companion plants for bush beans?
Good companion plants for bush beans include marigolds, nasturtiums, carrots, cucumbers, and rosemary. Marigolds deter pests, while nasturtiums attract beneficial insects. Carrots and cucumbers have different nutrient requirements, so they won’t compete with the beans. Rosemary is said to repel bean beetles. Avoid planting beans near onions or garlic, as they can inhibit bean growth.
Can I save seeds from my bush beans?
Yes, you can save seeds from your bush beans, but only if you are growing heirloom or open-pollinated varieties. Hybrid varieties will not produce true-to-type seeds. Allow some of the beans to dry completely on the plant. Once they are dry, remove the seeds from the pods and store them in a cool, dry place.
Leave a Comment