
Grow Rutabagas Raised Beds: Unlock the secrets to cultivating these often-overlooked root vegetables right in your own backyard! Have you ever dreamt of harvesting plump, delicious rutabagas but felt intimidated by the process? Well, fear not! This DIY guide is your passport to a bountiful rutabaga harvest, even if you’re short on space or gardening experience. We’re diving deep into the world of raised bed gardening, a method that makes growing rutabagas easier and more rewarding than you ever thought possible.
Rutabagas, a cross between a cabbage and a turnip, have a rich history, particularly in Scandinavian and Eastern European cuisines. They’ve been a staple food source for centuries, providing essential nutrients during harsh winters. While they might not be as trendy as kale or spinach, rutabagas offer a unique, slightly sweet flavor that adds depth to soups, stews, and roasted vegetable medleys.
But why should you bother with growing them yourself? Because fresh, homegrown rutabagas taste infinitely better than anything you’ll find at the grocery store! Plus, raised beds offer several advantages: improved drainage, better soil control, and reduced back strain. If you’re struggling with poor soil quality or limited space, raised beds are the perfect solution. I’m going to show you how to grow rutabagas raised beds, step-by-step, so you can enjoy the satisfaction of harvesting your own delicious and nutritious root vegetables. Let’s get started!
Growing Rutabagas in Raised Beds: A Comprehensive DIY Guide
Hey there, fellow gardeners! I’m so excited to share my experience growing rutabagas in raised beds. It’s a fantastic way to enjoy this often-overlooked root vegetable, and raised beds make the process even easier and more rewarding. Rutabagas, also known as swedes, are incredibly versatile in the kitchen, offering a slightly sweet and earthy flavor that’s delicious roasted, mashed, or added to stews. Let’s dive into how you can successfully cultivate these beauties in your own backyard!
Why Choose Raised Beds for Rutabagas?
Before we get started, let’s quickly touch on why raised beds are a great choice for growing rutabagas:
* Improved Drainage: Rutabagas need well-drained soil to thrive. Raised beds naturally offer better drainage than in-ground gardens, preventing root rot and other moisture-related issues.
* Warmer Soil: Raised beds tend to warm up faster in the spring, giving your rutabagas a head start.
* Soil Control: You have complete control over the soil composition in your raised beds, allowing you to create the perfect growing medium for your rutabagas.
* Easier Weed Control: Raised beds are generally easier to keep weed-free, saving you time and effort.
* Accessibility: Raised beds can be built to a comfortable height, making gardening easier on your back and knees.
Preparing Your Raised Bed for Rutabagas
The foundation for a successful rutabaga harvest lies in proper bed preparation. Here’s what you need to do:
1. Choose the Right Location: Rutabagas need at least 6 hours of direct sunlight per day. Select a location for your raised bed that receives ample sunlight. Also, consider proximity to a water source for easy watering.
2. Build or Purchase Your Raised Bed: You can either build your own raised bed from wood, concrete blocks, or other materials, or purchase a pre-made kit. A good size is typically 4 feet wide by 8 feet long and at least 12 inches deep. I personally prefer cedar wood because it’s naturally rot-resistant.
3. Line the Bed (Optional): While not strictly necessary, lining the bed with landscape fabric can help prevent weeds from growing up from the ground below and retain moisture.
4. Fill the Bed with Soil: This is arguably the most important step. Rutabagas prefer loose, well-drained soil that’s rich in organic matter. I recommend a mix of:
* Topsoil (1/3): Provides a base for the soil structure.
* Compost (1/3): Adds nutrients and improves drainage. I love using my own homemade compost!
* Peat Moss or Coco Coir (1/3): Helps retain moisture and improve soil aeration. Coco coir is a more sustainable option than peat moss.
* Amendments (As Needed): Depending on your soil test results (which I highly recommend doing!), you may need to add amendments like lime to raise the pH or bone meal to provide phosphorus. Rutabagas prefer a soil pH between 6.0 and 7.0.
5. Mix Thoroughly: Use a garden fork or tiller to thoroughly mix the soil components together. Break up any clumps and ensure a consistent texture.
6. Level the Soil: Rake the surface of the soil to create a level planting surface.
7. Water the Soil: Gently water the soil to settle it and provide moisture for the seeds.
Planting Your Rutabaga Seeds
Now comes the fun part – planting your rutabaga seeds!
1. Timing is Key: Rutabagas are a cool-season crop, meaning they thrive in cooler temperatures. The best time to plant them is in late summer or early fall for a fall/winter harvest. Check your local frost dates to determine the ideal planting time. You want to give them about 75-90 days to mature before the first hard frost.
2. Choose Your Seeds: Select a rutabaga variety that’s well-suited to your climate and growing conditions. ‘American Purple Top’ is a popular and reliable choice.
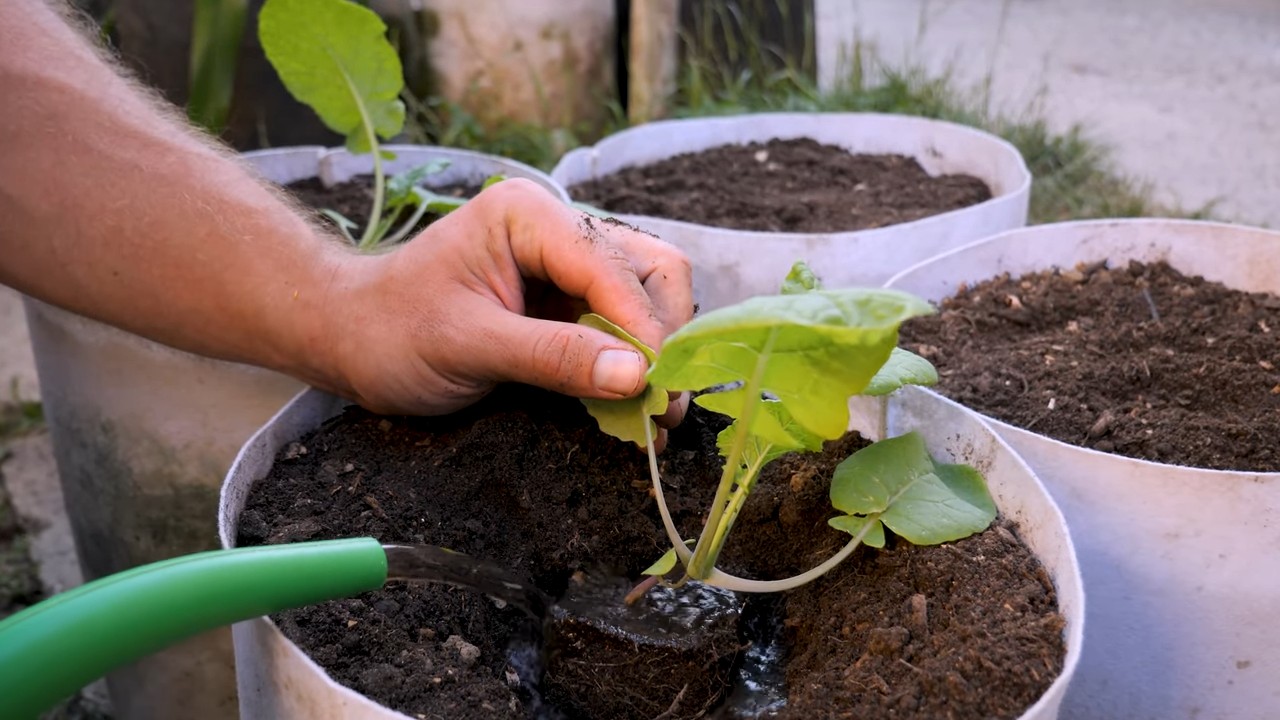
3. Sow the Seeds: Sow the seeds directly into the prepared soil, about 1/2 inch deep and 2-3 inches apart. You can thin them later if needed.
4. Cover the Seeds: Gently cover the seeds with soil and lightly pat down the surface.
5. Water Gently: Water the soil gently to avoid disturbing the seeds. Use a watering can with a rose head or a gentle spray nozzle on your hose.
6. Mark the Rows: Label your rows with the date and variety of rutabaga you planted. This will help you keep track of your progress.
Caring for Your Rutabaga Plants
Once your rutabaga seeds have sprouted, it’s important to provide them with the care they need to thrive.
1. Thinning: When the seedlings are about 2-3 inches tall, thin them to 6-8 inches apart. This will give the plants enough space to develop properly. Gently pull out the excess seedlings, being careful not to disturb the roots of the remaining plants.
2. Watering: Rutabagas need consistent moisture to grow well. Water them regularly, especially during dry periods. Aim for about 1 inch of water per week. Check the soil moisture by sticking your finger into the soil. If the top inch feels dry, it’s time to water.
3. Weeding: Keep your raised bed free of weeds. Weeds compete with rutabagas for nutrients and water. Hand-pull weeds regularly, being careful not to damage the rutabaga roots. Mulching can also help suppress weed growth.
4. Fertilizing: Rutabagas are heavy feeders, so they benefit from regular fertilization. Side-dress your plants with a balanced organic fertilizer every 4-6 weeks. Look for a fertilizer with a ratio of 10-10-10 or something similar. You can also use compost tea or liquid seaweed extract as a foliar feed.
5. Pest and Disease Control: Rutabagas are generally resistant to pests and diseases, but they can be susceptible to certain problems, such as:
* Flea Beetles: These tiny beetles can chew holes in the leaves of your rutabaga plants. Cover your plants with row covers to prevent flea beetle infestations. You can also use insecticidal soap or neem oil to control them.
* Root Maggots: These larvae feed on the roots of rutabagas, causing them to rot. Prevent root maggot infestations by covering your plants with row covers and practicing crop rotation.
* Clubroot: This fungal disease causes the roots of rutabagas to become swollen and distorted. Prevent clubroot by maintaining a soil pH between 6.0 and 7.0 and practicing crop rotation.
6. Mulching: Apply a layer of mulch around your rutabaga plants to help retain moisture, suppress weeds, and regulate soil temperature. Straw, hay, wood chips, or shredded leaves are all good options.
Harvesting Your Rutabagas
The moment you’ve been waiting for – harvesting your rutabagas!
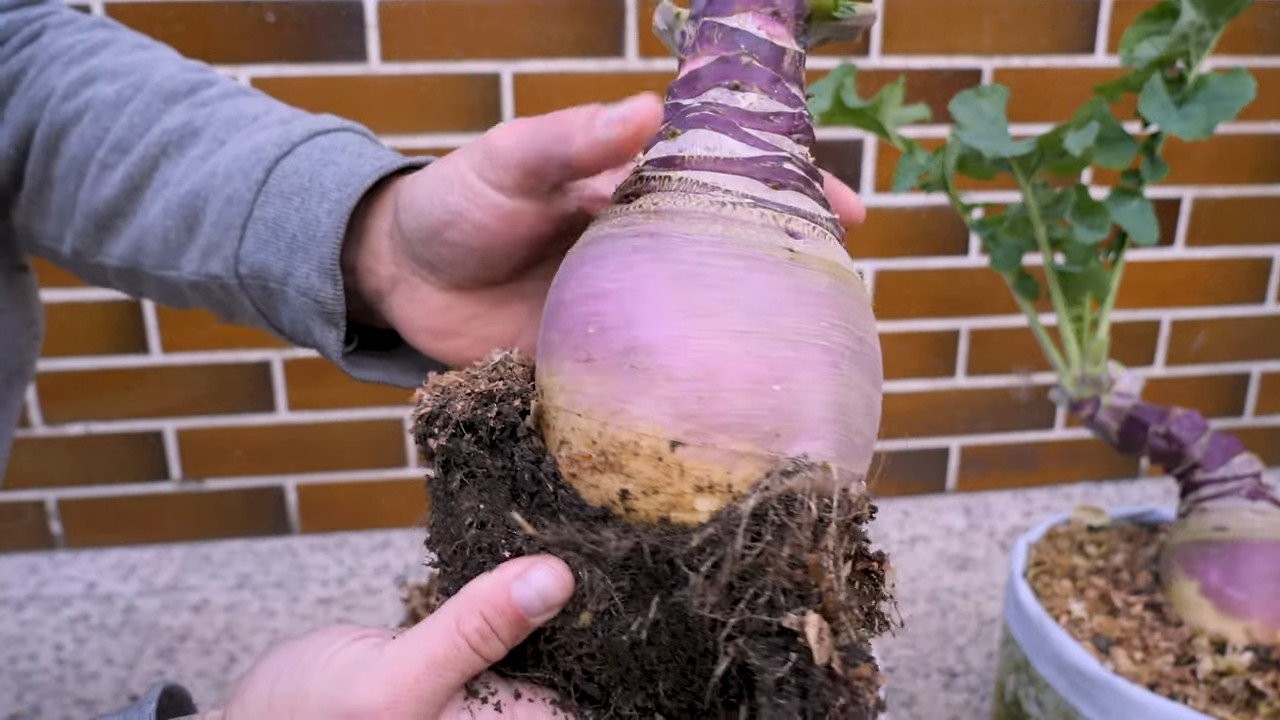
1. Timing: Rutabagas are typically ready to harvest 75-90 days after planting. The roots should be about 4-6 inches in diameter. You can also harvest them smaller if you prefer.
2. Check for Maturity: Gently dig around the base of a plant to check the size of the root. If it’s the size you want, you can harvest the entire plant.
3. Harvesting: Use a garden fork or spade to carefully lift the rutabaga plants from the soil. Be careful not to damage the roots.
Hey there, fellow gardeners! I’m so excited to share my experience growing rutabagas in raised beds. It’s a fantastic way to enjoy this often-overlooked root vegetable, and raised beds make the process even easier and more rewarding. Rutabagas, also known as swedes, are incredibly versatile in the kitchen, offering a slightly sweet and earthy flavor that’s delicious roasted, mashed, or added to stews. Let’s dive into how you can successfully cultivate these beauties in your own backyard!
Why Choose Raised Beds for Rutabagas?
Before we get started, let’s quickly touch on why raised beds are a great choice for growing rutabagas:
* Improved Drainage: Rutabagas need well-drained soil to thrive. Raised beds naturally offer better drainage than in-ground gardens, preventing root rot and other moisture-related issues.
* Warmer Soil: Raised beds tend to warm up faster in the spring, giving your rutabagas a head start.
* Soil Control: You have complete control over the soil composition in your raised beds, allowing you to create the perfect growing medium for your rutabagas.
* Easier Weed Control: Raised beds are generally easier to keep weed-free, saving you time and effort.
* Accessibility: Raised beds can be built to a comfortable height, making gardening easier on your back and knees.
Preparing Your Raised Bed for Rutabagas
The foundation for a successful rutabaga harvest lies in proper bed preparation. Here’s what you need to do:
1. Choose the Right Location: Rutabagas need at least 6 hours of direct sunlight per day. Select a location for your raised bed that receives ample sunlight. Also, consider proximity to a water source for easy watering.
2. Build or Purchase Your Raised Bed: You can either build your own raised bed from wood, concrete blocks, or other materials, or purchase a pre-made kit. A good size is typically 4 feet wide by 8 feet long and at least 12 inches deep. I personally prefer cedar wood because it’s naturally rot-resistant.
3. Line the Bed (Optional): While not strictly necessary, lining the bed with landscape fabric can help prevent weeds from growing up from the ground below and retain moisture.
4. Fill the Bed with Soil: This is arguably the most important step. Rutabagas prefer loose, well-drained soil that’s rich in organic matter. I recommend a mix of:
* Topsoil (1/3): Provides a base for the soil structure.
* Compost (1/3): Adds nutrients and improves drainage. I love using my own homemade compost!
* Peat Moss or Coco Coir (1/3): Helps retain moisture and improve soil aeration. Coco coir is a more sustainable option than peat moss.
* Amendments (As Needed): Depending on your soil test results (which I highly recommend doing!), you may need to add amendments like lime to raise the pH or bone meal to provide phosphorus. Rutabagas prefer a soil pH between 6.0 and 7.0.
5. Mix Thoroughly: Use a garden fork or tiller to thoroughly mix the soil components together. Break up any clumps and ensure a consistent texture.
6. Level the Soil: Rake the surface of the soil to create a level planting surface.
7. Water the Soil: Gently water the soil to settle it and provide moisture for the seeds.
Planting Your Rutabaga Seeds
Now comes the fun part – planting your rutabaga seeds!
1. Timing is Key: Rutabagas are a cool-season crop, meaning they thrive in cooler temperatures. The best time to plant them is in late summer or early fall for a fall/winter harvest. Check your local frost dates to determine the ideal planting time. You want to give them about 75-90 days to mature before the first hard frost.
2. Choose Your Seeds: Select a rutabaga variety that’s well-suited to your climate and growing conditions. ‘American Purple Top’ is a popular and reliable choice.
3. Sow the Seeds: Sow the seeds directly into the prepared soil, about 1/2 inch deep and 2-3 inches apart. You can thin them later if needed.
4. Cover the Seeds: Gently cover the seeds with soil and lightly pat down the surface.
5. Water Gently: Water the soil gently to avoid disturbing the seeds. Use a watering can with a rose head or a gentle spray nozzle on your hose.
6. Mark the Rows: Label your rows with the date and variety of rutabaga you planted. This will help you keep track of your progress.
Caring for Your Rutabaga Plants
Once your rutabaga seeds have sprouted, it’s important to provide them with the care they need to thrive.
1. Thinning: When the seedlings are about 2-3 inches tall, thin them to 6-8 inches apart. This will give the plants enough space to develop properly. Gently pull out the excess seedlings, being careful not to disturb the roots of the remaining plants.
2. Watering: Rutabagas need consistent moisture to grow well. Water them regularly, especially during dry periods. Aim for about 1 inch of water per week. Check the soil moisture by sticking your finger into the soil. If the top inch feels dry, it’s time to water.
3. Weeding: Keep your raised bed free of weeds. Weeds compete with rutabagas for nutrients and water. Hand-pull weeds regularly, being careful not to damage the rutabaga roots. Mulching can also help suppress weed growth.
4. Fertilizing: Rutabagas are heavy feeders, so they benefit from regular fertilization. Side-dress your plants with a balanced organic fertilizer every 4-6 weeks. Look for a fertilizer with a ratio of 10-10-10 or something similar. You can also use compost tea or liquid seaweed extract as a foliar feed.
5. Pest and Disease Control: Rutabagas are generally resistant to pests and diseases, but they can be susceptible to certain problems, such as:
* Flea Beetles: These tiny beetles can chew holes in the leaves of your rutabaga plants. Cover your plants with row covers to prevent flea beetle infestations. You can also use insecticidal soap or neem oil to control them.
* Root Maggots: These larvae feed on the roots of rutabagas, causing them to rot. Prevent root maggot infestations by covering your plants with row covers and practicing crop rotation.
* Clubroot: This fungal disease causes the roots of rutabagas to become swollen and distorted. Prevent clubroot by maintaining a soil pH between 6.0 and 7.0 and practicing crop rotation.
6. Mulching: Apply a layer of mulch around your rutabaga plants to help retain moisture, suppress weeds, and regulate soil temperature. Straw, hay, wood chips, or shredded leaves are all good options.
Harvesting Your Rutabagas
The moment you’ve been waiting for – harvesting your rutabagas!
1. Timing: Rutabagas are typically ready to harvest 75-90 days after planting. The roots should be about 4-6 inches in diameter. You can also harvest them smaller if you prefer.
2. Check for Maturity: Gently dig around the base of a plant to check the size of the root. If it’s the size you want, you can harvest the entire plant.
3. Harvesting: Use a garden fork or spade to carefully lift the rutabaga plants from the soil. Be careful not to damage the roots.
4. Cleaning: Brush off any excess soil from the roots.
5. Storing: Rutabagas can be stored for several months in a cool, dark, and humid place. Cut off the tops, leaving about 1-2 inches of stem. Store the roots in a root cellar, refrigerator, or unheated garage. You can also store them in a plastic bag in the refrigerator.
Enjoying Your Homegrown Rutabagas
Congratulations! You’ve successfully grown rutabagas in raised beds. Now it’s time to enjoy the fruits (or rather, roots) of your labor.
Rutabagas are incredibly versatile in the kitchen. Here are a few ideas:
* Roasted: Toss rutabaga cubes with olive oil, salt, pepper, and your favorite herbs, and roast them in the oven until tender and slightly caramelized.
* Mashed: Boil or steam rutabaga until tender, then mash it with butter, milk, and seasonings.
* Stewed: Add rutabaga cubes to stews and soups for a hearty and flavorful addition.
* French Fries: Cut rutabaga into
Conclusion
So, there you have it! Growing rutabagas in raised beds isn’t just a gardening trend; it’s a game-changer for anyone looking to maximize their yield, minimize pest problems, and enjoy the freshest, most flavorful rutabagas imaginable. We’ve walked through the steps, from selecting the perfect raised bed location and preparing the soil to planting, nurturing, and harvesting your very own crop of these often-overlooked root vegetables.
Why is this DIY trick a must-try? Because it addresses the common challenges associated with growing rutabagas directly in the ground. Raised beds offer superior drainage, preventing root rot and other moisture-related issues that can plague rutabagas. They also provide a more controlled environment, allowing you to tailor the soil composition to meet the specific needs of these nutrient-hungry plants. Furthermore, raised beds make weeding and pest control significantly easier, saving you time and effort while protecting your precious rutabagas.
But the benefits don’t stop there. Growing rutabagas in raised beds also allows for greater flexibility in terms of space. Even if you have limited yard space, you can still enjoy a bountiful harvest by utilizing raised beds on patios, balconies, or even rooftops. And let’s not forget the ergonomic advantages – raised beds reduce the strain on your back and knees, making gardening a more enjoyable and accessible activity for people of all ages and abilities.
Looking to experiment? Consider these variations:
* Companion Planting: Enhance your rutabaga patch by planting companion plants like marigolds (to deter nematodes) or nasturtiums (to attract aphids away from your rutabagas).
* Succession Planting: Extend your harvest season by planting rutabagas in succession, sowing new seeds every few weeks. This will ensure a continuous supply of fresh rutabagas throughout the fall and winter.
* Different Varieties: Explore different rutabaga varieties to find your favorite flavor and texture. ‘American Purple Top’ is a classic choice, but ‘Laurentian’ and ‘Joan’ are also worth trying.
* Vertical Gardening: While rutabagas are root vegetables, you can utilize the space around them in the raised bed for vertical gardening. Trellis peas or beans nearby to maximize your garden’s productivity.
Ultimately, the key to successful rutabaga cultivation lies in experimentation and adaptation. Don’t be afraid to try new things, observe your plants closely, and adjust your approach as needed. The rewards – a delicious and nutritious harvest of homegrown rutabagas – are well worth the effort.
So, what are you waiting for? Grab your gardening gloves, build or buy a raised bed, and start growing rutabagas today! We’re confident that you’ll be amazed by the results. And once you’ve experienced the joy of harvesting your own homegrown rutabagas, we encourage you to share your experiences with us. Tell us about your successes, your challenges, and any tips or tricks you’ve discovered along the way. Let’s build a community of rutabaga enthusiasts and help each other grow the best rutabagas possible! Share your photos and stories on social media using #RaisedBedRutabagas and let’s get growing!
Frequently Asked Questions (FAQ)
What are the specific benefits of growing rutabagas in raised beds compared to growing them directly in the ground?
Growing rutabagas in raised beds offers several key advantages. Firstly, raised beds provide superior drainage, which is crucial for rutabagas as they are susceptible to root rot in overly wet conditions. The elevated structure prevents water from pooling around the roots, ensuring healthier plant growth. Secondly, raised beds allow for better soil control. You can create a customized soil mix that is rich in organic matter and essential nutrients, providing the ideal growing medium for rutabagas. This is particularly beneficial if your native soil is heavy clay or sandy. Thirdly, raised beds offer improved pest and weed management. The defined boundaries of the bed make it easier to control weeds and prevent pests from reaching your rutabagas. You can also use row covers or netting more effectively in raised beds to protect your plants from insects and other critters. Finally, raised beds can extend the growing season. The soil in raised beds warms up faster in the spring, allowing you to plant earlier, and they also retain heat better in the fall, extending the harvest season.
What is the ideal soil composition for growing rutabagas in raised beds?
Rutabagas thrive in well-drained, fertile soil with a slightly acidic to neutral pH (6.0 to 7.0). The ideal soil composition for raised beds should include a mix of:
* Topsoil: Provides the foundation for plant growth.
* Compost: Adds organic matter, improves drainage, and provides essential nutrients.
* Well-rotted manure: Enriches the soil with nitrogen, phosphorus, and potassium.
* Peat moss or coco coir: Improves water retention and aeration.
* Sand or perlite: Enhances drainage and prevents soil compaction.
A good starting point is to mix equal parts topsoil, compost, and peat moss or coco coir. You can then amend the mixture with well-rotted manure and sand or perlite as needed. Before planting, test the soil pH and adjust it accordingly with lime (to raise the pH) or sulfur (to lower the pH).
How deep should my raised bed be for growing rutabagas?
Rutabagas are root vegetables, so they need sufficient space to develop their large, bulbous roots. A raised bed depth of at least 12 inches (30 cm) is recommended. This will provide ample room for the rutabagas to grow without being restricted by the bottom of the bed. If you have particularly poor soil beneath the raised bed, you may want to consider a deeper bed (18-24 inches) to ensure adequate drainage and root development.
What are some common pests and diseases that affect rutabagas, and how can I prevent or control them in raised beds?
Common pests that affect rutabagas include:
* Root maggots: These larvae feed on the roots of rutabagas, causing stunted growth and wilting. Prevent root maggots by using row covers to prevent adult flies from laying eggs near the plants. You can also use beneficial nematodes to control root maggot larvae in the soil.
* Flea beetles: These small, jumping beetles chew small holes in the leaves of rutabagas. Control flea beetles by using row covers, applying insecticidal soap, or dusting the plants with diatomaceous earth.
* Aphids: These sap-sucking insects can weaken rutabagas and transmit diseases. Control aphids by spraying the plants with a strong stream of water, applying insecticidal soap, or introducing beneficial insects like ladybugs.
Common diseases that affect rutabagas include:
* Clubroot: This fungal disease causes swollen, distorted roots and stunted growth. Prevent clubroot by practicing crop rotation, maintaining a soil pH above 7.0, and using disease-resistant varieties.
* Downy mildew: This fungal disease causes yellow spots on the upper surface of the leaves and a white, downy growth on the underside. Prevent downy mildew by providing good air circulation, avoiding overhead watering, and applying a fungicide if necessary.
Growing rutabagas in raised beds can help prevent some of these problems by improving drainage and air circulation. Regular monitoring of your plants and prompt action when pests or diseases are detected are essential for maintaining a healthy rutabaga crop.
How often should I water rutabagas in raised beds?
Rutabagas need consistent moisture to thrive, especially during hot, dry weather. Water your rutabagas deeply whenever the top inch of soil feels dry to the touch. Aim to provide about 1 inch of water per week, either through rainfall or irrigation. Avoid overwatering, as this can lead to root rot. Using a soaker hose or drip irrigation system can help deliver water directly to the roots of the plants, minimizing water loss and reducing the risk of foliar diseases. Mulching around the plants with straw or wood chips can also help retain moisture in the soil.
When is the best time to harvest rutabagas grown in raised beds?
Rutabagas are typically ready to harvest in the fall, about 90-100 days after planting. The ideal time to harvest is after the first frost, as this sweetens the flavor of the rutabagas. The roots should be about 4-6 inches in diameter. To harvest, loosen the soil around the rutabaga with a garden fork and gently pull the root out of the ground. Cut off the tops, leaving about 1-2 inches of stem. Store the rutabagas in a cool, dry place, such as a root cellar or refrigerator.
Leave a Comment