
Grow Dill for Fast Harvest: Imagine snipping fresh, fragrant dill right from your own backyard, ready to elevate your culinary creations! No more sad, wilted bunches from the grocery store – just vibrant, flavorful dill whenever you need it. This isn’t just a dream; it’s an easily achievable reality with a few simple home gardening tricks.
Dill, with its feathery foliage and distinctive anise-like flavor, has been cherished for centuries. Originating in the Mediterranean region, dill was used by ancient Egyptians for medicinal purposes and by the Romans as a symbol of good fortune. Its culinary uses have spread globally, becoming a staple in dishes from Scandinavian gravlax to Indian raita.
But why should you bother with growing your own? Well, store-bought dill often lacks the intense flavor of freshly harvested dill. Plus, let’s be honest, it can be expensive! This DIY guide will provide you with the secrets to grow dill for fast harvest, ensuring a constant supply of this versatile herb. I’ll share my favorite tips and tricks, from seed selection to harvesting techniques, that will have you enjoying a bountiful dill crop in no time. So, grab your gardening gloves, and let’s get started on this exciting journey to fresh, homegrown dill!
Grow Dill for Fast Harvest: My Foolproof DIY Guide
Hey there, fellow gardening enthusiasts! I’m so excited to share my tried-and-true method for getting a super-fast dill harvest. Dill is one of my absolute favorite herbs – its feathery leaves add such a fresh, bright flavor to everything from pickles to salads to creamy dips. But waiting for it to mature can feel like forever! That’s why I’ve developed this little system to speed things up. Get ready to enjoy fresh dill in no time!
Understanding Dill’s Needs
Before we dive into the nitty-gritty, let’s quickly cover what dill needs to thrive. This will help you understand why each step is important and how to troubleshoot if things don’t go exactly as planned.
* Sunlight: Dill loves sunshine! Aim for at least 6-8 hours of direct sunlight per day. The more sun, the bushier and more flavorful your dill will be.
* Soil: Well-draining soil is key. Dill doesn’t like to sit in soggy conditions, which can lead to root rot. A slightly acidic to neutral pH (around 6.0-7.0) is ideal.
* Watering: Keep the soil consistently moist, but not waterlogged. Water deeply when the top inch of soil feels dry to the touch.
* Temperature: Dill prefers cooler temperatures, especially during germination. Hot weather can cause it to bolt (go to seed) prematurely, which can affect the flavor of the leaves.
* Fertilizer: Dill isn’t a heavy feeder, but a light feeding of a balanced fertilizer can help boost growth.
The Secret to Speed: Starting Indoors
The biggest trick to getting a fast dill harvest is to start your seeds indoors. This gives them a head start and protects them from harsh weather conditions, pests, and diseases.
* Timing is Everything: Start your seeds about 4-6 weeks before the last expected frost in your area. This will give them plenty of time to develop a strong root system before you transplant them outdoors.
* Choosing the Right Container: I prefer to use biodegradable pots or peat pellets for starting dill seeds. Dill doesn’t like to be transplanted, so using biodegradable pots minimizes root disturbance when you move them to the garden.
* Seed Starting Mix: Use a high-quality seed starting mix. This is a lightweight, sterile mix that’s specifically designed for germinating seeds.
* Light Source: If you don’t have a sunny windowsill, you’ll need to use a grow light. Place the light a few inches above the seedlings and keep it on for 14-16 hours per day.
Step-by-Step Instructions: Starting Dill Indoors
Okay, let’s get our hands dirty! Here’s my step-by-step guide to starting dill seeds indoors:
1. Prepare Your Containers: Fill your biodegradable pots or peat pellets with seed starting mix. Moisten the mix thoroughly with water, allowing any excess water to drain away.
2. Sow the Seeds: Dill seeds are small, so you only need to sow a few seeds per pot. I usually plant 2-3 seeds per pot, about ¼ inch deep.
3. Cover and Mist: Gently cover the seeds with a thin layer of seed starting mix. Mist the surface with water to keep it moist.
4. Create a Humid Environment: Cover the pots with a clear plastic dome or plastic wrap to create a humid environment. This will help the seeds germinate.
5. Place in a Warm Location: Place the pots in a warm location, such as on top of a refrigerator or near a heat vent. The ideal temperature for germination is around 70-75°F (21-24°C).
6. Monitor Germination: Check the pots daily for signs of germination. Dill seeds typically germinate in 7-14 days.
7. Remove the Cover: Once the seeds have germinated, remove the plastic dome or plastic wrap.
8. Provide Light: Place the seedlings under a grow light or in a sunny windowsill.
9. Water Regularly: Water the seedlings regularly, keeping the soil consistently moist but not waterlogged.
10. Thin the Seedlings: Once the seedlings have developed a few sets of true leaves, thin them to one plant per pot. Snip off the weaker seedlings at the soil line.
11. Fertilize Lightly: Start fertilizing the seedlings with a diluted liquid fertilizer every 2-3 weeks.
Hardening Off Your Seedlings
Before you transplant your dill seedlings outdoors, you need to harden them off. This process gradually acclimates them to the outdoor environment, preventing transplant shock.
* What is Hardening Off?: Hardening off involves gradually exposing your seedlings to outdoor conditions like sunlight, wind, and temperature fluctuations.
* The Hardening Off Process: Start by placing your seedlings outdoors in a sheltered location for just an hour or two each day. Gradually increase the amount of time they spend outdoors each day, over the course of a week or two.
* Protect from Extreme Conditions: Protect your seedlings from strong winds, direct sunlight, and frost during the hardening off process.
Transplanting Dill Outdoors
Now for the exciting part – transplanting your dill seedlings into the garden!
* Choosing the Right Location: Select a sunny location with well-draining soil.
* Preparing the Soil: Amend the soil with compost or other organic matter to improve drainage and fertility.
* Transplanting Time: Transplant your dill seedlings on a cloudy day or in the late afternoon to minimize stress.
* Spacing: Space the seedlings about 12-18 inches apart.
* Gentle Handling: Gently remove the seedlings from their biodegradable pots and plant them in the prepared soil. If using peat pellets, make sure to thoroughly soak them before planting.
* Water Thoroughly: Water the seedlings thoroughly after transplanting.
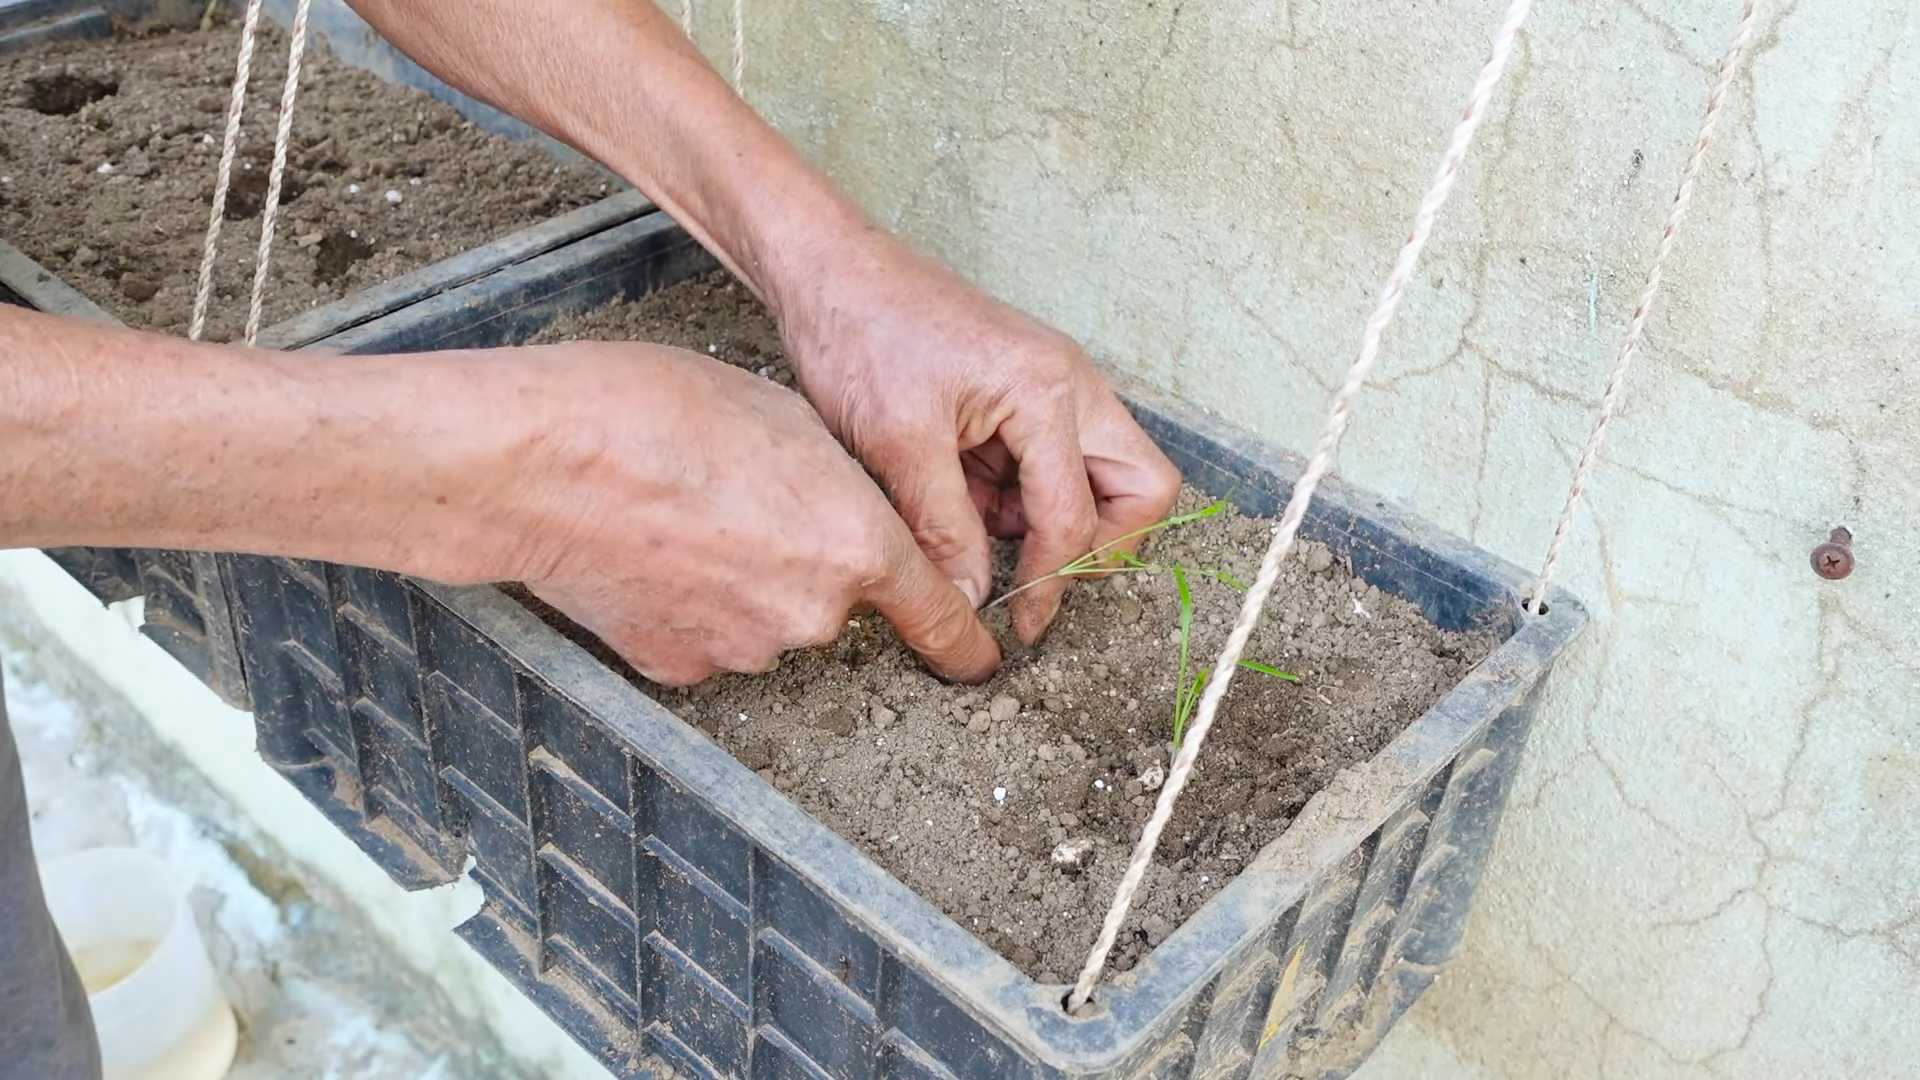
Step-by-Step Instructions: Transplanting Dill Outdoors
Here’s how I transplant my dill seedlings for the best results:
1. Dig the Holes: Dig holes that are slightly larger than the biodegradable pots or peat pellets.
2. Remove the Seedlings: Gently remove the seedlings from their pots. If using peat pellets, make sure they are thoroughly soaked.
3. Plant the Seedlings: Place the seedlings in the holes, making sure the top of the root ball is level with the surrounding soil.
4. Backfill with Soil: Backfill the holes with soil, gently firming it around the seedlings.
5. Water Thoroughly: Water the seedlings thoroughly after transplanting.
6. Mulch: Apply a layer of mulch around the seedlings to help retain moisture and suppress weeds.
Ongoing Care for a Bountiful Harvest
Once your dill is transplanted, it’s important to provide ongoing care to ensure a bountiful harvest.
* Watering: Water deeply when the top inch of soil feels dry to the touch.
* Fertilizing: Fertilize lightly with a balanced fertilizer every 4-6 weeks.
* Weeding: Keep the area around your dill plants free of weeds.
* Pest Control: Monitor your dill plants for pests, such as aphids and spider mites. Treat infestations promptly with insecticidal soap or neem oil.
* Bolting Prevention: To prevent bolting, keep the soil consistently moist and provide some shade during the hottest part of the day. You can also pinch off any flower buds that appear.
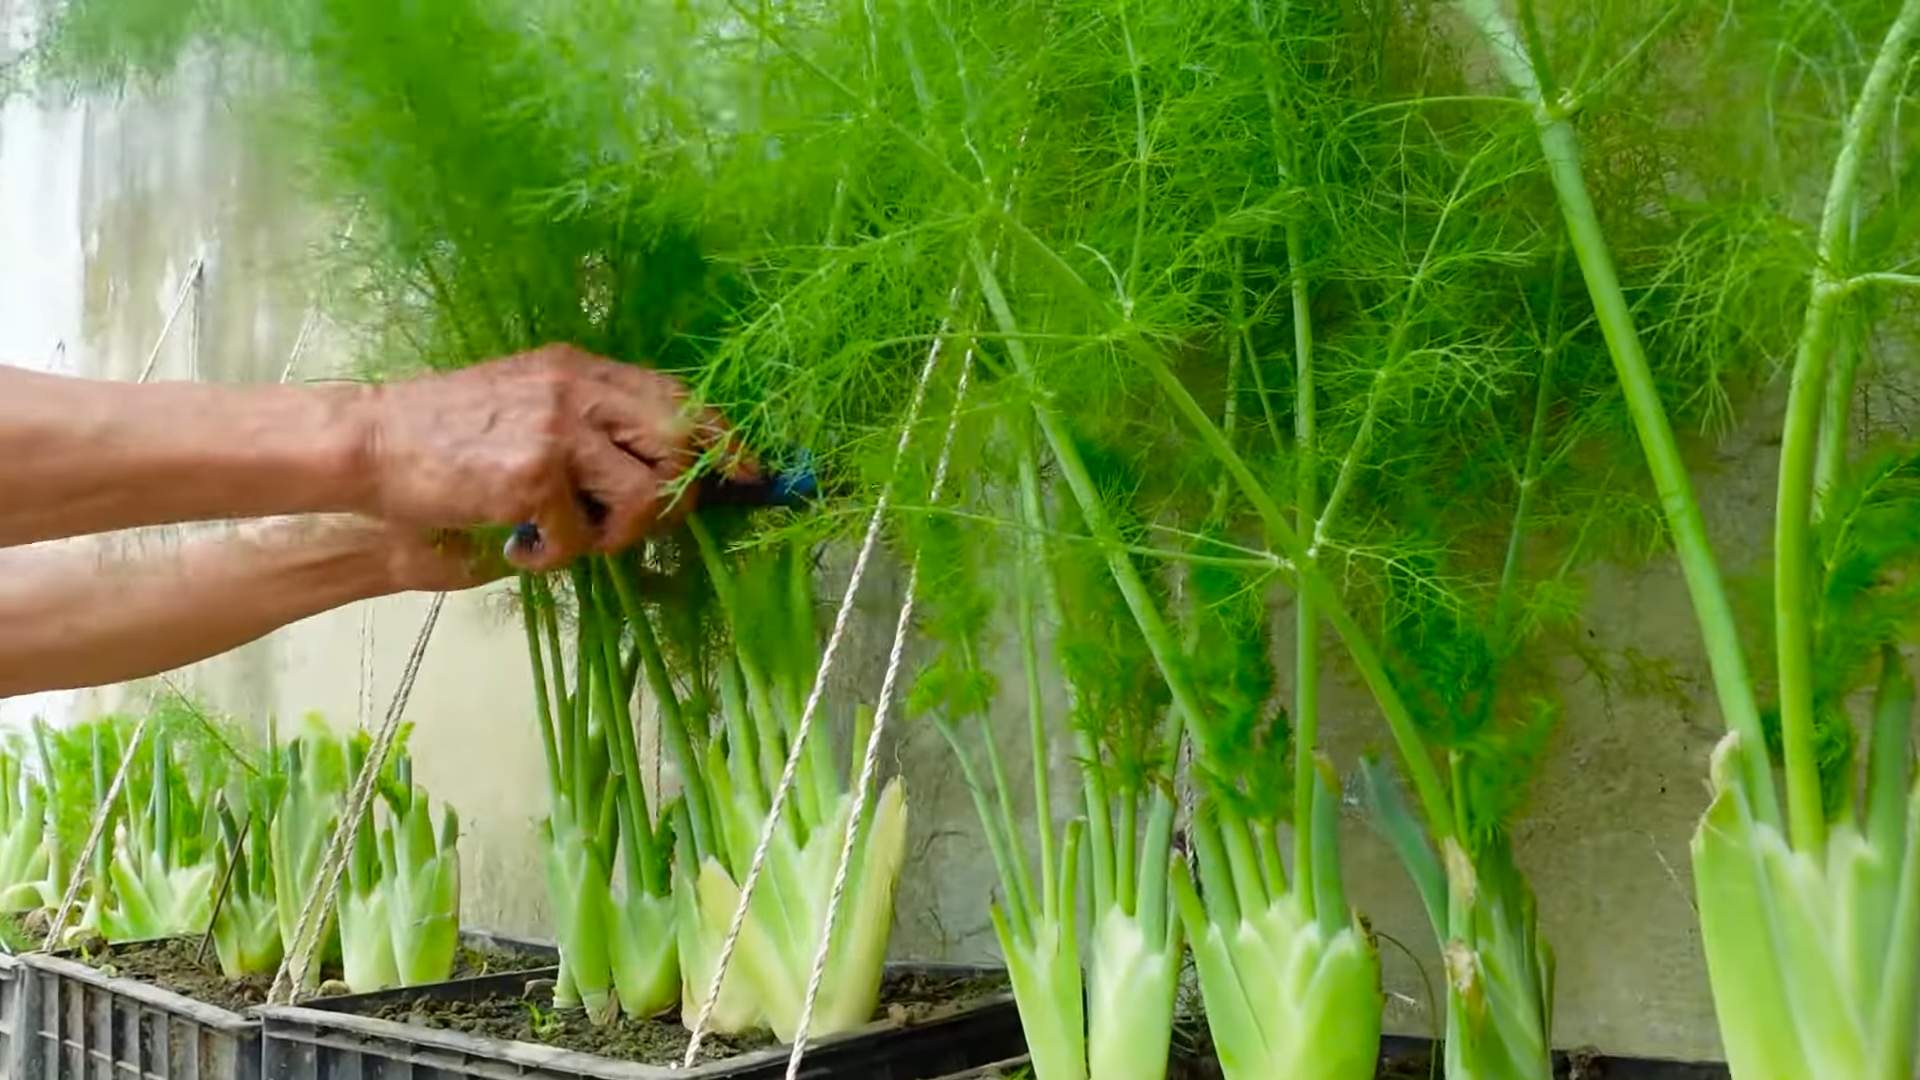
Harvesting Your Dill
The best part! You can start harvesting dill leaves as soon as the plants are about 6-8 inches tall.
* Harvesting Technique: Snip off the leaves with scissors or pruning shears.
* Regular Harvesting: Regular harvesting will encourage the plants to produce more leaves.
* Harvesting Seeds: If you want to harvest dill seeds, allow some of the plants to flower and go to seed. Once the seed heads have dried, you can harvest the seeds.
Troubleshooting Common Dill Problems
Even with the best care, you might encounter some problems with your dill plants. Here are some common issues and how to fix them:
* Yellowing Leaves: Yellowing leaves can be caused by overwatering, underwatering, nutrient deficiencies, or pests. Adjust your watering schedule, fertilize as needed, and inspect the plants for pests.
* Bolting: Bolting is when the plant prematurely goes to seed. This can be caused by hot weather, dry soil, or stress. Keep the soil consistently moist, provide some shade, and pinch off any flower buds that appear.
* Pests: Dill can be susceptible to pests such as aphids and spider mites. Treat infestations promptly with insecticidal soap or neem oil.
* Root Rot: Root rot is caused by overwatering and poor drainage. Make sure the soil is well-draining
Conclusion
So, there you have it! Mastering the art of growing dill for fast harvest is not only achievable but also incredibly rewarding. We’ve walked through the key steps, from selecting the right dill variety and preparing the soil to implementing strategic sowing techniques and providing optimal care. This isn’t just about having fresh dill on hand; it’s about connecting with nature, understanding the growth cycle of a plant, and experiencing the satisfaction of nurturing something from seed to harvest.
Why is this DIY trick a must-try? Because it empowers you to bypass the often-disappointing experience of buying wilted, flavorless dill from the grocery store. Imagine the vibrant aroma of freshly cut dill enhancing your favorite dishes – from creamy dips and tangy pickles to flavorful fish and hearty stews. The difference in taste and quality is simply undeniable. Plus, growing your own dill is a sustainable and cost-effective way to enjoy this versatile herb.
But the journey doesn’t end here! Feel free to experiment with different dill varieties to discover your personal favorite. Try succession planting, sowing new seeds every few weeks, to ensure a continuous supply of fresh dill throughout the growing season. Consider companion planting dill with vegetables like cucumbers, tomatoes, and lettuce, as it can help deter pests and improve their growth. You can even explore different methods of preserving your dill harvest, such as drying, freezing, or making dill-infused vinegar or oil.
We’ve focused on techniques to accelerate growth, but remember that patience is also key. While these methods will significantly speed up the process, dill still needs time to mature. Observe your plants closely, adjust your watering and fertilizing as needed, and don’t be afraid to experiment.
Now, it’s your turn to put these tips into practice! We encourage you to embark on your own dill-growing adventure and experience the joy of harvesting fresh, flavorful dill from your own garden. Don’t be discouraged if your first attempt isn’t perfect. Gardening is a learning process, and every mistake is an opportunity to grow (pun intended!).
Most importantly, we want to hear about your experiences! Share your successes, challenges, and any variations you try in the comments below. Let’s create a community of dill enthusiasts who can learn from each other and inspire others to embrace the rewarding world of home gardening. Did you find a particular variety that thrives in your climate? Did you discover a unique way to use your fresh dill? We’re eager to hear all about it! So, grab your seeds, get your hands dirty, and start growing dill for fast harvest today! You’ll be amazed at the difference it makes in your cooking and your connection to the natural world.
Frequently Asked Questions (FAQ)
What is the best time of year to plant dill for a fast harvest?
The ideal time to plant dill for a fast harvest is in the spring, after the last frost. Dill thrives in cooler temperatures, so planting it early in the season allows it to establish itself before the summer heat arrives. You can also plant dill in the late summer or early fall for a fall harvest, especially in regions with mild winters. However, for the quickest results, spring planting is generally recommended. Consider your local climate and average frost dates when determining the best time to sow your dill seeds.
How much sunlight does dill need to grow quickly?
Dill requires at least 6 hours of direct sunlight per day to grow quickly and produce abundant foliage. Choose a planting location that receives full sun throughout the day. If you live in a particularly hot climate, some afternoon shade may be beneficial to prevent the plants from scorching. Insufficient sunlight can lead to leggy, weak growth and a slower harvest.
What type of soil is best for growing dill for a fast harvest?
Dill prefers well-drained, fertile soil with a slightly acidic to neutral pH (6.0-7.0). Amend your soil with compost or other organic matter to improve its drainage and fertility. Avoid heavy clay soils, as they can become waterlogged and hinder dill’s growth. A well-draining soil allows the roots to access oxygen and nutrients efficiently, promoting faster growth and a more abundant harvest.
How often should I water dill to encourage fast growth?
Dill needs consistent moisture to thrive, but it’s important to avoid overwatering. Water deeply when the top inch of soil feels dry to the touch. During hot, dry weather, you may need to water more frequently. Overwatering can lead to root rot, which can stunt growth and even kill the plant. Use a watering can or a hose with a gentle spray nozzle to avoid damaging the delicate foliage.
What fertilizer should I use to promote fast dill growth?
A balanced fertilizer with equal amounts of nitrogen, phosphorus, and potassium (e.g., 10-10-10) can be used to promote fast dill growth. Apply the fertilizer according to the package instructions, being careful not to over-fertilize, as this can burn the plants. Alternatively, you can use a liquid seaweed fertilizer or compost tea to provide a gentle boost of nutrients. Avoid fertilizers that are high in nitrogen, as they can encourage excessive foliage growth at the expense of flavor.
How can I prevent pests and diseases from affecting my dill plants?
Dill is generally resistant to pests and diseases, but it can be susceptible to aphids, spider mites, and fungal diseases like powdery mildew. To prevent these problems, ensure good air circulation around your plants, avoid overwatering, and inspect your plants regularly for signs of infestation or disease. If you spot pests, you can try spraying them with insecticidal soap or neem oil. For fungal diseases, you can apply a fungicide or remove affected leaves. Companion planting dill with other herbs like basil or rosemary can also help deter pests.
When is the best time to harvest dill for the best flavor?
The best time to harvest dill for the best flavor is when the leaves are young and tender, before the plant begins to flower. Once the plant flowers, the leaves can become bitter and less flavorful. You can harvest dill leaves by snipping them off with scissors or pruning shears. For a continuous supply of fresh dill, harvest regularly, encouraging the plant to produce new growth.
Can I grow dill indoors for a fast harvest?
Yes, you can grow dill indoors, but it requires sufficient sunlight and proper care. Place your dill plant in a sunny window that receives at least 6 hours of direct sunlight per day. You may also need to supplement with artificial grow lights. Use a well-draining potting mix and water regularly, allowing the soil to dry slightly between waterings. Indoor-grown dill may not grow as quickly or as abundantly as outdoor-grown dill, but it can still provide a fresh supply of herbs throughout the year.
How do I save dill seeds for future planting?
To save dill seeds, allow the flower heads to dry completely on the plant. Once the flower heads are dry and brown, cut them off and place them in a paper bag. Shake the bag to release the seeds. Separate the seeds from the chaff by sifting them through a fine-mesh sieve. Store the seeds in an airtight container in a cool, dark, and dry place. Dill seeds can remain viable for several years if stored properly.
What are some creative ways to use my fast-harvested dill?
The possibilities are endless! Fresh dill can be used to flavor a wide variety of dishes, including dips, sauces, salads, soups, stews, and pickles. It pairs particularly well with fish, seafood, eggs, and potatoes. You can also use dill to make dill-infused vinegar or oil, or to create a flavorful dill butter. Experiment with different recipes and discover your favorite ways to use your fast-harvested dill. Don’t be afraid to get creative and add a touch of fresh dill to unexpected dishes!
Leave a Comment