
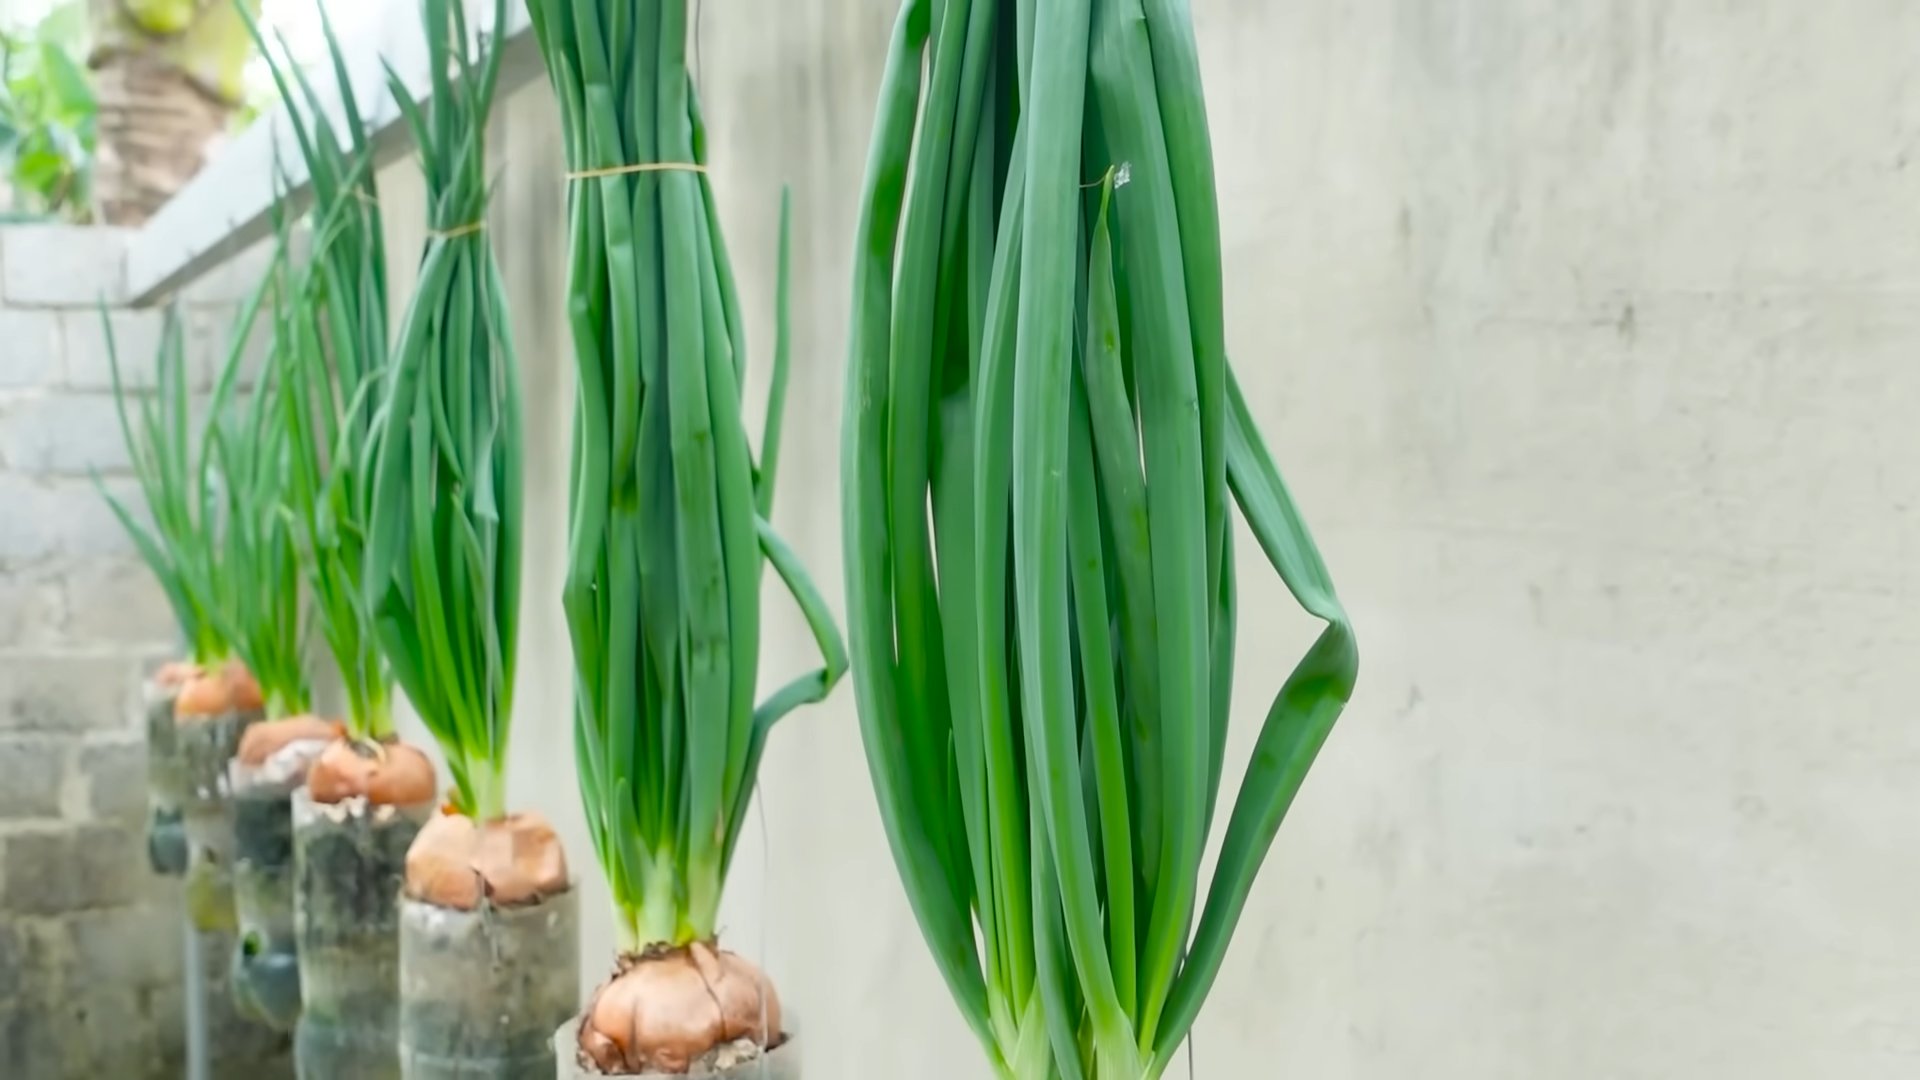
Onion growing plastic bottles – sounds a little unconventional, right? But trust me, this simple DIY trick can revolutionize your home garden and bring you a bountiful harvest of delicious onions! Forget struggling with limited space or battling pesky weeds; this method is a game-changer.
For centuries, humans have cultivated onions, dating back to ancient Egypt where they were even revered as symbols of eternity. Now, we’re taking this age-old practice and giving it a modern, eco-friendly twist. We’re not just growing onions; we’re repurposing plastic waste and creating a sustainable food source right in our backyards (or balconies!).
Why should you embrace this onion growing plastic bottles hack? Well, imagine having fresh, organic onions readily available whenever you need them. No more last-minute grocery store runs or settling for subpar produce. Plus, this method is incredibly space-efficient, making it perfect for apartment dwellers or anyone with limited gardening space. It’s also a fantastic way to teach kids about sustainability and the joy of growing their own food. I’m excited to share this easy and effective method with you, so let’s get started and transform those plastic bottles into mini onion farms!
Grow Onions in Plastic Bottles: A DIY Guide
Hey there, fellow gardening enthusiasts! Ever thought about growing onions in plastic bottles? It’s a fantastic way to recycle, save space, and enjoy fresh onions right from your windowsill or balcony. I’ve been doing this for a while now, and I’m excited to share my step-by-step guide with you. It’s easier than you think!
What You’ll Need
Before we dive in, let’s gather our supplies. This is what I usually have on hand:
* Plastic Bottles: The bigger, the better! Think 2-liter soda bottles, juice containers, or even larger water bottles. Make sure they’re clean.
* Onion Sets or Seedlings: You can use onion sets (small, immature onions) for a quicker harvest, or start from seeds if you’re patient. I prefer sets because they’re easier to handle.
* Potting Soil: A good quality potting mix is crucial for healthy onion growth.
* Scissors or a Utility Knife: For cutting the plastic bottles. Be careful!
* Drill or Nail: To create drainage holes.
* Watering Can or Spray Bottle: For watering your onions.
* Optional:
* Gravel or small stones for drainage.
* Fertilizer (onion-specific or balanced) for extra nutrients.
* Labels to mark the onion variety.
Preparing the Plastic Bottles
This is where we transform those discarded bottles into mini onion farms!
1. Clean the Bottles: Wash the plastic bottles thoroughly with soap and water to remove any residue. Rinse them well and let them dry completely. This prevents mold and bacteria from harming your onions.
2. Cut the Bottles: There are a couple of ways to do this, depending on the size of your bottle and how many onions you want to grow in each.
* Option 1 (Horizontal Cut): For larger bottles, you can cut them horizontally, creating two separate containers. I usually cut about one-third of the way down from the top. The top part can be inverted and used as a funnel for watering or as a mini-greenhouse cover when the seedlings are very young.
* Option 2 (Vertical Cut): For smaller bottles, you can cut them vertically, creating a trough-like container. This is great for growing a row of onions. Just be sure to leave enough of the bottle intact to provide stability.
* Option 3 (Stacking Method): Cut the bottom off several bottles. Then, cut the top off all but one bottle. Stack the bottles inside each other, creating a tiered planter. This is a great space-saving option!
3. Create Drainage Holes: Drainage is essential to prevent root rot. Use a drill or a nail (heated carefully with a lighter or stove) to create several drainage holes in the bottom of each bottle. I usually make about 4-5 holes, depending on the size of the container.
4. Add Drainage Layer (Optional): To further improve drainage, you can add a layer of gravel or small stones to the bottom of each bottle before adding the potting soil. This helps prevent the soil from becoming waterlogged.
Planting the Onions
Now for the fun part – planting those onions!
1. Fill with Potting Soil: Fill the prepared plastic bottles with potting soil, leaving about an inch of space at the top. Gently press down on the soil to remove any air pockets.
2. Plant the Onion Sets or Seedlings:
* Onion Sets: Make small holes in the soil, about 1-2 inches deep, and space them about 2-3 inches apart. Place the onion sets in the holes, root-side down, and cover them with soil. Only the very tip of the onion set should be visible above the soil.
* Onion Seedlings: Carefully remove the seedlings from their container and gently loosen the roots. Make small holes in the soil, large enough to accommodate the roots. Plant the seedlings at the same depth they were growing in their original container. Space them about 2-3 inches apart.
3. Water Thoroughly: After planting, water the onions thoroughly until the soil is evenly moist. Be careful not to overwater, as this can lead to root rot.
4. Label (Optional): If you’re growing different varieties of onions, label each bottle with the onion type and planting date. This will help you keep track of your progress.
Caring for Your Onions
Proper care is key to a successful onion harvest. Here’s what I do to keep my onions happy and healthy:
1. Sunlight: Onions need plenty of sunlight, at least 6-8 hours per day. Place your plastic bottle planters in a sunny location, such as a windowsill, balcony, or patio. If you don’t have enough natural light, you can supplement with grow lights.
2. Watering: Water your onions regularly, especially during dry periods. The soil should be consistently moist, but not waterlogged. Check the soil moisture by sticking your finger into the soil. If the top inch feels dry, it’s time to water.
3. Fertilizing: Onions are heavy feeders, so they benefit from regular fertilization. Use an onion-specific fertilizer or a balanced fertilizer (e.g., 10-10-10) every 2-3 weeks. Follow the instructions on the fertilizer package. You can also use organic fertilizers, such as compost tea or fish emulsion.
4. Weeding: Keep the plastic bottle planters free of weeds. Weeds compete with the onions for nutrients and water. Hand-pull any weeds that appear.
5. Pest and Disease Control: Keep an eye out for pests and diseases. Common onion pests include onion maggots, thrips, and aphids. Common diseases include onion rot and downy mildew. If you notice any problems, take action immediately. You can use organic pest control methods, such as insecticidal soap or neem oil. For diseases, ensure good air circulation and avoid overwatering.
6. Support (Optional): As the onions grow taller, they may need support to prevent them from falling over. You can use small stakes or trellises to provide support.
Harvesting Your Onions
The moment we’ve all been waiting for!
1. Harvest Time: Onions are typically ready to harvest when the tops start to turn yellow and fall over. This usually takes about 90-120 days from planting onion sets, or longer if you started from seeds.
2. Harvesting: Gently pull the onions from the soil. If the soil is dry, you may need to loosen it with a trowel first.
3. Curing: After harvesting, cure the onions by laying them out in a warm, dry, well-ventilated place for about 1-2 weeks. This allows the outer layers to dry and toughen, which helps prevent spoilage.
4. Storing: Store the cured onions in a cool, dry, dark place. You can braid the tops together and hang them, or store them in mesh bags or crates. Properly stored onions can last for several months.
Troubleshooting
Sometimes things don’t go exactly as planned. Here are some common problems and how to fix them:
* Yellowing Leaves: This could be a sign of overwatering, underwatering, nutrient deficiency, or pest infestation. Check the soil moisture, fertilize if necessary, and inspect for pests.
* Slow Growth: This could be due to lack of sunlight, poor soil, or nutrient deficiency. Move the plants to a sunnier location, amend the soil with compost, and fertilize regularly.
* Root Rot: This is caused by overwatering and poor drainage. Ensure good drainage by adding gravel to the bottom of the containers and avoid overwatering.
* Pest Infestation: Treat with organic pest control methods, such as insecticidal soap or neem oil.
Extra Tips and Tricks
* Succession Planting: Plant new onion sets every few weeks to ensure a continuous harvest.
* Companion Planting: Plant onions with other vegetables, such as carrots, tomatoes, and lettuce. These plants can help deter pests and improve growth.
* Recycle More: Use other recycled materials, such as yogurt containers or milk cartons, to start onion seedlings.
* Get Creative: Decorate your plastic bottle planters with paint, markers, or stickers to add a personal touch.
Growing onions in plastic bottles is a rewarding and sustainable way to enjoy fresh produce. I hope this guide has inspired you to give it a try. Happy gardening!

Conclusion
So, there you have it! Transforming discarded plastic bottles into miniature onion-growing powerhouses is not just a clever upcycling project; it’s a sustainable and surprisingly effective way to cultivate fresh onions right at home, even if you’re short on space or gardening experience. This DIY trick offers a multitude of benefits, from reducing waste and saving money to enjoying the unparalleled flavor of homegrown produce.
Why is this a must-try? Because it’s accessible, affordable, and yields tangible results. Imagine the satisfaction of snipping fresh chives or scallions grown from your own recycled materials. Think of the money you’ll save on grocery bills, and the positive impact you’ll have on the environment by diverting plastic from landfills. This method is particularly appealing for apartment dwellers, urban gardeners, or anyone looking to maximize their growing potential in limited spaces.
But the beauty of this DIY onion growing method lies in its adaptability. Feel free to experiment with different types of onions. Shallots, scallions, and even garlic cloves can be grown using this technique. Consider using different types of soil mixes to see which yields the best results in your specific climate. You can also get creative with the bottle design, painting them, adding drainage holes in different locations, or even creating a vertical garden by stacking multiple bottles.
Don’t be afraid to tweak the process to suit your needs and preferences. Perhaps you’ll discover a unique variation that enhances growth or simplifies the process even further. The possibilities are endless!
We wholeheartedly encourage you to give this DIY onion growing project a try. It’s a rewarding experience that connects you to the food you eat and empowers you to live more sustainably. Once you’ve harvested your first batch of homegrown onions, we’d love to hear about your experience! Share your photos, tips, and variations in the comments below. Let’s build a community of resourceful gardeners who are passionate about growing their own food and reducing their environmental footprint. Your insights could inspire others to embark on their own onion-growing adventures. Happy gardening!
Frequently Asked Questions
What type of plastic bottles are best for growing onions?
Ideally, you should use sturdy, food-grade plastic bottles. Two-liter soda bottles or larger water bottles work well. Avoid bottles that have contained harsh chemicals or cleaning products, as these could contaminate the soil and affect the onions. Make sure to thoroughly clean the bottles with soap and water before using them. The clearer the plastic, the better light penetration you’ll get to the soil, but even colored bottles can work effectively.
What kind of soil should I use for growing onions in plastic bottles?
A well-draining potting mix is essential. You can use a commercially available potting mix or create your own by combining equal parts of garden soil, compost, and perlite or vermiculite. The compost provides nutrients, while the perlite or vermiculite improves drainage and aeration. Good drainage is crucial to prevent root rot, which can be a common problem when growing onions in containers.
How often should I water my onions grown in plastic bottles?
Watering frequency depends on the climate, the type of soil, and the size of the bottle. Generally, you should water when the top inch of soil feels dry to the touch. Avoid overwatering, as this can lead to root rot. Ensure that the bottle has adequate drainage holes to allow excess water to escape. During hot, dry weather, you may need to water more frequently. A good rule of thumb is to check the soil moisture daily and water as needed.
Where should I place my plastic bottle onion garden?
Onions need plenty of sunlight, so choose a location that receives at least 6-8 hours of direct sunlight per day. A south-facing window or a sunny balcony is ideal. If you don’t have enough natural light, you can supplement with grow lights. Rotate the bottles regularly to ensure that all sides of the plants receive equal sunlight. This will help prevent them from becoming leggy and weak.
How long does it take to grow onions in plastic bottles?
The time it takes to grow onions depends on the variety and the growing conditions. Scallions and chives can be harvested in as little as 30-60 days, while bulb onions may take several months to mature. Regularly check the plants for signs of maturity, such as yellowing leaves or a swelling bulb. You can harvest scallions and chives as needed by snipping off the green tops. For bulb onions, wait until the tops have fallen over and dried out before harvesting.
Can I grow onions from seed in plastic bottles?
Yes, you can grow onions from seed in plastic bottles. Start the seeds indoors 6-8 weeks before the last expected frost. Sow the seeds thinly in the prepared soil mix and keep them moist. Once the seedlings have developed a few true leaves, you can transplant them into individual plastic bottles. Be sure to harden off the seedlings before transplanting them outdoors.
What are some common problems when growing onions in plastic bottles and how can I prevent them?
Some common problems include root rot, pests, and nutrient deficiencies. Root rot can be prevented by using well-draining soil and avoiding overwatering. Pests, such as aphids and onion maggots, can be controlled with insecticidal soap or neem oil. Nutrient deficiencies can be addressed by fertilizing the plants with a balanced fertilizer every few weeks. Regularly inspect the plants for signs of problems and take action promptly to prevent them from spreading.
Can I grow different types of onions in the same plastic bottle?
While technically possible, it’s generally not recommended to grow different types of onions in the same plastic bottle. Different varieties may have different growth rates and nutrient requirements, which can lead to competition and uneven growth. It’s best to grow each variety in its own separate container.
How do I fertilize my onions growing in plastic bottles?
Onions are heavy feeders and require regular fertilization. Use a balanced fertilizer with a ratio of 10-10-10 or 20-20-20. Apply the fertilizer according to the package instructions, typically every 2-3 weeks. You can also use organic fertilizers, such as compost tea or fish emulsion. Be careful not to over-fertilize, as this can burn the roots.
What do I do with the plastic bottles after I harvest the onions?
After harvesting the onions, you can reuse the plastic bottles for another planting season. Simply clean them thoroughly and refill them with fresh soil. If the bottles are damaged or worn out, you can recycle them or repurpose them for other gardening projects. Consider using them to start seeds, propagate cuttings, or create a miniature greenhouse. The possibilities are endless!
Leave a Comment