
Growing tomatoes at home can feel like a daunting task, right? I get it! You dream of juicy, sun-ripened tomatoes bursting with flavor, but the reality can sometimes be… well, less than ideal. Maybe you’ve battled blossom end rot, or perhaps your plants are just refusing to produce those beautiful red fruits. But don’t worry, I’m here to tell you that with a few clever DIY tricks and hacks, you can absolutely transform your backyard into a tomato-growing paradise!
For centuries, tomatoes have held a special place in cultures around the world. Originating in South America, they were initially viewed with suspicion in Europe, but eventually, their vibrant color and delicious taste won everyone over. Now, they’re a staple in countless cuisines, from Italian pasta sauces to refreshing summer salads. And let’s be honest, nothing beats the taste of a homegrown tomato, picked fresh from your own garden.
That’s why I’m so excited to share these simple yet effective DIY solutions with you. Whether you’re a seasoned gardener or just starting out, these tips will help you overcome common challenges and maximize your tomato harvest. Imagine enjoying the satisfaction of serving your family meals made with tomatoes you nurtured from seed to table. It’s not just about the food; it’s about connecting with nature, saving money, and knowing exactly what’s going into your meals. So, let’s dive in and unlock the secrets to successfully growing tomatoes at home!
Growing Tomatoes Like a Pro: My Foolproof DIY Guide
Hey there, fellow gardening enthusiasts! I’m so excited to share my tried-and-true method for growing juicy, delicious tomatoes right in your own backyard (or even on your balcony!). Forget those bland, store-bought tomatoes – we’re talking about homegrown goodness bursting with flavor. This guide is packed with everything I’ve learned over the years, from choosing the right variety to troubleshooting common problems. Let’s get our hands dirty!
Choosing the Right Tomato Variety
Before we even think about planting, let’s talk tomatoes! There are literally hundreds of varieties, and picking the right one for your space and climate is crucial. Here’s a quick rundown:
* Determinate vs. Indeterminate: This is the big one! Determinate tomatoes grow to a certain size and produce all their fruit at once, making them great for canning. Indeterminate tomatoes keep growing and producing fruit throughout the season, giving you a continuous harvest. I personally prefer indeterminate for fresh eating.
* Size Matters: Do you want tiny cherry tomatoes, medium-sized slicers, or giant beefsteaks? Consider how you plan to use your tomatoes.
* Disease Resistance: Look for varieties labeled with letters like “V,” “F,” “N,” “T,” or “A.” These indicate resistance to common tomato diseases like Verticillium wilt, Fusarium wilt, Nematodes, Tobacco Mosaic Virus, and Alternaria. Trust me, disease resistance is your friend!
* Climate Considerations: If you live in a hot climate, choose heat-tolerant varieties. If you have a short growing season, opt for early-maturing types.
Some of my personal favorites include:
* ‘Sungold’ (Indeterminate Cherry): Incredibly sweet and addictive!
* ‘Early Girl’ (Determinate): A reliable early producer, perfect for short seasons.
* ‘Brandywine’ (Indeterminate Heirloom): Large, flavorful, and beautiful.
* ‘Roma’ (Determinate): Ideal for making sauces and pastes.
Getting Started: Seeds vs. Seedlings
You have two main options for starting your tomato plants: from seed or from seedlings (also called transplants).
* Starting from Seed: This gives you the widest variety selection and is generally cheaper. However, it requires more time and effort. You’ll need to start your seeds indoors about 6-8 weeks before the last expected frost.
* Buying Seedlings: This is the easier option, especially for beginners. You can find seedlings at most garden centers in the spring. Just make sure to choose healthy-looking plants with sturdy stems and no signs of disease.
I usually start some of my tomatoes from seed and buy a few seedlings to get a head start.
Step-by-Step Guide: Growing Tomatoes from Seed
If you’re feeling adventurous, let’s start those seeds!
1. Gather Your Supplies: You’ll need:
* Tomato seeds
* Seed starting mix (not regular potting soil!)
* Seed starting trays or small pots
* A spray bottle
* A heat mat (optional, but helpful)
* A grow light (optional, but highly recommended)
2. Sow the Seeds: Fill your seed starting trays or pots with seed starting mix. Moisten the mix with the spray bottle until it’s damp but not soggy. Sow 2-3 seeds per cell or pot, about ¼ inch deep. Gently cover the seeds with more mix.
3. Provide Warmth and Moisture: Place the trays or pots on a heat mat (if using) and cover them with a clear plastic dome or plastic wrap to create a humid environment. Keep the mix consistently moist by spraying it with water as needed.
4. Wait for Germination: Tomato seeds typically germinate in 5-10 days. Once the seedlings emerge, remove the plastic dome or wrap and place them under a grow light. If you don’t have a grow light, place them in a sunny window, but be aware that they may become leggy (tall and spindly).
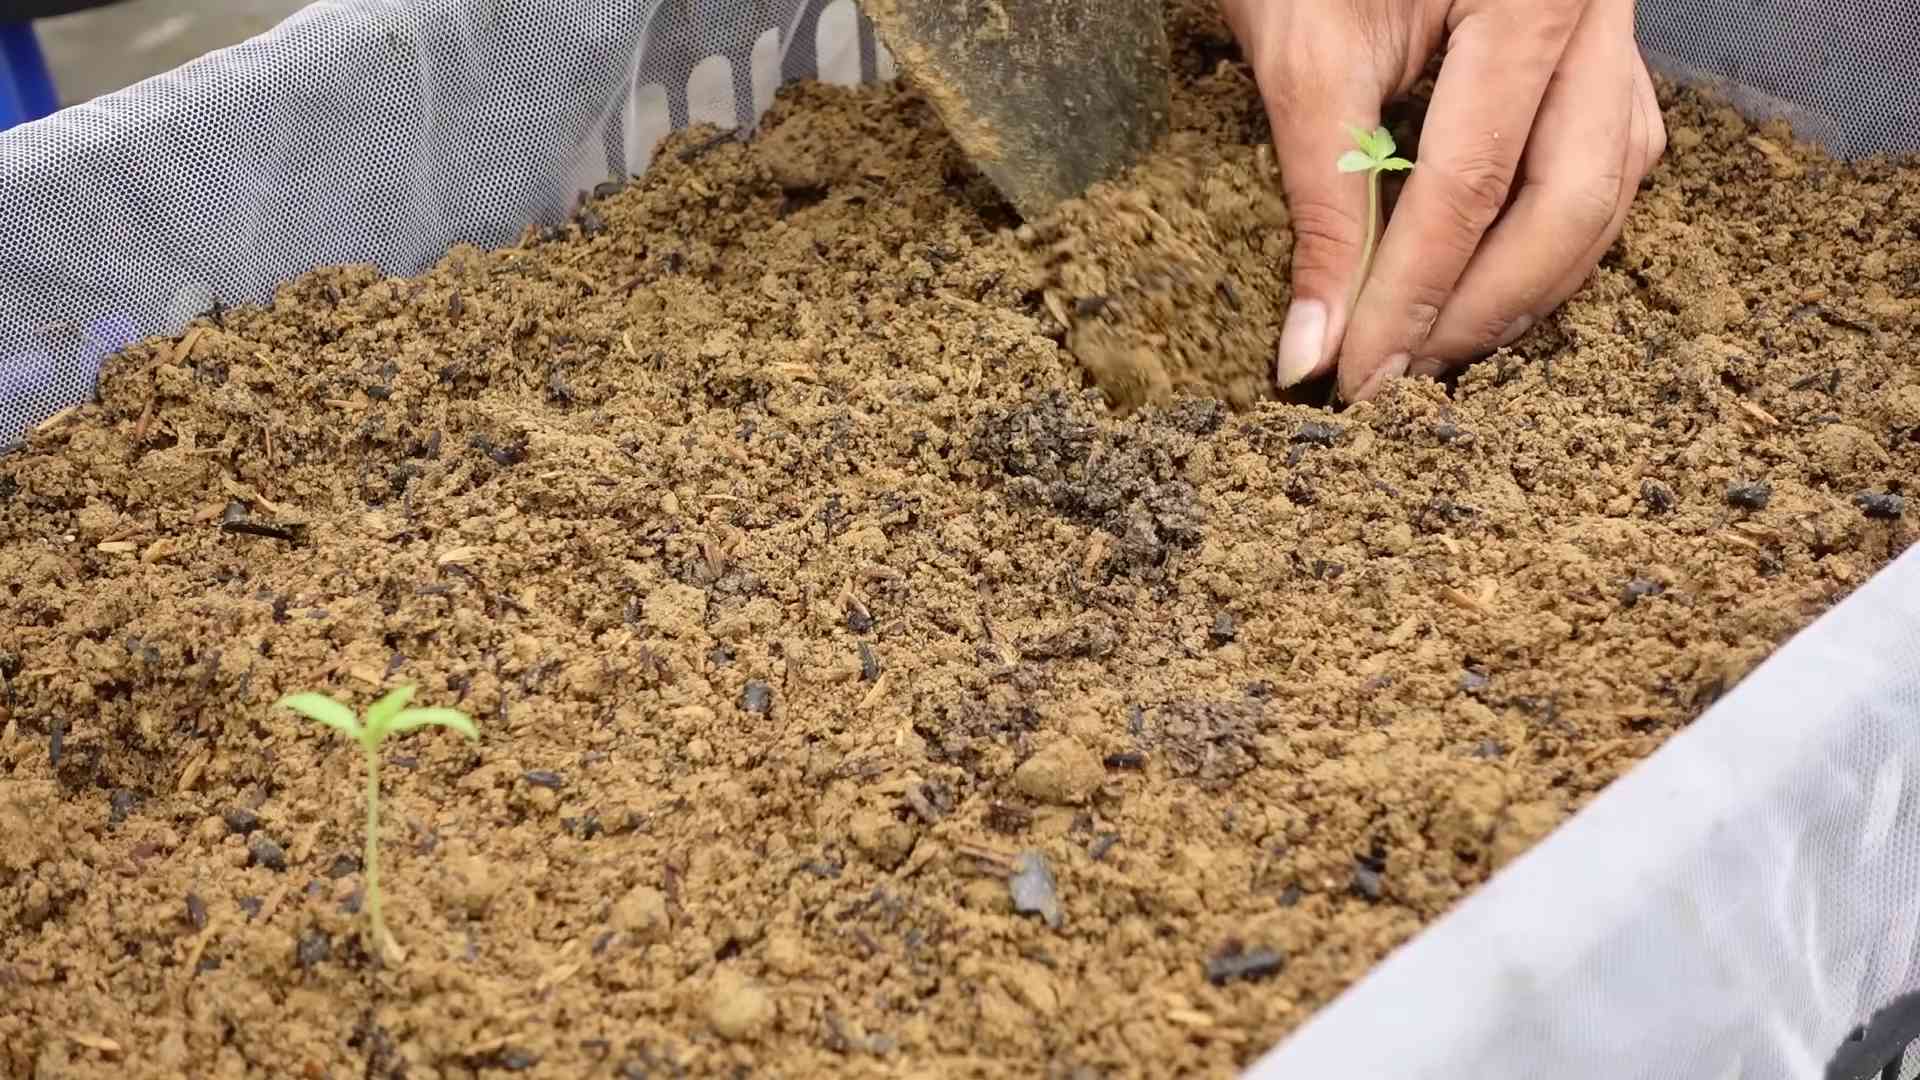
5. Thin the Seedlings: Once the seedlings have their first true leaves (the second set of leaves that appear after the initial seed leaves), thin them to one seedling per cell or pot. Choose the strongest-looking seedling and snip off the others at the soil line. Don’t pull them out, as this can disturb the roots of the remaining seedling.
6. Harden Off the Seedlings: Before transplanting your seedlings outdoors, you need to “harden them off.” This means gradually exposing them to outdoor conditions over a period of 7-10 days. Start by placing them in a sheltered spot outdoors for an hour or two each day, gradually increasing the amount of time they spend outside. This will help them adjust to the sun, wind, and temperature changes.
Step-by-Step Guide: Planting Tomato Seedlings
Whether you started your own seedlings or bought them from a garden center, the planting process is the same.
1. Choose a Sunny Location: Tomatoes need at least 6-8 hours of sunlight per day. Choose a spot in your garden that gets plenty of sun.
2. Prepare the Soil: Tomatoes prefer well-drained soil that is rich in organic matter. Amend your soil with compost or aged manure before planting. I like to add a handful of bone meal to each planting hole to provide phosphorus, which promotes root growth.
3. Dig the Holes: Dig holes that are deep enough to bury the bottom third of the tomato seedling’s stem. This may seem strange, but tomatoes can actually grow roots from their stems, which will result in a stronger, healthier plant.
4. Plant the Seedlings: Gently remove the seedlings from their pots. If the roots are pot-bound (tightly circling the pot), gently loosen them before planting. Place the seedlings in the holes and backfill with soil.
5. Water Thoroughly: Water the newly planted seedlings thoroughly.
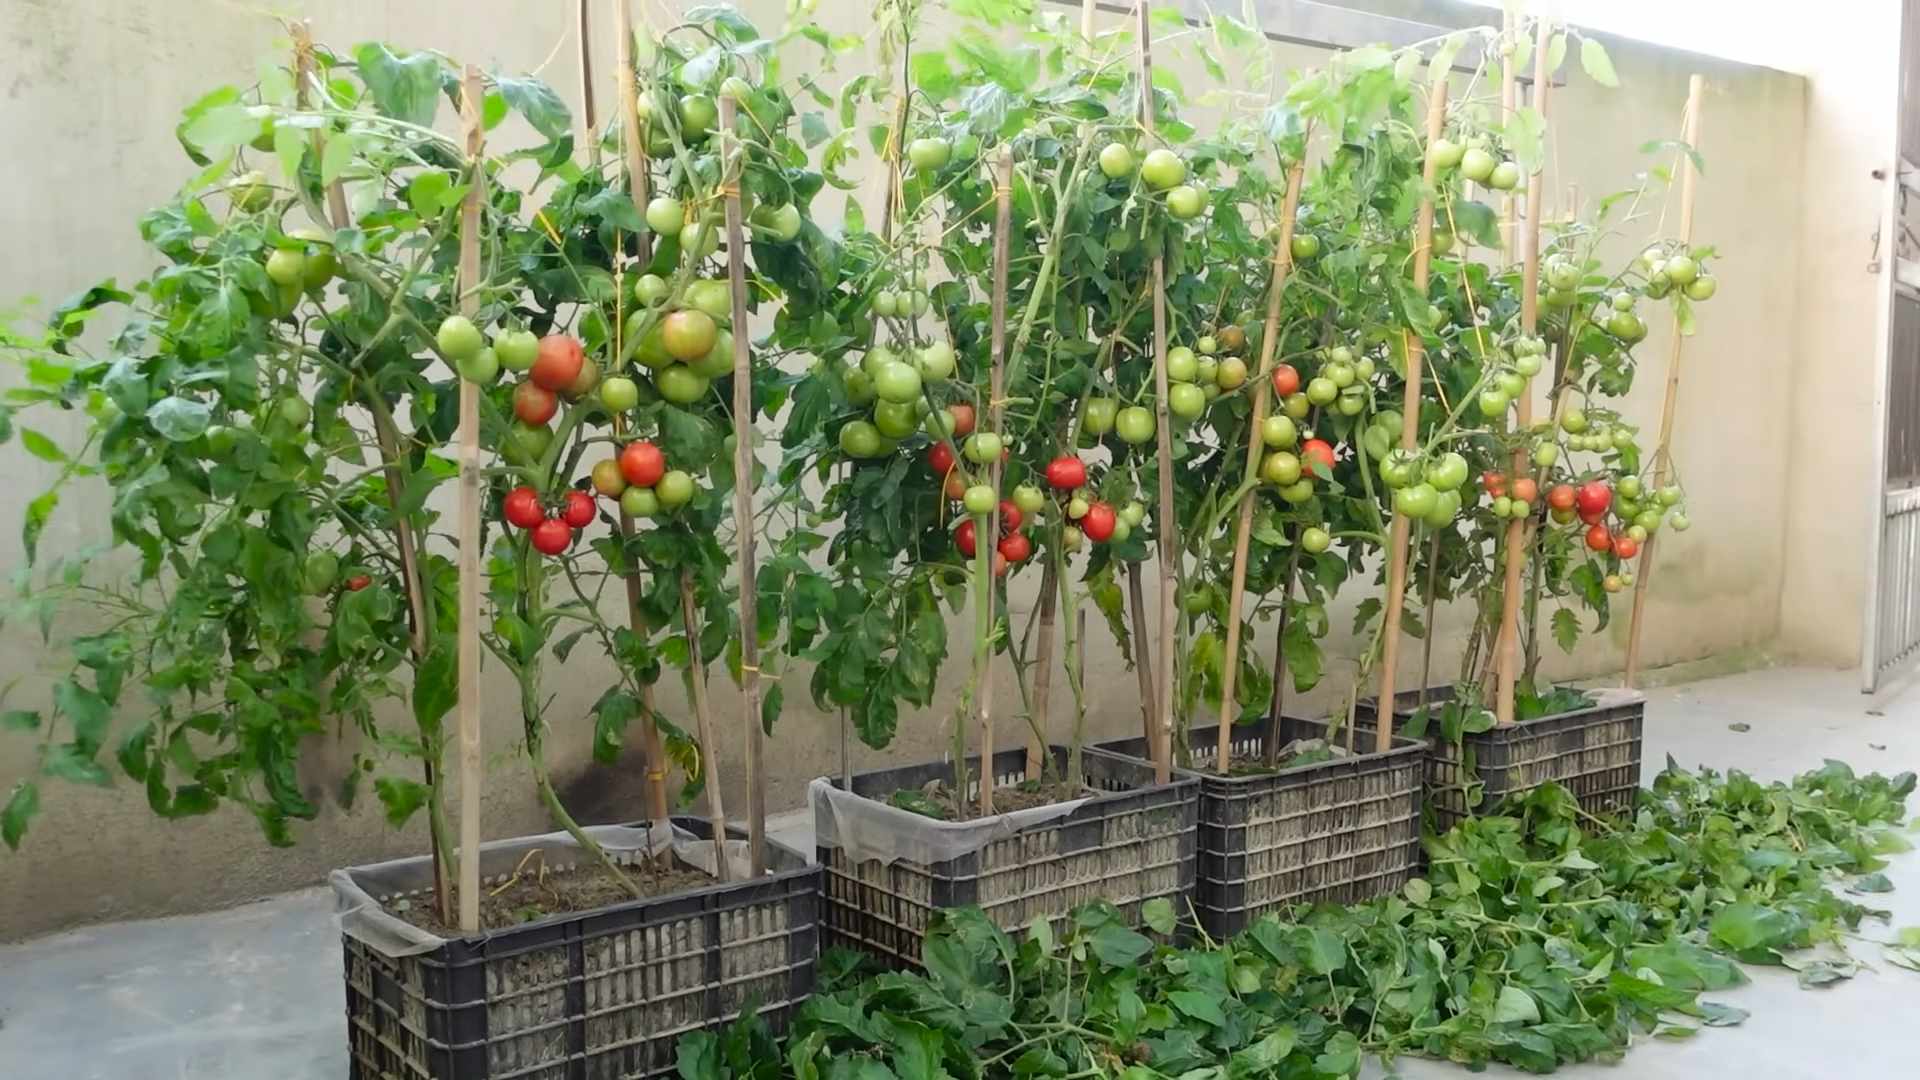
6. Add Support: Tomatoes, especially indeterminate varieties, need support to keep them from sprawling on the ground. You can use stakes, cages, or trellises. I prefer cages because they provide good support and allow the plants to grow naturally. Install the support at the time of planting to avoid damaging the roots later.
7. Mulch: Apply a layer of mulch around the base of the plants to help retain moisture, suppress weeds, and regulate soil temperature. I like to use straw or shredded leaves.
Caring for Your Tomato Plants
Once your tomato plants are in the ground, it’s time to provide them with the care they need to thrive.
* Watering: Water deeply and regularly, especially during hot, dry weather. Aim to water at the base of the plants to avoid wetting the foliage, which can lead to disease. A good rule of thumb is to water when the top inch of soil feels dry.
* Fertilizing: Tomatoes are heavy feeders, so they need regular fertilization. Use a balanced fertilizer (e.g., 10-10-10) or a tomato-specific fertilizer. Follow the instructions on the fertilizer package. I like to fertilize every 2-3 weeks.
* Pruning: Pruning is important for indeterminate tomato varieties. Remove the “suckers” that grow in the crotches between the main stem and the branches. These suckers will steal energy from the plant and reduce fruit production. Use your fingers to pinch off the suckers when they are small.
* Pest and Disease Control: Keep an eye out for pests and diseases. Common tomato pests include aphids, tomato hornworms, and whiteflies. Common diseases include early blight, late blight, and blossom end rot. There are many organic and conventional methods for controlling pests and diseases. I prefer to use organic methods whenever possible.
* Blossom End Rot Prevention: Blossom end rot, characterized by a dark, leathery spot on the bottom of the tomato, is caused by a calcium deficiency. To prevent blossom end rot, make sure your soil is well-drained and that you are watering consistently. You can also add calcium to the soil by mixing in crushed eggshells or bone meal.
Harvesting Your Tomatoes
The moment we’ve all been waiting for!
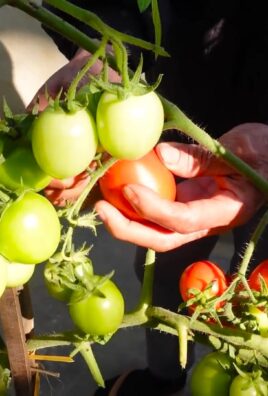
* When to Harvest: Tomatoes are ripe when they are fully colored and slightly soft to the touch. The exact color will depend on the variety.
* How to Harvest: Gently twist the tomato off the vine.
* Storing Tomatoes: Store ripe tomatoes at room temperature. Refrigerating them can affect their flavor and texture.
Troubleshooting Common Tomato Problems
Even with the best care, you may encounter some problems along the way. Here are a few common issues and how to address them:
* Yellowing Leaves: This can be caused by a variety of factors, including nutrient deficiencies, overwatering, or disease. Check the soil drainage and nutrient levels.
* Cracked Tomatoes: This is often caused by inconsistent watering. Water deeply and regularly, especially
Conclusion
So, there you have it! Growing tomatoes at home isn’t just a gardening hobby; it’s a gateway to incredibly flavorful, sun-ripened goodness that you simply can’t replicate with store-bought varieties. We’ve explored a simple yet effective DIY trick that can significantly boost your tomato yield and overall plant health. This method, focusing on [mention the specific DIY trick discussed in the article, e.g., “creating a DIY self-watering system with repurposed bottles”], is a game-changer for both novice and experienced gardeners alike.
Why is this a must-try? Because it addresses several key challenges in tomato cultivation: consistent watering, nutrient delivery, and minimizing water waste. By implementing this DIY solution, you’re not just saving money on expensive gardening equipment; you’re also creating a more sustainable and efficient growing environment for your precious tomato plants. Imagine biting into a juicy, perfectly ripe tomato that you nurtured from seedling to harvest, knowing you played a direct role in its exceptional flavor and quality. That’s the reward waiting for you.
But don’t stop there! Experimentation is key to successful gardening. Consider these variations to tailor the DIY trick to your specific needs and preferences:
* For smaller spaces: Adapt the system to smaller containers or hanging baskets. Use smaller bottles and adjust the watering frequency accordingly.
* For different tomato varieties: Different tomato varieties have different watering needs. Monitor your plants closely and adjust the system as needed. Determinate varieties, which grow to a fixed size, may require less frequent watering than indeterminate varieties, which continue to grow and produce throughout the season.
* Adding nutrients: Incorporate diluted liquid fertilizer into the water reservoir to provide your plants with a steady stream of essential nutrients. Organic options like compost tea or fish emulsion are excellent choices.
* Pest control: Consider adding a small amount of neem oil to the water reservoir to help prevent common tomato pests.
We are confident that this DIY trick will revolutionize your tomato-growing experience. It’s simple, cost-effective, and yields impressive results. Don’t just take our word for it – give it a try! We encourage you to embark on this rewarding gardening adventure and witness the difference firsthand.
Once you’ve implemented this DIY trick, we’d love to hear about your experience! Share your photos, tips, and challenges in the comments section below. Let’s build a community of tomato-growing enthusiasts and learn from each other’s successes and failures. Together, we can unlock the secrets to bountiful tomato harvests and enjoy the unparalleled taste of homegrown goodness. Happy gardening!
Frequently Asked Questions (FAQ)
What type of bottles are best for this DIY trick?
The best bottles to use are sturdy plastic bottles, such as those from water, soda, or juice. Avoid using bottles that are too thin or flimsy, as they may collapse under the weight of the soil and water. Clear or translucent bottles are ideal because they allow you to easily monitor the water level. Make sure to thoroughly clean the bottles before using them to remove any residue that could harm your plants. Consider using bottles of varying sizes depending on the size of your tomato plant and container. Larger plants in larger containers will benefit from larger bottles that can hold more water.
How often do I need to refill the water reservoir?
The frequency of refilling the water reservoir depends on several factors, including the size of the bottle, the size of the plant, the weather conditions, and the type of soil you’re using. In general, you’ll need to refill the reservoir every 1-3 days during hot, sunny weather, and less frequently during cooler or cloudy weather. Check the water level regularly and refill when it’s about halfway empty. Overwatering can be just as harmful as underwatering, so it’s important to monitor your plants closely and adjust the watering frequency accordingly. The best way to determine if your plants need water is to check the soil moisture. If the top inch of soil feels dry to the touch, it’s time to refill the reservoir.
Can I use this DIY trick for other plants besides tomatoes?
Yes, this DIY trick can be adapted for use with other plants that require consistent watering, such as peppers, cucumbers, eggplants, and herbs. However, it’s important to consider the specific watering needs of each plant. Some plants prefer drier conditions, while others require more frequent watering. Adjust the size of the bottle and the watering frequency accordingly. For example, succulents and cacti, which prefer dry conditions, would not be suitable for this type of self-watering system. Research the specific watering requirements of your plants before implementing this DIY trick.
What type of soil is best for growing tomatoes with this DIY trick?
The best type of soil for growing tomatoes with this DIY trick is a well-draining potting mix that is rich in organic matter. Avoid using garden soil, as it can be too heavy and compact, which can lead to poor drainage and root rot. A good potting mix will provide adequate drainage while still retaining enough moisture to keep your plants hydrated. Consider adding compost or other organic amendments to improve the soil’s fertility and water-holding capacity. A slightly acidic soil pH of around 6.0 to 6.8 is ideal for tomatoes.
What if I see mold or algae growing in the water reservoir?
The presence of mold or algae in the water reservoir is not uncommon, especially in warm, humid conditions. While it’s generally not harmful to your plants, it’s best to clean the reservoir regularly to prevent it from becoming excessive. To clean the reservoir, simply remove the bottle, empty it, and scrub it with a mild soap and water solution. Rinse thoroughly before refilling. You can also add a small amount of hydrogen peroxide to the water to help prevent the growth of mold and algae. Ensure the bottle is opaque or covered to prevent sunlight from reaching the water, as sunlight promotes algae growth.
How do I prevent pests from getting into the water reservoir?
To prevent pests from getting into the water reservoir, you can cover the opening of the bottle with a piece of fine mesh or cheesecloth. This will allow water to flow out while preventing insects from entering. You can also add a small amount of neem oil to the water to help repel pests. Regularly inspect your plants for signs of pests and take appropriate action if necessary. Consider using organic pest control methods, such as insecticidal soap or horticultural oil, to avoid harming beneficial insects.
My tomatoes are not growing well even with this DIY trick. What could be the problem?
If your tomatoes are not growing well even with this DIY trick, there could be several potential problems. First, ensure that your plants are getting enough sunlight. Tomatoes require at least 6-8 hours of direct sunlight per day. Second, check the soil pH to make sure it’s within the optimal range of 6.0 to 6.8. Third, make sure your plants are getting enough nutrients. Fertilize regularly with a balanced fertilizer or a tomato-specific fertilizer. Fourth, check for signs of pests or diseases. Treat any infestations or infections promptly. Finally, consider the variety of tomato you’re growing. Some varieties are more challenging to grow than others.
Leave a Comment