
Grow Basil Indoors? Absolutely! Imagine having fresh, fragrant basil readily available, even when the snow is falling outside. No more sad, wilted supermarket herbs – just vibrant, flavorful basil at your fingertips. For centuries, basil has been cherished not only for its culinary prowess but also for its purported medicinal properties and even its symbolic meaning in various cultures, representing love and good wishes.
But let’s be honest, sometimes life gets in the way, and maintaining an outdoor herb garden isn’t always feasible. That’s where the magic of indoor gardening comes in! I’m going to share some simple, yet effective DIY tricks and hacks that will empower you to grow basil indoors successfully, regardless of your experience level.
This isn’t just about convenience; it’s about reclaiming control over your food source, reducing waste, and adding a touch of green to your living space. Plus, the aroma of fresh basil wafting through your home is an instant mood booster! So, ditch the expensive store-bought basil and get ready to embark on a rewarding journey of indoor herb gardening. I promise, with these tips, you’ll be enjoying pesto, caprese salads, and countless other delicious dishes with your homegrown basil in no time!
Grow Your Own Delicious Basil Indoors: A Beginner’s Guide
Hey there, fellow plant enthusiasts! Are you craving the fresh, aromatic taste of basil all year round? Well, you’re in luck! Growing basil indoors is surprisingly easy, and I’m here to guide you through every step of the process. Forget those sad, wilted bunches from the grocery store – let’s get you harvesting your own vibrant, flavorful basil right from your windowsill.
What You’ll Need
Before we dive in, let’s gather our supplies. Here’s a checklist of everything you’ll need to successfully grow basil indoors:
* Basil Seeds or Seedlings: You can start from seeds for a more rewarding experience, or opt for seedlings if you want a head start. I personally love the Genovese variety for its classic flavor.
* Pots: Choose pots that are at least 6 inches in diameter. Good drainage is crucial, so make sure they have drainage holes. Terracotta pots are a great option as they allow the soil to breathe.
* Potting Mix: Don’t use garden soil! It’s too heavy and doesn’t drain well. Opt for a high-quality, well-draining potting mix specifically formulated for containers.
* Grow Lights (Optional but Recommended): While basil loves sunlight, it can be tricky to provide enough natural light indoors, especially during winter. Grow lights will ensure your basil gets the light it needs to thrive.
* Watering Can or Spray Bottle: For gentle watering.
* Small Shovel or Trowel: For planting.
* Fertilizer (Optional): A balanced liquid fertilizer can help boost growth, but it’s not essential.
* A Sunny Windowsill or a Dedicated Grow Space: Basil needs at least 6 hours of sunlight per day.
Starting from Seeds: A Rewarding Journey
Starting from seeds is a bit more time-consuming, but it’s incredibly satisfying to watch your basil plants sprout and grow from tiny specks.
1. Sowing the Seeds:
* Fill your pots with potting mix, leaving about an inch of space at the top.
* Moisten the soil gently with a spray bottle. You want it damp, not soggy.
* Sprinkle a few basil seeds evenly over the surface of the soil. Don’t overcrowd them!
* Cover the seeds with a very thin layer of potting mix (about 1/4 inch).
* Gently water the soil again with a spray bottle.
* Cover the pots with plastic wrap or a clear plastic bag to create a mini-greenhouse. This will help retain moisture and promote germination.
* Place the pots in a warm, sunny location or under grow lights.
2. Germination:
* Keep the soil consistently moist, but not waterlogged. Check it daily and mist with water as needed.
* Remove the plastic wrap or bag once the seeds start to germinate (usually within 5-10 days).
* Once the seedlings have emerged, ensure they receive plenty of light. If you’re using a windowsill, rotate the pots regularly to prevent the seedlings from leaning towards the light.
3. Thinning the Seedlings:
* Once the seedlings have developed their first set of true leaves (the leaves that look like miniature basil leaves, not the initial seed leaves), it’s time to thin them out.
* Carefully snip off the weaker seedlings at the soil line, leaving only the strongest one or two seedlings per pot. This will give the remaining seedlings enough space to grow.
Planting Seedlings: A Quick Start
If you’re short on time or just want a quicker start, planting basil seedlings is a great option.
1. Preparing the Pots:
* Fill your pots with potting mix, leaving about an inch of space at the top.
* Make a small hole in the center of each pot, large enough to accommodate the root ball of the seedling.
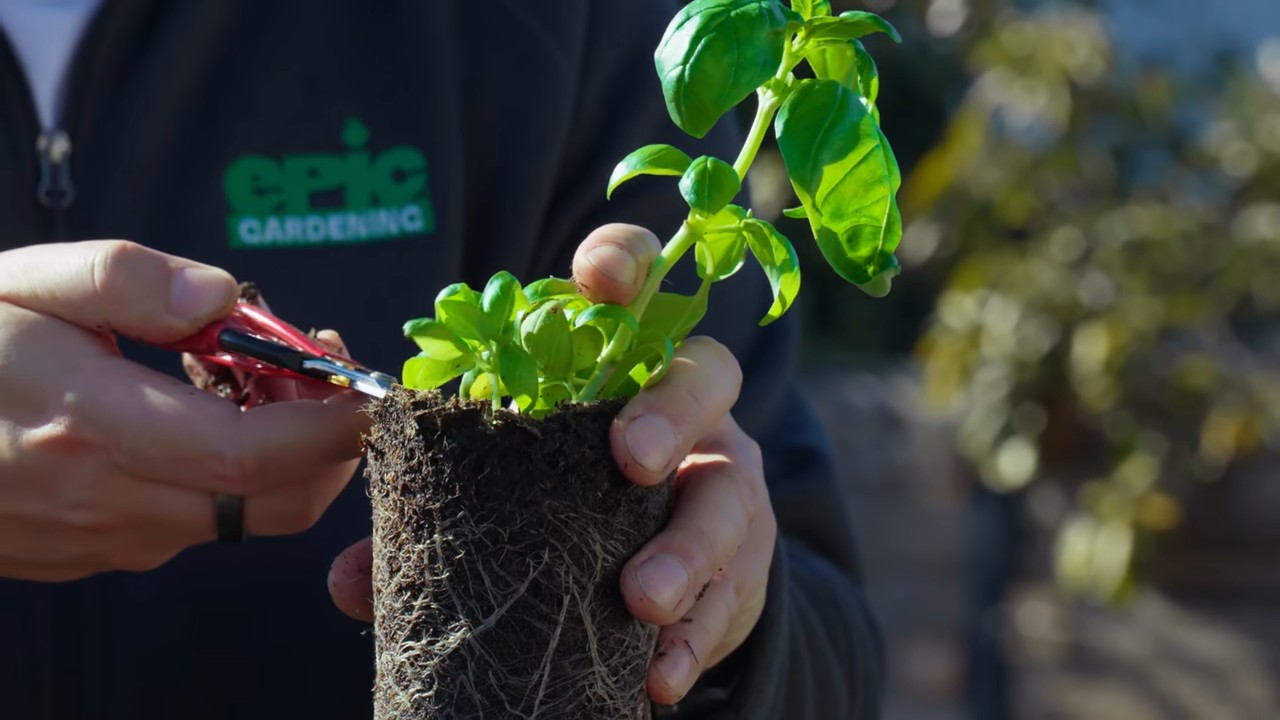
2. Planting the Seedlings:
* Gently remove the seedlings from their original containers. If they’re in a multi-pack, carefully separate them, being careful not to damage the roots.
* Place the seedlings in the holes you’ve created, ensuring that the top of the root ball is level with the surface of the soil.
* Gently fill in the surrounding soil and press down lightly to secure the seedlings.
3. Watering and Initial Care:
* Water the seedlings thoroughly after planting.
* Place the pots in a sunny location or under grow lights.
Caring for Your Indoor Basil Plants: The Key to Success
Now that your basil plants are happily settled in their pots, it’s time to provide them with the care they need to thrive.
1. Light:
* Basil needs at least 6 hours of sunlight per day. A south-facing windowsill is ideal.
* If you don’t have enough natural light, use grow lights. Position the lights a few inches above the plants and keep them on for 12-14 hours per day.
* Rotate your basil plants regularly to ensure even growth.
2. Watering:
* Water your basil plants when the top inch of soil feels dry to the touch.
* Water thoroughly, until water drains out of the drainage holes.
* Avoid overwatering, as this can lead to root rot.
* Water in the morning to allow the foliage to dry before nightfall.
3. Temperature:
* Basil prefers temperatures between 65°F and 80°F (18°C and 27°C).
* Avoid placing your basil plants near drafts or cold windows.
4. Fertilizing (Optional):
* If you want to boost growth, you can fertilize your basil plants every 2-4 weeks with a balanced liquid fertilizer.
* Follow the instructions on the fertilizer label.
* Don’t over-fertilize, as this can burn the roots.
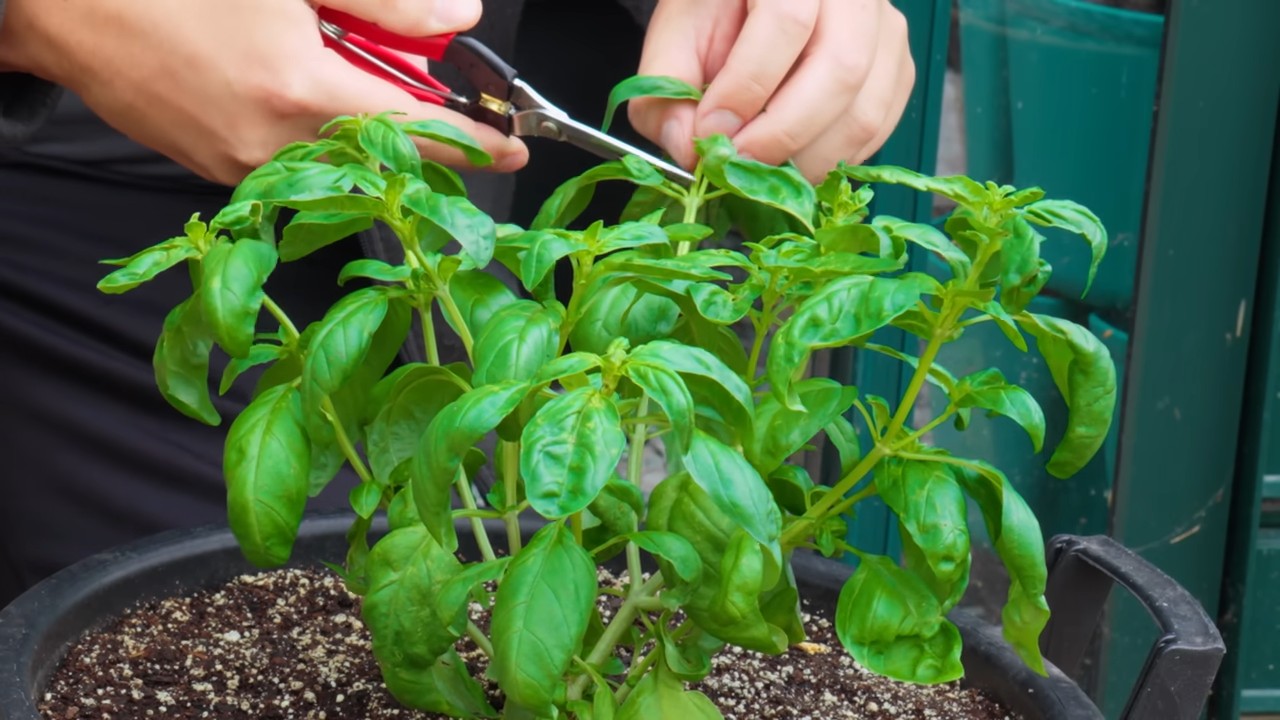
5. Pruning:
* Pruning is essential for encouraging bushy growth and preventing your basil plants from flowering too early.
* Pinch off the top sets of leaves regularly, just above a leaf node (the point where leaves emerge from the stem).
* Remove any flowers that appear. Flowering signals to the plant that it’s time to stop producing leaves, so removing them will encourage continued leaf growth.
* Don’t be afraid to prune generously! The more you prune, the bushier your basil plant will become.
Harvesting Your Basil: The Sweet Reward
The best part of growing your own basil is, of course, harvesting it!
1. When to Harvest:
* You can start harvesting basil leaves once the plant is about 6-8 inches tall.
* Harvest regularly to encourage continued growth.
2. How to Harvest:
* Use scissors or pruning shears to cut off the stems just above a leaf node.
* Harvest the larger, more mature leaves first.
* Avoid harvesting more than one-third of the plant at a time.
3. Storing Your Basil:
* Freshly harvested basil is best used immediately.
* If you need to store it, you can wrap the stems in a damp paper towel and place them in a plastic bag in the refrigerator. This will keep them fresh for a few days.
* You can also freeze basil leaves for longer storage. Blanch them in boiling water for a few seconds, then plunge them into ice water. Drain well and freeze in a single layer on a baking sheet. Once frozen, transfer them to a freezer bag.
* Another great option is to make basil pesto and freeze it in ice cube trays.
Troubleshooting: Common Basil Problems and Solutions
Even with the best care, you might encounter some problems while growing basil indoors. Here are some common issues and how to address them:
* Yellowing Leaves: This can be caused by overwatering, underwatering, or nutrient deficiencies. Adjust your watering schedule and consider fertilizing your plants.
* Leggy Growth: This is usually a sign of insufficient light. Move your basil plants to a sunnier location or provide them with grow lights.
* Pests: Aphids, spider mites, and whiteflies can sometimes infest basil plants. Inspect your plants regularly and treat any infestations with insecticidal soap or neem oil.
* Root Rot: This is caused by overwatering and poor drainage. Make sure your pots have drainage holes and avoid overwatering. If you suspect root rot, repot your basil plants in fresh potting mix.
Enjoy Your Homegrown Basil!
Growing basil indoors is a rewarding experience that allows you to enjoy fresh, flavorful herbs all year round. With a little care and attention, you’ll be harvesting your
Conclusion
So, there you have it! Growing basil indoors is not only achievable, but it’s also incredibly rewarding. Imagine fresh, fragrant basil leaves at your fingertips, ready to elevate your culinary creations any time of year. No more sad, wilted grocery store basil – just vibrant, flavorful goodness grown with your own two hands.
This DIY trick is a must-try for several reasons. First and foremost, it grants you access to fresh basil regardless of the season or your geographical location. Whether you live in a bustling city apartment or a sprawling suburban home, indoor basil cultivation puts control of your herb supply firmly in your grasp. Secondly, it’s a fantastic way to reduce your reliance on store-bought herbs, which can often be expensive and lack the intense flavor of homegrown varieties. Plus, let’s be honest, there’s a certain satisfaction that comes from nurturing a plant from seed to harvest.
But the benefits don’t stop there. Growing basil indoors is also a sustainable choice. You’re reducing your carbon footprint by eliminating the transportation and packaging associated with commercially grown herbs. And, you’re minimizing food waste by only harvesting what you need, when you need it.
Don’t be afraid to experiment with different varieties of basil. While sweet basil is the most common and versatile, consider trying Genovese basil for its classic Italian flavor, Thai basil for its anise-like notes, or lemon basil for a citrusy twist. You can also play around with different containers and growing mediums. While a standard pot with well-draining soil works perfectly well, you could also explore hydroponics or self-watering planters for a more hands-off approach.
For those looking to maximize their yield, consider investing in a grow light. While a sunny windowsill can provide sufficient light for basil to thrive, a grow light can supplement natural light, especially during the darker winter months. This will ensure that your basil plants receive the consistent light they need to produce abundant, flavorful leaves.
Another variation to consider is succession planting. By planting new basil seeds every few weeks, you can ensure a continuous supply of fresh basil throughout the year. This is particularly useful if you’re a heavy basil user or if you want to have a variety of basil types on hand.
We’ve covered the basics, but remember that every growing environment is unique. Pay attention to your basil plants and adjust your watering, lighting, and fertilization accordingly. Don’t be discouraged if you encounter a few bumps along the road. Gardening is a learning process, and even experienced gardeners face challenges from time to time.
So, what are you waiting for? Embrace the joy of growing basil indoors and experience the difference that fresh, homegrown herbs can make. We encourage you to give this DIY trick a try and share your experiences with us. Let us know what varieties you’re growing, what challenges you’ve overcome, and what delicious dishes you’re creating with your homegrown basil. Share your photos and tips in the comments below – we can’t wait to see your basil-growing success stories! Let’s cultivate a community of indoor basil enthusiasts!
Frequently Asked Questions (FAQ)
What is the best location for growing basil indoors?
The ideal location for growing basil indoors is a spot that receives at least 6-8 hours of direct sunlight per day. A south-facing windowsill is often the best choice, but an east- or west-facing window can also work. If you don’t have access to a sunny windowsill, you can supplement natural light with a grow light. Place the grow light about 6-12 inches above the basil plants and keep it on for 12-16 hours per day. Remember to rotate your basil plant regularly to ensure even light exposure on all sides, preventing it from leaning towards the light source.
How often should I water my indoor basil plant?
Water your basil plant when the top inch of soil feels dry to the touch. Avoid overwatering, as this can lead to root rot. When you do water, water thoroughly until water drains out of the bottom of the pot. Make sure the pot has drainage holes to prevent water from sitting at the bottom. During the warmer months, you may need to water your basil plant more frequently than during the cooler months. Check the soil moisture regularly and adjust your watering schedule accordingly. A good rule of thumb is to water deeply but infrequently, allowing the soil to dry out slightly between waterings.
What type of soil is best for growing basil indoors?
Basil prefers well-draining soil that is rich in organic matter. A good potting mix for basil is a blend of peat moss, perlite, and vermiculite. You can also add compost or other organic matter to the soil to improve its fertility. Avoid using garden soil, as it can be too heavy and may not drain well. The ideal pH for basil is between 6.0 and 7.5. You can test the pH of your soil using a soil testing kit. If the pH is too low, you can add lime to raise it. If the pH is too high, you can add sulfur to lower it.
Do I need to fertilize my indoor basil plant?
Yes, basil plants benefit from regular fertilization. Use a balanced liquid fertilizer, such as a 10-10-10 or 20-20-20, diluted to half strength. Fertilize your basil plant every 2-4 weeks during the growing season (spring and summer). Avoid over-fertilizing, as this can burn the roots. Look for fertilizers specifically formulated for herbs, as they often contain the right balance of nutrients for optimal growth and flavor. Organic fertilizers, such as compost tea or fish emulsion, are also excellent choices.
How do I harvest basil leaves from my indoor plant?
The best way to harvest basil leaves is to pinch or cut them off just above a leaf node (the point where leaves grow from the stem). This will encourage the plant to branch out and produce more leaves. Avoid removing more than one-third of the plant’s leaves at a time, as this can stress the plant. Regularly pruning your basil plant will also help to prevent it from flowering, which can reduce the flavor of the leaves. Pinch off any flower buds as soon as you see them. Harvest basil leaves in the morning, after the dew has dried, for the best flavor.
Why are the leaves on my basil plant turning yellow?
Yellowing leaves on a basil plant can be caused by several factors, including overwatering, underwatering, nutrient deficiencies, or pests. Check the soil moisture to ensure that you are not overwatering or underwatering. If the soil is consistently wet, reduce your watering frequency. If the soil is dry, water more often. If you suspect a nutrient deficiency, fertilize your basil plant with a balanced liquid fertilizer. Inspect the leaves for pests, such as aphids or spider mites. If you find pests, treat your basil plant with an insecticidal soap or neem oil. Yellowing leaves can also be a sign of root rot, so make sure your pot has drainage holes and that the soil is well-draining.
How do I prevent pests and diseases on my indoor basil plant?
To prevent pests and diseases on your indoor basil plant, start with healthy plants and use clean potting mix. Inspect your basil plant regularly for signs of pests or diseases. If you find pests, treat your basil plant with an insecticidal soap or neem oil. Avoid overwatering, as this can create a favorable environment for fungal diseases. Provide good air circulation around your basil plant to help prevent fungal diseases. You can also use a fungicide to prevent fungal diseases. Keep the area around your basil plant clean and free of debris.
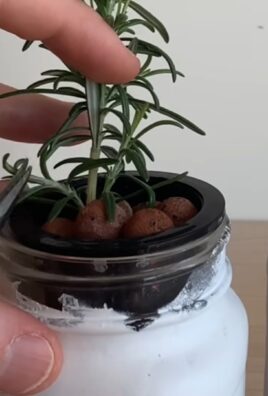
Can I grow basil from cuttings indoors?
Yes, you can easily propagate basil from cuttings. Take a 4-6 inch cutting from a healthy basil plant, removing the lower leaves. Place the cutting in a glass of water, making sure that the leaves are not submerged. Place the glass of water in a bright, indirect light location. Change the water every few days. After a week or two, roots will begin to form. Once the roots are about an inch long, you can transplant the cutting into a pot with well-draining soil. Water the newly transplanted cutting thoroughly and keep the soil moist until it is established.
How long will my indoor basil plant last?
With proper care, an indoor basil plant can last for several months, or even a year or more. However, basil is an annual plant, which means that it will eventually complete its life cycle and die. To prolong the life of your basil plant, pinch off any flower buds as soon as you see them. Regularly harvest leaves to encourage new growth. Provide adequate light, water, and fertilizer. You can also propagate new basil plants from cuttings to ensure a continuous supply of fresh basil.
Can I grow basil indoors year-round?
Yes, you can grow basil indoors year-round, provided that you provide adequate light, water, and fertilizer. During the winter months, you may need to supplement natural light with a grow light. Keep your basil plant away from drafts and cold temperatures. Adjust your watering schedule as needed, as the soil may dry out more slowly during the winter months. With a little care, you can enjoy fresh, homegrown basil all year long.
Leave a Comment