
Turnip Growing Hack No Garden? Absolutely! I know what you’re thinking: “Turnips? Without a garden? Impossible!” But trust me, it’s not only possible, it’s surprisingly easy and rewarding. For centuries, turnips have been a staple crop, providing sustenance and versatility to cultures around the globe. From hearty stews in medieval Europe to pickled delicacies in Asia, the humble turnip has proven its worth time and time again.
But what if you live in an apartment, have a tiny balcony, or simply lack the space for a traditional garden? That’s where this ingenious DIY trick comes in. We’re going to explore a simple, space-saving method that allows you to enjoy fresh, homegrown turnips, no matter your living situation. Imagine the satisfaction of harvesting your own crisp, slightly peppery turnips, knowing you grew them yourself, even without a sprawling backyard. This turnip growing hack is perfect for beginners, seasoned gardeners looking for a fun project, and anyone who wants to add a touch of green to their urban life.
This DIY guide will walk you through each step, from choosing the right container to nurturing your tiny turnip patch. So, ditch the store-bought veggies and get ready to experience the joy of growing your own food, even in the most unexpected places. Let’s get started!
Growing Turnips Without a Garden: A DIY Container Gardening Guide
Hey there, fellow gardening enthusiasts! So, you’re itching to grow some delicious turnips but lack the sprawling backyard of your dreams? Don’t fret! I’m here to show you how to cultivate these root veggies right on your balcony, patio, or even a sunny windowsill. This DIY container gardening guide will walk you through every step, ensuring a bountiful turnip harvest, no matter your space constraints.
Choosing the Right Container and Soil
Before we even think about seeds, let’s get the foundation right. The container and soil are crucial for happy, healthy turnips.
* Container Size: Turnips need room to grow downwards. I recommend a container that’s at least 12 inches deep and 12 inches in diameter. A larger container is always better, as it provides more space for the roots to develop. Think about using a large pot, a raised bed kit designed for patios, or even a repurposed storage tote (just make sure to drill drainage holes!).
* Drainage: This is non-negotiable! Turnips hate soggy feet. Ensure your container has plenty of drainage holes at the bottom. If you’re using a repurposed container, drill at least 4-5 holes, each about half an inch in diameter.
* Soil Mix: Forget garden soil; it’s too heavy and compacts easily in containers. Instead, opt for a well-draining potting mix. I like to use a mix of equal parts:
* Compost: Provides essential nutrients and improves soil structure.
* Peat Moss (or Coco Coir): Retains moisture while allowing for good drainage. Coco coir is a more sustainable alternative to peat moss.
* Perlite (or Vermiculite): Improves drainage and aeration.
Planting Your Turnip Seeds
Alright, now for the fun part – planting!
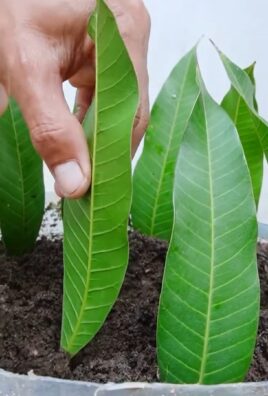
1. Fill the Container: Add your chosen potting mix to the container, leaving about an inch or two of space at the top. Gently pat down the soil to remove any large air pockets.
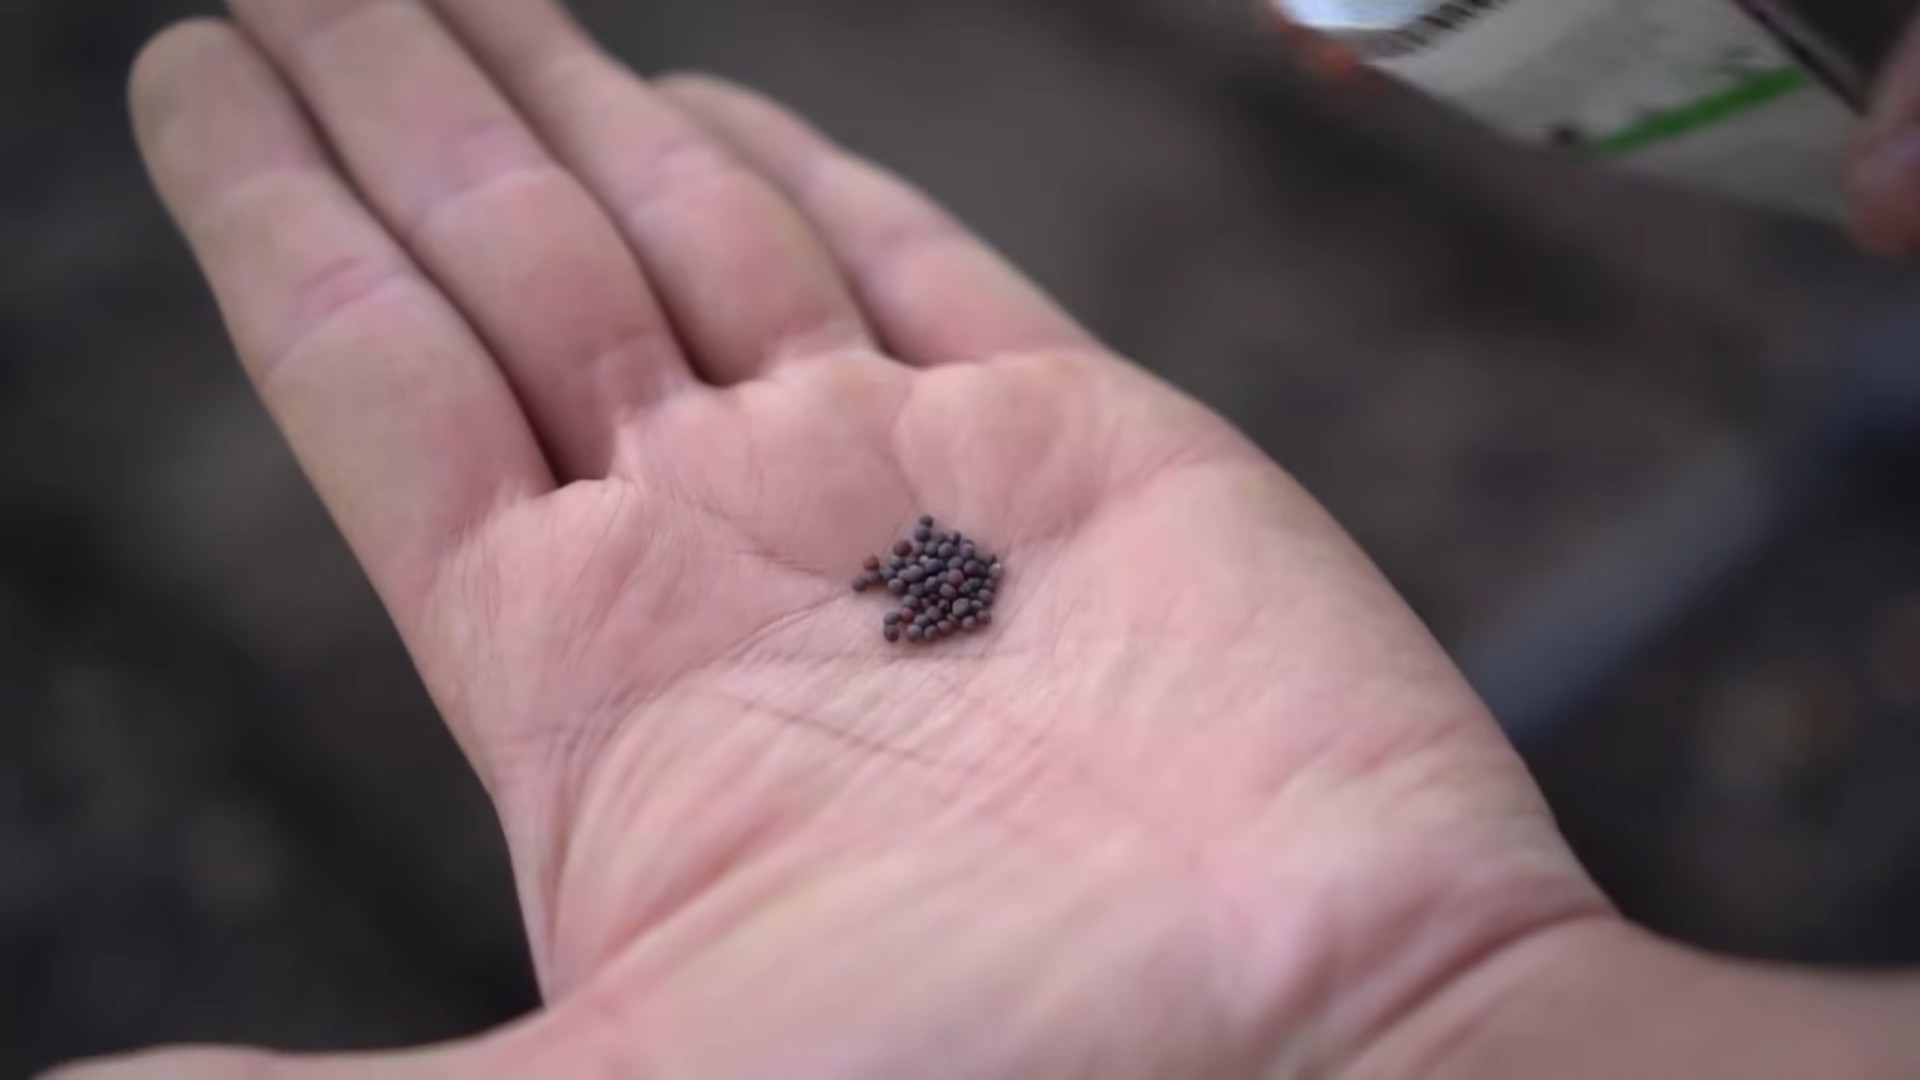
2. Sowing the Seeds: Turnip seeds are small, so handle them with care. I like to sprinkle the seeds evenly across the surface of the soil. Aim for about 2-3 seeds per inch. Don’t worry about being too precise; we’ll thin them out later.
3. Covering the Seeds: Lightly cover the seeds with about ¼ inch of soil. You can use your fingers or a small trowel to do this.
4. Watering: Gently water the soil using a watering can with a rose head (the sprinkler attachment). This will prevent the seeds from being washed away. The soil should be moist but not waterlogged.
5. Placement: Place your container in a location that receives at least 6 hours of direct sunlight per day. Turnips thrive in sunny spots. If you’re growing indoors, a south-facing window is ideal. You might also consider using grow lights if you don’t have enough natural light.
Caring for Your Turnip Plants
Now that your seeds are planted, it’s time to nurture them into healthy, thriving turnip plants.
* Watering: Keep the soil consistently moist, but avoid overwatering. Check the soil moisture by sticking your finger about an inch into the soil. If it feels dry, it’s time to water. Water deeply, allowing the water to drain out of the bottom of the container.
* Thinning: Once your seedlings have developed a few true leaves (the second set of leaves that appear after the initial seed leaves), it’s time to thin them out. This is crucial for giving the remaining plants enough space to grow.
1. Identify the Strongest Seedlings: Choose the healthiest and most vigorous seedlings in each area.
2. Remove the Weaker Ones: Gently snip off the weaker seedlings at the soil line using small scissors or nail clippers. Avoid pulling them out, as this can disturb the roots of the remaining plants. Aim for a spacing of about 3-4 inches between plants.
* Fertilizing: Turnips are heavy feeders, so they need regular fertilization. I recommend using a balanced liquid fertilizer (e.g., 10-10-10) diluted to half strength. Apply the fertilizer every 2-3 weeks, following the instructions on the fertilizer label. You can also use organic fertilizers like compost tea or fish emulsion.
* Weed Control: Keep an eye out for weeds and remove them promptly. Weeds compete with your turnip plants for nutrients and water. Hand-pulling is usually the best method for container gardens.
* Pest and Disease Control: Turnips are generally pest-resistant, but they can occasionally be affected by aphids, flea beetles, or root maggots.
* Aphids: These tiny insects suck the sap from plants. You can control them by spraying the plants with a strong stream of water or by using insecticidal soap.
* Flea Beetles: These small beetles chew tiny holes in the leaves. You can control them by covering the plants with row covers or by using insecticidal dust.
* Root Maggots: These larvae feed on the roots of turnips. You can prevent them by using row covers or by incorporating beneficial nematodes into the soil.
* Disease: Ensure good air circulation to prevent fungal diseases. If you notice any signs of disease, such as yellowing leaves or spots, remove the affected leaves immediately.
Harvesting Your Turnips
The moment you’ve been waiting for! Harvesting your homegrown turnips is incredibly rewarding.
* Harvest Time: Turnips are typically ready to harvest in 50-60 days from planting. The exact time will depend on the variety you’re growing.
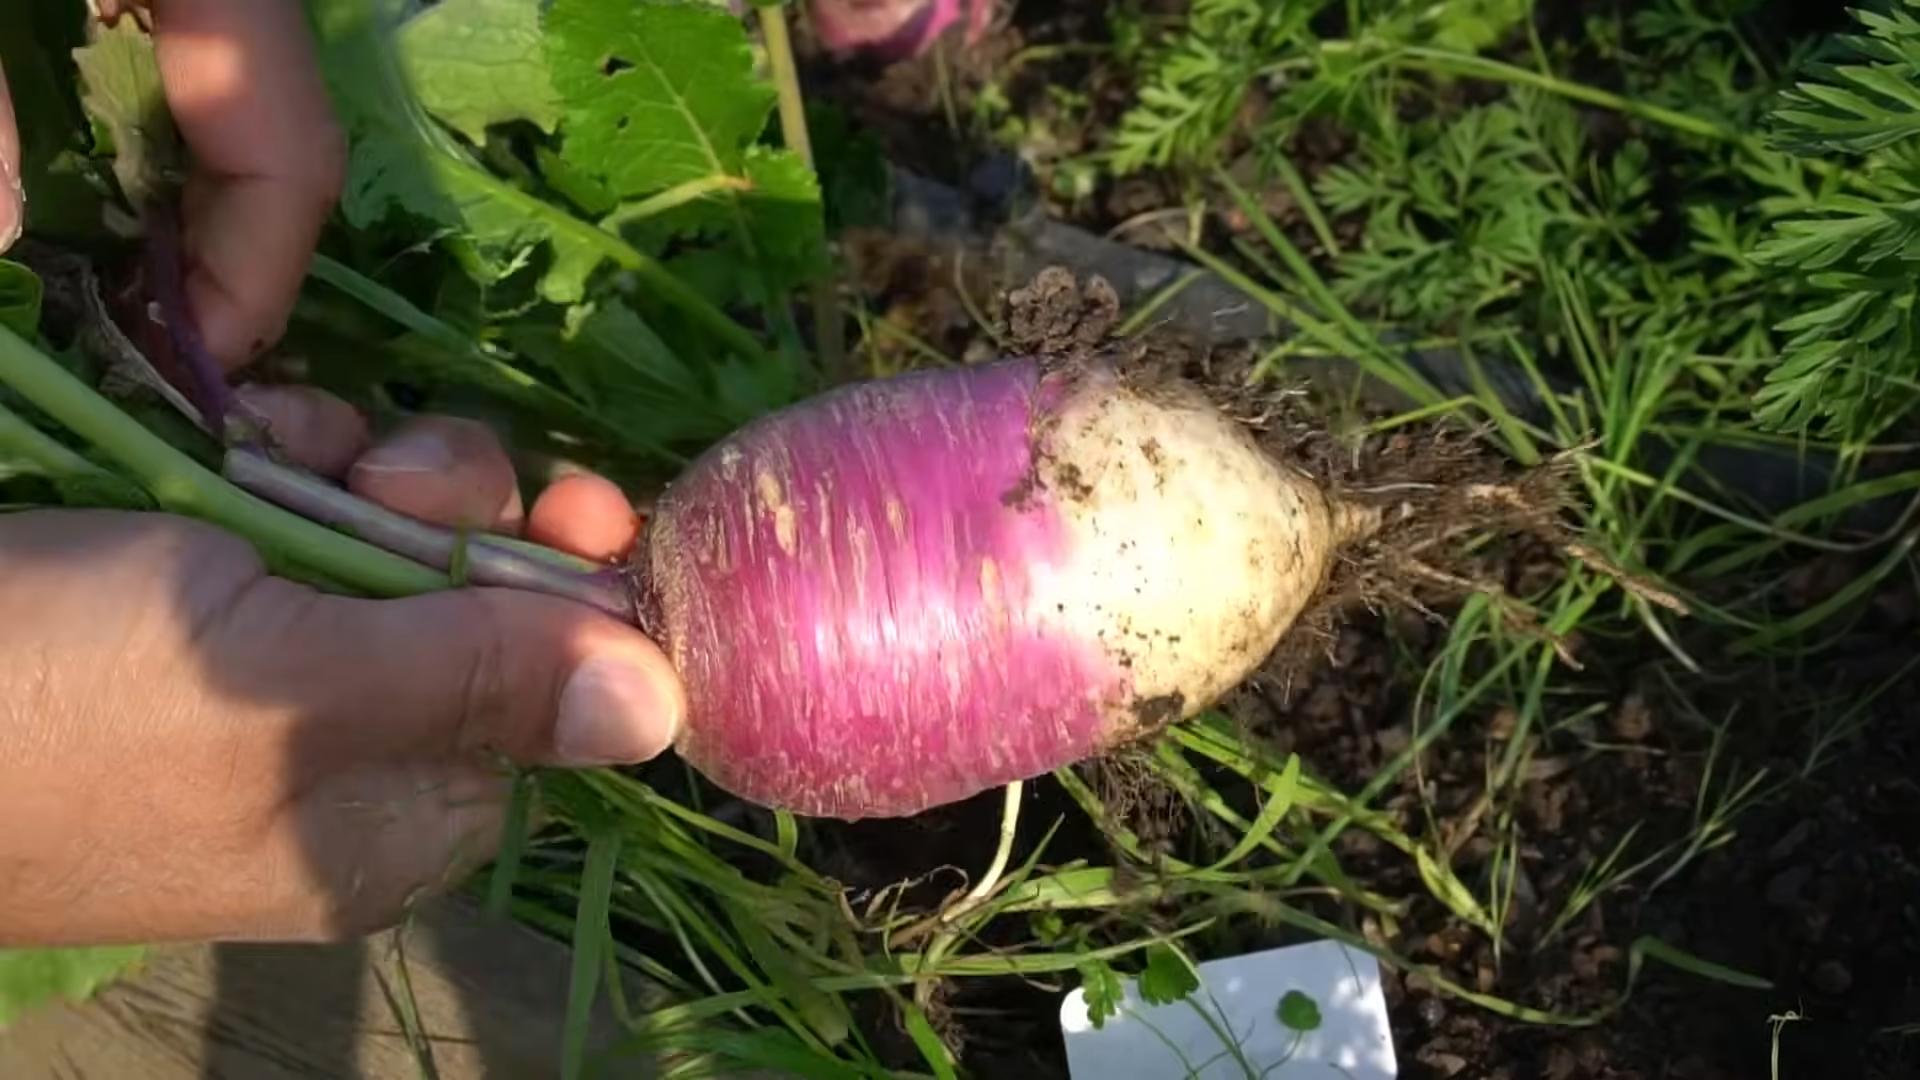
* Signs of Maturity: The turnip roots should be about 2-3 inches in diameter. You can also check the maturity by gently pushing away the soil around the base of the plant to get a better look at the root.
* Harvesting Technique: Gently loosen the soil around the turnip plant with a trowel or garden fork. Then, grasp the turnip greens near the base and pull the turnip out of the soil. If the turnip is difficult to pull, loosen the soil further.
* Harvesting the Greens: Don’t discard the turnip greens! They’re delicious and nutritious. You can harvest the greens at any time during the growing season. Simply snip off the outer leaves, leaving the inner leaves to continue growing.
* Storage: Store turnips in the refrigerator for up to 2 weeks. Remove the greens before storing, as they can draw moisture from the roots. Store the greens separately in a plastic bag in the refrigerator.
Choosing the Right Turnip Variety
Selecting the right turnip variety is key to a successful container garden. Here are a few of my favorites:
* ‘Tokyo Cross’: This is a fast-maturing variety that produces small, round turnips with a mild flavor. It’s perfect for container gardening because it doesn’t require a lot of space.
* ‘Purple Top White Globe’: This is a classic turnip variety with a purple top and a white bottom. It has a slightly stronger flavor than ‘Tokyo Cross’.
* ‘Golden Ball’: This variety produces round, yellow turnips with a sweet, mild flavor. It’s a good choice for those who don’t like the strong flavor of some other turnip varieties.
* ‘Hakurei’: This Japanese turnip is known for its sweet, mild flavor and crisp texture. It can be eaten raw or cooked.
Troubleshooting Common Problems
Even with the best care, you might encounter some problems while growing turnips in containers. Here are a few common issues and how to address them:
* Slow Growth: If your turnip plants are growing slowly, it could be due to a lack of nutrients, insufficient sunlight, or poor drainage. Make sure you’re fertilizing regularly, providing enough sunlight, and using a well-draining potting mix.
* Yellowing Leaves: Yellowing leaves can be a sign of overwatering, underwatering, or nutrient deficiency. Check the soil moisture and adjust your watering accordingly. If the soil is consistently moist, you may be overwatering. If the soil is dry, you may be underwatering. You can also try fertilizing with a balanced fertilizer.
* Bolting: Bolting is when the turnip plants start to produce flowers and seeds prematurely. This can happen if the plants are stressed by heat, drought, or lack of nutrients. To prevent bolting, keep the soil consistently moist, provide shade during the hottest part of the day, and fertilize regularly.
* Small Roots: If your turnip roots are small, it could be due to overcrowding, poor soil, or insufficient watering. Make sure you’ve thinned the seedlings properly, are using a well-draining potting mix, and are watering regularly.
Extra Tips for Success
Here are
Conclusion
So, there you have it! Growing turnips without a garden might sound like an impossible feat, but with this simple DIY trick, fresh, delicious turnips are within your reach, no matter where you live. This method isn’t just about circumventing the need for a traditional garden; it’s about embracing resourcefulness, connecting with your food source, and enjoying the satisfaction of nurturing something from seed to table.
Why is this a must-try? Because it democratizes access to fresh produce. Apartment dwellers, urbanites with limited space, or anyone facing challenging soil conditions can now cultivate their own turnips. It’s also incredibly cost-effective. A packet of turnip seeds is significantly cheaper than buying turnips at the grocery store, especially if you’re looking for organic or heirloom varieties. Plus, you control the growing environment, ensuring your turnips are free from unwanted pesticides and herbicides.
Beyond the basic method, there’s plenty of room for experimentation. Try different varieties of turnips! Some are better suited for greens, while others are prized for their roots. Consider using different containers. While a plastic storage bin works well, you could also repurpose old buckets, large pots, or even create a vertical growing system using stacked containers.
Don’t be afraid to get creative with your growing medium. While the soil mix we recommended is a good starting point, you can adjust it based on your local climate and the specific needs of your turnip variety. Adding compost or other organic matter can further enrich the soil and promote healthy growth.
And speaking of healthy growth, remember to monitor your turnips regularly. Check the soil moisture, watch for any signs of pests or diseases, and adjust your watering and feeding schedule as needed. The more attention you give your turnips, the better they’ll grow.
This DIY turnip growing hack is more than just a gardening technique; it’s an opportunity to learn, experiment, and connect with nature. It’s a chance to prove that you don’t need acres of land to grow your own food. It’s a testament to the power of ingenuity and the simple joy of harvesting something you’ve nurtured yourself.
We wholeheartedly encourage you to give this a try. Start small, experiment with different techniques, and most importantly, have fun! And once you’ve harvested your first batch of homegrown turnips, we’d love to hear about your experience. Share your photos, tips, and stories in the comments below. Let’s build a community of urban gardeners who are proving that anything is possible with a little creativity and a willingness to get your hands dirty. Let us know if you have found a better way to do turnip growing.
FAQ
Q: What kind of turnips are best for growing indoors using this method?
A: While you can grow almost any variety of turnip indoors, some are better suited than others. Smaller, faster-maturing varieties like ‘Tokyo Cross’ or ‘Hakurei’ are excellent choices because they don’t require as much space or time to reach maturity. These varieties also tend to have milder flavors, making them versatile for cooking. If you’re primarily interested in the greens, consider varieties specifically bred for their foliage, such as ‘Seven Top.’ Experimenting with different varieties is part of the fun, so don’t be afraid to try something new!
Q: How much sunlight do turnips need when grown indoors?
A: Turnips need at least 6 hours of direct sunlight per day to thrive. If you don’t have a sunny windowsill, you can supplement with grow lights. Fluorescent or LED grow lights are energy-efficient and provide the necessary spectrum of light for healthy growth. Position the lights a few inches above the plants and adjust as they grow. Remember to rotate your containers regularly to ensure even light exposure on all sides.
Q: What type of soil should I use for growing turnips in containers?
A: A well-draining potting mix is essential for growing healthy turnips in containers. Avoid using garden soil, as it can become compacted and doesn’t drain well. A good mix consists of equal parts peat moss, perlite, and vermiculite. You can also add compost or other organic matter to enrich the soil and provide essential nutrients. Make sure the soil is loose and airy to allow for proper root development.
Q: How often should I water my turnips?
A: Turnips need consistent moisture to grow well, but avoid overwatering, which can lead to root rot. Water when the top inch of soil feels dry to the touch. Water thoroughly until excess water drains out of the bottom of the container. Adjust your watering schedule based on the weather and the humidity levels in your home. During hot, dry periods, you may need to water more frequently.
Q: How do I know when my turnips are ready to harvest?
A: The harvesting time depends on the variety of turnip you’re growing. Generally, turnips are ready to harvest when the roots are about 2-3 inches in diameter. You can also harvest the greens at any time, but be careful not to remove too many leaves at once, as this can stunt the growth of the roots. To harvest, gently loosen the soil around the turnip and pull it out of the container.
Q: What are some common pests and diseases that affect turnips, and how can I prevent them?
A: Common pests that can affect turnips include aphids, flea beetles, and root maggots. To prevent pest infestations, inspect your plants regularly and remove any pests you find. You can also use insecticidal soap or neem oil to control pests. Diseases that can affect turnips include powdery mildew and root rot. To prevent diseases, ensure good air circulation around your plants and avoid overwatering. If you notice any signs of disease, remove the affected leaves or plants immediately.
Q: Can I grow turnips in the same container as other vegetables?
A: While it’s possible to grow turnips in the same container as other vegetables, it’s generally best to grow them separately. Turnips have different nutrient and watering requirements than many other vegetables, so growing them together can make it difficult to provide optimal conditions for both. If you do choose to grow turnips with other vegetables, select companions that have similar needs, such as radishes or lettuce.
Q: How can I use the turnip greens?
A: Turnip greens are a delicious and nutritious addition to any meal. They can be eaten raw in salads, sautéed with garlic and olive oil, or added to soups and stews. Turnip greens are a good source of vitamins A and C, as well as calcium and iron. To prepare turnip greens, wash them thoroughly and remove any tough stems. You can then chop them and cook them as desired.
Q: My turnip roots are small and underdeveloped. What could be the reason?
A: Several factors can contribute to small and underdeveloped turnip roots. Insufficient sunlight, poor soil quality, overcrowding, and inadequate watering can all hinder growth. Ensure your turnips are receiving at least 6 hours of direct sunlight per day, use a well-draining potting mix, thin out seedlings to provide adequate spacing, and water consistently. You may also need to fertilize your plants with a balanced fertilizer to provide essential nutrients.
Q: Can I save seeds from my homegrown turnips to plant next year?
A: Saving seeds from turnips can be a bit challenging, as they are biennials, meaning they typically produce seeds in their second year of growth. To save seeds, you’ll need to overwinter your turnips and allow them to flower and produce seeds the following spring. However, if you’re growing hybrid varieties, the seeds may not produce plants that are true to type. For best results, choose open-pollinated varieties if you plan to save seeds.
Leave a Comment