
Hibiscus continuous blooming tips are the holy grail for any gardener dreaming of a vibrant, tropical paradise right in their backyard! Let’s face it, we’ve all been there – meticulously caring for our hibiscus, eagerly anticipating those stunning blooms, only to be met with… well, not much. You get a few flowers, and then it’s back to green leaves, leaving you wondering what you did wrong.
Hibiscus flowers have captivated hearts for centuries, holding cultural significance in many societies. From being a symbol of delicate beauty in Hawaii to representing fleeting glory in other cultures, these blooms have always been admired. But wouldn’t it be amazing to extend that fleeting glory into a continuous spectacle?
That’s where these DIY tricks come in! I’m going to share some simple, yet incredibly effective, methods to encourage your hibiscus to bloom and bloom… and bloom! We’ll delve into the secrets of proper pruning, the magic of the right fertilizer, and the importance of sunlight and watering. These aren’t just random tips; they’re tried-and-true techniques that I’ve personally used to transform my own hibiscus plants into flowering powerhouses. So, if you’re ready to unlock the full potential of your hibiscus and enjoy a season-long display of vibrant color, keep reading! These hibiscus continuous blooming tips will have your garden bursting with tropical beauty in no time!
Unlocking Endless Blooms: My Guide to Continuous Hibiscus Flowering
Hey fellow plant lovers! Are you tired of your hibiscus putting on a spectacular show for a few weeks and then going dormant, leaving you with nothing but green leaves? I was too! After years of experimenting, I’ve cracked the code to encouraging continuous blooming in my hibiscus plants, and I’m so excited to share my secrets with you. It’s not magic, just a combination of understanding your plant’s needs and providing the right care. Let’s dive in!
Understanding Hibiscus Blooming Habits
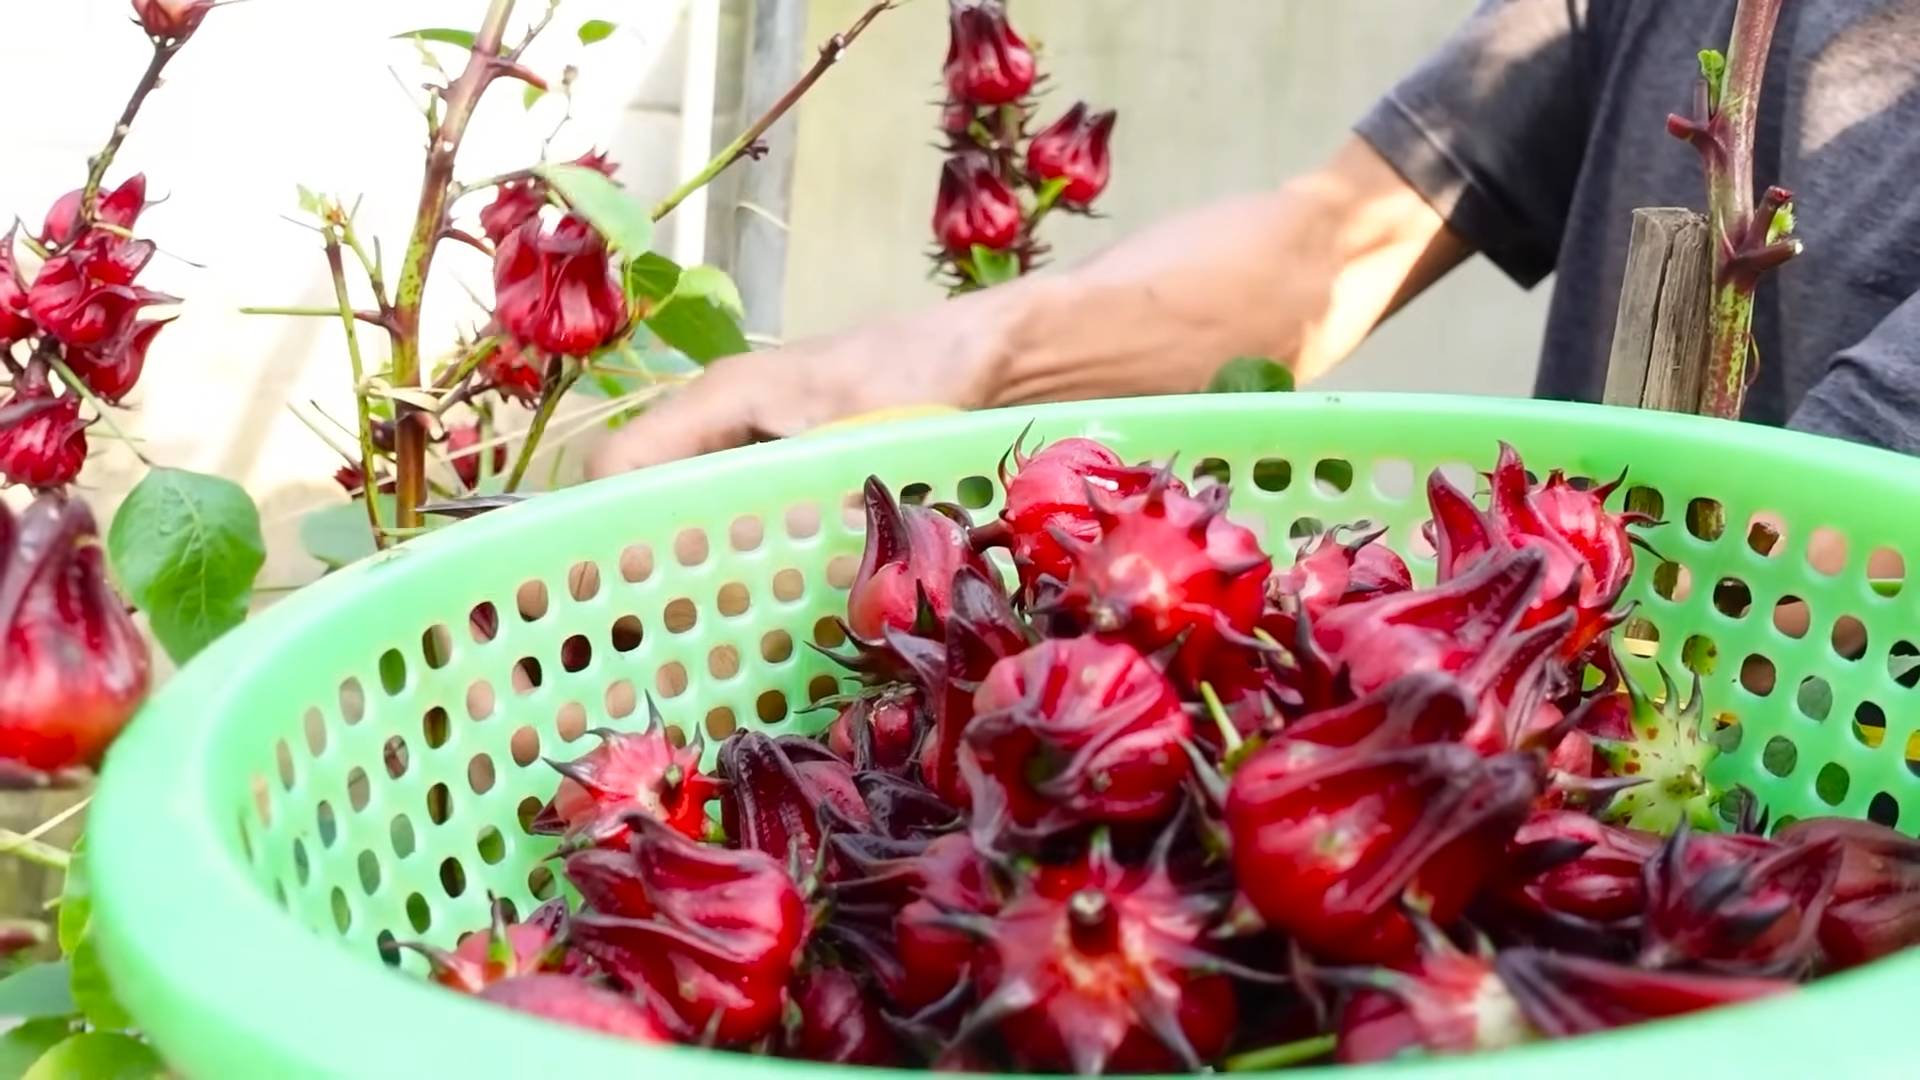
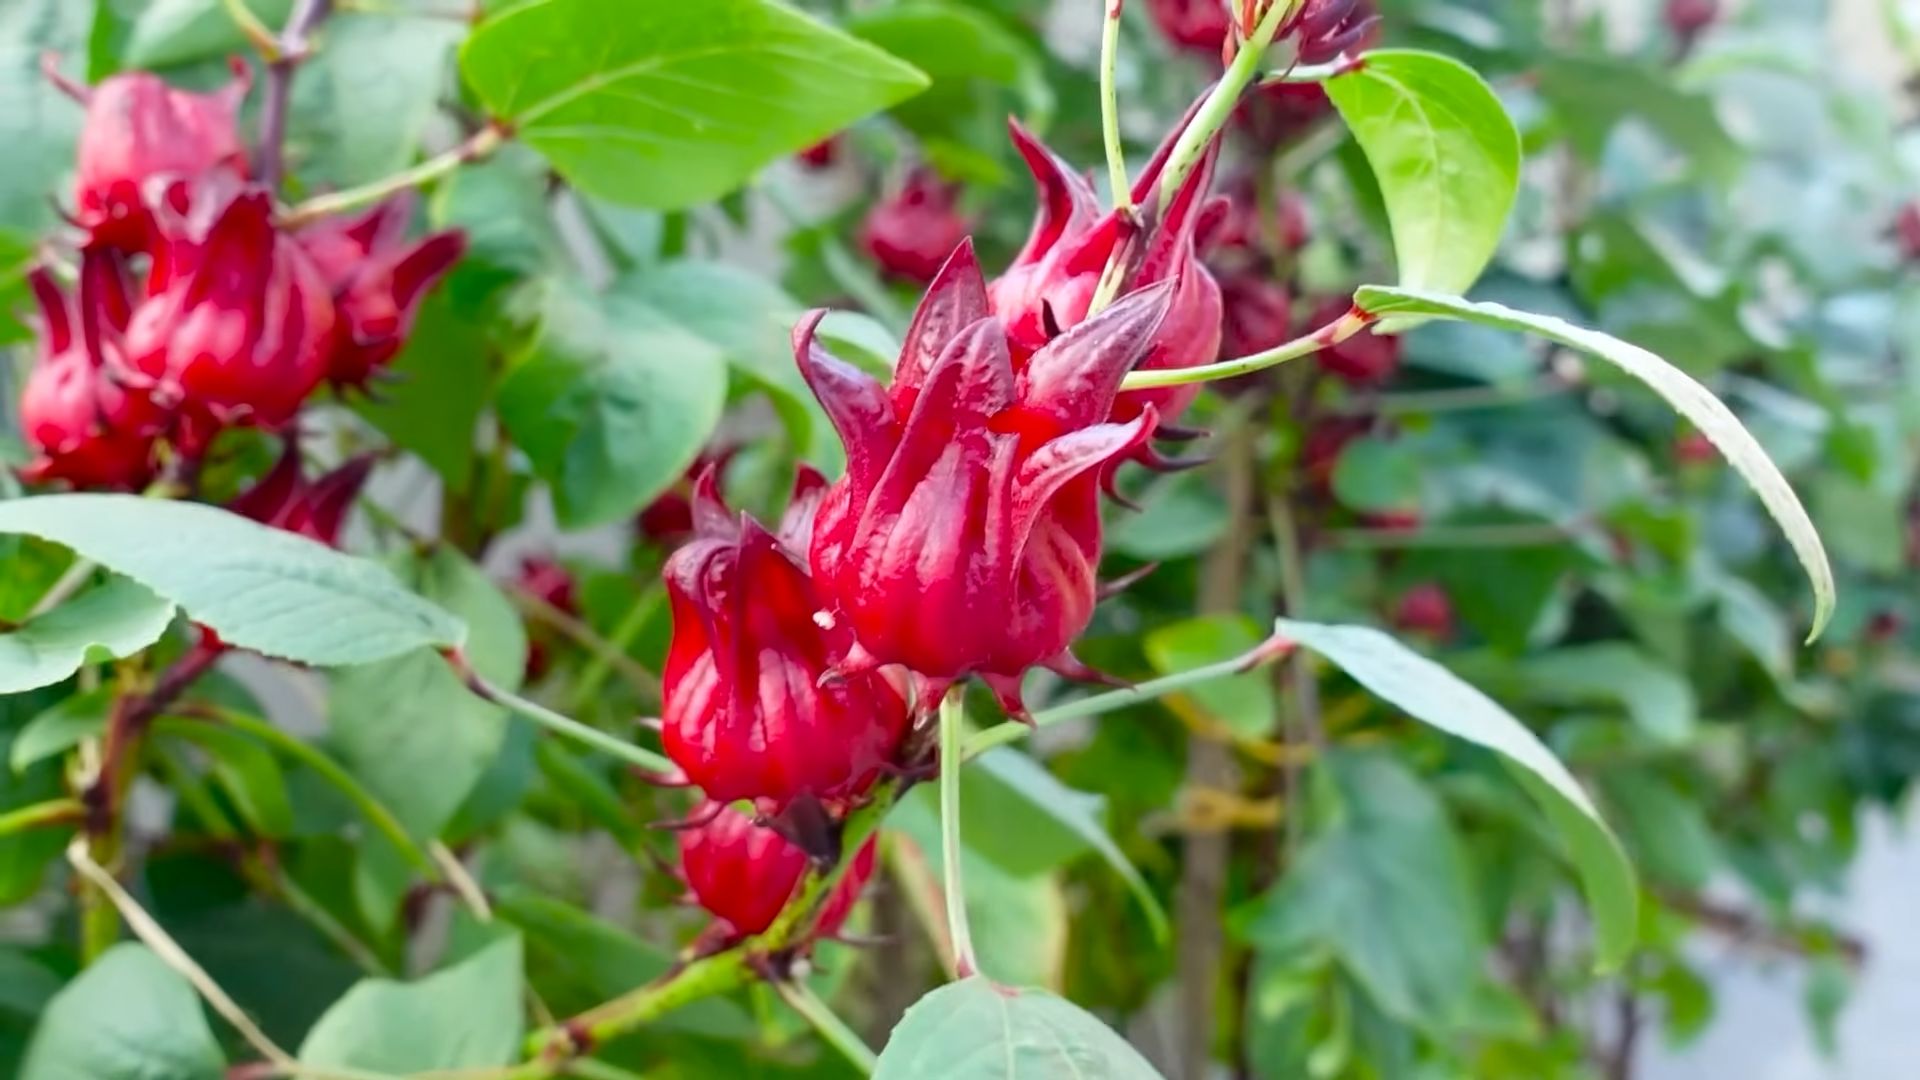
Before we get into the nitty-gritty, it’s important to understand that not all hibiscus are created equal. Some varieties are naturally more prolific bloomers than others. Tropical hibiscus (Hibiscus rosa-sinensis) are generally the ones we’re talking about when we want continuous blooms. Hardy hibiscus (Hibiscus moscheutos) are beautiful, but they die back to the ground in winter and bloom only in late summer. So, make sure you’re starting with the right type!
Also, remember that even with the best care, hibiscus need a certain amount of sunlight and warmth to bloom. They thrive in warm climates and need at least 6 hours of direct sunlight per day.
The Secret Sauce: My Continuous Blooming Strategy
My strategy for getting my hibiscus to bloom continuously revolves around these key elements:
* Consistent Watering: Hibiscus are thirsty plants, especially when they’re blooming.
* Regular Fertilizing: They need a steady supply of nutrients to fuel those beautiful flowers.
* Strategic Pruning: This encourages new growth, which is where the flowers appear.
* Pest and Disease Control: Healthy plants are happy plants, and happy plants bloom!
* Sunlight Optimization: Ensuring they get enough light is crucial.
* Temperature Management: Protecting them from extreme temperatures is key.
* Deadheading Diligently: Removing spent blooms encourages more to come.
Watering Wisely: Keeping Your Hibiscus Hydrated
Hibiscus love water, but they don’t like to sit in soggy soil. Overwatering can lead to root rot, which is a surefire way to stop blooming.
1. Check the Soil: Before you water, stick your finger about an inch or two into the soil. If it feels dry, it’s time to water. If it feels moist, wait a day or two and check again.
2. Water Deeply: When you do water, water deeply until water drains out of the drainage holes. This ensures that the entire root ball is moistened.
3. Watering Frequency: During the hot summer months, I usually water my hibiscus every day or every other day. In cooler weather, I water less frequently, maybe every 3-4 days. Adjust the frequency based on your local climate and the specific needs of your plant.
4. Morning Watering: I prefer to water in the morning so the foliage has time to dry before nightfall. This helps prevent fungal diseases.
5. Avoid Overwatering: Remember, soggy soil is a no-no! Make sure your pot has good drainage.
Fertilizing for Flowers: Feeding Your Hibiscus for Continuous Blooms
Hibiscus are heavy feeders, meaning they need a lot of nutrients to produce those gorgeous blooms. Regular fertilizing is essential for continuous flowering.
1. Choose the Right Fertilizer: Look for a fertilizer specifically formulated for hibiscus. These fertilizers typically have a higher phosphorus content (the middle number in the N-P-K ratio), which promotes blooming. I personally like using a balanced fertilizer with micronutrients as well.
2. Fertilizing Frequency: During the growing season (spring and summer), I fertilize my hibiscus every 2-3 weeks. In the fall and winter, I reduce the frequency to once a month or even stop fertilizing altogether, depending on how actively the plant is growing.
3. Liquid Fertilizer: I prefer using a liquid fertilizer because it’s easy to apply and the nutrients are readily available to the plant. Follow the instructions on the fertilizer label for the correct dosage.
4. Slow-Release Fertilizer: You can also use a slow-release fertilizer, which releases nutrients gradually over time. This is a good option if you’re forgetful or don’t have time to fertilize regularly.
5. Foliar Feeding: Occasionally, I’ll also give my hibiscus a foliar feeding by spraying the leaves with a diluted fertilizer solution. This helps the plant absorb nutrients quickly. Be sure to do this in the early morning or late evening to avoid burning the leaves.
Pruning Power: Shaping Your Hibiscus for More Blooms
Pruning might seem scary, but it’s actually one of the best things you can do for your hibiscus. Pruning encourages new growth, and hibiscus flowers form on new growth.
1. Timing is Key: The best time to prune hibiscus is in early spring, before new growth begins. You can also do light pruning throughout the growing season to remove dead or damaged branches and to shape the plant.
2. Use Sharp Tools: Always use clean, sharp pruning shears or scissors to avoid spreading diseases.
3. Remove Dead or Damaged Branches: Start by removing any dead, damaged, or diseased branches. Cut them back to the healthy wood.
4. Shape the Plant: Next, shape the plant by removing any crossing or rubbing branches. You can also prune to control the size and shape of the plant.
5. Encourage Bushiness: To encourage bushiness, prune back the tips of the branches. This will encourage the plant to produce more side shoots, which will result in more flowers.
6. Don’t Be Afraid to Prune: Don’t be afraid to prune your hibiscus! It’s a resilient plant and will bounce back quickly.
Pest Patrol: Keeping Your Hibiscus Healthy and Blooming
Pests and diseases can weaken your hibiscus and prevent it from blooming. Regularly inspect your plant for signs of pests or diseases and take action promptly.
1. Common Pests: Some common pests that attack hibiscus include aphids, spider mites, whiteflies, and mealybugs.
2. Identifying Pests: Look for signs of infestation, such as sticky residue on the leaves, webbing, or visible insects.
3. Treating Pests: You can treat pests with insecticidal soap, neem oil, or horticultural oil. Follow the instructions on the product label carefully.
4. Preventing Pests: To prevent pests, keep your hibiscus healthy and well-watered. Also, avoid overcrowding your plants, as this can create a favorable environment for pests.
5. Common Diseases: Some common diseases that affect hibiscus include root rot, leaf spot, and fungal diseases.
6. Preventing Diseases: To prevent diseases, provide good drainage, avoid overwatering, and ensure good air circulation.
7. Treating Diseases: Treat diseases with a fungicide. Follow the instructions on the product label carefully.
Sunlight Strategies: Maximizing Light for Maximum Blooms
Hibiscus need at least 6 hours of direct sunlight per day to bloom properly. If your hibiscus isn’t getting enough sunlight, it may not bloom at all.
1. Choose the Right Location: When planting your hibiscus, choose a location that receives plenty of sunlight.
2. Move Your Plant: If your hibiscus is in a pot, you can move it to a sunnier location if needed.
3. Supplement with Artificial Light: If you don’t have enough natural sunlight, you can supplement with artificial light. Use a grow light specifically designed for plants.
4. Rotate Your Plant: Rotate your plant regularly to ensure that all sides receive equal amounts of sunlight.
Temperature Tactics: Protecting Your Hibiscus from Extremes
Hibiscus are tropical plants and prefer warm temperatures. They can be damaged by frost or extreme heat.
1. Protect from Frost: If you live in an area with frost, you’ll need to protect your hibiscus during the winter months. You can bring it indoors, cover it with a blanket, or move it to a sheltered location.
2. Protect from Heat: In extremely hot weather, provide your hibiscus with some shade during the hottest part of the day. You can also mist the leaves with water to help keep them cool.
3. Ideal Temperature Range: The ideal temperature range for hibiscus is between 60°F and 90°F (15°C and 32°C).
Deadheading Done Right: Encouraging More Blooms
Deadheading is the process of removing spent flowers. This encourages the plant to produce more blooms.
1. Remove Spent Flowers: As soon as a flower starts to fade, remove it by cutting it off at the base of the stem.
2. Don’t Let Seed Pods Form: If you allow seed pods to form, the plant will put its energy into producing seeds instead of flowers.
3. Regular Deadheading: Deadhead your hibiscus regularly to encourage continuous blooming.
Conclusion
So, there you have it! Unlocking the secret to continuous hibiscus blooms isn’t about expensive fertilizers or complicated gardening techniques. It’s about understanding your hibiscus plant’s needs and implementing these simple, yet effective, DIY tricks. From crafting your own nutrient-rich soil amendments to mastering the art of strategic pruning, you now possess the knowledge to transform your hibiscus from a sporadic bloomer into a vibrant, ever-flowering spectacle.
Why is this a must-try? Because it’s empowering! You’re taking control of your plant’s health and vitality, fostering a deeper connection with your garden, and saving money in the process. Imagine the satisfaction of watching your hibiscus burst forth with a profusion of blooms, knowing that you played a direct role in its success. The vibrant colors and exotic beauty of continuously blooming hibiscus will not only enhance your outdoor space but also bring a sense of joy and accomplishment to your gardening endeavors.
But don’t stop there! Experiment with these techniques and discover what works best for your specific hibiscus variety and climate. Perhaps you’ll find that adding a touch of Epsom salts to your watering routine further enhances bloom production. Or maybe you’ll discover a unique pruning method that encourages even more flowering branches. The possibilities are endless!
Consider these variations to further personalize your approach:
* Compost Tea Boost: Brew a batch of compost tea using your own homemade compost and use it as a foliar spray to deliver essential nutrients directly to the leaves.
* Coffee Grounds Delight: Recycle your used coffee grounds by sprinkling them around the base of your hibiscus plant. Coffee grounds are a natural source of nitrogen, which is crucial for healthy growth and abundant blooms.
* Banana Peel Power: Bury banana peels near the roots of your hibiscus. As they decompose, they release potassium, a vital nutrient for flower development.
* Different Hibiscus Varieties: Try these techniques on different hibiscus varieties. Some may respond better to certain methods than others. Experiment and find what works best for your specific plants.
The key is to observe your plant closely and adjust your approach accordingly. Remember, gardening is a journey of learning and discovery.
We are confident that these DIY tricks will significantly improve your chances of achieving continuous hibiscus blooms. But we want to hear from you! Try these techniques and share your experiences with us. Did you notice a difference in bloom production? Did you discover any other helpful tips or variations? Your feedback will not only help us refine these methods but also inspire other gardeners to unlock the full potential of their hibiscus plants.
So, grab your gardening gloves, gather your supplies, and get ready to witness the magic of continuous hibiscus blooms. Your garden will thank you for it! Don’t forget to document your progress and share your stunning hibiscus photos with our community. Let’s create a vibrant online space where we can all learn and grow together. Happy gardening!
Frequently Asked Questions (FAQ)
Q: What type of hibiscus benefits most from these continuous blooming tips?
A: While these tips can benefit most hibiscus varieties, they are particularly effective for tropical hibiscus (Hibiscus rosa-sinensis), which are known for their potential to bloom year-round in warm climates. However, even hardy hibiscus (Hibiscus moscheutos), which die back in winter, can benefit from these techniques during their growing season, resulting in more abundant and prolonged blooms. Experimentation is key to see what works best for your specific variety.
Q: How often should I prune my hibiscus to encourage continuous blooming?
A: Light pruning can be done throughout the growing season to remove spent flowers and encourage new growth. However, a more significant pruning should be done in late winter or early spring, before new growth begins. This involves removing any dead or damaged branches and shaping the plant to promote air circulation and sunlight penetration. Avoid heavy pruning during the blooming season, as this can reduce flower production.
Q: What are the signs that my hibiscus is not getting enough nutrients?
A: Common signs of nutrient deficiency in hibiscus include yellowing leaves (chlorosis), stunted growth, poor bloom production, and small or pale flowers. The specific symptoms can vary depending on the nutrient that is lacking. For example, nitrogen deficiency often manifests as yellowing of older leaves, while iron deficiency can cause yellowing between the veins of younger leaves. A soil test can help identify specific nutrient deficiencies and guide your fertilization efforts.
Q: Can I use any type of fertilizer for my hibiscus?
A: While you can use commercially available hibiscus fertilizers, it’s important to choose one that is specifically formulated for hibiscus or flowering plants. These fertilizers typically have a higher phosphorus content, which is essential for flower development. Avoid fertilizers that are high in nitrogen, as this can promote excessive leaf growth at the expense of blooms. Organic fertilizers, such as compost tea and fish emulsion, are also excellent options for providing a slow-release source of nutrients.
Q: How much sunlight does my hibiscus need to bloom continuously?
A: Hibiscus plants need at least 6-8 hours of direct sunlight per day to bloom continuously. Insufficient sunlight can result in reduced bloom production and leggy growth. If your hibiscus is not getting enough sunlight, consider moving it to a sunnier location or supplementing with artificial grow lights.
Q: What is the best way to water my hibiscus?
A: Hibiscus plants prefer consistently moist soil, but they don’t like to be waterlogged. Water deeply when the top inch of soil feels dry to the touch. Avoid overwatering, as this can lead to root rot. During hot, dry weather, you may need to water more frequently.
Q: How do I protect my hibiscus from pests and diseases?
A: Regularly inspect your hibiscus for signs of pests and diseases. Common pests that affect hibiscus include aphids, spider mites, and whiteflies. These can be controlled with insecticidal soap or neem oil. Diseases such as root rot and fungal leaf spots can be prevented by providing good drainage and air circulation.
Q: My hibiscus is not blooming, even though I’m following all the tips. What could be the problem?
A: There could be several reasons why your hibiscus is not blooming, even if you’re following all the tips. Some possibilities include:
* Age of the plant: Young hibiscus plants may take some time to mature before they start blooming profusely.
* Rootbound: If your hibiscus is growing in a pot, it may be rootbound, which can restrict growth and bloom production. Consider repotting it into a larger container.
* Stress: Hibiscus plants can be sensitive to stress, such as sudden changes in temperature or light. Try to provide a stable environment for your plant.
* Incorrect pH: Hibiscus plants prefer slightly acidic soil. Test the pH of your soil and amend it if necessary.
* Dormancy: Some hibiscus varieties go dormant during the winter months and will not bloom until the weather warms up.
Q: Can I use these tips for hibiscus plants grown indoors?
A: Yes, these tips can be adapted for hibiscus plants grown indoors. However, you may need to make some adjustments to account for the different growing conditions. For example, you may need to supplement with artificial grow lights to provide sufficient sunlight. You’ll also need to be careful not to overwater your hibiscus, as indoor plants tend to dry out more slowly than outdoor plants.
Q: How can I encourage more vibrant colors in my hibiscus blooms?
A: To encourage more vibrant colors in your hibiscus blooms, ensure your plant receives adequate sunlight and is fertilized with a balanced fertilizer that is rich in phosphorus and potassium. Additionally, maintaining a slightly acidic soil pH can help enhance color intensity. Some gardeners also swear by adding a small amount of Epsom salts to the soil, as magnesium can contribute to brighter blooms.

Leave a Comment