
Salt and Detergent Cleaning DIY: Unlock the secrets to a sparkling home with simple ingredients you probably already have! Are you tired of spending a fortune on harsh chemical cleaners that promise the world but often fall short? I know I was! That’s why I’m so excited to share these incredible DIY cleaning solutions using just salt and detergent.
For centuries, resourceful homemakers have relied on the power of natural ingredients to keep their homes clean and fresh. While the specific combination of salt and detergent might be a more modern adaptation, the underlying principle of using readily available resources to tackle household chores is deeply rooted in our history. Think about it – our grandmothers didn’t have a shelf full of specialized cleaners; they used what they had, and they made it work beautifully!
In today’s world, where we’re increasingly conscious of the environmental impact of our choices and the potential health risks associated with harsh chemicals, finding effective and eco-friendly cleaning alternatives is more important than ever. This Salt and Detergent Cleaning DIY guide will empower you to create powerful cleaning solutions that are gentle on your home, your health, and your wallet. I’ll show you how to tackle everything from stubborn stains to grimy surfaces with these simple, yet surprisingly effective, recipes. Get ready to ditch those expensive cleaners and embrace the power of DIY!

DIY Power Cleaner: Salt and Detergent for Sparkling Results!
Hey everyone! I’m so excited to share this super simple, yet incredibly effective, DIY cleaning hack with you. I’ve been using this salt and detergent mixture for ages, and it’s seriously a game-changer for tackling tough stains and grime around the house. Forget expensive, chemical-laden cleaners – this homemade solution is budget-friendly, eco-conscious, and works like a charm!
What Makes This Cleaner So Great?
The magic lies in the combination of salt and detergent. Here’s why it works:
* Salt: Acts as a gentle abrasive, helping to scrub away stubborn dirt and grime without scratching most surfaces. It’s also a natural disinfectant and deodorizer.
* Detergent: Cuts through grease and oil, lifting dirt away from surfaces. It also helps to suspend the dirt in the water, preventing it from redepositing.
Where Can You Use This DIY Cleaner?
This cleaner is surprisingly versatile! I’ve used it successfully on:
* Sinks and Tubs: Removes soap scum, water stains, and general grime.
* Tile and Grout: Brightens grout lines and eliminates mildew.
* Stovetops and Ovens: Cuts through baked-on grease and food splatters (use with caution on delicate surfaces).
* Toilets: Cleans and deodorizes the bowl.
* Laundry Stains: Pre-treats tough stains like grass, mud, and food.
* Shoes: Cleans white canvas shoes and removes dirt from sneakers.
* Dishwasher: Helps to clean and deodorize your dishwasher.
Important Note: Always test this cleaner in an inconspicuous area first, especially on delicate surfaces like painted walls, wood, or certain types of plastic. While salt is generally gentle, it can scratch some materials.
What You’ll Need
Before we get started, gather these simple supplies:
* Table Salt: Regular table salt works perfectly fine.
* Dish Soap or Laundry Detergent: I prefer using dish soap for general cleaning and laundry detergent for stain removal. Choose a detergent that you know works well for you.
* Water: Warm water is best for dissolving the salt and activating the detergent.
* Spray Bottle (Optional): For easy application.
* Cleaning Cloths or Sponges: Microfiber cloths are great for general cleaning.
* Scrub Brush (Optional): For tackling tough stains and grout.
* Gloves (Optional): To protect your hands, especially if you have sensitive skin.
* Measuring Spoons: For accurate measurements.
Mixing the Magic Potion
This is where the fun begins! Here’s how to mix your DIY salt and detergent cleaner:
1. Choose Your Ratio: The ratio of salt to detergent depends on the cleaning task. Here are a few guidelines:
* General Cleaning: 1 tablespoon of salt per 1 tablespoon of detergent per 1 cup of warm water.
* Tough Stains: 2 tablespoons of salt per 1 tablespoon of detergent per 1 cup of warm water.
* Grout Cleaning: 3 tablespoons of salt per 1 tablespoon of detergent per 1/2 cup of warm water (for a thicker paste).
2. Combine Ingredients: In a bowl or spray bottle, combine the salt, detergent, and warm water.
3. Mix Well: Stir or shake the mixture until the salt is completely dissolved.
4. Test It Out: Before applying to a large area, test the cleaner on a small, inconspicuous spot to ensure it doesn’t damage the surface.
Cleaning Time! Step-by-Step Instructions
Now that you have your cleaner ready, let’s get down to business! I’ll walk you through how to use it on different surfaces.
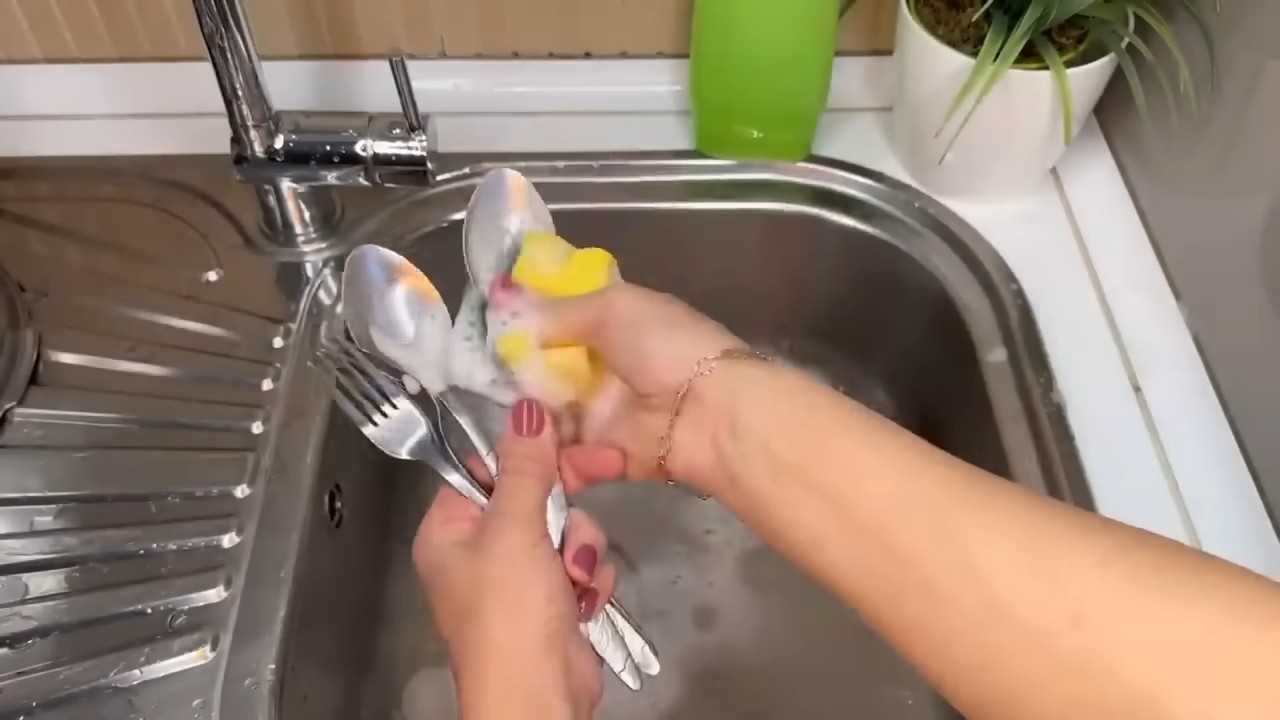
Cleaning Sinks and Tubs
1. Wet the Surface: Dampen the sink or tub with warm water.
2. Apply the Cleaner: Sprinkle the salt and detergent mixture directly onto the surface or spray it on using a spray bottle.
3. Scrub Gently: Use a cleaning cloth or sponge to scrub the surface in a circular motion. Pay extra attention to areas with soap scum or water stains.
4. Rinse Thoroughly: Rinse the sink or tub with clean water until all traces of the cleaner are gone.
5. Dry with a Clean Cloth: Wipe the surface dry with a clean cloth to prevent water spots.
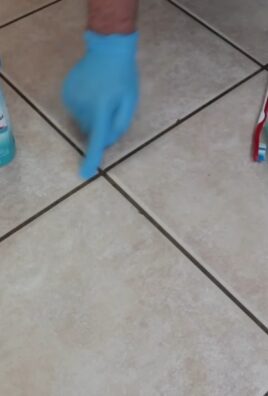
Cleaning Tile and Grout
1. Prepare the Area: If the grout is heavily soiled, pre-clean it with a damp cloth to remove loose dirt.
2. Apply the Paste: For grout, I prefer using a thicker paste. Apply the salt and detergent paste directly to the grout lines.
3. Scrub with a Brush: Use a scrub brush to scrub the grout lines vigorously. You might need to apply some elbow grease for stubborn stains.
4. Let it Sit: Allow the paste to sit on the grout for 5-10 minutes to allow the salt and detergent to work their magic.
5. Rinse Thoroughly: Rinse the tile and grout with clean water until all traces of the cleaner are gone.
6. Dry with a Clean Cloth: Wipe the tile and grout dry with a clean cloth to prevent water spots.
Cleaning Stovetops and Ovens
Important: Always unplug your stovetop or oven before cleaning.
1. Remove Loose Debris: Scrape away any loose food particles or grease with a spatula or scraper.
2. Apply the Cleaner: Sprinkle the salt and detergent mixture directly onto the stovetop or oven surface.
3. Scrub Gently: Use a cleaning cloth or sponge to scrub the surface in a circular motion. For baked-on grease, you might need to use a scrub brush.
4. Let it Sit: Allow the cleaner to sit on the surface for 10-15 minutes to loosen the grime.
5. Wipe Clean: Wipe the surface clean with a damp cloth. You might need to repeat this step several times to remove all traces of the cleaner.
6. Dry with a Clean Cloth: Wipe the surface dry with a clean cloth.
Cleaning Toilets
1. Pour into the Bowl: Pour about 1/2 cup of the salt and detergent mixture into the toilet bowl.
2. Let it Sit: Allow the mixture to sit in the bowl for at least 30 minutes, or even overnight for heavily soiled toilets.
3. Scrub the Bowl: Use a toilet brush to scrub the bowl thoroughly, paying attention to the waterline and any stains.
4. Flush: Flush the toilet to rinse away the cleaner and any loosened dirt.
Pre-Treating Laundry Stains
1. Dampen the Stain: Wet the stained area with water.
2. Apply the Paste: Make a paste of salt and laundry detergent (a 2:1 ratio works well). Apply the paste directly to the stain.
3. Rub Gently: Gently rub the paste into the stain with your fingers or a soft brush.
4. Let it Sit: Allow the paste to sit on the stain for 30 minutes to an hour.
5. Launder as Usual: Wash the garment as usual, following the care instructions on the label.
Cleaning Shoes
1. Remove Loose Dirt: Brush off any loose dirt or debris from the shoes.
2. Apply the Cleaner: Mix a small amount of salt and detergent with water to form a paste. Apply the paste to the dirty areas of the shoes.
3. Scrub Gently: Use a brush or cloth to scrub the shoes gently.
4. Rinse Thoroughly: Rinse the shoes with clean water to remove all traces of the cleaner.
5. Air Dry: Allow the shoes to air dry completely. Avoid placing them in direct sunlight or near a heat source, as this can damage the materials.
Cleaning Dishwashers
1. Empty the Dishwasher: Make sure your dishwasher is empty.
2. Add the Mixture: Pour about 1/2 cup of salt and 1/4 cup of detergent into the bottom of the dishwasher.
3. Run a Cycle: Run the dishwasher on a hot cycle.
Tips and Tricks for Best Results
* Adjust the Ratio: Don’t be afraid to experiment with the ratio of salt to detergent to find what works best for your specific cleaning needs.
* Use Warm Water: Warm water helps to dissolve the salt and activate the detergent, making the cleaner more effective.
* Don’t Over-Scrub: While salt is a gentle abrasive, excessive scrubbing
Conclusion
So, there you have it! This simple yet incredibly effective salt and detergent cleaning DIY is a game-changer for anyone looking to tackle stubborn stains and grime without resorting to harsh chemicals or expensive commercial cleaners. We’ve shown you how easy it is to combine these two readily available household ingredients to create a powerful cleaning solution that can be used on a variety of surfaces.
Why is this a must-try? Because it’s economical, eco-friendly, and, most importantly, it works! Think about all the money you spend on specialized cleaning products for different areas of your home. This DIY solution streamlines your cleaning routine, saving you both time and money. Plus, you’ll be reducing your exposure to potentially harmful chemicals, making your home a healthier environment for you and your family.
But the beauty of this DIY trick lies not only in its simplicity and effectiveness but also in its versatility. Feel free to experiment with variations to suit your specific cleaning needs. For instance, if you’re dealing with particularly tough grease stains in the kitchen, consider adding a tablespoon of white vinegar to the mixture for an extra boost of cleaning power. For a more pleasant scent, a few drops of your favorite essential oil, like lemon or lavender, can be added to the solution. Just be sure to test the solution on an inconspicuous area first, especially when cleaning delicate surfaces.
Another variation involves the type of salt you use. While regular table salt works perfectly well, you can also try using coarser salts like sea salt or Epsom salt for added abrasive power when scrubbing stubborn stains. Remember to adjust the amount of salt and detergent depending on the severity of the stain and the surface you’re cleaning.
We’ve found that this salt and detergent cleaning DIY is particularly effective on bathroom tiles, kitchen countertops, and even stained clothing. It’s also great for cleaning grout, which can be notoriously difficult to keep clean. The salt acts as a gentle abrasive, helping to lift dirt and grime, while the detergent breaks down grease and stains.
Don’t just take our word for it, though. We strongly encourage you to give this DIY cleaning solution a try. We’re confident that you’ll be amazed by the results. And once you’ve experienced the cleaning power of this simple combination, we’d love to hear about your experience. Share your before-and-after photos, your favorite variations, and any tips or tricks you’ve discovered in the comments section below. Let’s build a community of DIY cleaning enthusiasts and share our knowledge to make our homes cleaner, healthier, and more sustainable.
So, grab your salt, your detergent, and get ready to experience the magic of this simple yet powerful cleaning solution. You won’t be disappointed! Happy cleaning!
Frequently Asked Questions (FAQs)
What kind of salt and detergent should I use for this DIY cleaning solution?
For the salt, regular table salt works perfectly fine for most cleaning tasks. However, you can also experiment with coarser salts like sea salt or Epsom salt for added abrasive power when dealing with stubborn stains. As for the detergent, a standard dish soap or laundry detergent will do the trick. Avoid using detergents that contain bleach or harsh chemicals, as these can react negatively with the salt and potentially damage surfaces. A gentle, all-purpose detergent is generally the best choice.
Can I use this cleaning solution on all surfaces?
While this salt and detergent cleaning DIY is generally safe for most surfaces, it’s always a good idea to test it on an inconspicuous area first, especially when cleaning delicate materials like wood, painted surfaces, or fabrics. Avoid using it on surfaces that are easily scratched, such as polished metals or delicate plastics. For these surfaces, a gentler cleaning solution is recommended.
How much salt and detergent should I use?
The ideal ratio of salt to detergent will depend on the severity of the stain and the surface you’re cleaning. A good starting point is to mix equal parts of salt and detergent. For tougher stains, you can increase the amount of salt. For more delicate surfaces, you can dilute the solution with water. Always start with a small amount and adjust as needed.
Is this cleaning solution safe for pets and children?
While the ingredients in this DIY cleaning solution are generally considered safe, it’s still important to keep it out of reach of children and pets. Avoid using it in areas where pets or children are likely to ingest it. After cleaning, be sure to rinse the surface thoroughly with water to remove any residue. If you have concerns about the safety of this solution, consult with a professional cleaner or use a commercially available cleaning product that is specifically designed for use around pets and children.
How long does this cleaning solution last?
This cleaning solution is best used immediately after mixing. Over time, the salt may settle to the bottom of the container, and the detergent may lose its effectiveness. If you need to store the solution for later use, be sure to shake it well before using it. However, for optimal results, it’s always best to mix a fresh batch each time you clean.
Can I add other ingredients to this cleaning solution?
Yes, you can customize this cleaning solution by adding other ingredients to enhance its cleaning power or scent. For example, adding a tablespoon of white vinegar can help to cut through grease and grime. A few drops of essential oil, such as lemon or lavender, can add a pleasant fragrance. However, be sure to research the compatibility of any additional ingredients before adding them to the solution. Avoid mixing bleach or other harsh chemicals with this DIY cleaner.
What types of stains is this cleaning solution most effective on?
This salt and detergent cleaning DIY is particularly effective on a wide range of common household stains, including grease, grime, soap scum, mildew, and food stains. The salt acts as a gentle abrasive, helping to lift dirt and grime, while the detergent breaks down grease and stains. It’s also great for cleaning grout, which can be notoriously difficult to keep clean.
How do I clean grout with this solution?
To clean grout with this solution, apply the mixture directly to the grout lines. Let it sit for a few minutes to allow the salt and detergent to penetrate the grime. Then, use a scrub brush or old toothbrush to scrub the grout lines thoroughly. Rinse the area with water and wipe clean with a damp cloth. For stubborn stains, you may need to repeat the process.
What should I do if the solution leaves a residue on the surface?
If the solution leaves a residue on the surface, simply rinse the area thoroughly with water and wipe clean with a damp cloth. You may need to repeat this process several times to remove all of the residue. To prevent residue buildup, avoid using too much detergent in the solution.
Where can I share my experience with this DIY cleaning solution?
We encourage you to share your experience with this DIY cleaning solution in the comments section below. We’d love to hear about your before-and-after photos, your favorite variations, and any tips or tricks you’ve discovered. Let’s build a community of DIY cleaning enthusiasts and share our knowledge to make our homes cleaner, healthier, and more sustainable.


Leave a Comment