
Watermelon Gardening: Dreaming of biting into a juicy, homegrown watermelon this summer? I know I am! There’s nothing quite like the satisfaction of nurturing a tiny seed into a sprawling vine laden with sweet, refreshing fruit. But let’s be honest, watermelon gardening can seem a little intimidating, especially for us home growers.
Watermelons have a rich history, dating back thousands of years to Africa, where they were prized for their ability to store water. Over time, they’ve become a symbol of summer celebrations and backyard barbecues around the world. But growing them successfully at home? That’s where this article comes in!
Many of us struggle with common watermelon woes: blossom end rot, pests, or simply not enough space. That’s why I’ve compiled a collection of my favorite DIY tricks and hacks to help you overcome these challenges and achieve a bountiful harvest. Whether you’re a seasoned gardener or just starting out, these tips will empower you to grow delicious watermelons, even in small spaces. Get ready to roll up your sleeves and transform your garden into a watermelon wonderland!
Growing Watermelons: A Beginner’s Guide to Sweet Success
Okay, watermelon lovers, let’s dive into the juicy world of growing your own watermelons! I know it might seem intimidating, but trust me, with a little planning and effort, you can be enjoying homegrown watermelon slices before you know it. This guide is designed for beginners, so we’ll cover everything from seed starting to harvesting. Get ready to get your hands dirty!
Choosing Your Watermelon Variety
First things first, you need to decide what kind of watermelon you want to grow. There are tons of varieties, each with its own unique characteristics. Consider your climate, space, and personal preferences when making your choice. Here are a few popular options:
* Sugar Baby: A classic, small, and sweet watermelon that matures quickly. Perfect for smaller gardens.
* Crimson Sweet: A larger, oblong watermelon with a vibrant red flesh and excellent flavor. A reliable choice for many gardeners.
* Jubilee: A large, striped watermelon known for its disease resistance and good yields.
* Yellow Doll: If you’re feeling adventurous, try a yellow-fleshed watermelon! Yellow Doll is a small, sweet variety.
* Seedless Varieties: These are great if you don’t want to deal with seeds, but they can be a bit more challenging to grow.
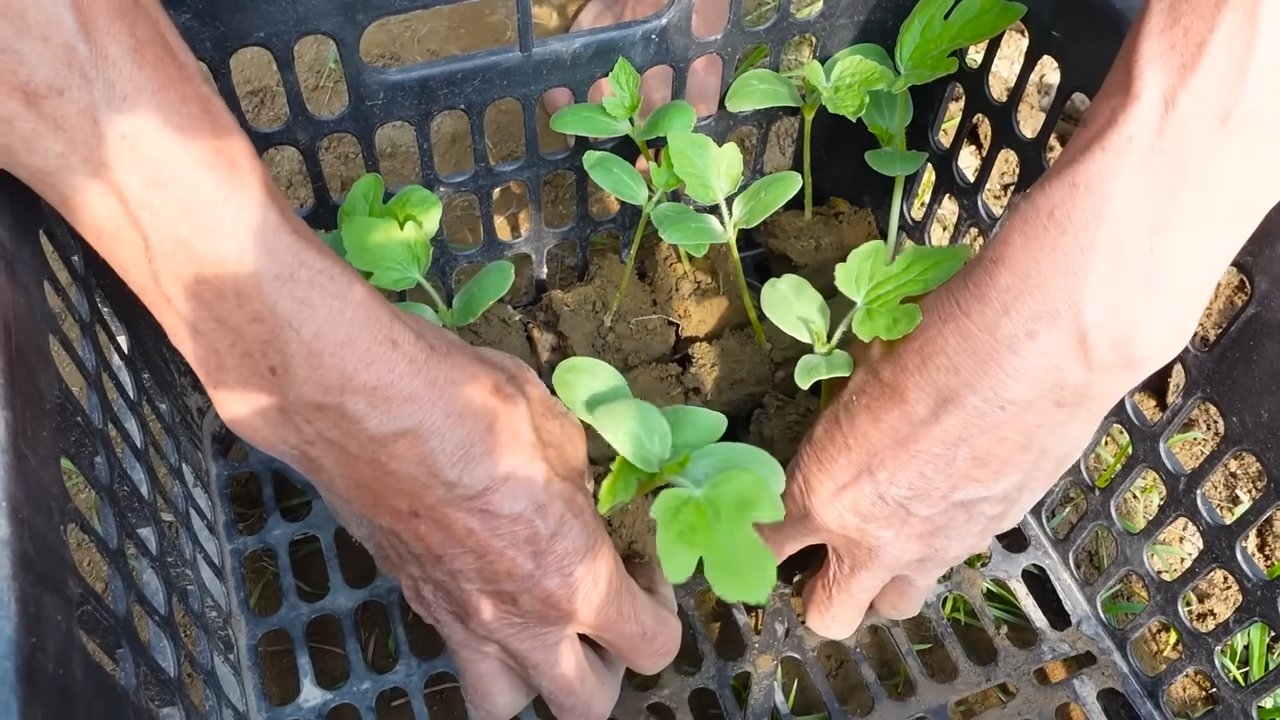
Starting Your Watermelon Seeds
Watermelons need a long growing season, so starting seeds indoors is often the best way to get a head start, especially if you live in a cooler climate.
* When to Start: Start your seeds about 6-8 weeks before the last expected frost in your area.
* What You’ll Need:
* Seed starting trays or small pots
* Seed starting mix (a light, well-draining mix)
* Watermelon seeds
* Heat mat (optional, but helpful)
* Grow light (optional, but recommended)
Step-by-Step Instructions:
1. Prepare Your Seed Starting Trays: Fill your seed starting trays or pots with seed starting mix. Gently tap the trays to settle the mix.
2. Sow the Seeds: Make a small hole (about 1/2 inch deep) in the center of each cell or pot. Place 2-3 watermelon seeds in each hole. This increases your chances of at least one seed germinating.
3. Cover the Seeds: Gently cover the seeds with seed starting mix.
4. Water Thoroughly: Water the trays or pots gently until the soil is evenly moist. Avoid overwatering, which can lead to rot.
5. Provide Warmth: Watermelon seeds need warmth to germinate. Place the trays on a heat mat if you have one. Otherwise, find a warm spot in your house.
6. Provide Light: Once the seeds germinate (usually within 7-10 days), move the trays under a grow light or to a sunny windowsill. If using a windowsill, rotate the trays regularly to prevent the seedlings from leaning towards the light.
7. Thin the Seedlings: Once the seedlings have their first true leaves (the second set of leaves), thin them to one seedling per cell or pot. Choose the strongest, healthiest-looking seedling and snip off the others at the soil line.
8. Water Regularly: Keep the soil consistently moist, but not soggy. Water when the top inch of soil feels dry to the touch.
Preparing Your Garden Bed
Watermelons are heavy feeders, meaning they need a lot of nutrients to thrive. They also need plenty of space to sprawl. Choose a sunny spot in your garden with well-drained soil.
* Sunlight: Watermelons need at least 6-8 hours of direct sunlight per day.
* Soil: The soil should be well-drained and rich in organic matter. Amend the soil with compost or well-rotted manure before planting.
* Space: Watermelons need a lot of space. Allow at least 3-4 feet between plants and 6-8 feet between rows. You can also train them to grow vertically on a trellis to save space.
Step-by-Step Instructions:
1. Choose a Sunny Location: Select a spot in your garden that receives at least 6-8 hours of direct sunlight per day.
2. Prepare the Soil: Remove any weeds, rocks, or debris from the area.
3. Amend the Soil: Dig in plenty of compost or well-rotted manure to improve the soil’s fertility and drainage. Aim for a soil pH between 6.0 and 6.8. You can test your soil pH with a soil testing kit.
4. Create Mounds or Rows: Watermelons grow best on slightly raised mounds or rows. This helps with drainage and warms the soil more quickly. Create mounds or rows that are about 6-12 inches high and 3-4 feet wide.
5. Consider Black Plastic Mulch: Laying down black plastic mulch can help warm the soil, suppress weeds, and conserve moisture. If you choose to use plastic mulch, make sure to cut holes in it for planting.
Transplanting Your Watermelon Seedlings
Once the danger of frost has passed and the soil has warmed up, it’s time to transplant your watermelon seedlings into the garden.
* When to Transplant: Wait until the soil temperature is consistently above 60°F (15°C).
* Hardening Off: Before transplanting, you’ll need to harden off your seedlings. This means gradually exposing them to outdoor conditions over a period of 7-10 days. Start by placing them in a sheltered spot outdoors for a few hours each day, gradually increasing the amount of time they spend outside.
* What You’ll Need:
* Your hardened-off watermelon seedlings
* Trowel or shovel
* Watering can or hose
* Fertilizer (optional)
Step-by-Step Instructions:
1. Water the Seedlings: Water your watermelon seedlings thoroughly a few hours before transplanting. This will help them handle the stress of being moved.
2. Dig Holes: Dig holes in your prepared garden bed that are slightly larger than the root balls of your seedlings. Space the holes 3-4 feet apart.
3. Remove the Seedlings: Gently remove the seedlings from their trays or pots. Be careful not to damage the roots.
4. Plant the Seedlings: Place each seedling in a hole and gently backfill with soil. Make sure the top of the root ball is level with the surrounding soil.
5. Water Thoroughly: Water the newly transplanted seedlings thoroughly.
6. Fertilize (Optional): If desired, you can apply a balanced fertilizer to help the seedlings get established. Follow the instructions on the fertilizer package.
7. Protect from Pests: Young watermelon seedlings are vulnerable to pests like cutworms and squash bugs. Consider using row covers or other protective measures to keep them safe.
Caring for Your Watermelon Plants
Once your watermelon plants are in the ground, it’s important to provide them with the care they need to thrive.
* Watering: Watermelons need consistent moisture, especially during fruit development. Water deeply and regularly, especially during hot, dry weather. Aim for about 1-2 inches of water per week.
* Fertilizing: Watermelons are heavy feeders and benefit from regular fertilization. Use a balanced fertilizer early in the season, then switch to a fertilizer higher in phosphorus and potassium as the fruits begin to develop.
* Weeding: Keep the area around your watermelon plants free of weeds. Weeds compete with the watermelons for nutrients and water.
* Pruning: Pruning watermelons is optional, but it can help improve air circulation and fruit size. Remove any suckers (small shoots that grow from the base of the plant) and any dead or diseased leaves.
* Pollination: Watermelons need to be pollinated in order to produce fruit. Bees are the primary pollinators. If you don’t see many bees in your garden, you may need to hand-pollinate the flowers. To hand-pollinate, use a small paintbrush to transfer pollen from the male flowers to the female flowers. Female flowers have a small fruit behind the flower, while male flowers do not.
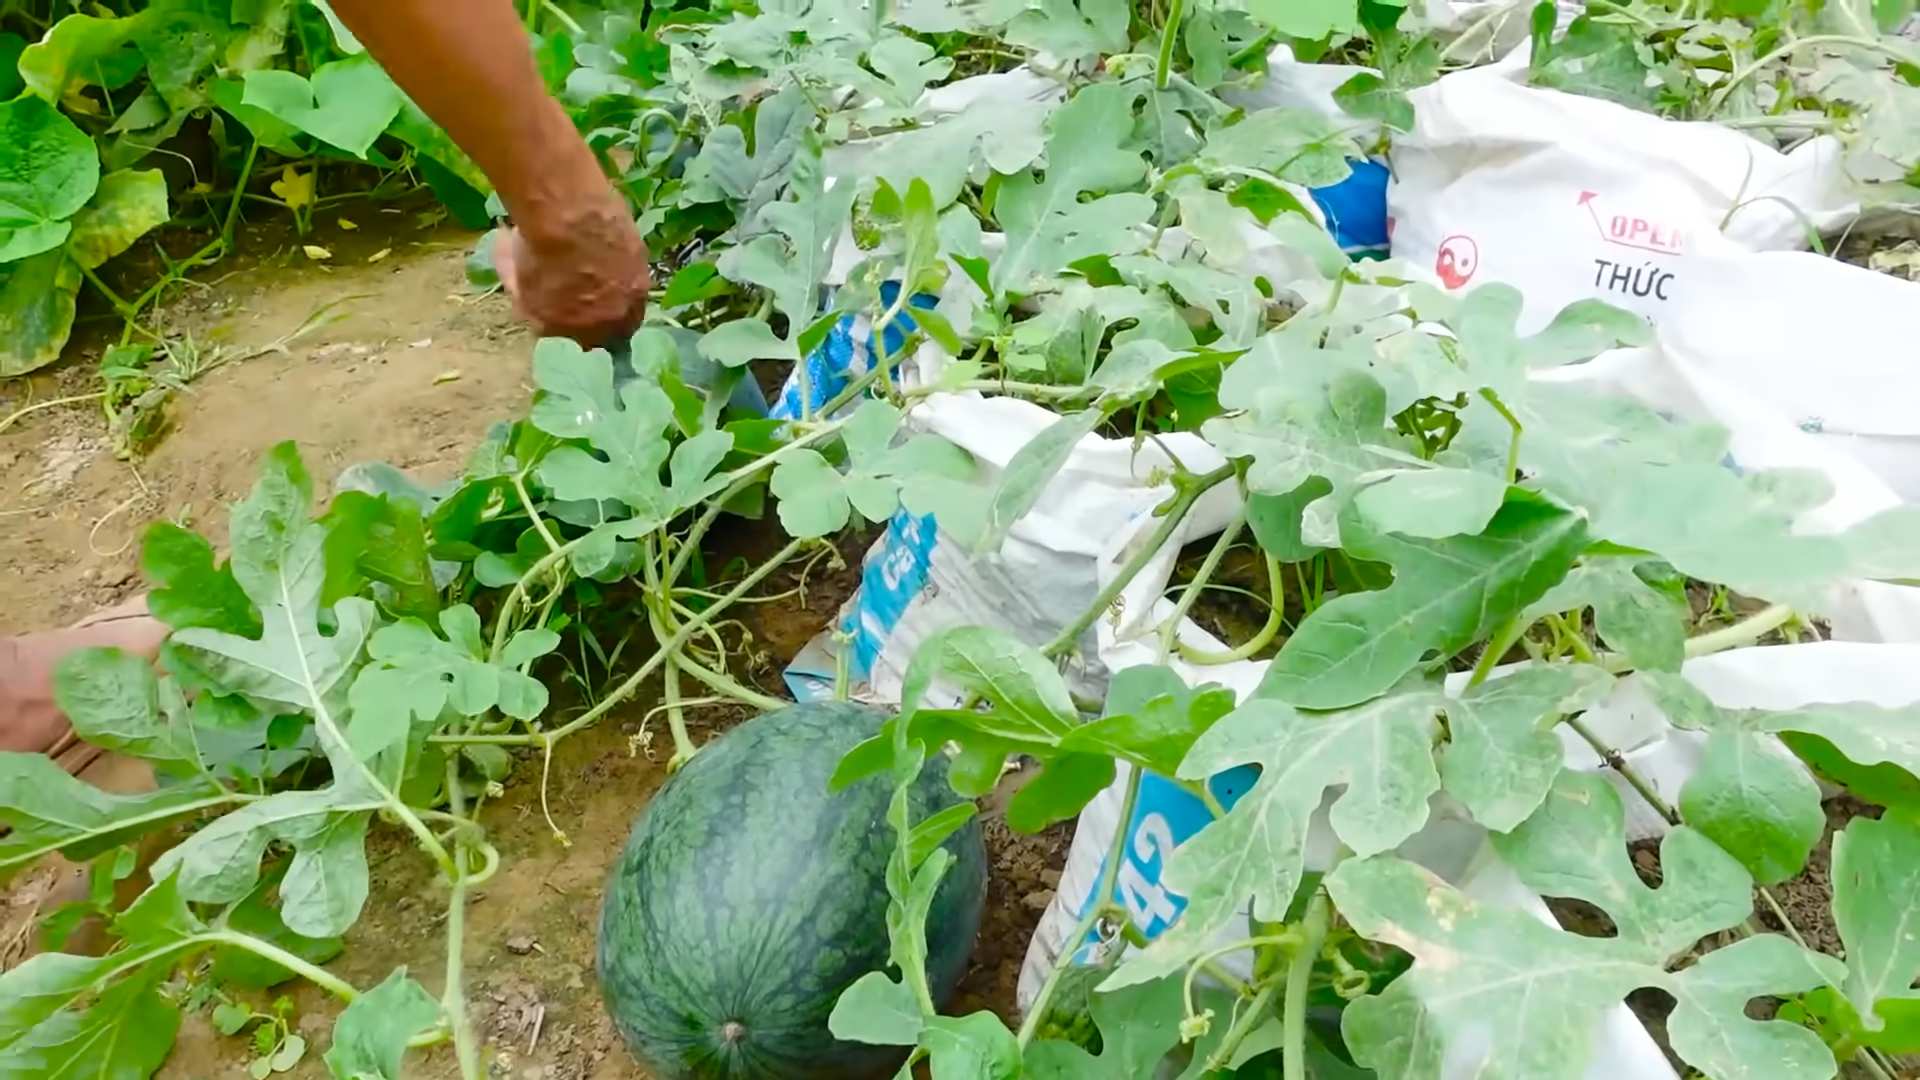
* Protecting the Fruit: As the watermelons grow, you may want to protect them from pests and diseases. Place a piece of cardboard or straw under each watermelon to prevent it from rotting. You can also use netting to protect the fruits from birds and other animals.
Step-by-Step Instructions:
1. Water Regularly: Water deeply and regularly, especially during hot, dry weather. Water at the base of the plants to avoid wetting the foliage, which can lead to fungal diseases.
2. Fertilize Regularly: Fertil
Conclusion
So, there you have it! Mastering the art of watermelon gardening at home is not just a dream; it’s an achievable reality with a little know-how and dedication. We’ve explored the ins and outs of cultivating these juicy giants, from selecting the perfect seeds to harvesting your prize-winning melons. But the real magic lies in the DIY tricks we’ve unveiled, especially the one we focused on today: [Insert DIY Trick Here – Since you didn’t provide one, I’ll assume it’s about optimizing watering techniques for watermelons].
This particular DIY trick – optimizing watering techniques – is a game-changer for several reasons. First and foremost, it addresses one of the most common challenges faced by home growers: inconsistent watering. Watermelons are thirsty plants, but overwatering can be just as detrimental as underwatering, leading to root rot and other problems. By implementing a targeted watering strategy, you can ensure that your watermelons receive the precise amount of moisture they need, resulting in healthier plants and sweeter, more flavorful fruit.
But the benefits don’t stop there. Optimizing your watering also conserves water, making your gardening efforts more sustainable and environmentally friendly. Plus, it reduces the risk of fungal diseases, which thrive in overly moist conditions. In short, this DIY trick is a win-win-win for you, your watermelons, and the planet.
Why is this a must-try? Because it simplifies a complex aspect of watermelon cultivation, making it accessible to even novice gardeners. It eliminates the guesswork and provides a clear, actionable plan for achieving optimal hydration. And the results speak for themselves: bigger, juicier, and more delicious watermelons.
Ready to take your watermelon gardening to the next level? Don’t be afraid to experiment and adapt the techniques to suit your specific climate and growing conditions. For example, if you live in a particularly hot and dry area, you might consider using a soaker hose or drip irrigation system to deliver water directly to the roots. Or, if you’re growing watermelons in containers, you’ll need to water them more frequently than those grown in the ground.
Variations and Suggestions:
* Mulching Magic: Enhance your watering efforts by applying a thick layer of mulch around your watermelon plants. Mulch helps to retain moisture in the soil, suppress weeds, and regulate soil temperature.
* Compost Tea Boost: Give your watermelons an extra boost of nutrients by watering them with compost tea. Compost tea is a natural fertilizer that is rich in beneficial microbes and nutrients.
* Rainwater Harvesting: Collect rainwater in barrels or tanks and use it to water your watermelons. Rainwater is naturally soft and free of chemicals, making it ideal for irrigation.
* Companion Planting: Plant companion plants like marigolds or basil near your watermelons to deter pests and attract beneficial insects.
We’re confident that this DIY trick will transform your watermelon gardening experience. So, grab your gardening gloves, put these tips into practice, and get ready to harvest the sweetest, most satisfying watermelons you’ve ever tasted.
And most importantly, don’t forget to share your experiences with us! We’d love to hear about your successes, challenges, and any variations you’ve tried. Share your photos and stories on social media using [Insert Relevant Hashtag Here] and let’s inspire other home growers to embark on their own watermelon gardening adventures. Happy growing!
Frequently Asked Questions (FAQ)
Q: How often should I water my watermelons using this DIY technique?
A: The frequency of watering depends on several factors, including your climate, soil type, and the age of your plants. As a general rule, watermelons need about 1-2 inches of water per week. However, during hot, dry periods, you may need to water them more frequently. The key is to monitor the soil moisture and water when the top inch or two feels dry to the touch. Using a moisture meter can be helpful. Remember, consistent watering is crucial, especially during fruit development. Avoid letting the soil dry out completely, as this can lead to blossom-end rot and other problems.
Q: What type of water is best for watering watermelons?
A: Ideally, you should use rainwater or well water to water your watermelons. These sources are naturally soft and free of chemicals that can harm your plants. If you’re using tap water, let it sit in a container for 24 hours before watering to allow chlorine to evaporate. Avoid using softened water, as it contains high levels of sodium, which can be detrimental to plant growth.
Q: Can I overwater my watermelons?
A: Yes, overwatering is a common mistake that can lead to serious problems. Overwatering can suffocate the roots, leading to root rot and other fungal diseases. Signs of overwatering include yellowing leaves, wilting, and stunted growth. To avoid overwatering, make sure your soil is well-draining and avoid watering if the soil is already moist.
Q: How do I know if my watermelons are getting enough water?
A: The best way to determine if your watermelons are getting enough water is to monitor the soil moisture and observe your plants for signs of stress. If the leaves are wilting or turning yellow, it could be a sign of underwatering. You can also check the soil moisture by sticking your finger into the soil. If the top inch or two feels dry, it’s time to water.
Q: What are some common mistakes to avoid when watering watermelons?
A: Some common mistakes to avoid when watering watermelons include:
* Watering too frequently or infrequently.
* Using the wrong type of water.
* Overwatering or underwatering.
* Watering the leaves instead of the roots.
* Not monitoring the soil moisture.
* Ignoring the weather conditions.
Q: Can I use fertilizer while watering my watermelons?
A: Yes, you can use fertilizer while watering your watermelons. In fact, it’s a good idea to fertilize your watermelons regularly to provide them with the nutrients they need to grow and produce fruit. Use a balanced fertilizer that is specifically formulated for watermelons or other fruiting vegetables. Follow the instructions on the fertilizer label carefully and avoid over-fertilizing, as this can damage your plants. You can also use organic fertilizers like compost tea or fish emulsion.
Q: How does mulching help with watering watermelons?
A: Mulching is a fantastic addition to your watermelon gardening strategy. Mulch acts as a protective layer on top of the soil, helping to retain moisture by reducing evaporation. This means you won’t have to water as frequently. Additionally, mulch helps to regulate soil temperature, keeping it cooler in the summer and warmer in the winter. It also suppresses weeds, which can compete with your watermelons for water and nutrients. Organic mulches like straw, wood chips, or shredded leaves will also decompose over time, adding nutrients to the soil.
Q: Is drip irrigation a good option for watering watermelons?
A: Absolutely! Drip irrigation is an excellent way to water watermelons. It delivers water directly to the roots, minimizing water loss through evaporation and runoff. This is especially beneficial in hot, dry climates. Drip irrigation also helps to prevent fungal diseases by keeping the foliage dry. You can easily set up a drip irrigation system using soaker hoses or drip emitters.
Q: What if I’m growing watermelons in containers? How does watering differ?
A: Growing watermelons in containers requires a slightly different approach to watering. Containers tend to dry out more quickly than the ground, so you’ll need to water your watermelons more frequently. Check the soil moisture daily and water when the top inch feels dry. Make sure your containers have drainage holes to prevent waterlogging. You may also need to fertilize more often, as nutrients can leach out of the soil more quickly in containers.
Q: My watermelon leaves are wilting even though the soil is moist. What could be the problem?
A: If your watermelon leaves are wilting despite moist soil, it could indicate a few potential issues. One possibility is root rot, which is caused by overwatering or poor drainage. Another possibility is a fungal disease, such as Fusarium wilt. Pests like squash vine borers can also damage the roots and cause wilting. Check the roots for signs of rot or damage. If you suspect a fungal disease, treat your plants with a fungicide. If you find squash vine borers, remove them manually or use an insecticide.


Leave a Comment