
Clean grout with Clorox – it’s a phrase that might not immediately spark joy, but trust me, the results will! Are you tired of staring at dingy, discolored grout lines that make your entire kitchen or bathroom look older than it is? I know I was! For years, I battled with stubborn stains, trying every cleaner under the sun with minimal success. It felt like a never-ending chore, and honestly, a bit of a losing battle.
Grout, that porous material nestled between your tiles, has been a part of our homes for centuries. From ancient Roman mosaics to modern-day backsplashes, grout has served a vital purpose. But its very nature makes it a magnet for dirt, grime, and mildew. And while a little elbow grease can help, sometimes you need a powerful solution to truly restore its original sparkle.
That’s where this DIY trick comes in. Learning how to clean grout with Clorox effectively can save you time, money, and a whole lot of frustration. No more endless scrubbing or expensive professional cleaning services! I’m going to share my tried-and-true method for achieving sparkling clean grout with just a few simple steps and readily available supplies. Get ready to transform your tiled surfaces and say goodbye to those unsightly grout lines for good!
DIY Grout Cleaning with Clorox: A Sparkling Transformation!
Okay, let’s be honest, grout is the bane of every homeowner’s existence. It gets grimy, stained, and just plain gross. But fear not! I’m going to show you how to tackle that dirty grout and bring it back to life using something you probably already have in your cleaning arsenal: Clorox bleach.
This method is effective, relatively inexpensive, and, with a little elbow grease, will leave your tiles looking brand new. Just remember to always prioritize safety when working with bleach.
Safety First!
Before we dive in, let’s talk safety. Bleach is a powerful chemical, and we need to treat it with respect.
* Ventilation is Key: Open windows and doors to ensure good airflow. We don’t want to be breathing in those fumes.
* Protective Gear: Wear rubber gloves to protect your hands from irritation. Eye protection, like safety glasses or goggles, is also a good idea, especially when working on vertical surfaces where splashes are more likely.
* Avoid Mixing: Never, ever mix bleach with ammonia or other cleaning products. This can create toxic and dangerous fumes.
* Test in an Inconspicuous Area: Before applying bleach to the entire area, test it on a small, hidden spot to ensure it doesn’t discolor your grout or tiles. Some colored grout can fade with bleach.
* Keep Away From Children and Pets: Store bleach out of reach of children and pets.
Materials You’ll Need
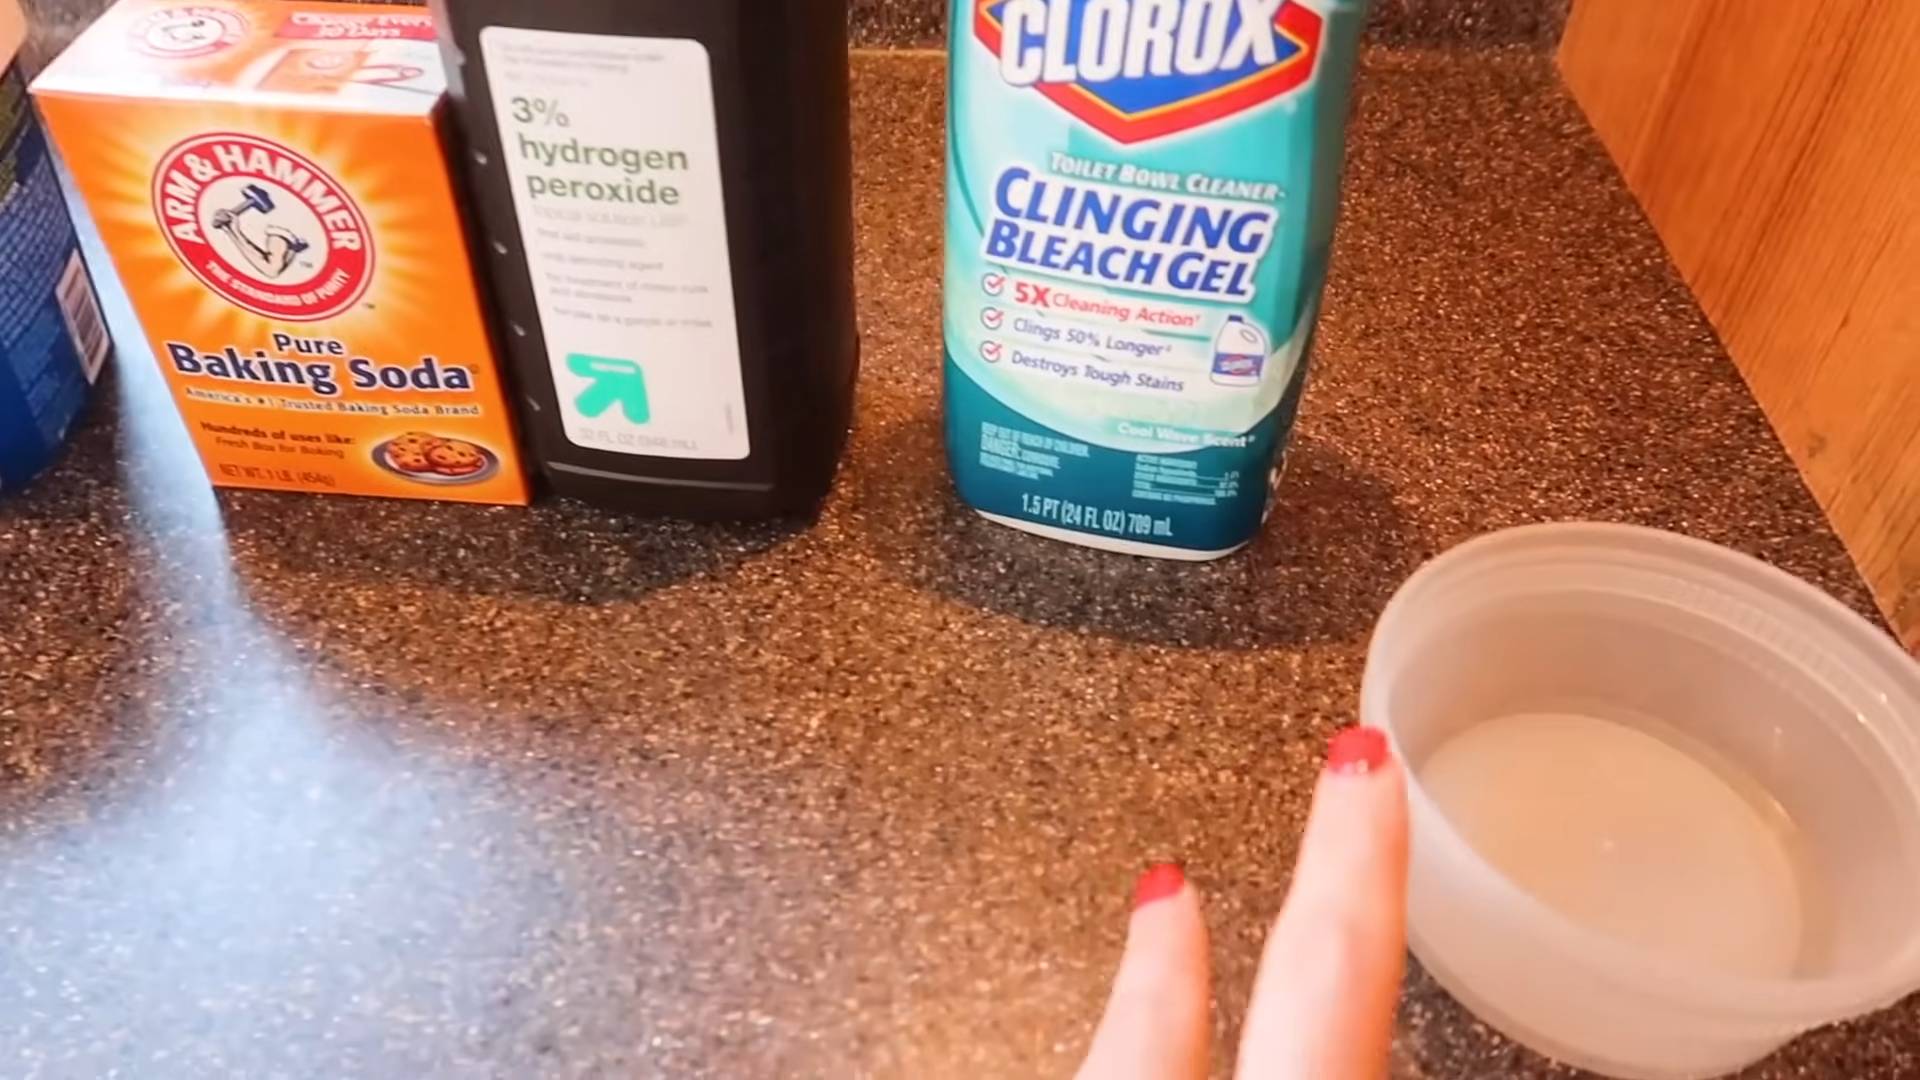
Here’s a list of everything you’ll need to get started:
* Clorox bleach (regular strength)
* Spray bottle (dedicated to bleach use only!)
* Old toothbrush or grout brush
* Clean water
* Sponge or cloth
* Rubber gloves
* Eye protection (optional, but recommended)
* Ventilation (open windows and doors)
* Optional: Baking soda (for extra cleaning power)
* Optional: Paper towels
Step-by-Step Grout Cleaning Guide
Alright, let’s get down to business! Here’s how to clean your grout with Clorox bleach:
1. Prepare the Area: Start by sweeping or vacuuming the area you’ll be cleaning. This removes loose dirt and debris, allowing the bleach to work directly on the grout.
2. Mix Your Cleaning Solution: In your spray bottle, mix a solution of equal parts Clorox bleach and water. For heavily soiled grout, you can use straight bleach, but be extra cautious and ensure excellent ventilation. I usually start with a 50/50 mix and adjust as needed.
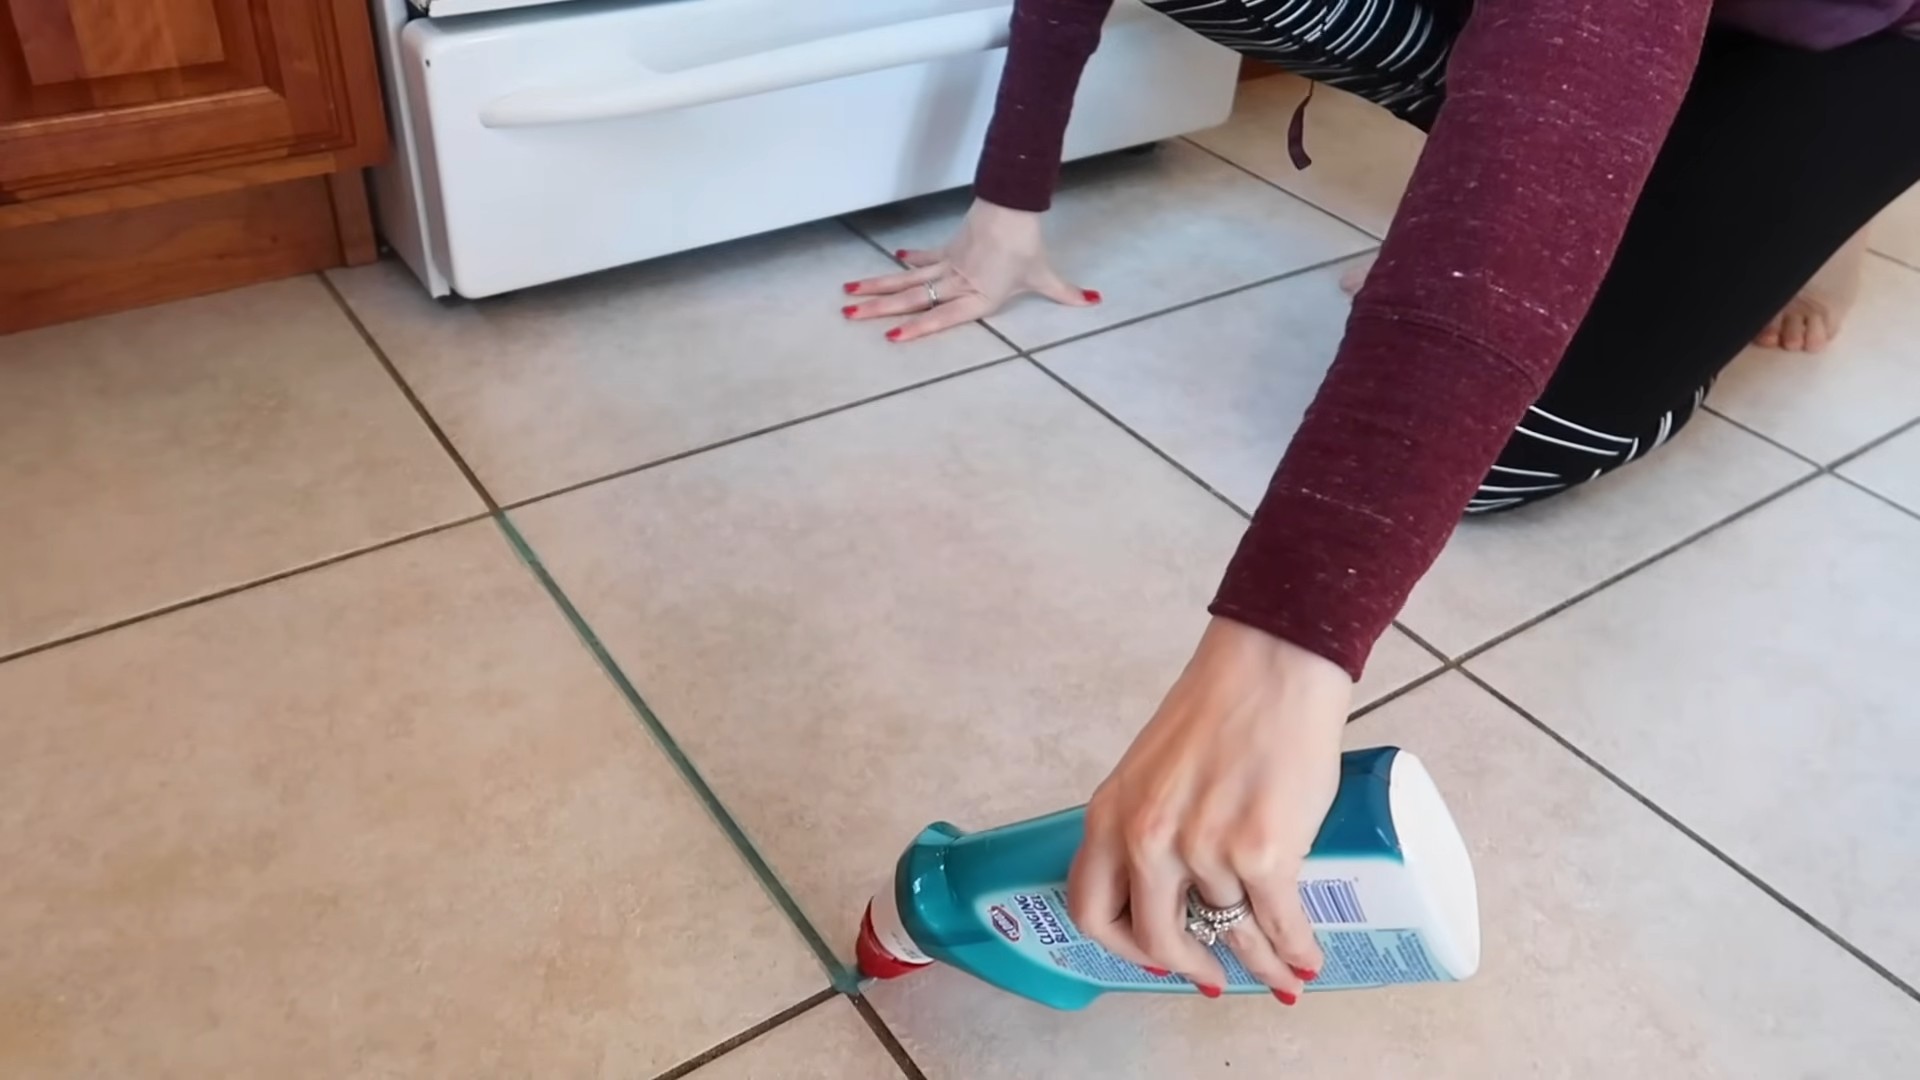
3. Spray the Grout: Carefully spray the bleach solution directly onto the grout lines. Avoid spraying it excessively on the tiles themselves, although most tiles are bleach-resistant.
4. Let it Sit: Allow the bleach solution to sit on the grout for 10-15 minutes. This gives it time to penetrate the stains and kill any mold or mildew. Don’t let it dry completely.
5. Scrub-a-dub-dub: Using your old toothbrush or grout brush, scrub the grout lines thoroughly. Apply firm pressure and work in small sections. You’ll likely see the dirt and grime start to lift away. For stubborn stains, you might need to scrub a little harder.
6. Rinse Thoroughly: Once you’ve scrubbed all the grout lines, rinse the area thoroughly with clean water. Use a sponge or cloth to wipe away any remaining bleach residue. It’s crucial to remove all traces of bleach to prevent damage or discoloration.
7. Dry the Area: Use a clean towel or cloth to dry the area completely. This will help prevent water spots and further staining.
8. Inspect and Repeat (If Necessary): Take a look at your grout. If you’re happy with the results, great! If not, you can repeat the process, focusing on any stubborn stains. For particularly tough stains, you might consider using a stronger bleach solution or letting it sit for a longer period.
Dealing with Stubborn Stains: The Baking Soda Boost
Sometimes, bleach alone isn’t enough to tackle those really stubborn stains. That’s where baking soda comes in!
1. Make a Paste: Mix baking soda with a small amount of water to create a thick paste.
2. Apply the Paste: Apply the baking soda paste directly to the stained grout lines.
3. Let it Sit: Allow the paste to sit for 15-20 minutes.
4. Scrub and Rinse: Scrub the grout lines with your toothbrush or grout brush, then rinse thoroughly with clean water.
5. Follow Up with Bleach (Optional): If the stain is still visible, you can follow up with the bleach cleaning method described above.
Tips and Tricks for Grout Cleaning Success
Here are a few extra tips to help you achieve the best possible results:
* Timing is Everything: Don’t let the bleach solution sit on the grout for too long, as it can potentially damage or discolor the grout.
* Proper Ventilation: I can’t stress this enough! Make sure you have adequate ventilation to avoid breathing in harmful fumes.
* Regular Cleaning: The best way to keep your grout clean is to clean it regularly. Wipe up spills immediately and clean the grout lines at least once a month.
* Grout Sealant: After cleaning your grout, consider applying a grout sealant. This will help protect the grout from future stains and make it easier to clean.
* Consider a Grout Pen: If your grout is severely stained or discolored, you might consider using a grout pen to restore its color. These pens are available in a variety of colors and can be a quick and easy way to refresh your grout.
* Steam Cleaning: For a deeper clean, you can use a steam cleaner to clean your grout. The steam will help loosen dirt and grime, making it easier to scrub away.
* Don’t Forget the Corners: Pay special attention to the corners and edges of your tiled areas, as these areas tend to accumulate more dirt and grime.
* Be Patient: Cleaning grout can be a time-consuming process, so be patient and don’t get discouraged if it takes a few tries to achieve the desired results.
Maintaining Your Sparkling Grout
Once you’ve achieved that sparkling clean grout, you’ll want to keep it that way! Here are a few tips for maintaining your grout:
* Wipe Up Spills Immediately: The sooner you wipe up spills, the less likely they are to stain your grout.
* Regular Cleaning: Clean your grout lines at least once a month with a mild cleaning solution.
* Use a Grout Brush: Use a grout brush to scrub the grout lines regularly.
* Apply Grout Sealant: Apply a grout sealant every year or two to protect your grout from stains.
* Avoid Harsh Chemicals: Avoid using harsh chemicals or abrasive cleaners on your grout, as they can damage the grout and make it more susceptible to staining.
Troubleshooting Common Grout Cleaning Problems
Even with the best instructions, you might encounter some challenges. Here are a few common problems and how to address them:
* Grout is Still Stained: If your grout is still stained after cleaning, try using a stronger bleach solution or letting it sit for a longer period. You can also try using a baking soda paste to scrub the grout lines.
* Grout is Discolored: If your grout is discolored after cleaning, it’s possible that the bleach has damaged the grout. In this case, you might need to replace the grout.
* Bleach Smell is Lingering: If the bleach smell is lingering after cleaning, make sure you’ve rinsed the area thoroughly with clean water. You can also try using a fan to circulate the air and help dissipate the smell.
* Tiles are Damaged: If your tiles are damaged after cleaning, it’s possible that the bleach has damaged the tiles. In this case, you might need to replace the tiles. Always test in an inconspicuous area first!
Cleaning grout with Clorox bleach is a simple and effective way to restore your tiles to their former glory. Just remember to prioritize safety, follow the instructions carefully, and be patient. With a little elbow grease, you’ll have sparkling clean grout in no time! Good luck, and happy cleaning!
Conclusion
So, there you have it! Cleaning grout with Clorox is not just a cleaning hack; it’s a transformative experience for your home. We’ve walked you through the simple yet effective steps to reclaim your grout’s original glory, banishing years of grime and discoloration with a readily available household staple. Why spend a fortune on specialized grout cleaners when you can achieve professional-level results with something you likely already have under your sink?
This DIY trick is a must-try because it’s cost-effective, efficient, and delivers visible results almost immediately. Imagine the satisfaction of seeing your dingy grout lines brighten before your eyes, instantly revitalizing your kitchen, bathroom, or any tiled surface in your home. It’s more than just cleaning; it’s about restoring the beauty and freshness of your living space.
But the possibilities don’t stop there! While Clorox is a powerhouse on its own, feel free to experiment with variations to suit your specific needs and preferences. For particularly stubborn stains, consider creating a paste of Clorox and baking soda for extra scrubbing power. Apply the paste, let it sit for a few minutes, and then scrub with a stiff-bristled brush. You can also try using a grout pen after cleaning to further enhance the color and protect against future staining. Remember to always test any cleaning solution in an inconspicuous area first to ensure it doesn’t damage your tiles.
Don’t be afraid to get creative and adapt this method to your unique situation. Perhaps you’ll discover a new and improved technique that works even better for you! The key is to be patient, persistent, and always prioritize safety by wearing gloves and ensuring proper ventilation.
We are confident that once you try cleaning grout with Clorox, you’ll be amazed by the results. It’s a game-changer for anyone who wants to achieve a sparkling clean home without breaking the bank. So, grab your Clorox, gather your supplies, and prepare to witness the transformation.
Now, we want to hear from you! Have you tried this DIY grout cleaning method? What were your results? Do you have any tips or variations to share? We encourage you to try this simple yet effective technique and share your experience in the comments below. Your feedback will not only help other readers but also contribute to a community of DIY enthusiasts who are passionate about creating beautiful and clean homes. Let’s work together to unlock the secrets of sparkling grout and transform our living spaces, one tile at a time! We are eager to hear your success stories and learn from your experiences. Let’s make grout cleaning a breeze, together!
Frequently Asked Questions (FAQ)
Is it safe to clean grout with Clorox?
Yes, cleaning grout with Clorox is generally safe when done correctly. However, it’s crucial to prioritize safety. Always wear rubber gloves to protect your skin from irritation. Ensure adequate ventilation by opening windows or using a fan, as Clorox fumes can be strong. Avoid mixing Clorox with other cleaning products, especially ammonia, as this can create dangerous and toxic gases. If you have sensitive skin or respiratory issues, consider wearing a mask and eye protection. After cleaning, thoroughly rinse the area with water to remove any residual Clorox. If you experience any adverse reactions, discontinue use and consult a medical professional.
What type of Clorox should I use for cleaning grout?
Regular household Clorox bleach is typically the most effective and readily available option for cleaning grout. Avoid using scented or splash-less varieties, as they may contain additives that could leave a residue or affect the cleaning power. Plain, unscented Clorox bleach is the best choice for achieving optimal results. Always dilute the Clorox with water according to the recommended ratio (usually 1:1) to prevent damage to the grout or tiles.
Can Clorox damage my grout or tiles?
While Clorox is effective at cleaning grout, it’s essential to use it properly to avoid potential damage. Prolonged exposure to undiluted Clorox can weaken grout over time, making it more susceptible to cracking and crumbling. It can also potentially discolor certain types of tiles, especially natural stone. Always dilute the Clorox with water and avoid leaving it on the grout for extended periods. Test the solution in an inconspicuous area first to ensure it doesn’t damage your tiles. If you’re concerned about potential damage, consider using a less concentrated solution or exploring alternative grout cleaning methods.
How often should I clean my grout with Clorox?
The frequency of cleaning grout with Clorox depends on several factors, including the amount of foot traffic, the level of humidity, and the type of grout. In high-traffic areas or bathrooms with poor ventilation, you may need to clean your grout more frequently, perhaps once a month. In less frequently used areas, cleaning every few months may suffice. Avoid over-cleaning, as excessive use of Clorox can weaken the grout over time. Regularly wiping down your tiles and grout with a mild cleaner can help prevent the buildup of dirt and grime, reducing the need for frequent deep cleaning with Clorox.
What if Clorox doesn’t remove all the stains from my grout?
If Clorox alone doesn’t remove all the stains from your grout, there are several alternative approaches you can try. First, consider creating a paste of Clorox and baking soda. Apply the paste to the stained grout, let it sit for a few minutes, and then scrub with a stiff-bristled brush. For particularly stubborn stains, you can try using a grout pen to touch up the color and conceal any remaining discoloration. Another option is to use a specialized grout cleaner designed for removing tough stains. Always follow the manufacturer’s instructions and test any cleaning solution in an inconspicuous area first. In some cases, severely stained or damaged grout may require professional cleaning or even replacement.
What are some alternatives to using Clorox for cleaning grout?
If you prefer not to use Clorox, there are several alternative grout cleaning methods you can try. Baking soda and vinegar is a popular natural cleaning solution. Mix baking soda with water to form a paste, apply it to the grout, and then spray with vinegar. Let it fizz for a few minutes, then scrub and rinse. Steam cleaning is another effective option that uses high-pressure steam to loosen dirt and grime without the need for harsh chemicals. You can also find a variety of commercial grout cleaners that are specifically formulated to remove stains and dirt without damaging the grout or tiles. Always read the product labels carefully and follow the manufacturer’s instructions.
How can I prevent grout from getting dirty in the first place?
Preventing grout from getting dirty is the best way to minimize the need for frequent cleaning. Regularly wipe down your tiles and grout with a mild cleaner to remove dirt and spills before they have a chance to set in. Use a squeegee after showering to remove excess water and prevent mildew growth. Consider sealing your grout to create a protective barrier that repels water and stains. Reapply grout sealant every year or two, or as needed. Place mats or rugs in high-traffic areas to protect the grout from dirt and wear. By taking these preventative measures, you can keep your grout looking clean and fresh for longer.

Leave a Comment