
Bag Grown Corn: Imagine sinking your teeth into sweet, juicy corn on the cob, knowing you grew it yourself, even without a sprawling garden! Sounds impossible? Not with this incredible DIY guide! For centuries, corn has been a staple crop, deeply woven into the cultures of the Americas, providing sustenance and playing a vital role in traditions. But what if you live in an apartment, have limited space, or simply want to try a fun and unconventional gardening method? That’s where the magic of bag grown corn comes in.
I’m here to show you how to cultivate your own little cornfield in a bag! This method is perfect for urban dwellers, beginner gardeners, or anyone looking for a unique and rewarding gardening experience. Forget the large plots and extensive tilling; with just a few simple materials and this easy-to-follow guide, you’ll be harvesting your own delicious bag grown corn in no time. We’ll cover everything from choosing the right corn variety to troubleshooting common issues, ensuring you have a bountiful harvest. So, grab your gardening gloves, and let’s get started on this exciting adventure!
Growing Corn in a Bag: A DIY Guide for Urban Gardeners
Hey there, fellow gardening enthusiasts! Ever dreamed of having fresh, homegrown corn but thought you didn’t have the space? Well, I’m here to tell you that you absolutely can grow corn, even in a bag! This DIY project is perfect for balconies, patios, or any small space where you want to add a touch of rural charm and, of course, delicious corn on the cob. Let’s get started!
What You’ll Need
Before we dive in, let’s gather all the necessary materials. This will make the process smoother and more enjoyable. Trust me, preparation is key!
* A Large, Sturdy Bag: Think big! We’re talking about a heavy-duty gardening bag, a burlap sack, or even a repurposed feed bag. The bigger, the better, as corn plants need room for their roots to spread. Aim for at least 20 gallons in capacity.
* Potting Mix: Don’t skimp on the soil! Use a high-quality potting mix that’s well-draining and rich in nutrients. Avoid using garden soil directly, as it can become compacted in a bag.
* Corn Seeds: Choose a variety of corn that’s suitable for your climate and growing season. Sweet corn is a popular choice, but you can also experiment with other types like popcorn or ornamental corn.
* Slow-Release Fertilizer: Corn is a heavy feeder, so a slow-release fertilizer will provide a steady supply of nutrients throughout the growing season. Look for a balanced formula or one specifically designed for vegetables.
* Watering Can or Hose: Essential for keeping your corn plants hydrated.
* Scissors or a Knife: For making drainage holes in the bag.
* Optional: Stakes or Trellis: Depending on the corn variety and your local weather conditions, you might need to provide support for the plants.
* Gloves: To keep your hands clean and protected.
Preparing the Bag
This is a crucial step to ensure proper drainage and prevent waterlogging, which can be detrimental to your corn plants.
1. Choose Your Location: Select a sunny spot that receives at least 6-8 hours of direct sunlight per day. Corn needs plenty of sunshine to thrive.
2. Prepare the Bag: If you’re using a new bag, it’s ready to go. If you’re repurposing a bag, make sure it’s clean and free of any debris.
3. Create Drainage Holes: Using your scissors or knife, carefully poke several drainage holes in the bottom of the bag. Space them evenly apart to ensure good drainage. I usually aim for about 6-8 holes.
4. Roll Down the Edges (Optional): Rolling down the edges of the bag can make it more stable and easier to work with. It also gives it a neater appearance.
Planting the Corn Seeds
Now comes the fun part – planting the seeds! Remember, corn is wind-pollinated, so planting in a block rather than a single row is essential for good pollination.
1. Fill the Bag with Potting Mix: Gradually fill the bag with your chosen potting mix, leaving about 4-6 inches of space at the top. This will prevent the soil from overflowing when you water.
2. Add Slow-Release Fertilizer: Mix the slow-release fertilizer into the top few inches of the potting mix, following the instructions on the fertilizer package.
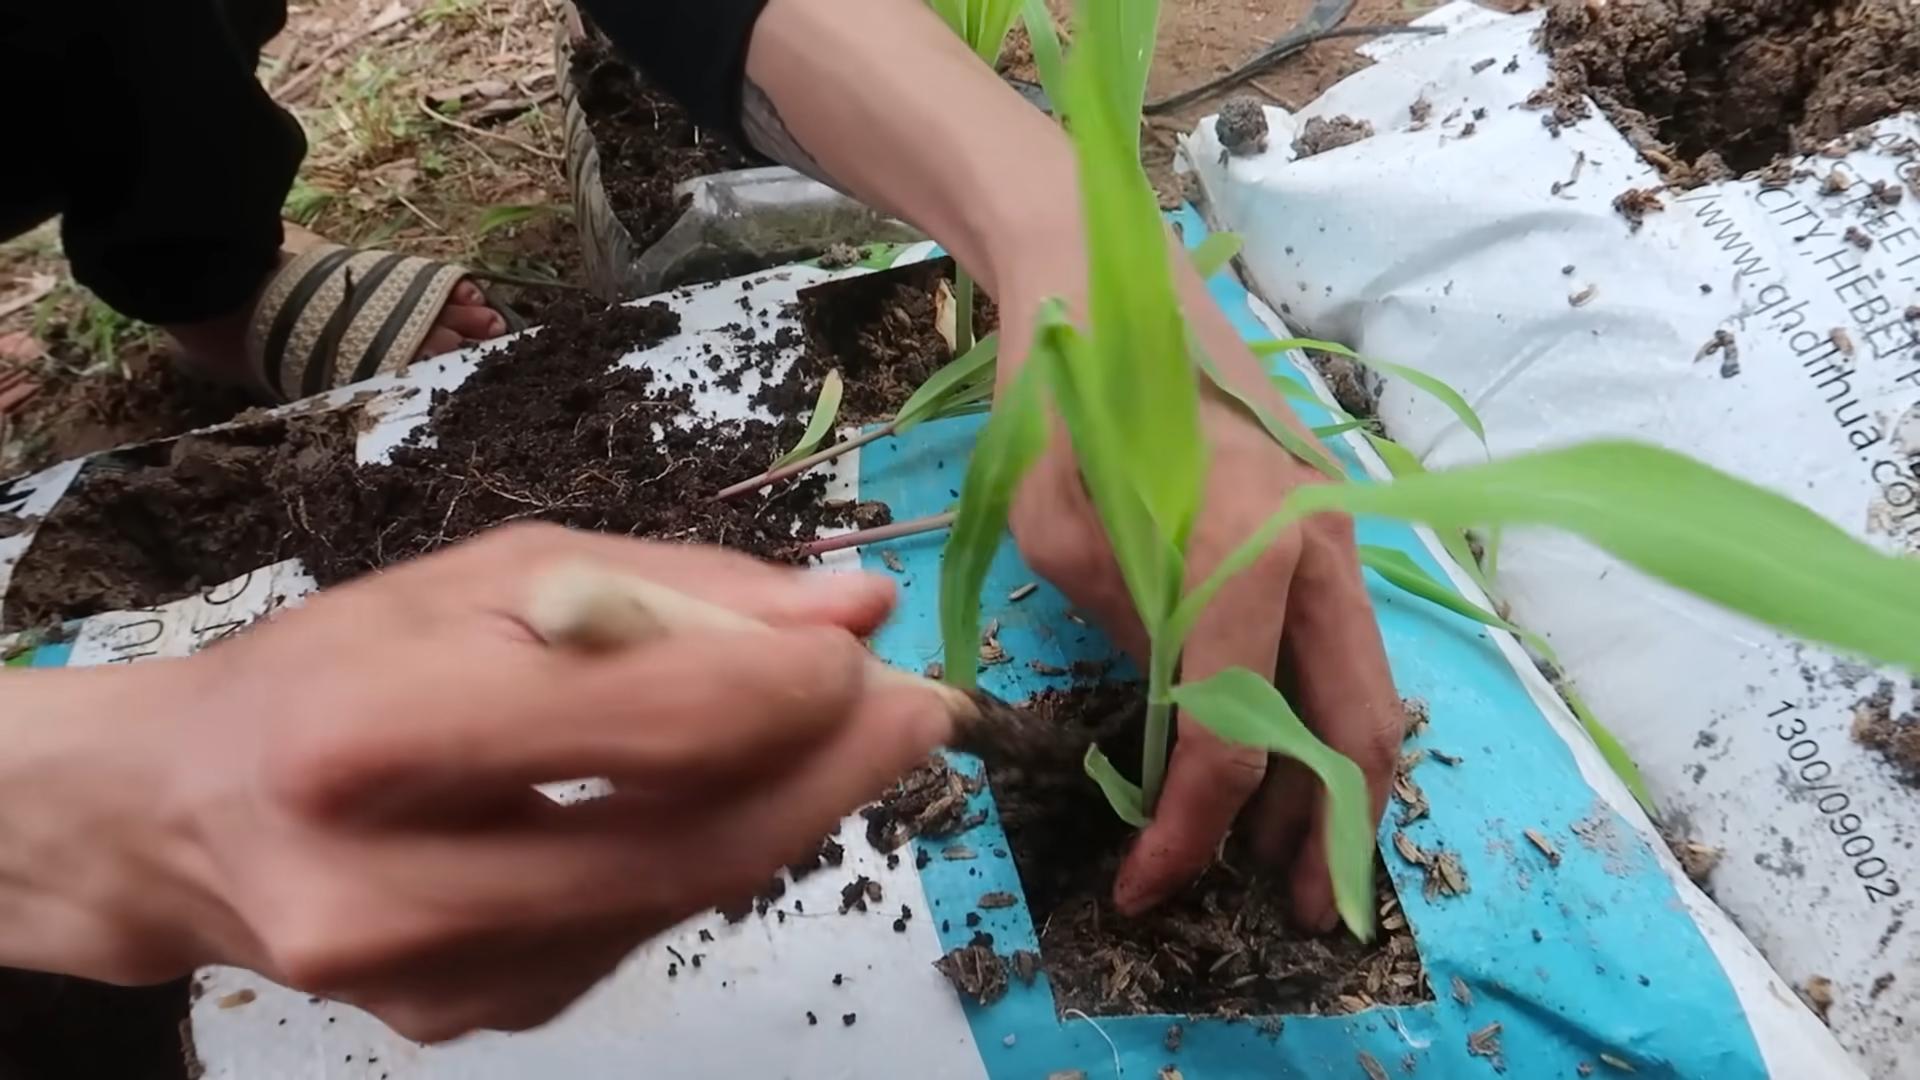
3. Plant the Seeds: Sow the corn seeds about 1-2 inches deep and 4-6 inches apart. Plant them in a grid pattern rather than a straight line. I usually plant about 6-8 seeds per bag, depending on the size of the bag.
4. Cover the Seeds: Gently cover the seeds with potting mix and lightly pat down the soil.
5. Water Thoroughly: Water the bag thoroughly until the soil is evenly moist. Be careful not to overwater, as this can cause the seeds to rot.
Caring for Your Corn Plants
Consistent care is essential for healthy corn plants and a bountiful harvest.
1. Watering: Keep the soil consistently moist, but not waterlogged. Water deeply whenever the top inch of soil feels dry to the touch. Corn plants need a lot of water, especially during hot weather.
2. Fertilizing: Corn is a heavy feeder, so you’ll need to supplement the slow-release fertilizer with additional feedings throughout the growing season. Use a liquid fertilizer specifically formulated for vegetables, following the instructions on the package. I usually fertilize every 2-3 weeks.
3. Weeding: Keep the bag free of weeds, as they can compete with the corn plants for nutrients and water. Hand-pull any weeds that appear.
4. Pollination Assistance (Optional): If you’re growing corn in a sheltered location with limited wind, you may need to assist with pollination. When the tassels (the male flowers at the top of the plant) begin to shed pollen, gently shake the plants to distribute the pollen onto the silks (the female flowers that emerge from the developing ears of corn). You can also collect pollen from the tassels and manually apply it to the silks using a small brush.
5. Pest Control: Keep an eye out for common corn pests like corn earworms and aphids. If you notice any pests, take action promptly to prevent them from damaging your plants. You can use organic pest control methods like insecticidal soap or neem oil.
6. Staking (Optional): As the corn plants grow taller, they may become susceptible to wind damage. If you live in an area with strong winds, consider staking the plants for support. You can use bamboo stakes or wooden stakes and tie the plants to the stakes with twine.
Harvesting Your Corn
The moment you’ve been waiting for! Harvesting your homegrown corn is incredibly rewarding.
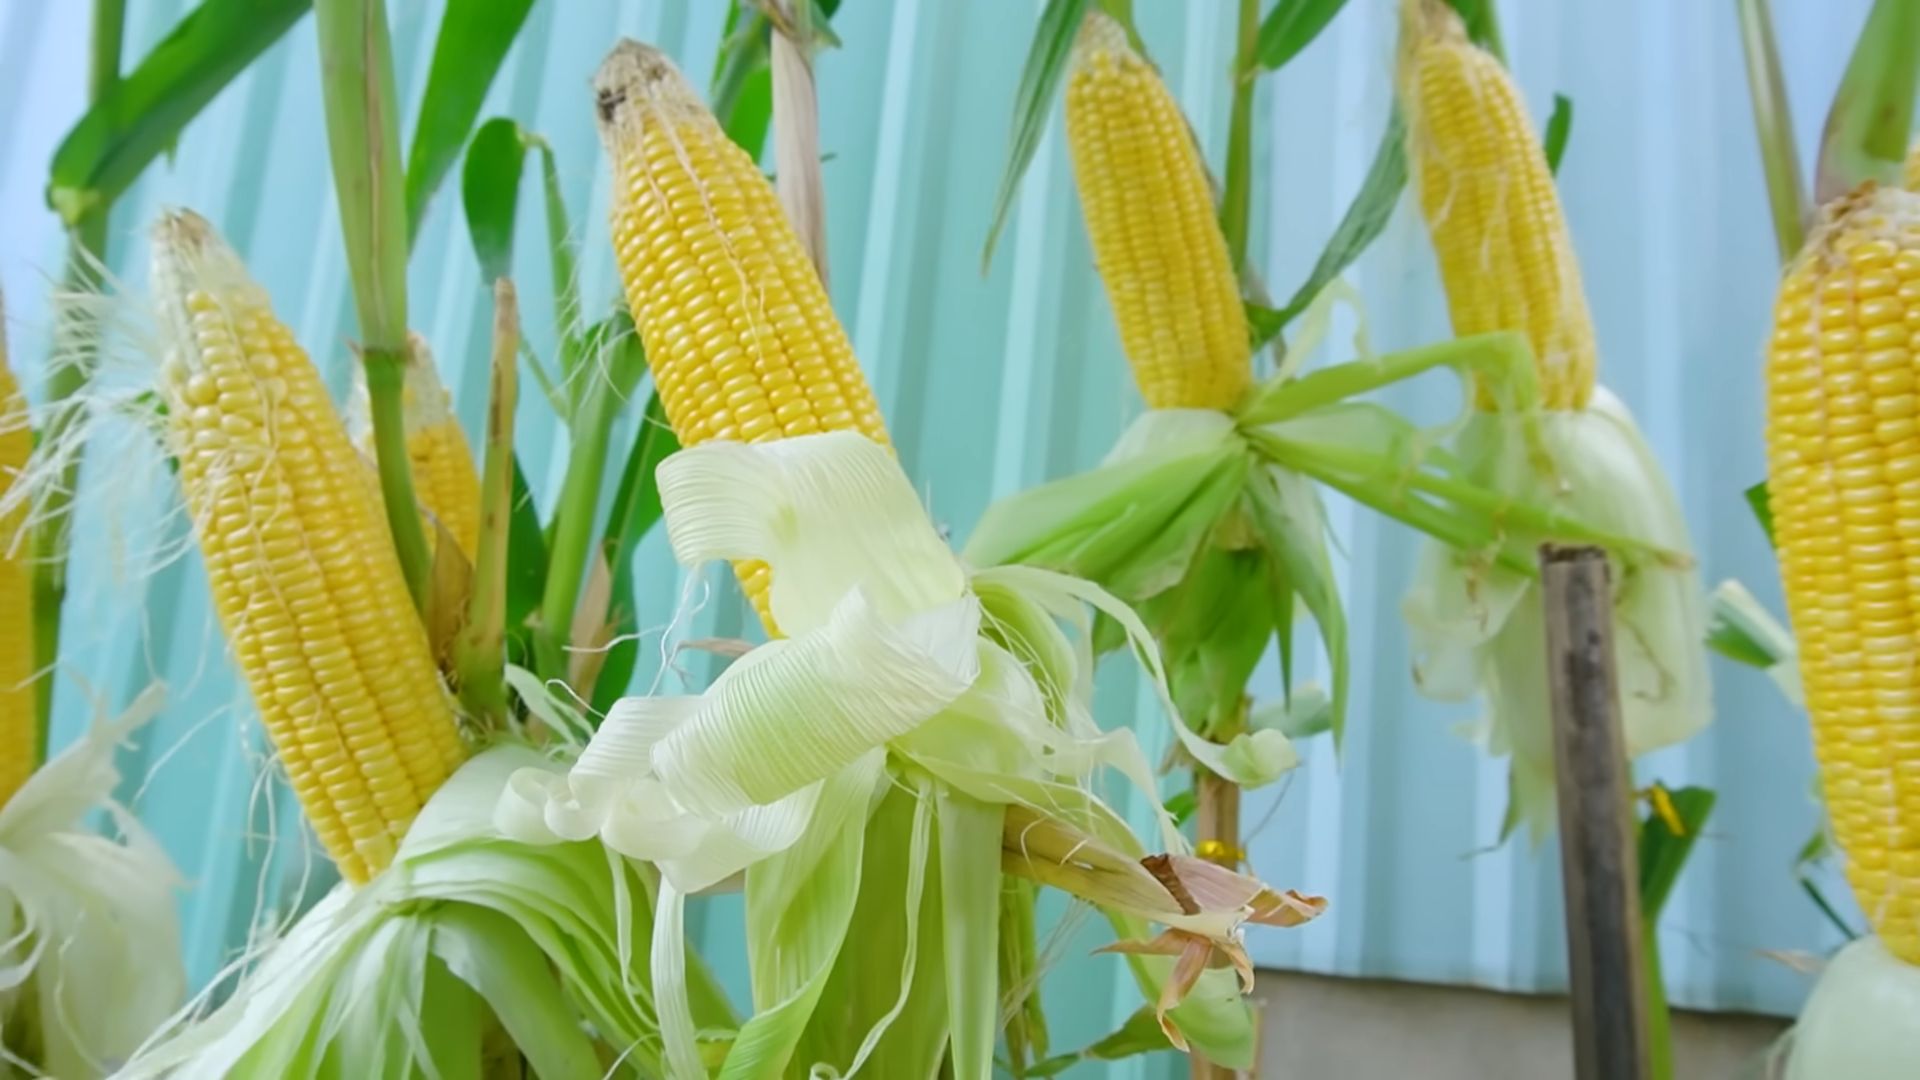
1. Check for Ripeness: Corn is typically ready to harvest about 60-100 days after planting, depending on the variety. The silks will turn brown and dry, and the ears will feel plump and full.
2. Feel the Ears: Gently feel the ears of corn through the husks. They should feel firm and the kernels should be well-developed.
3. Peel Back the Husk: Carefully peel back a small portion of the husk to check the kernels. The kernels should be plump and milky when punctured.
4. Harvest the Ears: To harvest the ears, grasp the ear firmly and twist it downward. It should snap off easily from the stalk.
5. Enjoy Your Harvest: Cook and enjoy your freshly harvested corn on the cob! You can also freeze or can the corn for later use.
Troubleshooting
Even with the best care, you might encounter some challenges along the way. Here are a few common problems and how to address them:
* Poor Germination: If your corn seeds aren’t germinating, it could be due to several factors, such as cold soil, overwatering, or poor-quality seeds. Make sure the soil temperature is warm enough (at least 60°F) before planting, avoid overwatering, and use fresh, high-quality seeds.
* Yellowing Leaves: Yellowing leaves can indicate a nutrient deficiency, especially nitrogen. Fertilize your corn plants with a balanced fertilizer or one specifically formulated for vegetables.
* Stunted Growth: Stunted growth can be caused by a variety of factors, including poor soil, lack of sunlight, or pest infestations. Make sure your corn plants are getting enough sunlight, water, and nutrients, and check for pests regularly.
* Poor Pollination: If your corn ears are not filling out properly, it could be due to poor pollination. Assist with pollination by shaking the plants or manually applying pollen to the silks.
* Pest Problems: Keep an eye out for common corn pests like corn earworms and aphids. Use organic pest control methods like insecticidal soap or neem oil to control pests.
Tips for Success
Here are a few extra tips to help you succeed with your bag-grown corn:
* Choose the Right Variety: Select a corn variety that’s well-suited for your climate and growing season.
* Start with Good Soil: Use a high-quality potting mix that’s well-draining and rich in nutrients.
* Provide Plenty of Sunlight: Corn needs at least 6-8 hours of direct sunlight per day.
* Water Regularly: Keep the soil consistently moist, but not waterlogged.
* Fertilize Regularly: Corn is a heavy feeder, so you’ll need to fertilize regularly throughout the growing season.
* Protect from Pests: Keep an eye out for common corn pests and take action promptly to prevent them from damaging your plants.
* Be Patient: Growing corn takes time and patience. Don’t get discouraged if you don’t see results immediately.
Growing corn in a bag is a fun and rewarding DIY project that anyone can do. With
Conclusion
So, there you have it! Growing your own corn in a bag might sound unconventional, but as you’ve seen, it’s a surprisingly effective and rewarding way to enjoy fresh, homegrown corn, even without a traditional garden. This method opens up the possibility of enjoying sweet, juicy corn on the cob for apartment dwellers, balcony gardeners, and anyone with limited space. It’s a fantastic project for families, offering a hands-on learning experience about plant life cycles and the satisfaction of harvesting your own food.
The beauty of this DIY trick lies in its simplicity and adaptability. You’re not bound by soil conditions or sprawling garden plots. You have complete control over the growing environment, from the quality of the soil to the amount of sunlight your corn receives. Plus, it’s a budget-friendly option, utilizing readily available materials and eliminating the need for expensive gardening equipment.
But the benefits extend beyond just convenience and cost. Bag-grown corn often yields surprisingly impressive results. The concentrated nutrients and controlled watering can lead to healthier plants and larger, more flavorful ears of corn. It’s a testament to the power of innovative gardening techniques and a reminder that you don’t need acres of land to enjoy the fruits (or vegetables!) of your labor.
Why is this a must-try? Because it democratizes corn growing! It empowers anyone, regardless of their living situation or gardening experience, to cultivate their own delicious corn. It’s a fun, educational, and ultimately rewarding project that connects you to the source of your food.
Looking for variations? Consider experimenting with different types of corn. While sweet corn is a popular choice, you could also try growing popcorn varieties or even ornamental corn for a decorative touch. You can also adjust the size of your bag depending on the space you have available and the number of corn stalks you want to grow. Remember to adjust watering and fertilization accordingly. Another variation is to add companion plants to your bag, such as beans or squash, to create a mini-ecosystem and improve soil health. Just be mindful of spacing and nutrient requirements.
We wholeheartedly encourage you to give this DIY trick a try. It’s a simple yet effective way to grow your own corn and experience the joy of harvesting your own food. Don’t be afraid to experiment, adapt, and make it your own.
And most importantly, we want to hear about your experience! Share your photos, tips, and stories with us. Let us know what worked for you, what challenges you faced, and any creative variations you came up with. Together, we can build a community of bag-grown corn enthusiasts and inspire others to embrace this innovative gardening technique. So grab a bag, some soil, and some corn seeds, and get ready to enjoy the taste of homegrown goodness! Let’s all enjoy the fruits of our labor and share the joy of growing our own food.
Frequently Asked Questions (FAQ)
What kind of bag should I use for growing corn?
The ideal bag is a heavy-duty, dark-colored plastic bag, like a contractor bag or a large garbage bag. The dark color helps retain heat, which corn loves. Make sure the bag is thick enough to withstand the weight of the soil and the growing plants. Avoid using clear bags, as they can promote algae growth. The size of the bag depends on how many corn stalks you want to grow. A good starting point is a bag that’s at least 24 inches in diameter and 36 inches tall. You can also use grow bags specifically designed for gardening, which often have drainage holes and are made from breathable fabric.
What type of soil is best for bag-grown corn?
Corn thrives in well-draining, nutrient-rich soil. A good mix is equal parts of topsoil, compost, and peat moss or coco coir. The topsoil provides structure, the compost adds nutrients, and the peat moss or coco coir improves drainage and water retention. Avoid using heavy clay soil, as it can become waterlogged and suffocate the roots. You can also add a slow-release fertilizer to the soil mix to provide a steady supply of nutrients throughout the growing season.
How often should I water my bag-grown corn?
Watering frequency depends on the weather and the drainage of your soil. Generally, you should water deeply whenever the top inch of soil feels dry to the touch. Corn needs consistent moisture, especially during the tasseling and silking stages. Avoid overwatering, as this can lead to root rot. Make sure the bag has adequate drainage holes to prevent water from pooling at the bottom. A good rule of thumb is to water thoroughly every 2-3 days, but adjust as needed based on your local conditions.
How much sunlight does bag-grown corn need?
Corn needs at least 6-8 hours of direct sunlight per day to thrive. Choose a location that receives plenty of sunlight throughout the day. If you’re growing corn on a balcony or patio, make sure it’s not shaded by buildings or trees. If you don’t have enough natural sunlight, you can supplement with grow lights. Position the grow lights close to the plants and adjust the height as they grow.
How do I pollinate my bag-grown corn?
Corn is wind-pollinated, so if you’re growing multiple stalks in a bag, the wind should naturally pollinate them. However, if you’re growing corn indoors or in a sheltered location, you may need to hand-pollinate them. To hand-pollinate, gently shake the tassels (the male flowers at the top of the plant) to release pollen. Then, brush the pollen onto the silks (the female flowers that emerge from the ears of corn). Repeat this process every day for a week or two to ensure good pollination.
When is the best time to plant corn in a bag?
The best time to plant corn is after the last frost, when the soil has warmed up to at least 60°F (15°C). Corn is a warm-season crop and doesn’t tolerate frost. You can start corn seeds indoors 2-3 weeks before the last frost and transplant them into the bag once the weather warms up. Alternatively, you can direct sow the seeds directly into the bag.
How many corn seeds should I plant in a bag?
The number of seeds you plant depends on the size of the bag and the variety of corn. Generally, you can plant 3-4 corn seeds per bag. Thin the seedlings to the strongest one or two plants once they’re a few inches tall. This will give the remaining plants enough space to grow and develop.
How do I fertilize my bag-grown corn?
Corn is a heavy feeder and needs plenty of nutrients to grow. Fertilize your bag-grown corn every 2-3 weeks with a balanced fertilizer, such as 10-10-10. You can also use organic fertilizers, such as compost tea or fish emulsion. Apply the fertilizer according to the package directions. Avoid over-fertilizing, as this can burn the roots.
How do I know when my corn is ready to harvest?
Corn is typically ready to harvest about 60-100 days after planting, depending on the variety. The silks will turn brown and dry, and the ears will feel plump and full. To check for ripeness, peel back a portion of the husk and puncture a kernel with your fingernail. If the liquid is milky, the corn is ready to harvest. If the liquid is clear, it’s not quite ripe. If the liquid is doughy, it’s overripe.
What are some common problems with bag-grown corn and how do I solve them?
Some common problems with bag-grown corn include pests, diseases, and nutrient deficiencies. Pests, such as corn earworms and aphids, can damage the plants and ears. Control pests with insecticidal soap or neem oil. Diseases, such as corn smut and rust, can cause spots and lesions on the leaves. Prevent diseases by providing good air circulation and avoiding overwatering. Nutrient deficiencies can cause yellowing or stunted growth. Correct nutrient deficiencies by fertilizing with a balanced fertilizer.
Leave a Comment