
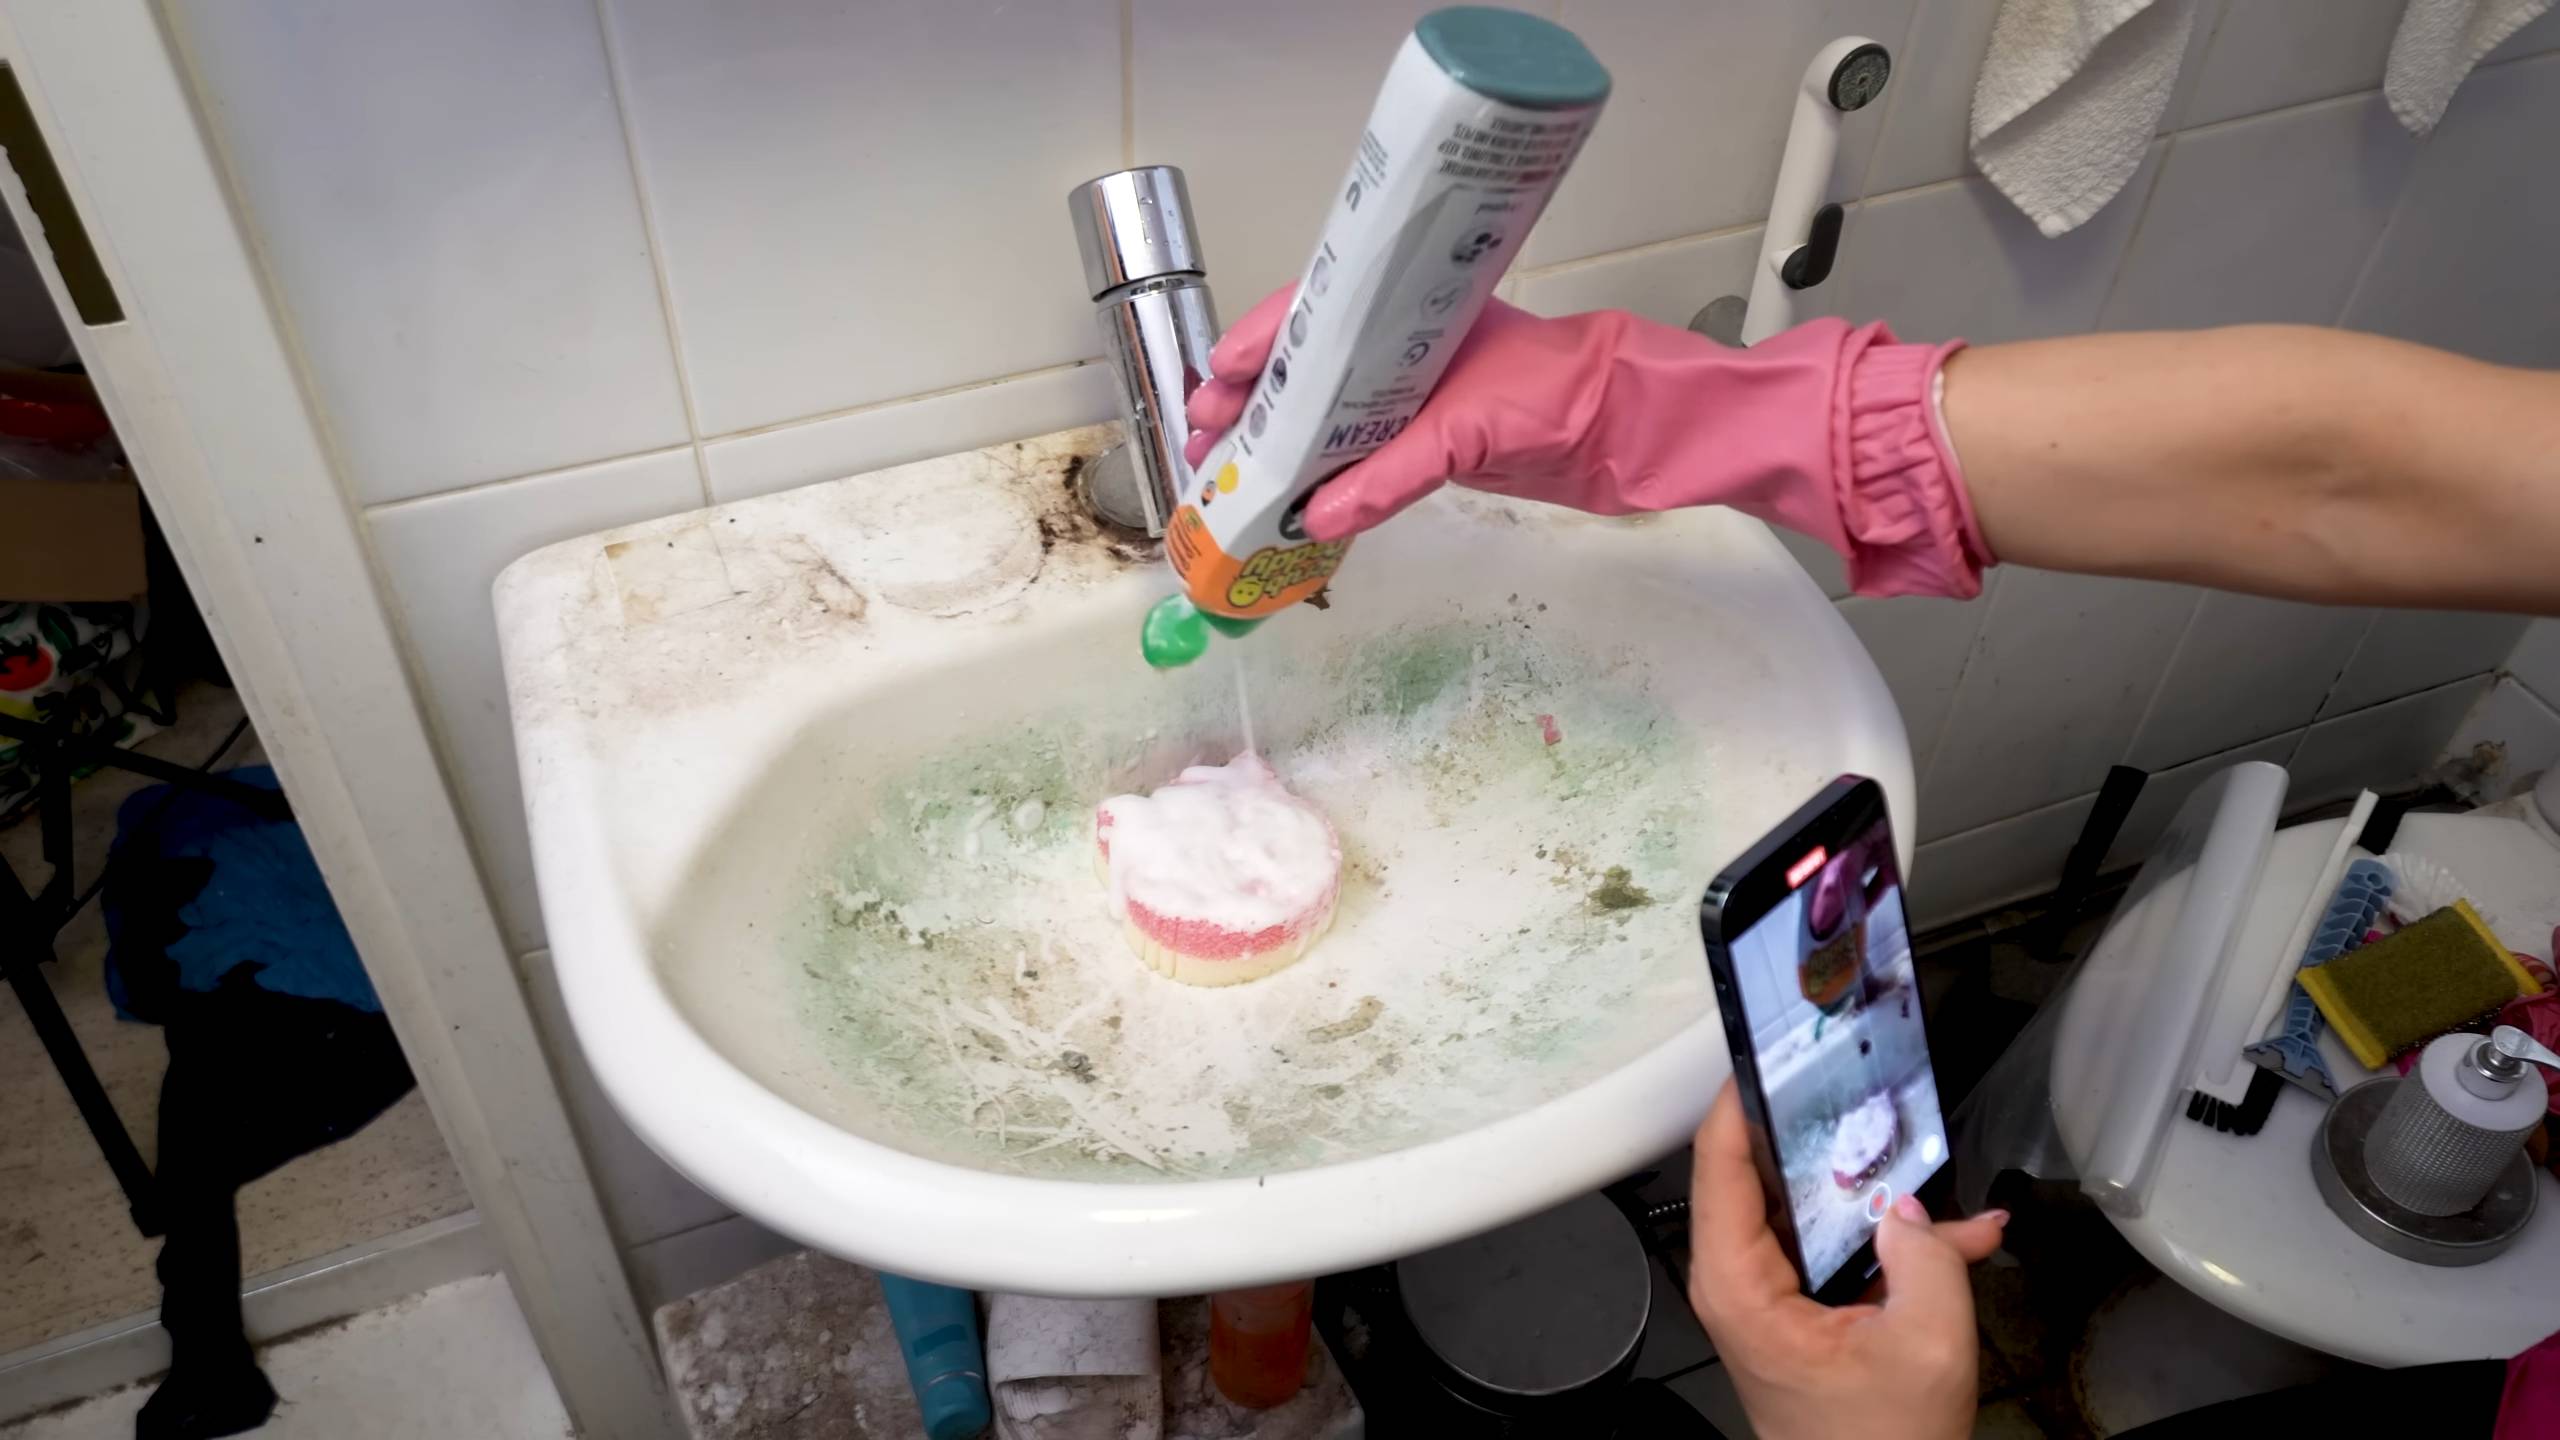
CIF cleaner amazing uses – who knew this household staple could be so much more than just a kitchen and bathroom savior? I’m constantly amazed by the hidden potential in everyday items, and CIF cleaner is definitely one of them! For generations, cleaning products have been evolving, from simple lye soaps to the complex formulas we have today. But it’s only recently that we’ve truly started exploring their versatility beyond their intended purpose.
Think about it: you’re tackling a tough stain, reaching for a specialized cleaner, and then it hits you – could CIF cleaner actually do the trick? The answer, more often than not, is a resounding YES! This DIY guide is packed with unexpected and brilliant ways to utilize CIF cleaner amazing uses around your home and even beyond.
Why do you need these DIY tricks? Because saving time, money, and reducing clutter is something we all strive for! Instead of buying a dozen different products, you can unlock the power of one. I’m going to show you how to clean everything from your sneakers to your garden furniture with this one product. Let’s dive into the world of CIF cleaner and discover its amazing uses together!
Growing Brussels Sprouts in Containers: A DIY Guide
Hey there, fellow gardening enthusiasts! I’m so excited to share my experience with growing Brussels sprouts in containers. It’s totally doable, even if you don’t have a huge garden. I’ve found it’s a rewarding way to enjoy fresh, homegrown veggies, and it’s surprisingly easier than you might think. Let’s dive in!
Choosing the Right Container and Soil
Before we even think about seeds, we need to get the foundation right. Brussels sprouts need space to grow, so picking the right container is crucial.
* Container Size: Opt for a large container, at least 12 inches in diameter and 12 inches deep. Bigger is generally better, as it gives the roots plenty of room to spread out. I’ve had success with 15-gallon containers, but even larger ones will work.
* Material: Plastic, terracotta, or even repurposed containers like large buckets can work. Just make sure whatever you choose has good drainage holes.
* Drainage: This is non-negotiable! Brussels sprouts hate sitting in soggy soil. If your container doesn’t have enough drainage, drill some extra holes in the bottom.
* Soil: Use a high-quality potting mix. Don’t use garden soil directly in your containers, as it can compact and not drain well. I like to amend my potting mix with compost for extra nutrients.
Planting Your Brussels Sprouts
Now for the fun part – getting those little sprouts started! You can either start from seeds or buy seedlings from a nursery. I’ve done both, and both work well.
* Starting from Seeds:
* Timing: Start seeds indoors about 4-6 weeks before the last expected frost.
* Sowing: Sow seeds about ½ inch deep in seed-starting trays or small pots.
* Watering: Keep the soil consistently moist but not soggy.
* Light: Provide plenty of light. A sunny windowsill or grow lights work well.
* Hardening Off: Before transplanting seedlings outdoors, gradually acclimate them to outdoor conditions over a week or two. This is called “hardening off.” Place them outside for a few hours each day, gradually increasing the time.
* Buying Seedlings:
* Selection: Choose healthy-looking seedlings with sturdy stems and no signs of disease or pests.
* Timing: Plant seedlings after the last expected frost.
Step-by-Step Planting Instructions
Alright, let’s get our hands dirty!
1. Prepare the Container: Fill your chosen container with the potting mix, leaving about an inch or two of space at the top.
2. Dig a Hole: Dig a hole in the center of the container that’s large enough to accommodate the root ball of your seedling (or the hardened-off seedling you grew from seed).
3. Plant the Seedling: Gently remove the seedling from its container and place it in the hole. Make sure the top of the root ball is level with the surrounding soil.
4. Backfill: Fill in the hole with potting mix, gently firming the soil around the base of the plant.
5. Water Thoroughly: Water the plant thoroughly until water drains out of the bottom of the container. This helps settle the soil and ensures the roots are well-hydrated.
6. Mulch (Optional): Add a layer of mulch around the base of the plant to help retain moisture and suppress weeds. I like to use straw or wood chips.
Caring for Your Brussels Sprouts
Now that your Brussels sprouts are planted, it’s time to give them the TLC they need to thrive.
* Sunlight: Brussels sprouts need at least 6 hours of sunlight per day. Place your container in a sunny location.
* Watering: Water regularly, especially during hot, dry weather. The soil should be consistently moist but not soggy. Check the soil moisture by sticking your finger about an inch into the soil. If it feels dry, it’s time to water.
* Fertilizing: Brussels sprouts are heavy feeders, so they need regular fertilization. Use a balanced fertilizer every 2-3 weeks. I like to use a liquid fertilizer diluted to half strength.
* Pest Control: Keep an eye out for pests like aphids, cabbage worms, and flea beetles. Handpick pests off the plants or use an organic insecticide if necessary. I’ve had good luck with neem oil.
* Supporting the Plant: As the Brussels sprouts grow, they can become quite tall and top-heavy. You may need to stake or support the plant to prevent it from falling over. I use bamboo stakes and twine to gently tie the plant to the stake.
* Removing Lower Leaves: As the sprouts start to form, you can remove the lower leaves of the plant. This encourages the plant to focus its energy on producing sprouts. Just snap them off close to the stem.
Harvesting Your Brussels Sprouts
The moment we’ve all been waiting for! Harvesting your homegrown Brussels sprouts is so satisfying.
* Timing: Brussels sprouts are typically ready to harvest in the fall or early winter, after a few light frosts. The cold weather actually improves their flavor.
* Harvesting Technique: Harvest the sprouts from the bottom of the plant upwards. The sprouts should be firm and about 1-2 inches in diameter. Simply twist or snap them off the stem.
* Storage: Store harvested Brussels sprouts in the refrigerator for up to a week.
Troubleshooting
Even with the best care, you might encounter a few challenges along the way. Here are some common problems and how to address them:
* Yellowing Leaves: This could be a sign of overwatering, underwatering, or nutrient deficiency. Check the soil moisture and adjust your watering accordingly. Fertilize the plant with a balanced fertilizer.
* Sprouts Not Forming: This could be due to insufficient sunlight, lack of nutrients, or warm temperatures. Make sure the plant is getting enough sunlight and fertilize regularly. Brussels sprouts prefer cooler temperatures.
* Pest Infestation: Regularly inspect your plants for pests and take action promptly. Handpick pests off the plants or use an organic insecticide.
* Bolting: Bolting (premature flowering) can occur if the plant is stressed by heat or lack of water. Provide consistent watering and try to protect the plant from extreme heat.
Tips and Tricks for Success
Here are a few extra tips that I’ve learned along the way:
* Choose the Right Variety: Some Brussels sprout varieties are better suited for container growing than others. Look for compact or dwarf varieties.
* Rotate Your Crops: Don’t plant Brussels sprouts in the same container year after year. Rotate your crops to prevent soilborne diseases.
* Companion Planting: Plant companion plants like marigolds or nasturtiums to help deter pests.
* Succession Planting: Plant a new batch of Brussels sprouts every few weeks to extend your harvest season.
* Be Patient: Brussels sprouts take a while to mature, so don’t get discouraged if you don’t see results right away.
Enjoying Your Harvest
Now that you’ve harvested your delicious Brussels sprouts, it’s time to enjoy them! There are so many ways to cook them. I love roasting them with olive oil, salt, and pepper. They’re also great sautéed, steamed, or even shredded in a salad.
Growing Brussels sprouts in containers is a rewarding experience that allows you to enjoy fresh, homegrown vegetables even if you don’t have a traditional garden. With a little bit of care and attention, you can successfully grow these delicious sprouts right on your patio or balcony. Happy gardening!
Conclusion
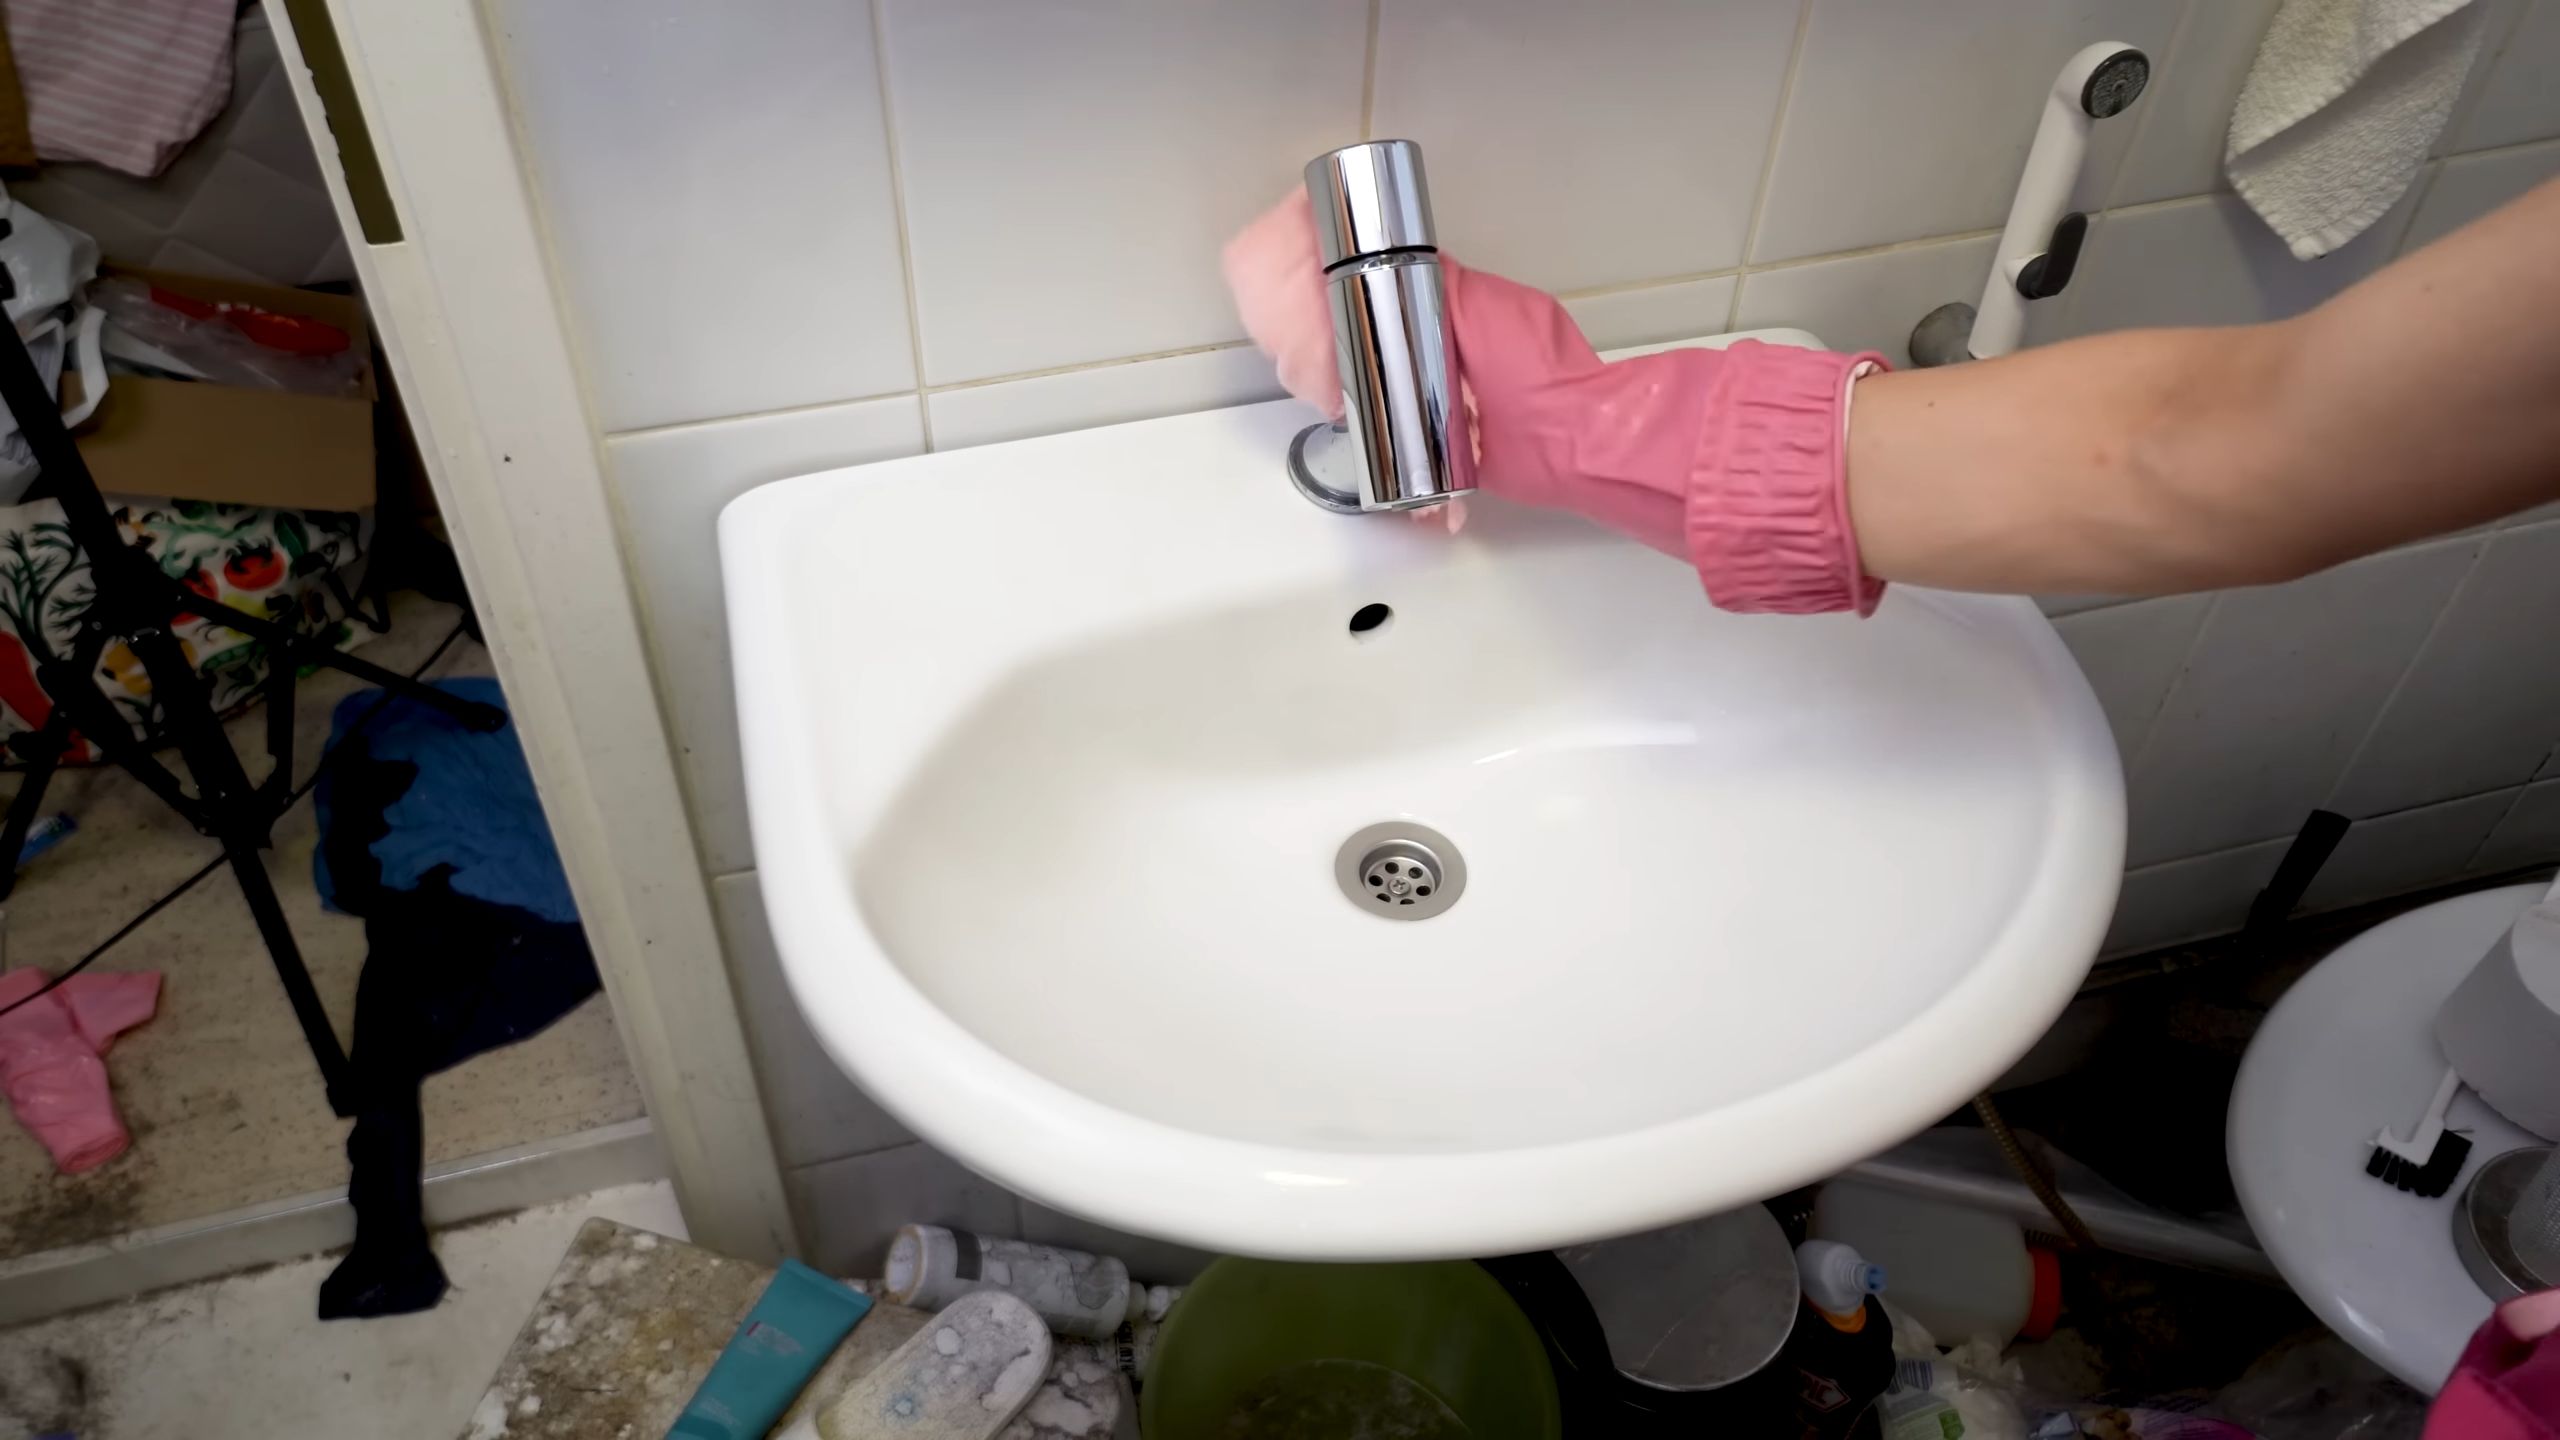
So, there you have it! Transforming your cleaning routine with these amazing CIF cleaner uses is not just about saving money; it’s about unlocking a world of cleaning possibilities you never knew existed. We’ve explored how this humble household staple can go far beyond its intended purpose, tackling everything from stubborn stains on your stovetop to grimy grout in your bathroom. The versatility of CIF cleaner is truly remarkable, and incorporating these DIY tricks into your cleaning arsenal will undoubtedly make your life easier and your home sparkling.
Why is this a must-try? Because it’s effective, economical, and surprisingly simple. You’re already likely to have CIF cleaner under your sink, so you’re not adding another specialized product to your collection. You’re simply maximizing the potential of what you already own. Plus, by using these methods, you’re often reducing the need for harsh chemicals and specialized cleaners, making your home a healthier and more environmentally friendly space.
Looking for variations? Absolutely! For extra stubborn stains on stainless steel, try mixing a small amount of baking soda with your CIF cleaner to create a gentle abrasive paste. This will help lift the grime without scratching the surface. For cleaning bathroom tiles, consider adding a few drops of your favorite essential oil, like tea tree or eucalyptus, to the CIF cleaner for an added boost of freshness and antibacterial properties. If you’re dealing with particularly delicate surfaces, always test the CIF cleaner in an inconspicuous area first to ensure it doesn’t cause any damage or discoloration. Remember, a little goes a long way!
We’ve shown you how to use CIF cleaner to revitalize your sneakers, remove scuff marks from walls, and even polish chrome fixtures. These are just a few examples of the countless ways you can harness the power of this cleaning powerhouse. The possibilities are truly endless, and we encourage you to experiment and discover even more innovative uses for CIF cleaner around your home.
Don’t just take our word for it – try these DIY tricks yourself! We’re confident that you’ll be amazed by the results. And most importantly, we want to hear about your experiences. Did you discover a new and ingenious way to use CIF cleaner? Did one of these tricks work particularly well for you? Share your tips, tricks, and before-and-after photos in the comments below. Let’s create a community of cleaning enthusiasts who are passionate about finding creative and effective solutions for a sparkling clean home. Your insights could inspire others and help them unlock the full potential of their CIF cleaner. So go ahead, give it a try, and let us know what you think! We can’t wait to hear from you.
FAQ
What exactly is CIF cleaner, and what is it typically used for?
CIF cleaner is a brand of cleaning products known for its cream cleaners and sprays. It’s typically used for cleaning hard surfaces like kitchen countertops, stovetops, bathroom tiles, and sinks. The cream cleaners contain micro-particles that help to lift dirt and grime without scratching surfaces. While traditionally used for these purposes, its versatility extends far beyond, as demonstrated in the DIY tricks we’ve discussed.
Is CIF cleaner safe to use on all surfaces?
While CIF cleaner is generally safe for most hard, non-porous surfaces, it’s always a good idea to test it in an inconspicuous area first, especially when dealing with delicate materials like painted surfaces, certain types of plastic, or natural stone. Avoid using CIF cleaner on surfaces that are sensitive to abrasives, as the micro-particles in the cream cleaner could potentially cause scratching. Always read the product label for specific warnings and instructions.
Can I use CIF cleaner to clean my oven?
Yes, CIF cleaner can be effective for cleaning ovens, particularly for removing baked-on grease and food residue. However, it’s important to follow these steps: First, ensure the oven is cool. Apply CIF cleaner to the affected areas, let it sit for a few minutes to loosen the grime, and then scrub with a non-abrasive sponge or cloth. Rinse thoroughly with clean water to remove any remaining cleaner. For heavily soiled ovens, you may need to repeat the process. Avoid using CIF cleaner on self-cleaning ovens, as it could damage the self-cleaning mechanism.
How do I remove CIF cleaner residue after cleaning?
Removing CIF cleaner residue is crucial to prevent streaks and ensure a clean finish. After cleaning with CIF cleaner, thoroughly rinse the surface with clean water. Use a clean, damp cloth to wipe away any remaining residue. For glass or shiny surfaces, follow up with a dry microfiber cloth to buff the surface and prevent water spots.
Can I mix CIF cleaner with other cleaning products?
It’s generally not recommended to mix CIF cleaner with other cleaning products, especially bleach or ammonia. Mixing cleaning products can create dangerous fumes that can be harmful to your health. Always use CIF cleaner on its own and avoid combining it with other chemicals.
Is CIF cleaner environmentally friendly?
The environmental impact of CIF cleaner varies depending on the specific product and its ingredients. Some CIF cleaners contain chemicals that can be harmful to the environment. To minimize your environmental impact, look for CIF cleaner products that are labeled as eco-friendly or biodegradable. You can also consider using natural cleaning alternatives whenever possible.
How can I store CIF cleaner properly?
Store CIF cleaner in a cool, dry place, away from direct sunlight and heat. Keep it out of reach of children and pets. Ensure the container is tightly closed to prevent spills and evaporation. Follow the storage instructions on the product label for specific recommendations.
What are some alternative uses for CIF cleaner besides cleaning?
Beyond the cleaning uses we’ve discussed, CIF cleaner can also be used for removing crayon marks from walls, polishing silverware, and cleaning car interiors. Its versatility makes it a valuable tool for a variety of household tasks. However, always exercise caution and test in an inconspicuous area first to ensure it doesn’t damage the surface.
Where can I buy CIF cleaner?
CIF cleaner is widely available at most supermarkets, drugstores, and online retailers. You can also find it at discount stores and home improvement stores. Check the product label for specific information about the manufacturer and distributor.
What if I have a specific cleaning problem that isn’t addressed in this article?
If you have a specific cleaning problem that isn’t addressed in this article, we encourage you to consult the CIF cleaner product label for specific instructions and warnings. You can also search online for cleaning tips and tricks or consult a professional cleaning service for expert advice. Remember to always exercise caution and test any cleaning solution in an inconspicuous area first to ensure it doesn’t damage the surface.


Leave a Comment