
Cleaning baseboards easily – it’s a chore we all dread, isn’t it? I know I do! But what if I told you there are simple, DIY tricks that can transform this tedious task into a breeze? Forget spending hours on your hands and knees, armed with a bucket and a scrub brush. We’re diving into the world of clever hacks that will leave your baseboards sparkling with minimal effort.
Baseboards, those often-overlooked strips of trim, have been protecting our walls and adding a touch of elegance to our homes for centuries. From the ornate, hand-carved designs of Victorian mansions to the sleek, modern lines of contemporary homes, they’ve always played a vital role in interior design. But regardless of their style, one thing remains constant: they get dirty! Dust, grime, pet hair – it all accumulates on those horizontal surfaces, making our homes look less than their best.
That’s where these DIY cleaning baseboards easily tricks come in. In today’s busy world, who has time to spend hours scrubbing? These hacks are designed to save you time, energy, and maybe even a little bit of your sanity. I’m going to share my favorite methods, using common household items, to get your baseboards looking pristine in no time. Get ready to say goodbye to dirty baseboards and hello to a cleaner, brighter home!

DIY Baseboard Cleaning Hack: Sparkling Clean Baseboards with Minimal Effort!
Okay, let’s be honest, cleaning baseboards is nobody’s favorite chore. It’s back-breaking, tedious, and often feels like you’re just pushing dust around. But fear not! I’ve discovered a game-changing hack that will make this dreaded task so much easier and faster. This method uses common household items and will leave your baseboards looking sparkling clean. Get ready to say goodbye to sore knees and hello to beautifully clean baseboards!
What You’ll Need: The Magic Arsenal
Before we dive in, let’s gather our supplies. This is a low-cost, low-fuss operation, so you probably already have most of these items on hand.
* Microfiber Cloths: These are your best friends for picking up dust and grime. I recommend having a few on hand so you can switch to a clean one when needed.
* Spray Bottle: This will hold our cleaning solution.
* Warm Water: The base of our cleaning solution.
* White Vinegar: A natural cleaning powerhouse! It cuts through grime and disinfects.
* Dish Soap (Optional): A tiny bit of dish soap can help with stubborn dirt.
* Old Sock: Yes, you read that right! An old sock will be our secret weapon.
* Paint Roller Handle (or Broom Handle): This is what we’ll attach the sock to, creating our baseboard cleaning tool.
* Rubber Bands or Duct Tape: To secure the sock to the handle.
* Bucket (Optional): For rinsing the sock if needed.
* Vacuum Cleaner with Brush Attachment: To pre-clean the baseboards.
Phase 1: Prepping for Success
Before we unleash our cleaning power, we need to prep the area. This will make the whole process much more efficient.
1. Vacuum the Baseboards: This is crucial! Use the brush attachment on your vacuum cleaner to remove loose dust, dirt, and pet hair from the baseboards. This prevents us from just smearing the dirt around when we start cleaning. Pay special attention to corners and crevices where dust tends to accumulate. I usually go over each section twice to make sure I get everything.
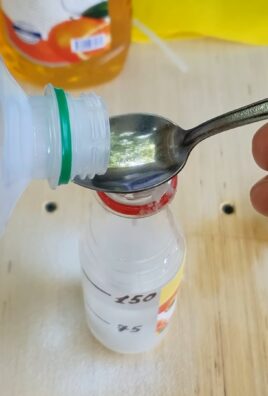
2. Prepare the Cleaning Solution: In your spray bottle, mix equal parts warm water and white vinegar. If your baseboards are particularly dirty, you can add a tiny squirt of dish soap (no more than a teaspoon). Shake gently to combine. Remember, a little goes a long way with dish soap! Too much can leave a residue.
3. Assemble Your Cleaning Tool: This is where the magic happens! Take your old sock and slide it over the end of the paint roller handle (or broom handle). Make sure the sock is snug and covers the end of the handle completely. Secure the sock with rubber bands or duct tape. I prefer duct tape because it provides a more secure hold. Wrap the tape tightly around the sock and handle to prevent it from slipping.
Phase 2: The Cleaning Blitz
Now for the fun part! We’re going to transform those dusty, grimy baseboards into sparkling clean surfaces.
1. Spray the Baseboards: Lightly spray the baseboards with your cleaning solution. Don’t saturate them! A light mist is all you need. Work in small sections, about 2-3 feet at a time.
2. Wipe with Your Sock Tool: Using your sock-covered handle, wipe the baseboards in a smooth, even motion. Apply gentle pressure to remove dirt and grime. The sock will act as a soft, absorbent cleaning pad, reaching into corners and crevices with ease.
3. Rinse (If Needed): If your baseboards are heavily soiled, you may need to rinse the sock periodically. Simply dip it in a bucket of clean water and wring it out thoroughly. Then, continue wiping the baseboards.
4. Dry with a Microfiber Cloth: After wiping with the sock, use a clean, dry microfiber cloth to dry the baseboards. This will prevent water spots and leave them looking shiny.
5. Repeat: Continue spraying, wiping, and drying in sections until you’ve cleaned all the baseboards in the room.
Phase 3: Tackling Stubborn Spots
Sometimes, you’ll encounter stubborn spots that require a little extra attention. Don’t worry, we’ve got this!
1. Spot Treatment: For stubborn spots, spray the area directly with the cleaning solution and let it sit for a minute or two. This will give the solution time to penetrate the grime.
2. Scrub Gently: Use a clean microfiber cloth or a soft-bristled brush to gently scrub the spot. Avoid using abrasive cleaners or scrub brushes, as these can damage the baseboards.
3. Wipe Clean: After scrubbing, wipe the area clean with a damp microfiber cloth and dry with a clean, dry cloth.
4. Magic Eraser (Optional): For really tough stains, a magic eraser can be helpful. However, use it sparingly and test it in an inconspicuous area first, as it can sometimes remove paint.
Extra Tips and Tricks for Baseboard Cleaning Success
* Frequency is Key: Cleaning your baseboards regularly (every few months) will prevent dirt and grime from building up, making the task much easier in the long run.
* Protect Your Back: This hack is designed to minimize bending, but if you still find yourself straining, consider using knee pads or sitting on a small stool.
* Ventilation is Important: Open windows or turn on a fan to ensure good ventilation while cleaning.
* Test in an Inconspicuous Area: Before cleaning your entire baseboard, test the cleaning solution in a small, hidden area to ensure it doesn’t damage the finish.
* Consider the Material: This method works well on most painted or vinyl baseboards. For wood baseboards, you may want to use a wood-specific cleaner and avoid excessive moisture.
* Pet Hair Power: If you have pets, you know how much hair accumulates along baseboards. A lint roller can be surprisingly effective at removing pet hair before you start cleaning.
* Don’t Forget the Corners: Corners are notorious for collecting dust and grime. Use a small brush or a cotton swab to clean these areas thoroughly.
* Get the Kids Involved (Maybe!): Okay, maybe not. But if you have older kids, you could turn baseboard cleaning into a family activity (with appropriate supervision, of course!).
* Preventative Measures: Consider placing mats or rugs near doorways to trap dirt and prevent it from reaching your baseboards.
* Enjoy the Results! Once you’re finished, take a step back and admire your sparkling clean baseboards. You deserve it!
Why This Hack Works So Well
This DIY baseboard cleaning hack is effective for several reasons:
* Ergonomic Design: The sock-covered handle allows you to clean the baseboards without bending over, saving your back and knees.
* Effective Cleaning Solution: The vinegar and water solution is a natural and effective cleaner that cuts through grime and disinfects.
* Microfiber Power: Microfiber cloths are excellent at picking up dust and dirt, leaving your baseboards clean and shiny.
* Cost-Effective: This hack uses common household items, so you don’t have to spend a lot of money on expensive cleaning products.
* Easy to Customize: You can adjust the cleaning solution and tools to suit your specific needs and preferences.
So there you have it! My foolproof DIY baseboard cleaning hack. I promise, once you try this method, you’ll never go back to cleaning baseboards the old-fashioned way. Happy cleaning!
Conclusion
So, there you have it! Cleaning baseboards easily doesn’t have to be a dreaded chore. By implementing this simple DIY trick, you can transform this often-overlooked task into a quick and efficient part of your cleaning routine. Forget about backaches and hours spent scrubbing on your hands and knees. This method is not only easier on your body but also delivers sparkling clean results that will instantly elevate the look of your entire home.
The beauty of this DIY approach lies in its simplicity and adaptability. You’re not locked into using specific, expensive cleaning products. Feel free to experiment with different cleaning solutions to find what works best for your baseboards and your personal preferences. For instance, if you have painted baseboards, a gentle solution of dish soap and water might be all you need. For tougher grime or scuff marks, a magic eraser can be your best friend, but always test it in an inconspicuous area first to ensure it doesn’t damage the finish.
Consider adding a few drops of essential oil to your cleaning solution for a fresh, clean scent that lingers long after you’ve finished. Lemon, lavender, or eucalyptus are all excellent choices that not only smell wonderful but also possess natural cleaning properties.
Beyond the cleaning solution itself, think about the tools you’re using. While microfiber cloths are generally excellent for cleaning, you might find that a slightly textured cloth works better for removing stubborn dirt. A soft-bristled brush can also be incredibly helpful for getting into those hard-to-reach corners and crevices.
Remember, consistency is key. Incorporating this DIY baseboard cleaning trick into your regular cleaning schedule will prevent dirt and grime from building up, making future cleanings even easier. Aim to clean your baseboards at least once a month, or more frequently if you have pets or children.
We are confident that once you try this method, you’ll never go back to your old ways of cleaning baseboards. It’s a game-changer that will save you time, energy, and frustration.
Don’t just take our word for it, though! We highly encourage you to give this DIY trick a try and see the difference for yourself. We’re eager to hear about your experiences and any variations you might discover. Share your tips, tricks, and before-and-after photos in the comments below. Let’s create a community of clean baseboard enthusiasts! Let us know if you have found an even easier way of cleaning baseboards easily.
Frequently Asked Questions (FAQ)
What exactly do I need for this DIY baseboard cleaning trick?
You’ll need a few basic supplies: a bucket or container for your cleaning solution, a microfiber cloth (or a slightly textured cloth), your preferred cleaning solution (dish soap and water, all-purpose cleaner, or a homemade solution), a soft-bristled brush (optional, for corners and crevices), and a magic eraser (optional, for stubborn marks). A long-handled duster or mop can also be helpful for reaching baseboards without bending over.
What kind of cleaning solution is best for baseboards?
The best cleaning solution depends on the type of baseboards you have and the level of dirt. For painted baseboards, a gentle solution of dish soap and warm water is usually sufficient. For vinyl or laminate baseboards, an all-purpose cleaner or a mixture of vinegar and water can be effective. For wood baseboards, be sure to use a cleaner specifically designed for wood surfaces to avoid damage. Always test any new cleaning solution in an inconspicuous area first to ensure it doesn’t discolor or damage the finish.
How often should I clean my baseboards?
Ideally, you should clean your baseboards at least once a month. However, the frequency may vary depending on your lifestyle and environment. If you have pets or children, or if you live in a dusty area, you may need to clean them more often. Regular cleaning will prevent dirt and grime from building up, making future cleanings easier.
What if I have really stubborn dirt or scuff marks on my baseboards?
For stubborn dirt or scuff marks, a magic eraser can be very effective. However, be careful when using a magic eraser, as it can be abrasive and may damage the finish of your baseboards. Always test it in an inconspicuous area first. You can also try using a paste of baking soda and water to gently scrub away stubborn marks.
How can I reach baseboards without bending over?
Bending over to clean baseboards can be hard on your back. To avoid this, use a long-handled duster or mop with a microfiber pad. You can also attach a microfiber cloth to a paint roller extension pole for easier reach.
Can I use a steam cleaner on my baseboards?
While steam cleaners can be effective for cleaning many surfaces, it’s generally not recommended to use them on baseboards, especially wood baseboards. The high heat and moisture can damage the finish and cause warping.
How do I clean baseboards that are behind furniture?
Cleaning baseboards behind furniture can be tricky. Use a long-handled duster or a crevice tool attachment on your vacuum cleaner to remove loose dust and debris. For deeper cleaning, try using a flexible cleaning tool or a microfiber cloth wrapped around a ruler or spatula to reach behind furniture.
What are some natural alternatives to chemical cleaners for baseboards?
If you prefer to use natural cleaning solutions, there are several options you can try. A mixture of vinegar and water is a classic choice that’s effective for cleaning many surfaces. You can also use baking soda as a gentle abrasive for removing stubborn marks. Lemon juice is another natural cleaner that can help to brighten and disinfect surfaces.
How can I prevent my baseboards from getting dirty so quickly?
There are several things you can do to prevent your baseboards from getting dirty so quickly. Regularly vacuum or sweep your floors to remove loose dirt and debris that can accumulate on baseboards. Use doormats at entrances to trap dirt and mud before they get tracked into your home. Consider applying a sealant or protective coating to your baseboards to make them easier to clean and more resistant to dirt and stains.
My baseboards are painted with a glossy paint. Does that change the cleaning method?
Glossy painted baseboards are generally easier to clean than those with a matte finish. You can usually get away with just using a damp microfiber cloth to wipe away dirt and grime. For tougher spots, a mild dish soap solution will work well. Avoid using abrasive cleaners or scrub brushes, as they can scratch the glossy finish.

Leave a Comment