
DIY Bottle Planters: Transform Trash into Treasure and Unleash Your Inner Gardener!
Have you ever looked at an empty plastic bottle and thought, “There has to be a better use for this?” Well, you’re in luck! We’re diving headfirst into the wonderful world of upcycling with a fun and incredibly rewarding project: DIY bottle planters. For centuries, resourceful gardeners have found creative ways to cultivate plants using whatever materials were available. From ancient terracotta pots to repurposed containers, the spirit of making do and creating beauty has always been at the heart of gardening.
But why should you embrace the DIY bottle planters trend? In today’s world, where sustainability is more important than ever, this project offers a fantastic way to reduce waste and create something beautiful and functional. Plus, it’s incredibly budget-friendly! Forget expensive pots and planters; with a few simple steps, you can transform those discarded bottles into charming homes for your favorite herbs, flowers, or even vegetables. I’m excited to show you how to create these unique planters, adding a touch of personality and eco-consciousness to your home or garden. Let’s get started and turn those bottles into blooming masterpieces!
DIY Bottle Planters: Turning Trash into Treasure!
Hey there, fellow plant lovers and DIY enthusiasts! I’m so excited to share this super fun and eco-friendly project with you: turning old plastic bottles into adorable planters! Not only is this a great way to recycle and reduce waste, but it also lets you add a personal touch to your indoor or outdoor garden. Plus, it’s incredibly easy and budget-friendly. Let’s get started!
What You’ll Need
Before we dive in, let’s gather all the necessary supplies. Don’t worry, most of these are probably already lying around your house!
* Plastic Bottles: Any size will do, but I personally love using 2-liter soda bottles or larger water bottles. Just make sure they’re clean and dry.
* Scissors or a Craft Knife: For cutting the bottles. Be careful and always supervise children if they’re helping.
* Paint (Optional): Acrylic paint works best, but you can also use spray paint. Get creative with colors and designs!
* Paintbrushes (Optional): If you’re using acrylic paint.
* Potting Soil: Choose a soil mix that’s appropriate for the plants you’ll be growing.
* Small Plants or Seeds: Herbs, succulents, flowers – the choice is yours!
* Water: For watering your new plants.
* Markers (Optional): For drawing designs or labeling your planters.
* String or Twine (Optional): For hanging your planters.
* Gravel or Small Stones (Optional): For drainage.
* Safety Glasses (Recommended): To protect your eyes while cutting.
Preparing Your Bottles
This is where the magic begins! We’ll transform those ordinary plastic bottles into the foundation for our mini gardens.
1. Clean and Dry the Bottles: Make sure your bottles are thoroughly cleaned and completely dry. Remove any labels and sticky residue. A little soap and water usually does the trick.
2. Decide on Your Design: There are tons of ways to cut your bottles. You can cut them in half horizontally to create two separate planters, or you can cut out a section of the side to create a “window” for your plants. I personally love the look of the horizontal cut, as it gives you two planters from one bottle!
3. Cutting the Bottle:
* Using Scissors: Carefully poke a small hole in the bottle with the tip of your scissors. Then, insert the scissors and start cutting along your desired line. Take your time and try to make the cut as even as possible.
* Using a Craft Knife: Place the bottle on a cutting board and carefully score the bottle along your desired line with the craft knife. Then, apply a bit more pressure and continue cutting until you’ve separated the bottle. Remember to always cut away from yourself!
4. Smooth the Edges (Important!): The cut edges of the plastic can be sharp, so it’s important to smooth them out. You can use sandpaper, a lighter (carefully!), or even fold the edges inward and secure them with tape. I usually use sandpaper to gently smooth any rough spots.
Decorating Your Planters (The Fun Part!)
Now comes the really fun part – decorating! This is where you can let your creativity shine and personalize your planters to match your style.
1. Choose Your Paint: Acrylic paint is a great option because it adheres well to plastic and comes in a wide variety of colors. Spray paint is also a good choice for a quick and even finish.
2. Painting Techniques:
* Solid Color: Apply a base coat of paint to the entire planter. Let it dry completely, then add a second coat if needed.
* Patterns: Use stencils, tape, or freehand designs to create patterns. Stripes, polka dots, geometric shapes – the possibilities are endless!
* Ombre Effect: Blend different shades of paint to create a gradient effect.
* Distressed Look: After painting, lightly sand some areas to reveal the plastic underneath for a rustic look.
3. Adding Details: Once the paint is dry, you can add details with markers, glitter, or other embellishments. I love using paint pens to draw cute faces or plant-themed designs.
4. Sealing (Optional): If you’re planning to keep your planters outdoors, you might want to seal them with a clear coat of sealant to protect the paint from the elements.
Planting Your Green Friends
Alright, our planters are looking fabulous! Now it’s time to bring them to life with some greenery.
1. Drainage (Essential!): Before adding soil, it’s crucial to create drainage. This prevents the roots of your plants from sitting in water and rotting. Add a layer of gravel or small stones to the bottom of the planter.
2. Adding Soil: Fill the planter with potting soil, leaving about an inch of space at the top.
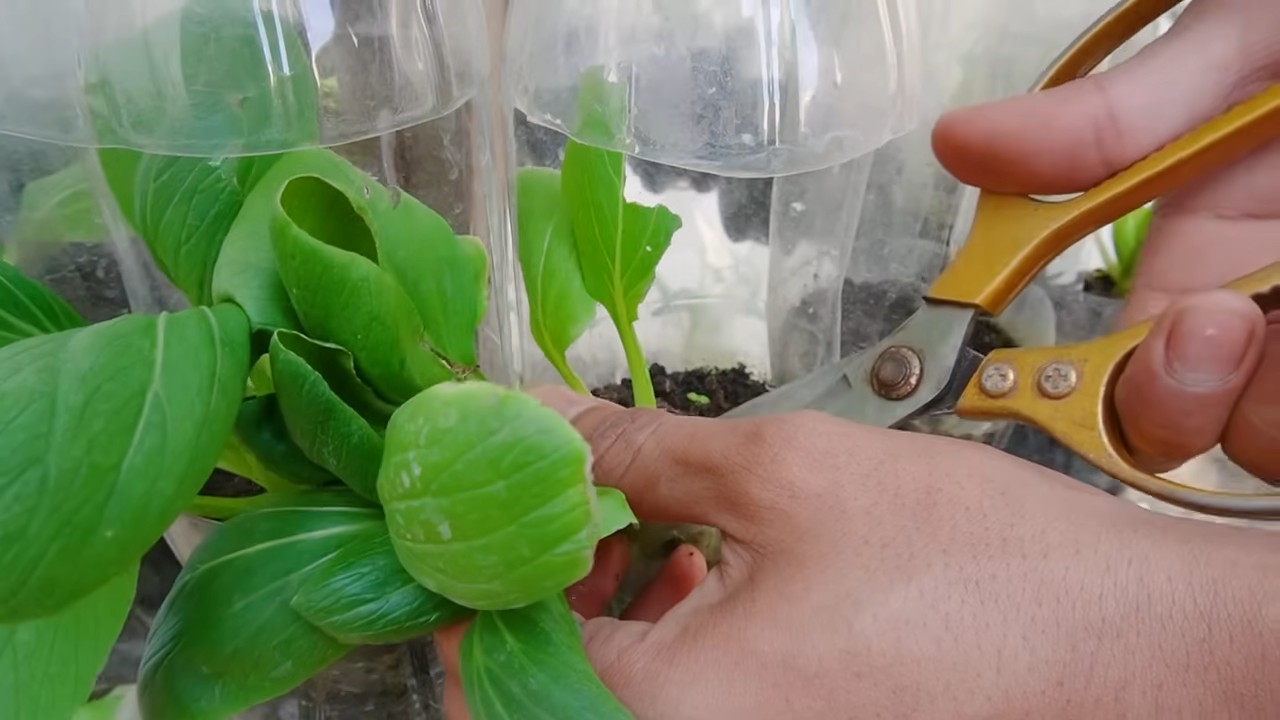
3. Planting: Gently remove your plant from its original container and loosen the roots slightly. Dig a small hole in the soil and place the plant in the hole. Cover the roots with soil and gently pat it down.
4. Watering: Water your newly planted plant thoroughly, until water drains out of the bottom of the planter.
Hanging Your Planters (Optional)
If you want to create hanging planters, here’s how to do it:
1. Drilling Holes: Carefully drill two or three holes around the rim of the planter. Make sure the holes are evenly spaced.
2. Attaching String or Twine: Cut three equal lengths of string or twine. Thread one end of each string through a hole and tie a knot to secure it.
3. Gathering the Strings: Gather the other ends of the strings and tie them together at the desired height.
4. Hanging: Hang your planter from a hook or other sturdy support.
Tips and Tricks for Success
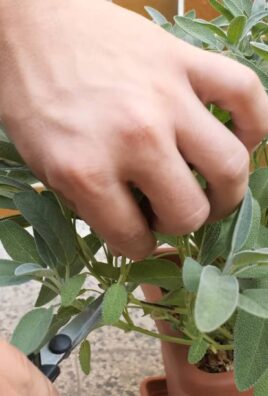
* Choose the Right Plants: Consider the amount of sunlight your planters will receive and choose plants that are suitable for those conditions. Succulents and herbs are generally easy to grow in bottle planters.
* Watering: Don’t overwater! Allow the soil to dry out slightly between waterings.
* Fertilizing: Feed your plants with a diluted liquid fertilizer every few weeks to keep them healthy and thriving.
* Repotting: As your plants grow, they may need to be repotted into larger containers.
* Experiment! Don’t be afraid to try different designs, colors, and planting combinations. The possibilities are endless!
* Safety First: Always use caution when using sharp tools like scissors and craft knives. Wear safety glasses to protect your eyes.
* Consider Self-Watering Options: You can create a self-watering system by inverting the top half of the bottle into the bottom half, with the neck submerged in water. The soil will wick up the water as needed. There are many tutorials online for this!
* Label Your Plants: Use waterproof markers to label your planters, especially if you’re growing herbs.
* Get the Kids Involved: This is a great project to do with kids! They’ll love decorating the planters and learning about plants.
* Upcycle Other Materials: Get creative and use other recycled materials to decorate your planters, such as bottle caps, buttons, or fabric scraps.
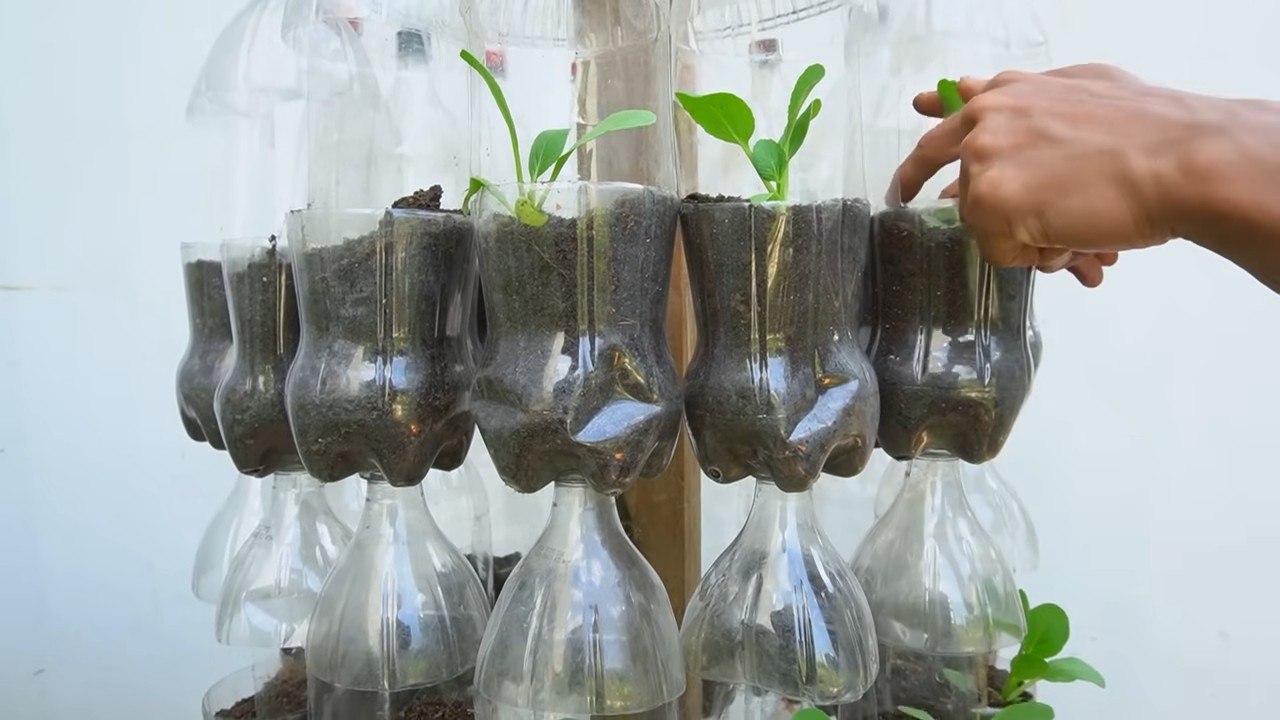
* Consider Vertical Gardening: Attach multiple bottle planters to a wall or fence to create a vertical garden.
* Use Different Bottle Shapes: Experiment with different bottle shapes and sizes to create a variety of planter designs. Wine bottles, juice bottles, and even shampoo bottles can be used.
* Add Drainage Holes to the Bottom: If you’re not using gravel, make sure to drill drainage holes in the bottom of the planter.
* Protect from Extreme Temperatures: Plastic can become brittle in extreme temperatures, so avoid placing your planters in direct sunlight or freezing conditions.
* Clean Regularly: Wipe down your planters regularly to remove dust and dirt.
Troubleshooting
* Plants are Wilting: This could be due to overwatering, underwatering, or lack of sunlight. Adjust your watering schedule and move the planter to a location with more sunlight.
* Leaves are Turning Yellow: This could be due to nutrient deficiency. Fertilize your plants with a diluted liquid fertilizer.
* Mold Growing on the Soil: This is usually caused by overwatering. Allow the soil to dry out completely before watering again.
* Pests: Inspect your plants regularly for pests. If you find any, treat them with an appropriate insecticide.
I hope you enjoyed this DIY project! I’m so excited to see what you create. Happy planting!
Conclusion
So, there you have it! Transforming discarded plastic bottles into charming and functional planters is not just a fun craft project; it’s a small step towards a more sustainable lifestyle. We’ve shown you how easy it is to create your own DIY bottle planters, and hopefully, inspired you to give it a try.
But why is this DIY trick a must-try? Beyond the obvious environmental benefits of reducing plastic waste, these planters offer a cost-effective and creative way to add greenery to your home, balcony, or garden. They’re incredibly versatile, allowing you to grow herbs, flowers, vegetables, or even start seedlings. Plus, the process itself is therapeutic and rewarding, providing a sense of accomplishment as you watch your plants thrive in their upcycled homes.
Don’t feel limited to the basic design we’ve outlined. Get creative with your bottle planters! Experiment with different sizes and shapes of bottles to create a tiered garden or a hanging display. Paint the bottles with vibrant colors or use decorative paper to add a personal touch. Consider using different types of soil mixes depending on the plants you intend to grow. For example, succulents thrive in well-draining soil, while herbs may prefer a richer, more nutrient-dense mix. You could even incorporate a self-watering system by adding a wick that draws water from a reservoir at the bottom of the bottle.
Another variation is to create vertical gardens using multiple bottle planters attached to a wall or fence. This is a fantastic way to maximize space, especially in small apartments or balconies. You can also use different types of rope or wire to hang the planters, creating a visually appealing and unique display.
The possibilities are truly endless! The key is to have fun and let your creativity guide you. Remember, there’s no right or wrong way to create your own DIY bottle planters.
We strongly encourage you to try this DIY project and experience the joy of upcycling and gardening firsthand. It’s a simple yet impactful way to make a difference and add a touch of green to your life.
Once you’ve created your own DIY bottle planters, we’d love to see your creations! Share your photos and experiences with us on social media using #DIYBottlePlanters. We’re eager to see your unique designs and learn from your experiences. Let’s inspire each other to embrace sustainable living and create beautiful, thriving gardens, one bottle at a time. Happy planting!
Frequently Asked Questions (FAQ)
What types of plastic bottles are best for making planters?
Ideally, you should use sturdy plastic bottles, such as those used for water, soda, or juice. Avoid using thin, flimsy bottles that may collapse under the weight of the soil and plants. Bottles with a wider base are generally more stable and less likely to tip over. Also, ensure the bottles are clean and free of any residue before you start.
How do I properly clean the plastic bottles before using them?
Wash the bottles thoroughly with warm, soapy water. Rinse them well to remove any soap residue. For stubborn stains or odors, you can use a solution of water and vinegar or baking soda. Make sure the bottles are completely dry before you start cutting or decorating them.
What kind of soil should I use for my bottle planters?
The type of soil you use will depend on the plants you intend to grow. For most general-purpose plants, a good quality potting mix will work well. For succulents and cacti, use a well-draining soil mix specifically formulated for these types of plants. For herbs, you can use a mix of potting soil and compost. Always research the specific soil requirements of your plants to ensure they thrive.
How do I ensure proper drainage in my bottle planters?
Proper drainage is crucial to prevent root rot. Before adding soil, create drainage holes at the bottom of the bottle. You can use a drill, a nail, or a sharp knife to make these holes. Add a layer of gravel or small stones at the bottom of the bottle to further improve drainage.
How often should I water my plants in bottle planters?
The frequency of watering will depend on the type of plant, the climate, and the type of soil you’re using. Check the soil moisture regularly by sticking your finger into the soil. If the top inch of soil feels dry, it’s time to water. Avoid overwatering, as this can lead to root rot.
Can I use bottle planters for indoor plants?
Yes, bottle planters are perfect for indoor plants. Just make sure to place them in a location that receives adequate sunlight. You may also need to adjust your watering schedule depending on the humidity levels in your home.
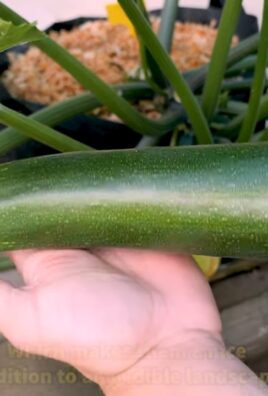
Are bottle planters suitable for growing vegetables?
Yes, you can grow many types of vegetables in bottle planters, especially smaller varieties like herbs, lettuce, spinach, and cherry tomatoes. Make sure to choose a bottle that is large enough to accommodate the root system of the vegetable you want to grow.
How do I prevent algae growth in my bottle planters?
Algae growth can occur in bottle planters, especially if they are exposed to direct sunlight. To prevent algae growth, try to keep the bottles out of direct sunlight as much as possible. You can also paint the outside of the bottles with a dark color to block out light.
How long will bottle planters last?
The lifespan of bottle planters will depend on the quality of the plastic and the environmental conditions. With proper care, they can last for several years. However, the plastic may eventually degrade due to exposure to sunlight and weather.
Can I recycle the bottle planters when I’m finished with them?
Yes, you can recycle the bottle planters when you’re finished with them. Just make sure to remove the soil and clean the bottles thoroughly before placing them in your recycling bin. Check with your local recycling guidelines to ensure that plastic bottles are accepted.
What if I don’t have a knife or scissors to cut the bottle?
If you don’t have a knife or scissors, you can use a hot wire or a soldering iron to carefully melt through the plastic. However, exercise extreme caution when using these tools, as they can cause burns. Always work in a well-ventilated area and wear protective gloves.
How can I make my bottle planters more decorative?
There are many ways to decorate your bottle planters. You can paint them with acrylic paints, cover them with decorative paper or fabric, or add embellishments like beads, buttons, or shells. You can also use stencils to create intricate designs. Let your imagination run wild and create planters that reflect your personal style.
Is it safe to use plastic bottles for growing food?
While there is some debate about the safety of using plastic bottles for growing food, most experts agree that it is generally safe as long as you use food-grade plastic bottles (those that were originally used to hold food or beverages). Avoid using bottles made from PVC or other plastics that may leach harmful chemicals into the soil.
How do I create a self-watering system for my bottle planters?
To create a self-watering system, cut the bottle in half and invert the top half into the bottom half. Place a wick (such as a cotton rope or strip of fabric) through the neck of the bottle, with one end submerged in the water reservoir in the bottom half and the other end buried in the soil in the top half. The wick will draw water up from the reservoir and keep the soil moist.
Where can I find inspiration for DIY bottle planter designs?
You can find inspiration for DIY bottle planter designs on websites like Pinterest, Instagram, and YouTube. Search for “DIY bottle planters” or “upcycled planters” to find a wealth of ideas and tutorials.
Leave a Comment