
Dragon Bean Growing Tips: Unleash the Gardener Within! Ever dreamt of harvesting vibrant, exotic Dragon Beans right from your own backyard? Imagine the look on your friends’ faces when you serve up a dish featuring these uniquely shaped and deliciously nutritious beans, all grown with your own two hands. This isn’t just about gardening; it’s about creating a conversation starter, a culinary adventure, and a connection to nature, all rolled into one satisfying experience.
While Dragon Beans might seem like a modern culinary trend, beans, in general, have a rich history, dating back thousands of years and playing a crucial role in diets across various cultures. From ancient civilizations to modern-day kitchens, beans have been a staple food source, providing essential nutrients and sustenance. Now, you can participate in this legacy by cultivating your own unique variety.
Let’s face it, store-bought vegetables often lack the freshness and flavor of homegrown produce. Plus, knowing exactly where your food comes from and how it’s grown offers unparalleled peace of mind. That’s where these Dragon Bean Growing Tips come in! I’m going to share my tried-and-true secrets for successfully cultivating these beauties, even if you’re a complete beginner. We’ll cover everything from seed selection and soil preparation to watering techniques and pest control, ensuring you have a bountiful harvest of Dragon Beans in no time. Get ready to transform your garden and your plate with this exciting and rewarding DIY project!
Growing Dragon Beans: A DIY Guide to a Bountiful Harvest
Hey there, fellow gardening enthusiasts! I’m so excited to share my tried-and-true method for growing dragon beans. These vibrant, climbing beans are not only beautiful additions to any garden, but they also produce delicious, tender pods. Get ready to impress your friends and family with your dragon bean bounty!
What You’ll Need
Before we dive in, let’s gather our supplies. Having everything ready will make the process smooth and enjoyable.
* Dragon bean seeds (obviously!)
* Well-draining soil (I prefer a mix of compost, potting soil, and a little bit of sand)
* A sunny location (at least 6-8 hours of direct sunlight per day)
* A sturdy trellis or support structure (these beans can climb high!)
* Gardening gloves
* Watering can or hose
* Optional: Compost or aged manure for soil enrichment
* Optional: Seed starting trays and potting mix (if starting indoors)
* Optional: Liquid fertilizer formulated for beans
Getting Started: Planting Your Dragon Beans
There are two main ways to get your dragon beans growing: direct sowing and starting indoors. I’ll walk you through both methods.
Direct Sowing (My Preferred Method)
Direct sowing is planting the seeds directly into the garden soil. This is my go-to method because it’s simple and the plants tend to be stronger.
1. Prepare the Soil: Choose a sunny spot in your garden and clear away any weeds, rocks, or debris. Dragon beans thrive in well-draining soil, so amend the soil with compost or aged manure to improve its fertility and drainage. I usually dig in about 2-3 inches of compost.
2. Create Planting Holes: Sow seeds 1 inch deep and 4-6 inches apart. If you’re planting in rows, space the rows about 2-3 feet apart. This gives the plants plenty of room to grow and climb.
3. Plant the Seeds: Place 2-3 seeds in each hole. This increases the chances of at least one seed germinating. Cover the seeds with soil and gently pat down.
4. Water Thoroughly: Water the planting area gently but thoroughly. Keep the soil consistently moist until the seeds germinate.
5. Thin Seedlings (If Necessary): Once the seedlings emerge and have a few true leaves, thin them to one strong plant per hole. Choose the healthiest-looking seedling and gently snip off the others at soil level.
Starting Indoors (For an Early Start)
If you live in an area with a short growing season, starting your dragon beans indoors can give them a head start.
1. Prepare Seed Starting Trays: Fill seed starting trays or small pots with a good quality seed starting mix.
2. Sow the Seeds: Plant 1-2 seeds per cell or pot, about 1 inch deep.
3. Water Gently: Water the trays gently to moisten the soil. Avoid overwatering, which can lead to damping-off disease.
4. Provide Warmth and Light: Place the trays in a warm location (around 70-75°F) and provide plenty of light. A sunny windowsill or a grow light works well.
5. Harden Off Seedlings: Once the seedlings have a few true leaves, gradually acclimate them to outdoor conditions before transplanting. This process, called “hardening off,” involves exposing the seedlings to increasing amounts of sunlight and wind over a period of 7-10 days.
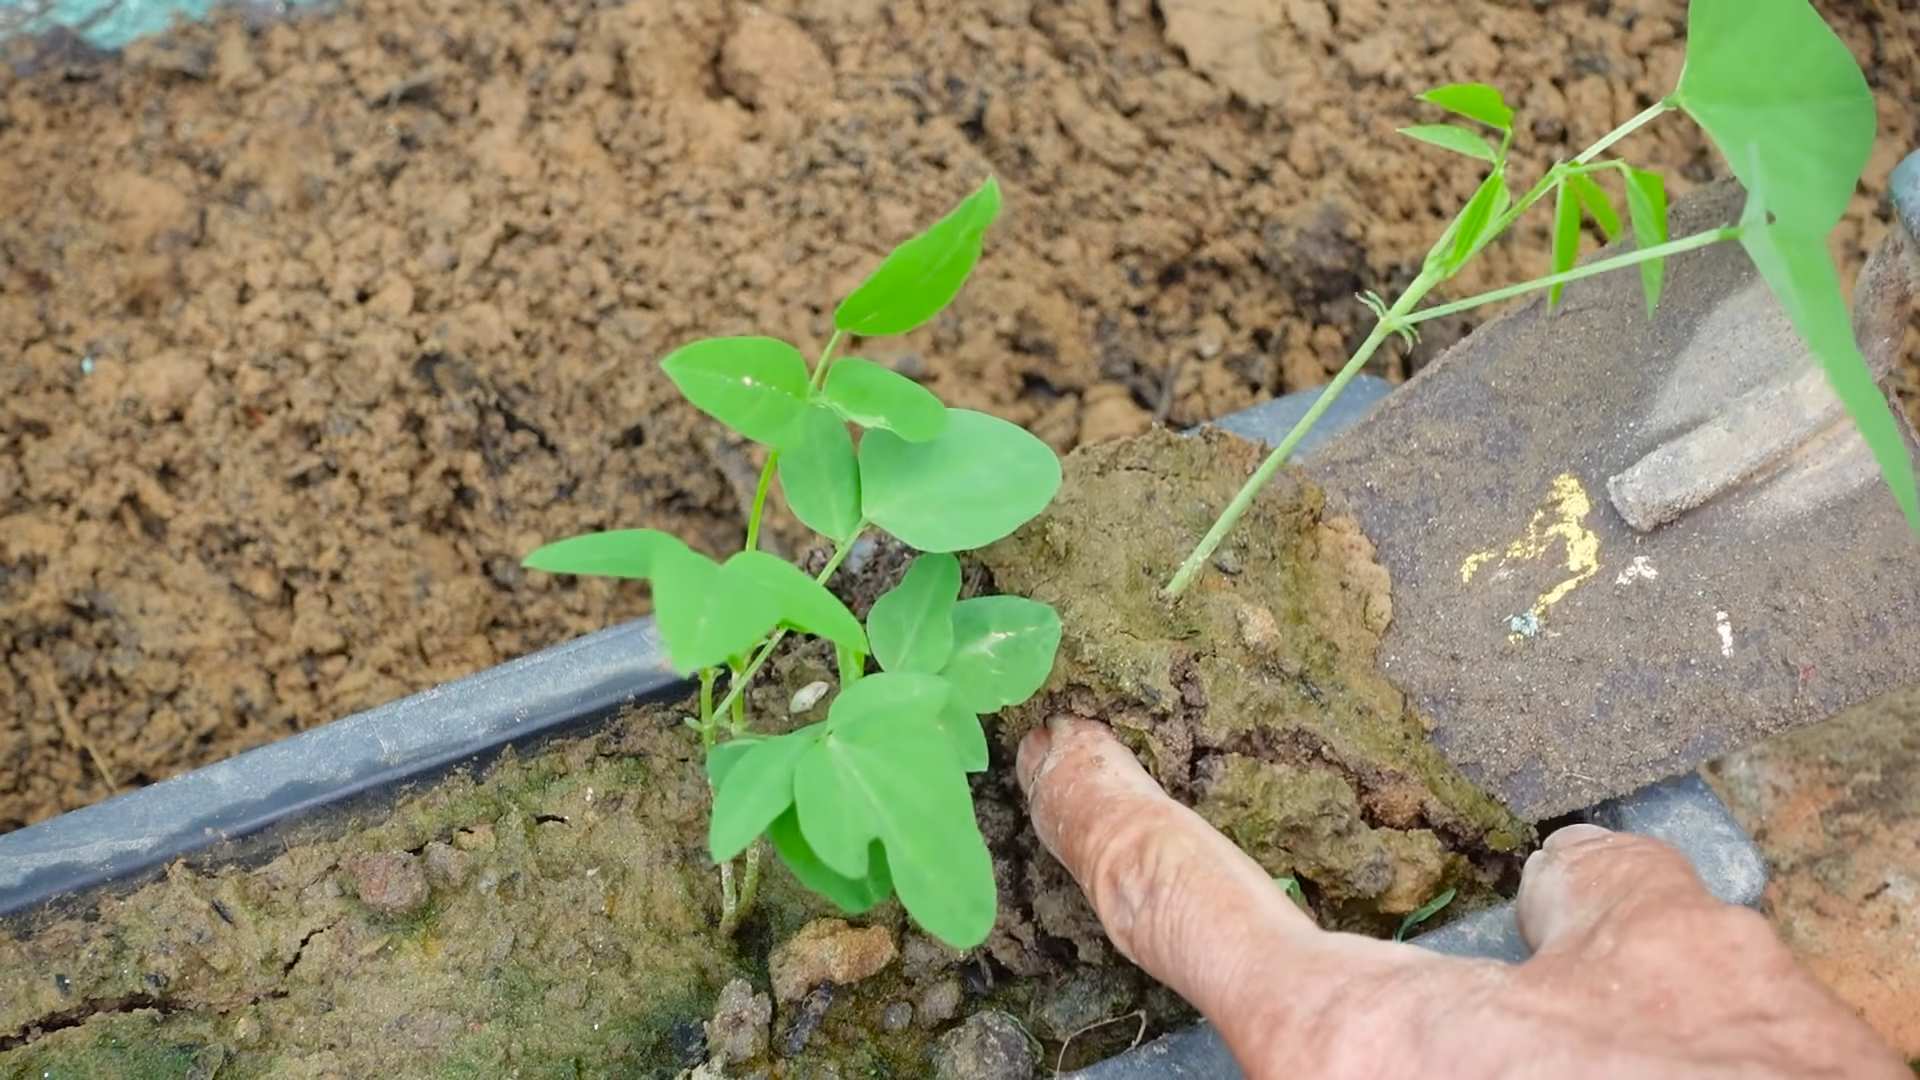
6. Transplant Seedlings: Once the danger of frost has passed and the soil has warmed up, transplant the seedlings into your garden. Follow the same spacing guidelines as for direct sowing.
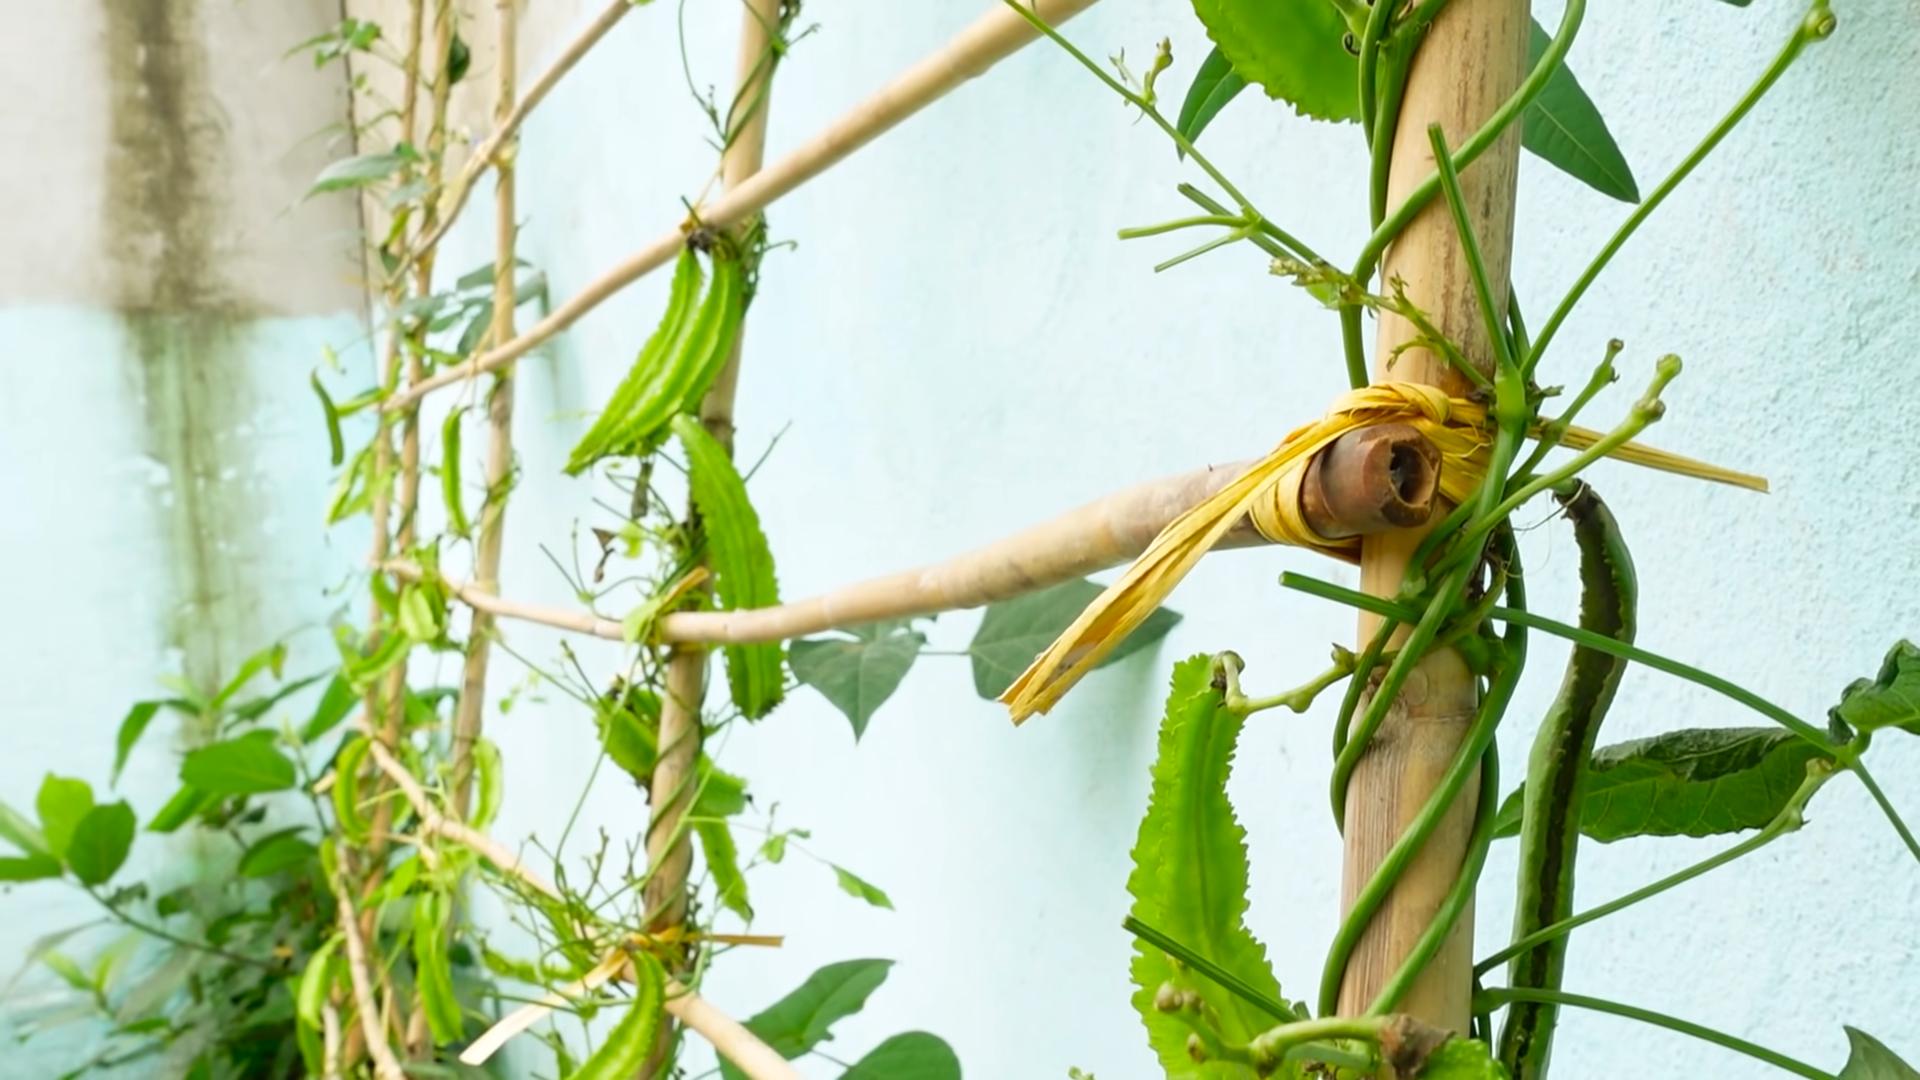
Providing Support: Trellising Your Dragon Beans
Dragon beans are climbers, so they need a sturdy trellis or support structure to grow on. This is crucial for a healthy and productive plant.
1. Choose a Trellis: There are many different types of trellises you can use, including bamboo stakes, netting, fences, or even a simple A-frame structure. I personally love using a tall bamboo trellis.
2. Install the Trellis: Install the trellis before or shortly after planting the seeds or transplanting the seedlings. Make sure the trellis is securely anchored in the ground to prevent it from falling over under the weight of the growing vines.
3. Guide the Vines: As the dragon bean vines grow, gently guide them onto the trellis. You may need to tie them to the trellis with soft twine or plant ties.
4. Maintain the Trellis: Regularly check the trellis to make sure it’s sturdy and that the vines are properly supported.
Caring for Your Dragon Beans: Watering, Fertilizing, and Pest Control
Once your dragon beans are planted and supported, it’s time to focus on providing them with the care they need to thrive.
1. Watering: Dragon beans need consistent moisture, especially during hot, dry weather. Water deeply and regularly, aiming to keep the soil consistently moist but not waterlogged. I usually water deeply every 2-3 days, depending on the weather.
2. Fertilizing: Dragon beans are relatively light feeders, but they can benefit from occasional fertilization. Use a liquid fertilizer formulated for beans, following the instructions on the label. Avoid over-fertilizing, which can lead to excessive foliage growth and reduced pod production. I fertilize every 4-6 weeks.
3. Weeding: Keep the area around your dragon beans free of weeds, which can compete for nutrients and water. Hand-pull weeds regularly or use a hoe to cultivate the soil.
4. Pest Control: Dragon beans can be susceptible to certain pests, such as aphids, bean beetles, and spider mites. Inspect your plants regularly for signs of infestation and take action promptly. I prefer using organic pest control methods, such as insecticidal soap or neem oil. You can also attract beneficial insects to your garden, such as ladybugs and lacewings, which will help control pests naturally.
5. Disease Prevention: To prevent diseases, ensure good air circulation around your plants by spacing them properly and pruning any overcrowded foliage. Avoid overhead watering, which can create a humid environment that encourages fungal diseases.
Harvesting Your Dragon Beans: When and How
The moment we’ve all been waiting for! Harvesting your dragon beans is the most rewarding part of the process.
1. Harvest Time: Dragon beans are typically ready to harvest about 50-60 days after planting. The pods should be firm, plump, and brightly colored.
2. Harvesting Technique: Gently snap the pods off the vine, being careful not to
Hey there, fellow gardening enthusiasts! I’m so excited to share my tried-and-true method for growing dragon beans. These vibrant, climbing beans are not only beautiful additions to any garden, but they also produce delicious, tender pods. Get ready to impress your friends and family with your dragon bean bounty!
What You’ll Need
Before we dive in, let’s gather our supplies. Having everything ready will make the process smooth and enjoyable.
* Dragon bean seeds (obviously!)
* Well-draining soil (I prefer a mix of compost, potting soil, and a little bit of sand)
* A sunny location (at least 6-8 hours of direct sunlight per day)
* A sturdy trellis or support structure (these beans can climb high!)
* Gardening gloves
* Watering can or hose
* Optional: Compost or aged manure for soil enrichment
* Optional: Seed starting trays and potting mix (if starting indoors)
* Optional: Liquid fertilizer formulated for beans
Getting Started: Planting Your Dragon Beans
There are two main ways to get your dragon beans growing: direct sowing and starting indoors. I’ll walk you through both methods.
Direct Sowing (My Preferred Method)
Direct sowing is planting the seeds directly into the garden soil. This is my go-to method because it’s simple and the plants tend to be stronger.
1. Prepare the Soil: Choose a sunny spot in your garden and clear away any weeds, rocks, or debris. Dragon beans thrive in well-draining soil, so amend the soil with compost or aged manure to improve its fertility and drainage. I usually dig in about 2-3 inches of compost.
2. Create Planting Holes: Sow seeds 1 inch deep and 4-6 inches apart. If you’re planting in rows, space the rows about 2-3 feet apart. This gives the plants plenty of room to grow and climb.
3. Plant the Seeds: Place 2-3 seeds in each hole. This increases the chances of at least one seed germinating. Cover the seeds with soil and gently pat down.
4. Water Thoroughly: Water the planting area gently but thoroughly. Keep the soil consistently moist until the seeds germinate.
5. Thin Seedlings (If Necessary): Once the seedlings emerge and have a few true leaves, thin them to one strong plant per hole. Choose the healthiest-looking seedling and gently snip off the others at soil level.
Starting Indoors (For an Early Start)
If you live in an area with a short growing season, starting your dragon beans indoors can give them a head start.
1. Prepare Seed Starting Trays: Fill seed starting trays or small pots with a good quality seed starting mix.
2. Sow the Seeds: Plant 1-2 seeds per cell or pot, about 1 inch deep.
3. Water Gently: Water the trays gently to moisten the soil. Avoid overwatering, which can lead to damping-off disease.
4. Provide Warmth and Light: Place the trays in a warm location (around 70-75°F) and provide plenty of light. A sunny windowsill or a grow light works well.
5. Harden Off Seedlings: Once the seedlings have a few true leaves, gradually acclimate them to outdoor conditions before transplanting. This process, called “hardening off,” involves exposing the seedlings to increasing amounts of sunlight and wind over a period of 7-10 days.
6. Transplant Seedlings: Once the danger of frost has passed and the soil has warmed up, transplant the seedlings into your garden. Follow the same spacing guidelines as for direct sowing.
Providing Support: Trellising Your Dragon Beans
Dragon beans are climbers, so they need a sturdy trellis or support structure to grow on. This is crucial for a healthy and productive plant.
1. Choose a Trellis: There are many different types of trellises you can use, including bamboo stakes, netting, fences, or even a simple A-frame structure. I personally love using a tall bamboo trellis.
2. Install the Trellis: Install the trellis before or shortly after planting the seeds or transplanting the seedlings. Make sure the trellis is securely anchored in the ground to prevent it from falling over under the weight of the growing vines.
3. Guide the Vines: As the dragon bean vines grow, gently guide them onto the trellis. You may need to tie them to the trellis with soft twine or plant ties.
4. Maintain the Trellis: Regularly check the trellis to make sure it’s sturdy and that the vines are properly supported.
Caring for Your Dragon Beans: Watering, Fertilizing, and Pest Control
Once your dragon beans are planted and supported, it’s time to focus on providing them with the care they need to thrive.
1. Watering: Dragon beans need consistent moisture, especially during hot, dry weather. Water deeply and regularly, aiming to keep the soil consistently moist but not waterlogged. I usually water deeply every 2-3 days, depending on the weather.
2. Fertilizing: Dragon beans are relatively light feeders, but they can benefit from occasional fertilization. Use a liquid fertilizer formulated for beans, following the instructions on the label. Avoid over-fertilizing, which can lead to excessive foliage growth and reduced pod production. I fertilize every 4-6 weeks.
3. Weeding: Keep the area around your dragon beans free of weeds, which can compete for nutrients and water. Hand-pull weeds regularly or use a hoe to cultivate the soil.
4. Pest Control: Dragon beans can be susceptible to certain pests, such as aphids, bean beetles, and spider mites. Inspect your plants regularly for signs of infestation and take action promptly. I prefer using organic pest control methods, such as insecticidal soap or neem oil. You can also attract beneficial insects to your garden, such as ladybugs and lacewings, which will help control pests naturally.
5. Disease Prevention: To prevent diseases, ensure good air circulation around your plants by spacing them properly and pruning any overcrowded foliage. Avoid overhead watering, which can create a humid environment that encourages fungal diseases.
Harvesting Your Dragon Beans: When and How
The moment we’ve all been waiting for! Harvesting your dragon beans is the most rewarding part of the process.
1. Harvest Time: Dragon beans are typically ready to harvest about 50-60 days after planting. The pods should be firm, plump, and brightly colored.
2. Harvesting Technique: Gently snap the pods off the vine, being careful not to damage the plant. Harvest regularly to encourage continued pod production.
3. Enjoy Your Harvest: Dragon beans can be eaten fresh, steamed, stir-fried, or added to soups and stews. They’re also delicious pickled or frozen for later use. I love stir-frying them with garlic and a little soy sauce.
Troubleshooting: Common Problems and Solutions
Even with the best care, you may encounter some challenges when growing dragon beans. Here are a few common problems and how to address them.
* Poor Germination: If your seeds aren’t germinating, make sure the soil is warm enough and consistently moist. You can also try soaking the seeds in water for 24 hours before planting to improve germination rates.
* Yellowing Leaves: Yellowing leaves can be a sign of nutrient deficiency, overwatering, or pest infestation. Check the soil drainage, fertilize if necessary, and inspect the plants for pests.
* Lack of Pod Production: Lack of pod production can be caused by insufficient sunlight, poor pollination, or over-fertilization. Make sure your plants are getting at least 6-8 hours of direct sunlight per day, attract pollinators to your garden, and avoid over-fertilizing.
* Pest Infestation: If you notice pests on your dragon beans, take action promptly to prevent them from spreading. Use organic pest control methods or introduce beneficial insects to your garden.
Extra Tips for Dragon Bean Success
Here are a few extra tips to help you grow the best dragon beans possible:
* Succession Planting: Plant dragon beans every 2-3 weeks to ensure a continuous harvest throughout the growing season.
* Companion Planting: Plant dragon beans alongside beneficial companion plants, such as marigolds, nasturtiums, and rosemary, to deter pests and attract pollinators.
* Saving Seeds: If you want to save seeds from your dragon beans for next year, allow a few pods to mature fully on the vine. Once the pods are dry and brittle, harvest the seeds and store them in a cool, dry place.
Growing dragon beans is a rewarding experience that will add beauty and flavor to your garden. With a little bit of care and attention, you can enjoy a bountiful harvest of these delicious and nutritious beans. Happy gardening!
Conclusion
So, there you have it! Growing your own dragon beans isn’t just a gardening project; it’s an adventure in flavor, a testament to sustainable living, and a rewarding experience from seed to table. We’ve covered everything from selecting the perfect seeds to nurturing your plants through their various growth stages, ensuring a bountiful harvest of these unique and delicious legumes.
Why is this DIY trick a must-try? Because it empowers you to control the quality of your food, reduces your reliance on commercially grown produce (often laden with pesticides), and connects you with the natural world in a tangible and meaningful way. Imagine the satisfaction of serving a dish featuring dragon beans you cultivated yourself – the vibrant colors, the fresh taste, and the knowledge that you played an integral role in bringing it to your plate. It’s an experience that store-bought beans simply can’t replicate.
But the journey doesn’t end here. Feel free to experiment with different varieties of dragon beans. Some boast deeper purple hues, while others offer a slightly sweeter flavor profile. Consider companion planting to enhance growth and deter pests naturally. Marigolds, for example, are excellent companions for dragon beans, repelling nematodes and attracting beneficial insects. You can also explore different trellising methods to maximize space and create a visually stunning vertical garden. Try using bamboo poles, repurposed branches, or even a decorative metal trellis to support your climbing dragon bean vines.
Furthermore, don’t limit yourself to just boiling or steaming your dragon beans. They’re incredibly versatile in the kitchen. Try adding them to stir-fries for a pop of color and texture, incorporating them into hearty stews and soups, or even pickling them for a tangy and flavorful condiment. Roasted dragon beans make a delicious and healthy snack. The possibilities are truly endless!
We encourage you to embrace this DIY project and discover the joys of growing your own dragon beans. It’s a rewarding endeavor that will not only enhance your culinary repertoire but also deepen your appreciation for the natural world. Remember to document your progress, take photos of your flourishing plants, and share your experiences with fellow gardening enthusiasts.
Most importantly, don’t be afraid to experiment and learn along the way. Gardening is a journey of continuous discovery, and every season brings new challenges and opportunities. So, grab your seeds, prepare your soil, and embark on your dragon bean growing adventure today! We are confident that you will find the process both enjoyable and incredibly rewarding. Share your successes (and even your challenges!) in the comments below. We can’t wait to hear about your dragon bean growing journey! Let’s cultivate a community of dragon bean enthusiasts!
Frequently Asked Questions (FAQ)
What are dragon beans, and why should I grow them?
Dragon beans, also known as borlotti beans or cranberry beans, are a type of shelling bean prized for their beautiful mottled appearance and creamy texture. They offer a slightly nutty and sweet flavor that is delicious in a variety of dishes. Growing your own dragon beans allows you to enjoy fresh, organic produce, control the quality of your food, and experience the satisfaction of cultivating your own harvest. Plus, their vibrant colors add a touch of visual appeal to your garden.
When is the best time to plant dragon beans?
Dragon beans are warm-season crops, so they should be planted after the last frost in your area. Generally, this is in late spring or early summer. Check your local frost dates to determine the optimal planting time. You can also start seeds indoors a few weeks before the last frost to get a head start on the growing season.
What kind of soil do dragon beans need?
Dragon beans thrive in well-drained soil that is rich in organic matter. Amend your soil with compost or aged manure before planting to improve its fertility and drainage. A slightly acidic to neutral soil pH (around 6.0 to 7.0) is ideal. Avoid heavy clay soils, as they can become waterlogged and hinder root development.
How much sunlight do dragon beans require?
Dragon beans need at least 6-8 hours of direct sunlight per day to thrive. Choose a sunny location in your garden where they will receive ample sunlight throughout the growing season. Insufficient sunlight can lead to leggy growth and reduced yields.
How often should I water my dragon bean plants?
Water your dragon bean plants regularly, especially during dry periods. Keep the soil consistently moist but not waterlogged. Water deeply at the base of the plants to encourage deep root growth. Avoid overhead watering, as it can increase the risk of fungal diseases. Mulching around the plants can help retain moisture and suppress weeds.
Do dragon beans need a trellis?
Yes, dragon beans are climbing plants and require a trellis or other support structure to grow properly. A trellis provides support for the vines, allowing them to climb and produce more beans. You can use a variety of materials for your trellis, such as bamboo poles, wooden stakes, or metal fencing. Ensure the trellis is sturdy enough to support the weight of the mature plants.
What are some common pests and diseases that affect dragon beans?
Common pests that can affect dragon beans include aphids, bean beetles, and spider mites. Regularly inspect your plants for signs of infestation and take appropriate measures to control them. Organic pest control methods, such as insecticidal soap or neem oil, can be effective. Common diseases include bean rust and powdery mildew. Ensure good air circulation around the plants and avoid overhead watering to prevent these diseases.
How do I know when my dragon beans are ready to harvest?
Dragon beans are typically ready to harvest when the pods are plump and the beans inside are fully developed but still tender. The pods will also start to change color, becoming more mottled or speckled. You can shell the beans from the pods and use them fresh, or you can allow the pods to dry completely on the vine and store the dried beans for later use.
Can I save seeds from my dragon bean plants?
Yes, you can save seeds from your dragon bean plants for future planting. Allow the pods to dry completely on the vine, then shell the beans and store them in an airtight container in a cool, dry place. Be sure to label the seeds with the variety and date of harvest.
What are some creative ways to use dragon beans in cooking?
Dragon beans are incredibly versatile in the kitchen. They can be boiled, steamed, sautéed, or roasted. Add them to soups, stews, salads, and stir-fries. They also make a delicious side dish on their own. Try using them in Italian dishes like pasta e fagioli or ribollita. You can also pickle them for a tangy and flavorful condiment. Experiment with different recipes and flavor combinations to discover your favorite ways to enjoy dragon beans.


Leave a Comment