
Easy time-saving cleaning tips are like little bursts of magic in our busy lives, aren’t they? I know I’m always on the lookout for ways to reclaim my weekends from endless chores. For generations, resourceful homemakers have passed down cleaning hacks, often born out of necessity and a desire to keep their homes sparkling without spending all day scrubbing. Think about it – our grandmothers didn’t have the fancy gadgets we do, yet their homes were often impeccably clean! They relied on clever techniques and simple ingredients, a tradition we can absolutely benefit from today.
In today’s fast-paced world, who has time to spend hours cleaning? That’s where these easy time-saving cleaning tips come in. We’re all juggling work, family, hobbies, and everything in between. Spending less time cleaning means more time for the things we truly enjoy. This article is packed with DIY solutions and clever hacks that will transform your cleaning routine from a dreaded chore into a quick and efficient task. Get ready to discover how to achieve a sparkling clean home without sacrificing your precious free time!
DIY Time-Saving Cleaning Hacks: Conquer Your Chores!
Okay, let’s be honest, cleaning isn’t exactly anyone’s favorite pastime. But what if I told you there were some super simple, almost magical, ways to cut down on cleaning time and effort? I’ve gathered some of my go-to cleaning hacks that have seriously revolutionized my cleaning routine. Get ready to reclaim your weekends!
Hack 1: The Microwave Steam Clean
This is a game-changer for anyone who’s ever stared into a splattered microwave with dread. No more scrubbing!
What you’ll need:
* 1 cup of water
* 1 tablespoon of white vinegar or lemon juice
* Microwave-safe bowl
Step-by-step instructions:
1. Prepare the solution: In your microwave-safe bowl, mix the water and vinegar (or lemon juice). The vinegar helps loosen grime, while the lemon juice adds a fresh scent.
2. Microwave it: Place the bowl in the microwave and heat on high for 5-7 minutes. You want the water to boil and create a good amount of steam.
3. Let it sit: Don’t open the microwave immediately! Let the steam work its magic for another 5-10 minutes. This allows the condensation to loosen all the stuck-on food particles.
4. Wipe it down: Carefully remove the bowl (it will be hot!). Use a clean cloth or sponge to easily wipe away the loosened grime. You’ll be amazed at how effortlessly it comes off.
5. Final touches: For any stubborn spots, you might need a little extra elbow grease, but trust me, it will be significantly easier than scrubbing from the start.
Hack 2: Sparkling Shower Head with Vinegar
Hard water deposits can clog your shower head, reducing water pressure and making your shower less enjoyable. This hack is a simple and effective way to dissolve those mineral deposits.
What you’ll need:
* White vinegar
* Plastic bag (sandwich bag or larger, depending on the size of your shower head)
* Rubber band or twist tie
Step-by-step instructions:
1. Fill the bag: Pour enough white vinegar into the plastic bag to completely submerge the shower head.
2. Secure the bag: Carefully position the bag over the shower head, ensuring the shower head is fully immersed in the vinegar. Use a rubber band or twist tie to secure the bag tightly around the shower head’s neck.
3. Soak overnight: Let the shower head soak in the vinegar overnight (or for at least a few hours). This allows the vinegar to dissolve the mineral deposits effectively.
4. Remove and rinse: Remove the bag and discard the vinegar. Turn on the shower and let the water run for a few minutes to flush out any remaining vinegar and loosened debris.
5. Wipe clean: Use a clean cloth to wipe down the shower head. You should notice a significant improvement in water pressure and a sparkling clean shower head. If there are still some stubborn deposits, use an old toothbrush to gently scrub them away.
Hack 3: Effortless Oven Cleaning with Baking Soda and Vinegar
Oven cleaning is notoriously dreaded. But this baking soda and vinegar method is a natural and effective way to loosen baked-on grease and grime without harsh chemicals.
What you’ll need:
* Baking soda
* White vinegar
* Water
* Spray bottle
* Spatula or scraper
* Sponge or cloth
Phase 1: Baking Soda Paste
1. Prepare the paste: In a bowl, mix ½ cup of baking soda with enough water to form a spreadable paste. The consistency should be similar to frosting.
2. Apply the paste: Spread the baking soda paste evenly over the interior surfaces of your oven, avoiding the heating elements. Pay special attention to areas with heavy grease buildup.
3. Let it sit overnight: This is the key! Allow the baking soda paste to sit in the oven overnight (or for at least 12 hours). This gives the baking soda time to penetrate and loosen the grime.
Phase 2: Vinegar Reaction and Cleaning
1. Spray with vinegar: The next day, fill a spray bottle with white vinegar. Spray the baking soda paste generously with vinegar. You’ll notice a fizzing reaction – this is the baking soda and vinegar working together to lift the grime.
2. Wipe away the grime: Let the fizzing subside for a few minutes. Then, use a spatula or scraper to scrape away the loosened grime and baking soda paste.
3. Wipe clean: Use a damp sponge or cloth to wipe down the interior of the oven, removing any remaining residue. You may need to rinse the sponge or cloth several times.
4. Final rinse: For a final touch, spray the oven with clean water and wipe it dry with a clean cloth. This will ensure that all traces of baking soda and vinegar are removed.
Hack 4: Clean Your Blender in Seconds
Cleaning a blender can be a pain, especially after making smoothies or sauces. This hack makes it incredibly easy.
What you’ll need:
* Water
* Dish soap
Step-by-step instructions:
1. Fill with water: After emptying your blender, fill it about halfway with warm water.
2. Add dish soap: Add a few drops of dish soap to the water.
3. Blend: Secure the lid and blend on high speed for about 30-60 seconds.
4. Rinse: Pour out the soapy water and rinse the blender thoroughly with clean water.
5. Dry: Let the blender air dry or dry it with a clean towel.
Hack 5: Dust-Free Baseboards with Dryer Sheets
Dryer sheets aren’t just for laundry! They’re also great for repelling dust on baseboards.
What you’ll need:
* Dryer sheets (used or new)
Step-by-step instructions:
1. Wipe the baseboards: Simply wipe your baseboards with a dryer sheet. The dryer sheet’s antistatic properties will help repel dust and prevent it from clinging to the baseboards.
2. Repeat regularly: Repeat this process every few weeks to keep your baseboards dust-free.
Hack 6: Clean Your Grout with Baking Soda and Hydrogen Peroxide
Dirty grout can make your entire bathroom or kitchen look dingy. This simple paste will brighten your grout lines in no time.
What you’ll need:
* Baking soda
* Hydrogen peroxide
* Old toothbrush
Step-by-step instructions:
1. Make a paste: Mix baking soda and hydrogen peroxide to form a thick paste. The ratio should be about 2 parts baking soda to 1 part hydrogen peroxide.
2. Apply the paste: Apply the paste to the grout lines, covering them completely.
3. Let it sit: Let the paste sit for 5-10 minutes.
4. Scrub: Use an old toothbrush to scrub the grout lines. You’ll see the dirt and grime start to lift.
5. Rinse: Rinse the area thoroughly with water. You can use a damp sponge or cloth to wipe away any remaining residue.
Hack 7: Freshen Your Garbage Disposal with Citrus Peels
A smelly garbage disposal can stink up your entire kitchen. This hack is a natural and refreshing way to eliminate odors.
What you’ll need:
* Citrus peels (lemon, lime, orange, grapefruit)
* Ice cubes
* Water
Step-by-step instructions:
1. Gather citrus peels: Save your citrus peels after eating oranges, lemons, limes, or grapefruits.
2. Add ice and peels: Place a handful of ice cubes and the citrus peels into the garbage disposal.
3. Turn on the disposal: Turn on the cold water and run the garbage disposal for about 30 seconds. The ice helps to scrub the disposal blades, while the citrus peels release their natural oils, freshening the disposal and your kitchen.
Hack 8: Clean Your Dishwasher with Vinegar
Your dishwasher needs cleaning too! This hack helps remove food particles, mineral deposits, and odors.
What you’ll need:
* White vinegar
* Dishwasher-safe cup
Step-by-step instructions:
1. Fill the cup: Fill a dishwasher-safe cup with white vinegar.
2. Place in dishwasher: Place the cup on the top rack of your empty dishwasher.
3. Run a cycle: Run the dishwasher on a hot cycle. The vinegar will help dissolve grease, grime, and mineral deposits, leaving your dishwasher clean and fresh.
Hack 9: Streak-Free Mirrors and Windows
Conclusion
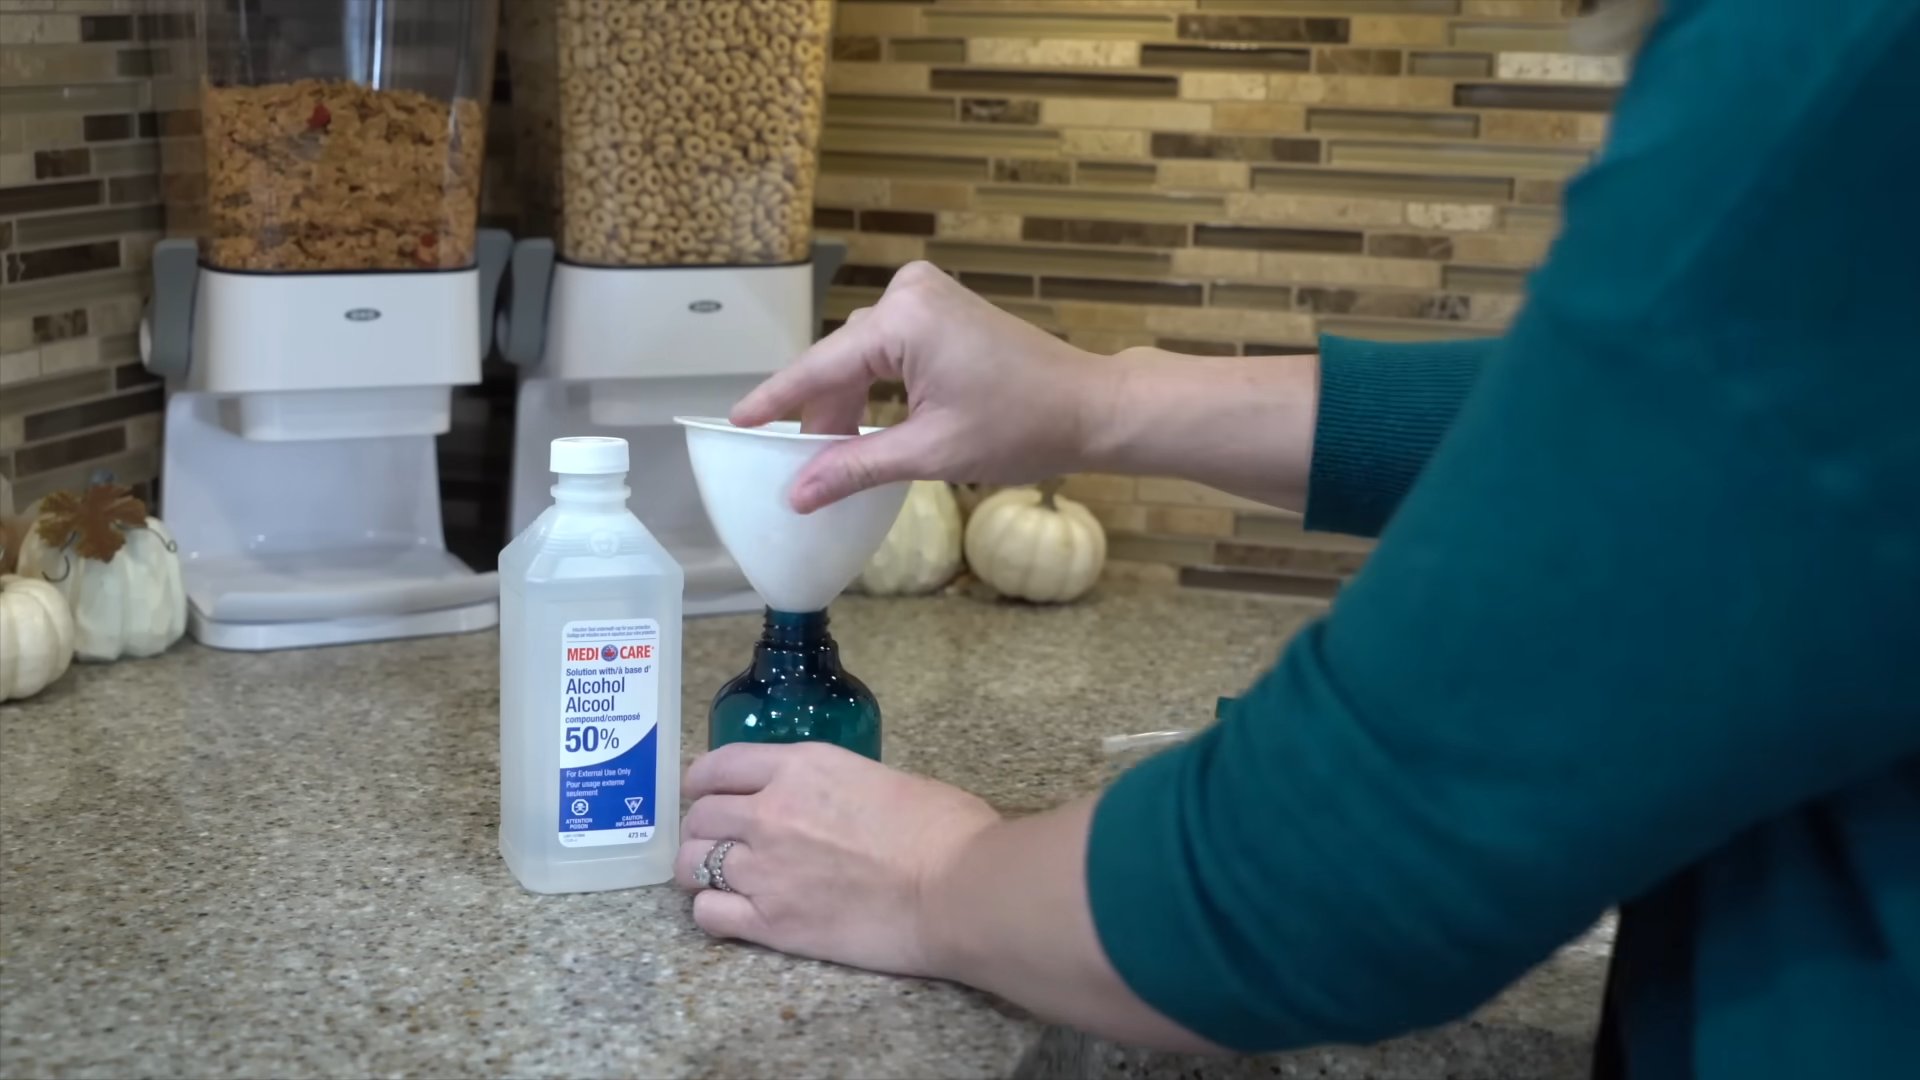
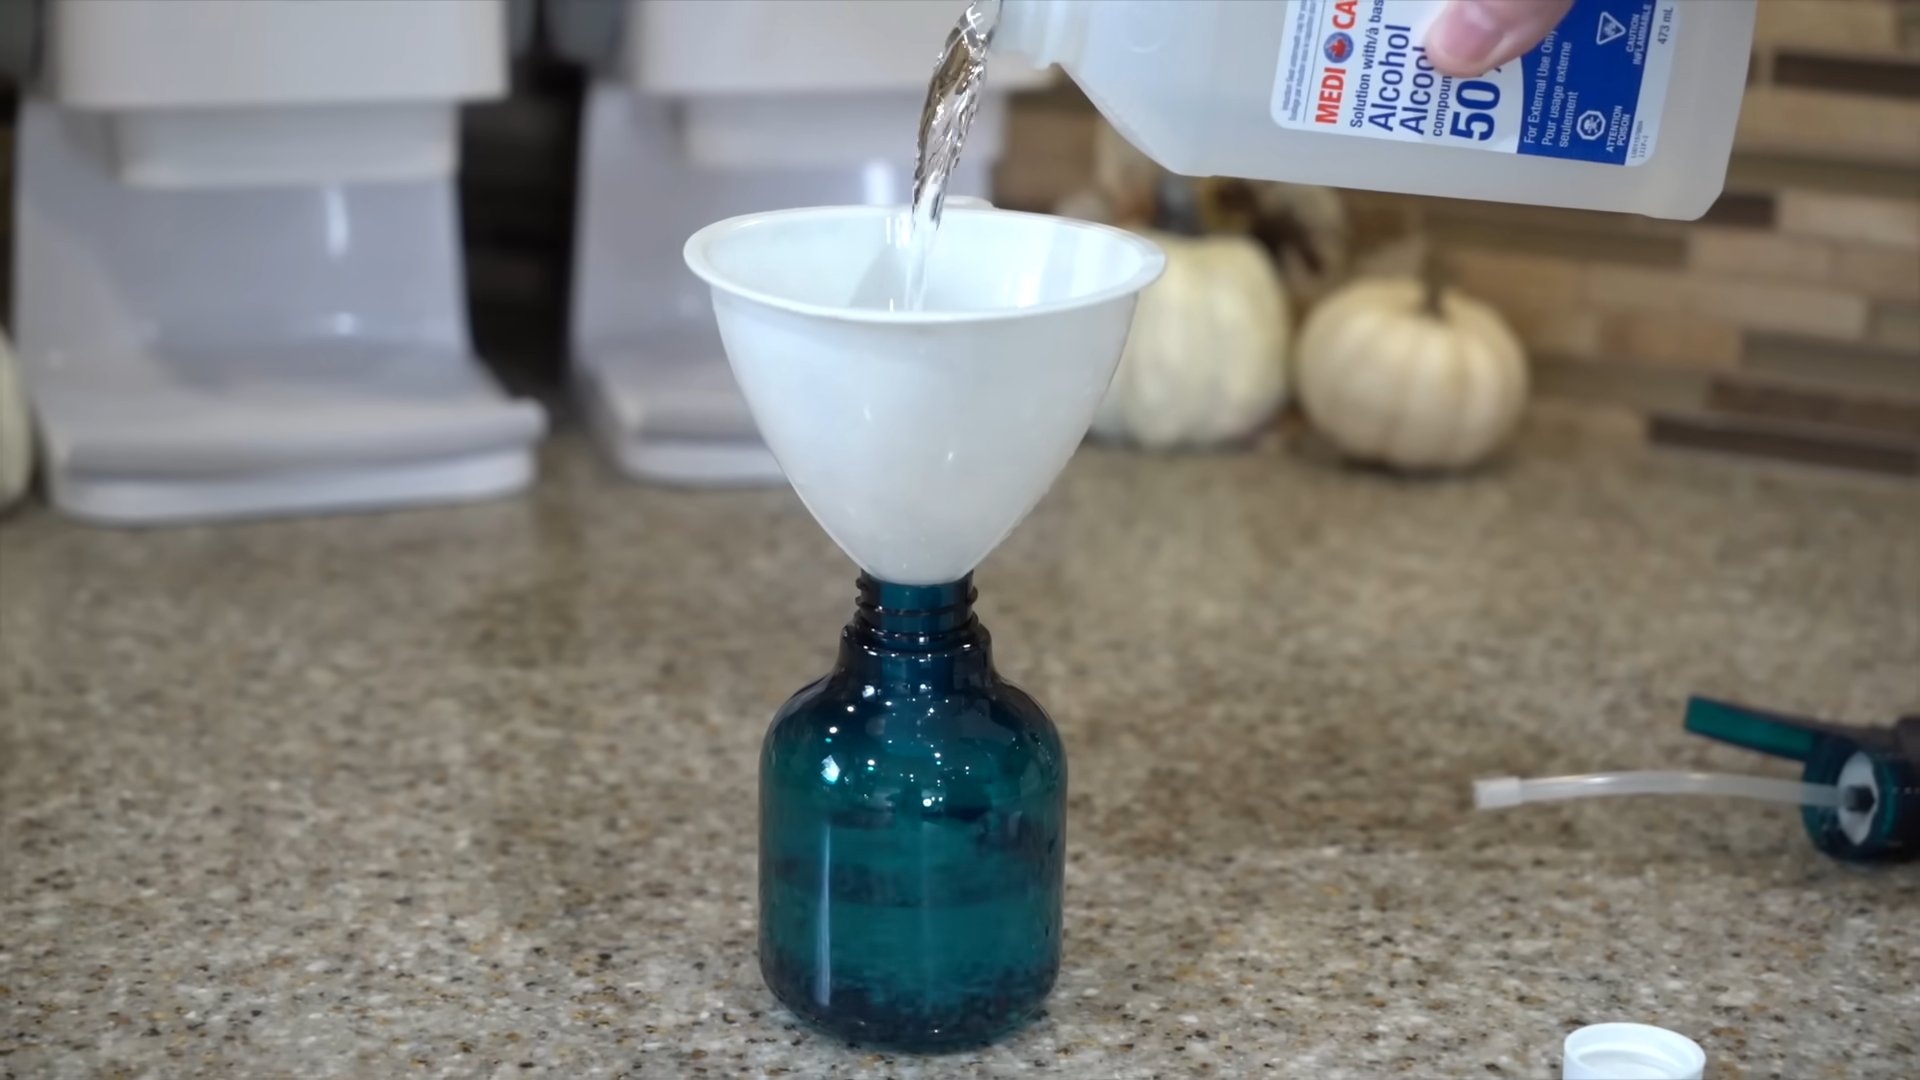
So, there you have it! This simple, yet incredibly effective DIY cleaning trick is a game-changer for anyone looking to reclaim their time and maintain a sparkling clean home. We’ve all been there, staring down a mountain of chores, feeling overwhelmed and wishing there was an easier way. Well, this is it. This isn’t just another cleaning hack; it’s a lifestyle shift. It’s about working smarter, not harder, and enjoying the fruits of your labor – a clean, comfortable, and inviting living space – without sacrificing your precious free time.
The beauty of this method lies in its adaptability. Feel free to experiment with different essential oils to create a scent that truly resonates with you. Lavender for relaxation, lemon for a burst of freshness, or eucalyptus for a revitalizing clean – the possibilities are endless. You can also adjust the concentration of the cleaning solution to suit your specific needs. For heavily soiled areas, a slightly stronger concentration might be necessary, while for lighter cleaning, a more diluted solution will suffice.
Beyond the basic recipe, consider adding a tablespoon of white vinegar for extra disinfecting power, especially in bathrooms and kitchens. Vinegar is a natural disinfectant and deodorizer, making it a valuable addition to your cleaning arsenal. Another variation involves using castile soap instead of dish soap. Castile soap is a gentle, plant-based cleanser that’s perfect for those with sensitive skin or allergies.
But the real magic of this DIY cleaning trick is its ability to simplify your cleaning routine. No more lugging around multiple bottles of harsh chemicals. No more spending hours scrubbing and wiping. With this all-in-one solution, you can tackle a wide range of cleaning tasks quickly and efficiently. From countertops and floors to windows and mirrors, this versatile cleaner will leave your home sparkling from top to bottom.
We are confident that once you try this DIY cleaning trick, you’ll wonder how you ever lived without it. It’s not just about saving time; it’s about creating a more sustainable and eco-friendly cleaning routine. By using natural ingredients and reducing your reliance on store-bought cleaning products, you’re not only protecting your health but also contributing to a healthier planet.
So, what are you waiting for? Gather your ingredients, mix up a batch of this amazing cleaner, and experience the difference for yourself. We encourage you to try this easy time saving cleaning tip and share your results with us in the comments below. Let us know what variations you tried, what scents you loved, and how much time you saved. We can’t wait to hear your success stories! Your feedback will not only help us improve this recipe but also inspire others to embrace a simpler, more sustainable way of cleaning. Let’s create a community of clean-living enthusiasts who are passionate about saving time and protecting our planet.
Frequently Asked Questions
What exactly are the benefits of using this DIY cleaning solution compared to store-bought cleaners?
There are several key advantages to using this DIY cleaning solution. First and foremost, you have complete control over the ingredients. This means you can avoid harsh chemicals, artificial fragrances, and other potentially harmful substances that are often found in commercial cleaners. This is particularly beneficial for individuals with allergies, sensitivities, or young children. Secondly, it’s significantly more cost-effective. The ingredients are readily available and relatively inexpensive, making it a budget-friendly alternative to pricey store-bought cleaners. Thirdly, it’s environmentally friendly. By using natural ingredients and reducing your reliance on plastic bottles, you’re minimizing your environmental impact. Finally, it’s incredibly versatile. This single solution can be used to clean a wide range of surfaces, simplifying your cleaning routine and reducing clutter.
Can I use this cleaning solution on all surfaces? Are there any surfaces I should avoid?
While this DIY cleaning solution is generally safe for most surfaces, there are a few exceptions. Avoid using it on unsealed granite or marble, as the acidity of vinegar (if you choose to add it) can etch the surface. Also, be cautious when using it on wood furniture, especially if it has a delicate finish. Always test the solution on an inconspicuous area first to ensure it doesn’t cause any discoloration or damage. For delicate surfaces, consider diluting the solution further or omitting the vinegar altogether. Generally, it’s safe to use on countertops (excluding unsealed granite/marble), floors (tile, laminate, sealed wood), windows, mirrors, sinks, toilets, and appliances.
How long does the cleaning solution last? Should I make a fresh batch each time?
This DIY cleaning solution typically lasts for about 2-3 weeks when stored in an airtight container in a cool, dark place. Over time, the essential oils may lose their potency, and the solution may become less effective. It’s generally recommended to make a fresh batch every few weeks to ensure optimal cleaning performance. However, if you notice any signs of spoilage, such as a change in color or odor, discard the solution immediately.
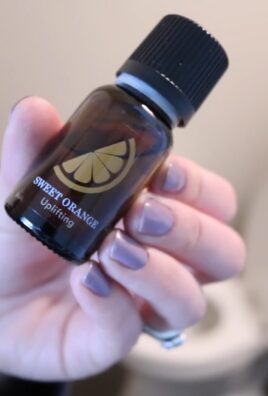
What essential oils are best to use in this cleaning solution?
The best essential oils to use in this cleaning solution depend on your personal preferences and desired benefits. Some popular choices include:
* **Lavender:** Known for its calming and relaxing properties, lavender is a great choice for creating a peaceful and inviting atmosphere.
* **Lemon:** A natural disinfectant and deodorizer, lemon essential oil adds a bright and refreshing scent to your home.
* **Tea Tree:** With its powerful antibacterial and antifungal properties, tea tree oil is ideal for cleaning bathrooms and kitchens.
* **Eucalyptus:** Known for its invigorating and decongestant properties, eucalyptus essential oil is perfect for cleaning during cold and flu season.
* **Peppermint:** A refreshing and energizing scent, peppermint essential oil can help to boost your mood and improve focus.
Feel free to experiment with different combinations of essential oils to create a custom scent that you love.
Can I use this cleaning solution if I have pets or small children?
Yes, this DIY cleaning solution is generally safe to use around pets and small children, as it doesn’t contain any harsh chemicals or toxic ingredients. However, it’s important to exercise caution when using essential oils, as some can be harmful to pets if ingested or inhaled in large quantities. Always dilute the essential oils properly and avoid spraying the solution directly onto your pets or in areas where they spend a lot of time. If you have any concerns, consult with your veterinarian before using essential oils around your pets. Also, ensure that the cleaning solution is stored out of reach of children to prevent accidental ingestion.
What type of dish soap should I use?
Choose a dish soap that is free of dyes and perfumes for the most natural cleaning solution. Many people opt for a plant-based dish soap.
Can I use this solution in a spray mop?
Yes, this solution is perfect for spray mops. Just ensure that the solution is well mixed before adding it to the mop’s reservoir.

Leave a Comment