
Kohlrabi Planting Guide: Your Path to a Bountiful Harvest
Kohlrabi Planting Guide – Have you ever dreamt of harvesting your own crisp, delicious kohlrabi straight from your garden? It’s easier than you think! This comprehensive guide will walk you through everything you need to know, from seed selection to harvesting, transforming your backyard into a thriving kohlrabi patch. Forget expensive grocery store produce; I’ll show you how to grow your own, saving money and enjoying the unparalleled flavor of homegrown vegetables.
While kohlrabi might seem like a newcomer to many modern gardens, its history stretches back centuries. A member of the brassica family, alongside cabbage and broccoli, kohlrabi has been cultivated for its unique bulbous stem for hundreds of years, playing a significant role in various cultures’ cuisines. Its versatility in the kitchen, from salads to stir-fries, makes it a welcome addition to any garden.
Why Grow Your Own Kohlrabi?
There are so many reasons to embark on this rewarding gardening journey! Firstly, homegrown kohlrabi tastes unbelievably better than anything you’ll find in the supermarket. The freshness is unmatched, and the flavor is intensely satisfying. Secondly, growing your own gives you complete control over the quality and growing process, ensuring you’re consuming pesticide-free, healthy produce. Finally, the sheer satisfaction of nurturing a plant from seed to harvest is incredibly rewarding, a true testament to your green thumb. This Kohlrabi Planting Guide will empower you to achieve this success.
So, let’s get started on your kohlrabi adventure! This guide will cover everything from choosing the right seeds and preparing your soil to dealing with common pests and diseases. Get ready to experience the joy of homegrown goodness with this easy-to-follow Kohlrabi Planting Guide.
Harvesting Your Okra: A Guide to a Bountiful Crop
Okra, with its unique texture and flavor, is a rewarding vegetable to grow. But knowing when and how to harvest it is key to getting the most out of your plants. Follow these steps for a successful okra harvest!
Preparing for the Harvest
- Check your okra plants daily, especially during peak growing season. Okra grows quickly, and you’ll want to harvest frequently to encourage more production.
- Look for pods that are tender and young. The ideal size is generally 2 to 3 inches long, though this can vary slightly depending on the variety you’re growing. Larger pods will be tough and stringy.
- Gather your harvesting tools. You’ll need a sharp knife or garden shears. A small bucket or basket is also helpful to collect your harvest.
- Wear gloves (optional). Some people find the okra plant’s fuzzy leaves irritating to their skin.
Step-by-Step Harvesting Instructions
- Locate a mature okra pod. Remember, you’re looking for pods that are 2-3 inches long, firm, and free of blemishes. Avoid pods that are too small (they haven’t developed enough flavor) or too large (they’ll be tough and stringy).
- Gently grasp the pod near its base. Be careful not to damage the plant itself.
- Use your knife or shears to make a clean cut. Cut the pod just above the stem. A clean cut helps prevent disease and encourages new pod growth. Avoid pulling or snapping the pods off, as this can damage the plant.
- Inspect the cut end. If you see any signs of disease or pests, take note and address the issue promptly. This might involve removing affected leaves or treating the plant with an appropriate organic solution.
- Place the harvested okra in your bucket or basket. Continue harvesting all mature pods from the plant. Remember to be gentle to avoid damaging the plant.
- Repeat steps 1-5 for all mature pods on the plant. You might find that some pods are ready while others are still developing. It’s okay to leave the smaller pods to mature.
- Harvest regularly. Aim to harvest every 1-2 days, especially during the peak growing season. This will encourage the plant to produce more pods and prevent the existing pods from becoming too large and tough.
Troubleshooting Common Harvesting Issues
Problem: My okra pods are too large and tough.
Solution: You’re not harvesting frequently enough. Aim to harvest every 1-2 days to prevent pods from becoming overripe. Remember, smaller pods are more tender and flavorful.
Problem: My okra plants aren’t producing many pods.
Solution: Several factors can affect okra production. Ensure your plants are receiving adequate sunlight (at least 6-8 hours per day), water (especially during dry periods), and nutrients. Check for pests and diseases and address any issues promptly. Consider adding compost or other organic matter to improve soil fertility.
Problem: My okra pods are developing blemishes or discoloration.
Solution: This could be a sign of disease or pest infestation. Inspect your plants carefully for any signs of pests or diseases. If you find any, take appropriate action to control the problem. This might involve using organic pest control methods or removing affected plant parts.
Problem: I’m unsure when my okra is ready to harvest.
Solution: Refer to the size guidelines mentioned earlier (2-3 inches long). Also, gently squeeze the pod. A tender pod will feel firm but not hard. An overripe pod will feel tough and stringy.
Post-Harvest Care
- Wash your harvested okra gently. Remove any dirt or debris.
- Store your okra properly. Okra is best used fresh, but you can store it in the refrigerator for a few days. Place it in a plastic bag or container to maintain freshness.
- Consider freezing or canning your okra. These methods allow you to preserve your harvest for longer periods.
Tips for a Successful Okra Harvest
- Choose the right okra variety. Some varieties are more productive than others. Consider your climate and growing conditions when selecting a variety.
- Provide adequate spacing between plants. This allows for good air circulation and prevents disease.
- Mulch around your plants. This helps retain moisture and suppress weeds.
- Regularly inspect your plants for pests and diseases. Early detection and treatment are crucial for a healthy crop.
- Enjoy your delicious homegrown okra!
Conclusion
So there you have it – your comprehensive guide to successfully planting kohlrabi! This DIY approach to growing your own kohlrabi isn’t just about saving money; it’s about experiencing the unparalleled satisfaction of nurturing a plant from seed to harvest. The unique flavor and crisp texture of homegrown kohlrabi far surpasses anything you’ll find in the supermarket. This kohlrabi planting guide empowers you to take control of your food source, ensuring fresh, delicious kohlrabi throughout the growing season. The process, while requiring some dedication, is surprisingly straightforward, even for beginner gardeners. The rewards, however, are immeasurable – from the vibrant green leaves to the satisfying crunch of a perfectly grown bulb. You’ll be amazed at how easy it is to cultivate this often-overlooked root vegetable.
Beyond the basic planting method outlined, there’s a world of possibilities to explore. Experiment with different kohlrabi varieties – some boast a purple hue, while others offer a milder flavor. Consider companion planting; incorporating herbs like dill or chamomile nearby can deter pests and improve overall plant health. For those with limited space, try vertical gardening techniques or container planting. Even a small balcony or window box can yield a bountiful harvest. Don’t be afraid to get creative! The beauty of DIY gardening lies in its adaptability. You can tailor the process to your specific environment and preferences.
We strongly encourage you to try your hand at this rewarding endeavor. The experience of planting, nurturing, and harvesting your own kohlrabi is incredibly fulfilling. Share your journey with us! Post pictures of your thriving kohlrabi plants on social media using #DIYKohlrabi and tag us. We’d love to see your success and hear about your experiences, both the triumphs and the learning curves. Let’s build a community of kohlrabi enthusiasts, sharing tips, tricks, and delicious recipes. Remember, even small successes in the garden are worth celebrating. So grab your seeds, get your hands dirty, and embark on this exciting journey of growing your own delicious kohlrabi. You won’t regret it!
Frequently Asked Questions
What is the best time to plant kohlrabi?
The ideal time to plant kohlrabi depends on your climate. Generally, kohlrabi thrives in cool weather, so aim for spring or fall planting. In warmer climates, you might need to plant it in the early spring or late summer/early fall to avoid the intense heat. Check your local frost dates to determine the optimal planting window for your region. Starting seeds indoors 4-6 weeks before the last expected frost can give your plants a head start.
How much space do kohlrabi plants need?
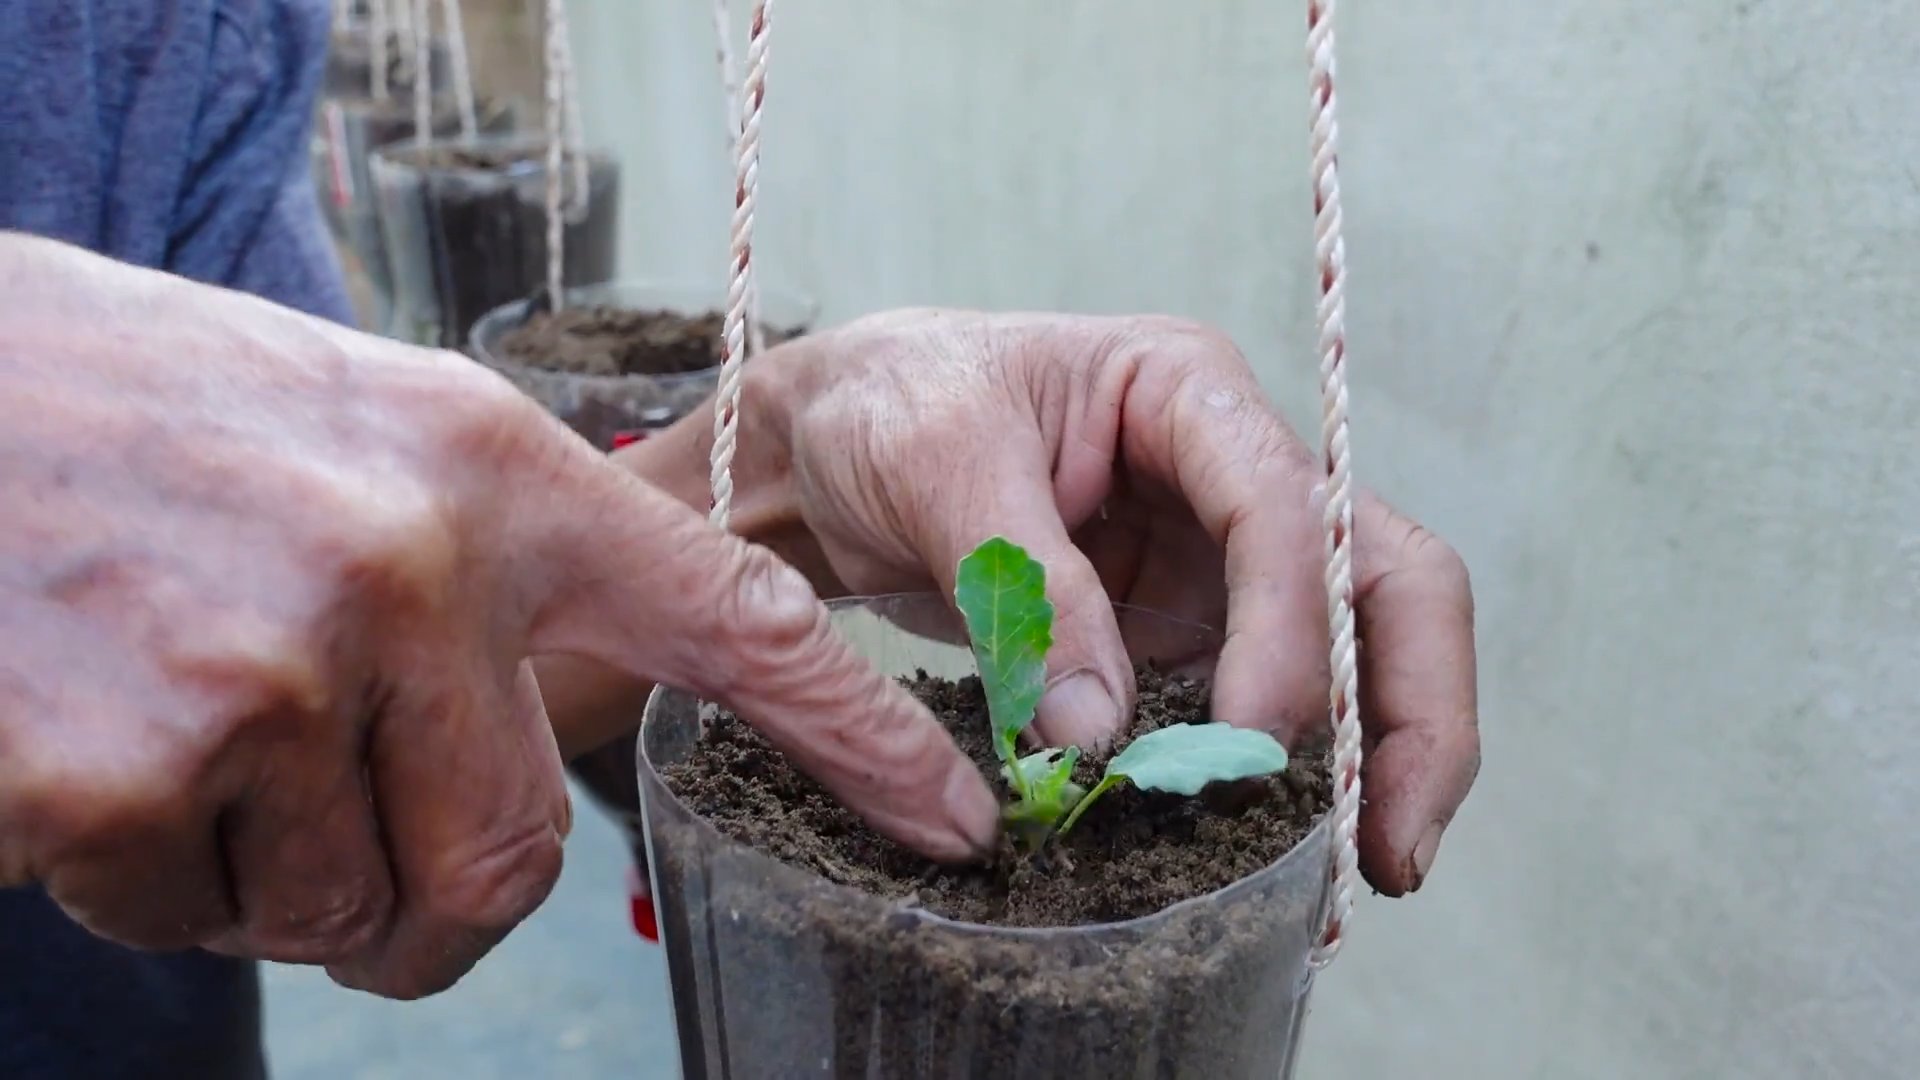
Kohlrabi plants need adequate spacing to allow for proper growth and prevent overcrowding. Aim for approximately 6-8 inches between each plant. Overcrowding can lead to smaller bulbs and increased susceptibility to diseases. Consider the mature size of the variety you’re planting when determining spacing.
What type of soil is best for kohlrabi?
Kohlrabi prefers loose, well-drained soil rich in organic matter. Amend heavy clay soils with compost or other organic materials to improve drainage and aeration. A slightly acidic to neutral pH (6.0-7.0) is ideal. Before planting, ensure the soil is loose and free of rocks or debris.
How often should I water my kohlrabi?
Consistent watering is crucial for healthy kohlrabi growth. Aim to keep the soil consistently moist, but not waterlogged. Water deeply and regularly, especially during dry periods. Mulching around the plants can help retain soil moisture and suppress weeds. Overwatering can lead to root rot, while underwatering can result in stunted growth and smaller bulbs.
What are some common pests and diseases that affect kohlrabi?
Kohlrabi can be susceptible to various pests and diseases, including aphids, flea beetles, and cabbage worms. Regularly inspect your plants for signs of infestation. Consider using organic pest control methods, such as insecticidal soap or neem oil, to manage pests. Proper spacing and good air circulation can help prevent fungal diseases. Rotating your crops annually can also help reduce the risk of disease buildup in the soil.
How do I harvest kohlrabi?
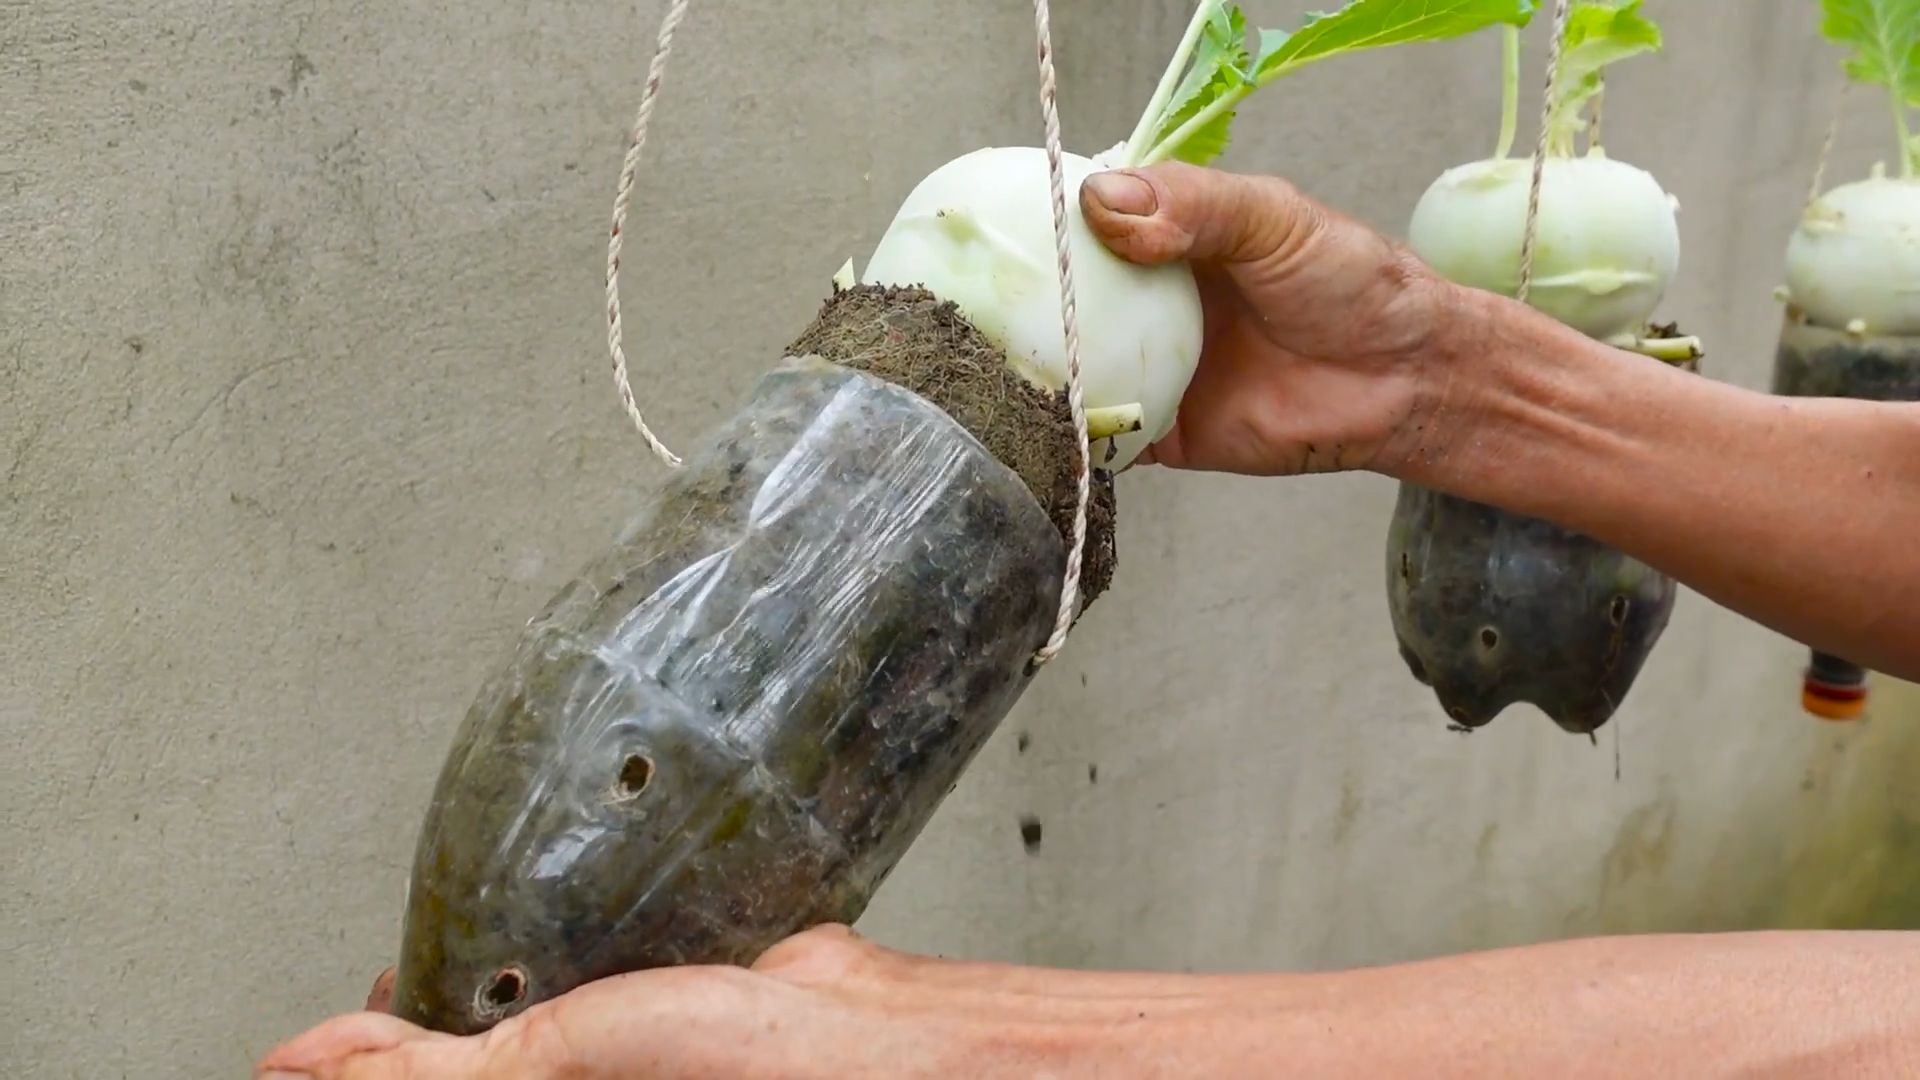
Kohlrabi is ready for harvest when the bulbs reach the desired size, typically 2-3 inches in diameter. Harvesting too early will result in small, underdeveloped bulbs, while harvesting too late can lead to tough, woody bulbs. Use a sharp knife to cut the bulbs from the plant, leaving about an inch of stem attached. Harvesting can be done over a period of time, picking the bulbs as they mature.
Can I save kohlrabi seeds for next year’s planting?
While you can try saving kohlrabi seeds, it’s generally not recommended for home gardeners. Kohlrabi is a hybrid plant, meaning the seeds from your harvest may not produce plants with the same characteristics as the parent plant. It’s often easier and more reliable to purchase fresh seeds from a reputable supplier each year. However, if you are interested in experimenting, allow some of your plants to go to seed and collect the seeds once they are fully dry.
What are some creative ways to use kohlrabi?
Kohlrabi is a versatile vegetable that can be used in a variety of dishes. It can be eaten raw, shredded in salads, or cooked like potatoes. Try roasting kohlrabi with other root vegetables, adding it to stir-fries, or making kohlrabi slaw. Its mild flavor pairs well with many herbs and spices. Experiment with different cooking methods to discover your favorite ways to enjoy this delicious vegetable. The possibilities are endless!


Leave a Comment