
Grow Backyard Watermelons? Absolutely! Imagine biting into a juicy, sweet watermelon you nurtured from seed to fruit, right in your own backyard. It’s a rewarding experience that’s easier than you might think, and this DIY guide is here to show you how. For centuries, watermelons have been a symbol of summer, abundance, and refreshment, enjoyed in cultures around the globe. From ancient Egypt, where they were depicted in hieroglyphics, to modern-day picnics, watermelons hold a special place in our hearts (and stomachs!).
But let’s be honest, buying watermelons from the store can be a gamble. Are they truly ripe? Were they grown with care? By learning to grow backyard watermelons yourself, you gain complete control over the process, ensuring you get the sweetest, most delicious fruit possible. Plus, it’s a fantastic way to connect with nature, reduce your carbon footprint, and impress your friends and family with your green thumb. In this article, I’ll share my favorite DIY tricks and hacks to help you cultivate thriving watermelon vines, even if you’re a beginner gardener. Get ready to transform your backyard into a watermelon wonderland!
Growing Strawberries from Seed: A Comprehensive DIY Guide
Okay, so you want to grow strawberries from seed? Awesome! It’s a bit more challenging than buying starter plants, but the reward of nurturing those tiny seeds into juicy berries is totally worth it. Plus, you get access to varieties you might not find at your local garden center. Let’s dive in!
Choosing Your Strawberry Variety
Before we get our hands dirty, let’s talk strawberries. Not all strawberries are created equal, and choosing the right variety is crucial for success.
* June-Bearing: These produce one large crop of berries in the spring, usually over a period of a few weeks. They’re great if you want a big harvest for jam-making or freezing.
* Everbearing: Despite the name, these don’t produce berries continuously. They typically have two or three harvests – one in the spring, one in late summer/early fall.
* Day-Neutral: These are the most consistent producers, yielding berries throughout the growing season as long as the temperature is between 35°F and 85°F.
Consider your climate and how you plan to use your strawberries when making your choice. I personally love day-neutral varieties because I enjoy having fresh berries all summer long.
Gathering Your Supplies
Alright, time to gather our tools and materials. Here’s what you’ll need:
* Strawberry Seeds: You can buy these online or from a reputable seed supplier. Make sure they’re from a reliable source to ensure good germination rates.
* Seed Starting Trays or Small Pots: These will be your nurseries for the baby strawberry plants.
* Seed Starting Mix: This is a light, sterile soil mix specifically designed for starting seeds. Don’t use regular garden soil; it’s too heavy and can harbor diseases.
* Spray Bottle: For gently watering the seeds without disturbing them.
* Clear Plastic Wrap or a Humidity Dome: To create a humid environment for germination.
* Grow Lights (Optional but Recommended): Strawberry seeds need plenty of light to germinate and grow. If you don’t have a sunny windowsill, grow lights are a must.
* Small Toothpick or Skewer: For carefully handling the tiny seeds.
* Fertilizer: A balanced liquid fertilizer diluted to half strength.
* Permanent Markers: To label your seed trays with the variety and date.
* Patience: Seriously, you’ll need it! Growing strawberries from seed takes time and dedication.
Stratification: The Cold Treatment
Strawberry seeds often need a period of cold stratification to break dormancy and improve germination rates. This mimics the natural winter conditions they would experience in the wild.
1. Prepare the Seeds: Place your strawberry seeds in a small, airtight container or a zip-top bag.
2. Moisten the Seeds: Lightly moisten a paper towel and place it in the container with the seeds. The paper towel should be damp, not soaking wet.
3. Refrigerate: Seal the container and place it in the refrigerator for 4-6 weeks. The ideal temperature is around 35-45°F (2-7°C).
4. Check Regularly: Check the seeds every week or so to make sure the paper towel is still moist. If it’s drying out, lightly mist it with water.
Sowing the Seeds
Now for the fun part – planting!
1. Prepare the Seed Starting Trays: Fill your seed starting trays or small pots with seed starting mix. Gently firm the soil, but don’t pack it down too tightly.
2. Sow the Seeds: Strawberry seeds are tiny, so handle them carefully. Use a toothpick or skewer to pick up individual seeds and place them on the surface of the soil. Space the seeds about 1 inch apart.
3. Lightly Cover the Seeds: Strawberry seeds need light to germinate, so don’t bury them too deeply. Just sprinkle a very thin layer of seed starting mix over the seeds, or gently press them into the surface of the soil.
4. Water Gently: Use a spray bottle to mist the soil thoroughly. Be careful not to dislodge the seeds.
5. Create a Humid Environment: Cover the seed starting trays with clear plastic wrap or a humidity dome. This will help to keep the soil moist and create a humid environment that the seeds need to germinate.
6. Provide Light: Place the seed starting trays under grow lights or in a very sunny windowsill. Strawberry seeds need at least 12-14 hours of light per day to germinate.
7. Maintain Temperature: The ideal temperature for germination is around 70-75°F (21-24°C).
Germination and Early Growth
This is where the patience comes in! Strawberry seeds can take anywhere from 1 to 4 weeks to germinate, so don’t get discouraged if you don’t see sprouts right away.
1. Monitor Moisture Levels: Check the soil moisture daily. The soil should be consistently moist, but not soggy. Mist with a spray bottle as needed.
2. Ventilation: Once you see seedlings emerging, start to vent the plastic wrap or humidity dome for a few hours each day. This will help to prevent fungal diseases.
3. Remove the Cover: After a week or so, you can remove the plastic wrap or humidity dome completely.
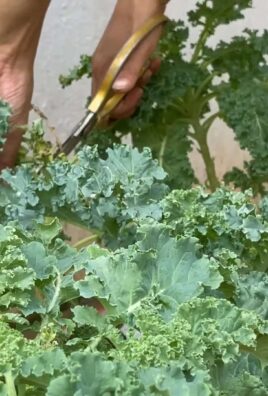
4. Thin the Seedlings: Once the seedlings have their first true leaves (the second set of leaves that appear after the initial seed leaves), thin them out so that only the strongest seedlings remain. Use small scissors to snip off the weaker seedlings at the soil line.
5. Fertilize: Once the seedlings have several sets of true leaves, start to fertilize them with a diluted liquid fertilizer. Follow the instructions on the fertilizer label.
Transplanting Seedlings
Once your strawberry seedlings are large enough to handle, it’s time to transplant them into larger pots.
1. Prepare the Pots: Fill small pots (about 3-4 inches in diameter) with a good quality potting mix.
2. Gently Remove the Seedlings: Carefully remove the seedlings from the seed starting trays, being careful not to damage the roots. You can use a small spoon or fork to help you lift the seedlings out.
3. Plant the Seedlings: Make a small hole in the center of each pot and gently place the seedling in the hole. Backfill with potting mix and gently firm the soil around the seedling.
4. Water Thoroughly: Water the newly transplanted seedlings thoroughly.
5. Provide Light and Warmth: Place the pots under grow lights or in a sunny windowsill. Continue to fertilize the seedlings regularly.
Hardening Off
Before you can plant your strawberry plants outdoors, you need to “harden them off.” This process gradually acclimates the plants to outdoor conditions, preventing them from being shocked by the change in environment.
1. Start Slowly: Begin by placing the pots outdoors in a sheltered location for a few hours each day.
2. Gradually Increase Exposure: Gradually increase the amount of time the plants spend outdoors each day, and gradually expose them to more sunlight and wind.
3. Monitor the Plants: Keep a close eye on the plants and bring them back indoors if they show signs of stress, such as wilting or sunburn.
4. After a Week or Two: After a week or two of hardening off, your strawberry plants should be ready to be planted outdoors.
Planting Outdoors
Finally, the moment we’ve been waiting for!
1. Choose a Location: Select a sunny location with well-drained soil. Strawberries need at least 6-8 hours of sunlight per day.
2. Prepare the Soil: Amend the soil with compost or other organic matter to improve drainage and fertility.
3. Plant the Strawberries: Dig holes that are large enough to accommodate the root balls of the strawberry plants. Space the plants about 12-18 inches apart.
4. Water Thoroughly: Water the newly planted strawberries thoroughly.
5. Mulch: Apply a layer of mulch around the plants to help retain moisture, suppress weeds, and keep the berries clean. Straw, pine needles, or wood chips are all good choices.
Caring for Your Strawberry Plants
Now that your strawberry plants are in the ground, it’s important to provide them with proper care to ensure a bountiful harvest.
* Watering: Water your strawberry plants regularly, especially during dry periods. Aim to keep the soil consistently moist, but not soggy.
* Fertilizing: Fertilize your strawberry plants regularly with a balanced fertilizer. Follow the instructions on the fertilizer label.
* Weeding: Keep the area around your strawberry plants free of weeds. Weeds can compete with the strawberries for nutrients and water.
* Pest and
Conclusion
So, there you have it! Growing backyard watermelons might seem daunting at first, but with a little planning, preparation, and the right techniques, you can be harvesting your own juicy, sweet watermelons in no time. This DIY approach isn’t just about saving money; it’s about connecting with nature, understanding where your food comes from, and experiencing the immense satisfaction of nurturing something from seed to table.
Why is this a must-try? Because store-bought watermelons, while convenient, often lack the intense flavor and freshness of homegrown varieties. Plus, you have complete control over the growing process, ensuring your watermelons are free from unwanted chemicals and pesticides. Imagine biting into a perfectly ripe watermelon, bursting with flavor, knowing you grew it yourself – that’s an experience worth pursuing!
But the fun doesn’t stop there! Feel free to experiment with different watermelon varieties. Try growing smaller, personal-sized watermelons like Sugar Baby, or go for a unique heirloom variety like Moon and Stars for a visually stunning addition to your garden. You can also explore different trellising methods to save space and keep your watermelons off the ground, reducing the risk of rot and pests. Consider companion planting with herbs like basil or marigolds to deter pests naturally and enhance the flavor of your watermelons.
Don’t be afraid to get your hands dirty and embrace the learning process. Gardening is all about experimentation, and even if you encounter a few challenges along the way, the reward of harvesting your own delicious watermelons will be well worth the effort.
We wholeheartedly encourage you to give this DIY watermelon growing trick a try. It’s a rewarding experience that will not only provide you with fresh, delicious fruit but also connect you with the natural world in a meaningful way. Once you’ve harvested your first watermelon, be sure to share your experience with us! We’d love to hear about your successes, challenges, and any unique tips you’ve discovered along the way. Share your photos and stories in the comments below – let’s build a community of backyard watermelon growers! Let us know what kind of fertilizer worked best for you, or if you found a particularly effective method for pest control. Your insights could help other aspiring gardeners achieve their watermelon-growing dreams.
Remember, growing backyard watermelons is more than just a gardening project; it’s an investment in your health, your connection to nature, and your overall well-being. So, grab your seeds, prepare your soil, and get ready to enjoy the sweet taste of success!
Frequently Asked Questions (FAQ)
Q: How much space do I really need to grow watermelons?
A: Watermelons are sprawling plants, so space is definitely a consideration. As a general rule, you’ll need at least 6-8 feet of space per plant. However, if you’re short on space, you can train your watermelons to grow vertically on a trellis. This not only saves space but also helps to improve air circulation and reduce the risk of fungal diseases. Choose a sturdy trellis that can support the weight of the developing watermelons, and be prepared to provide some support for the fruits as they grow larger. Smaller varieties like Sugar Baby are better suited for trellising.
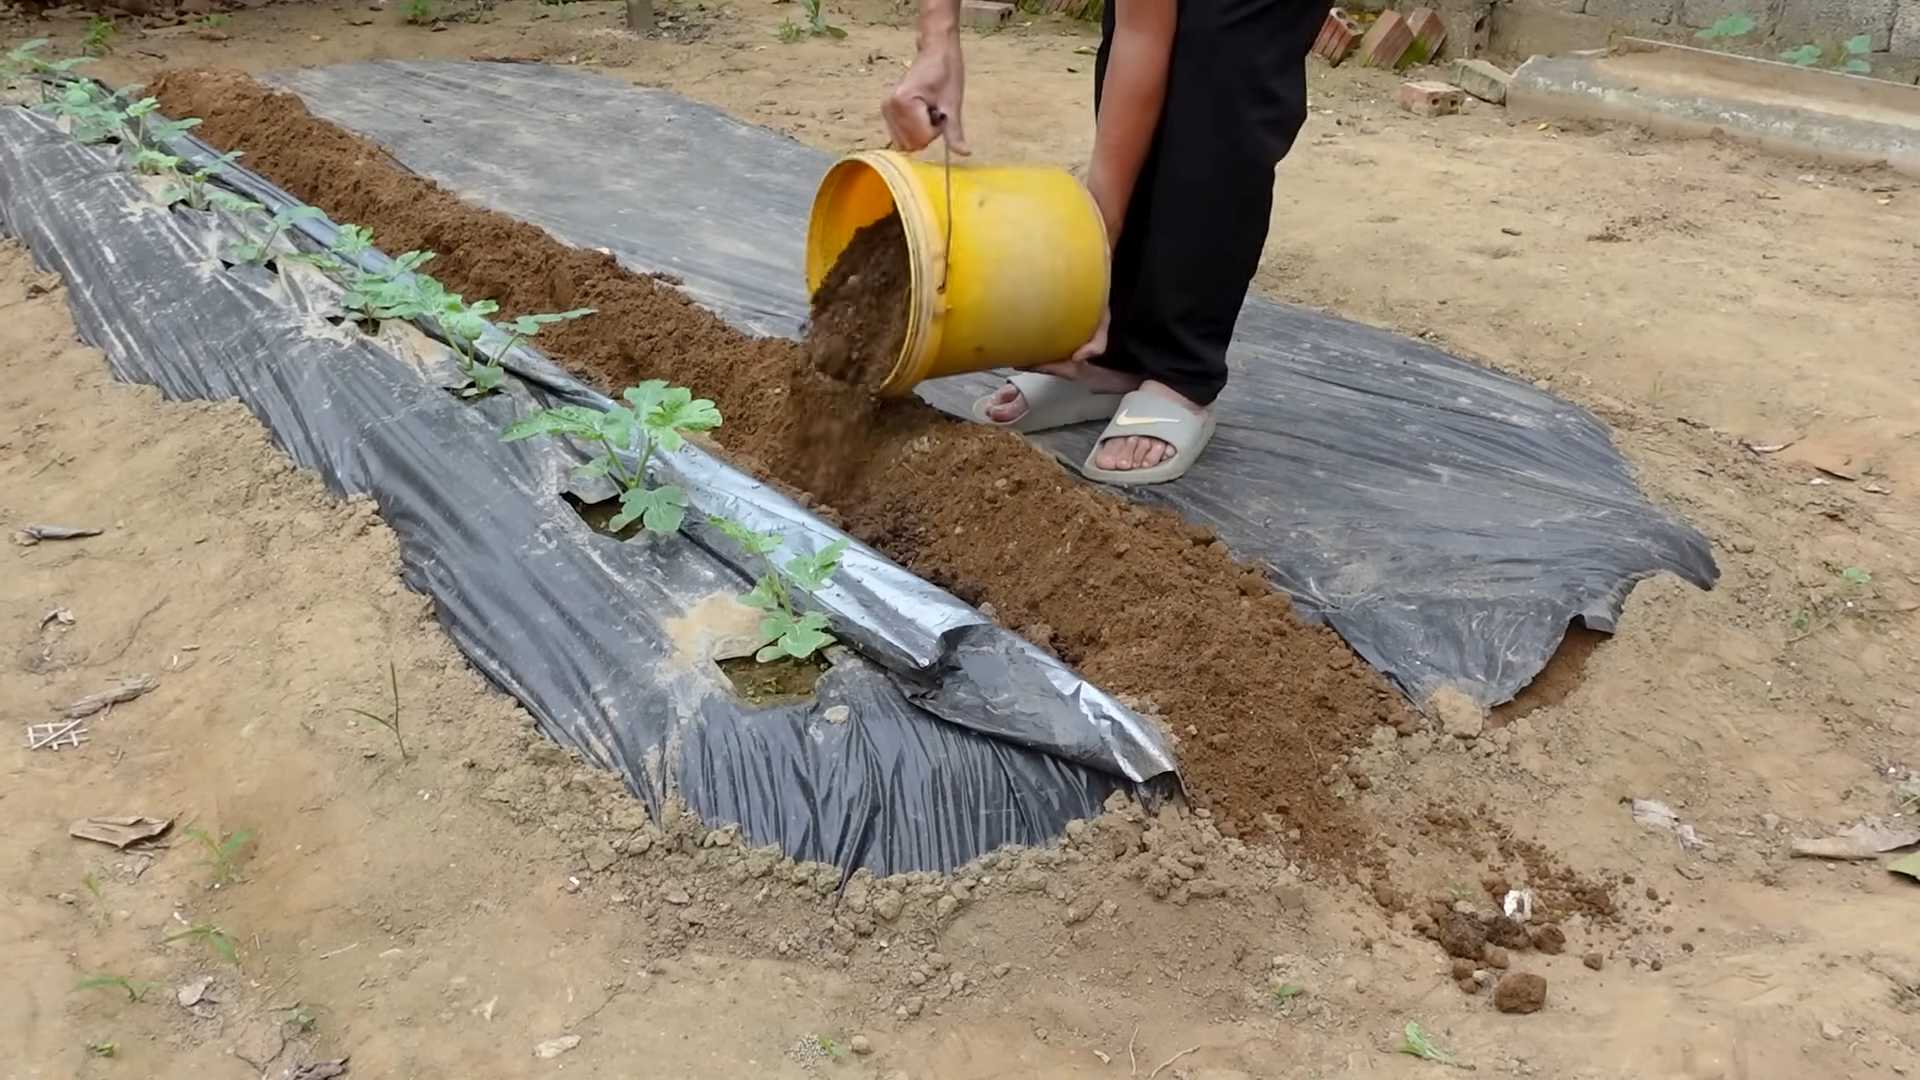
Q: What kind of soil is best for growing watermelons?
A: Watermelons thrive in well-drained, sandy loam soil that is rich in organic matter. The soil should have a pH between 6.0 and 6.8. Before planting, amend your soil with compost or well-rotted manure to improve its fertility and drainage. If your soil is heavy clay, consider adding sand or other amendments to improve its texture. Good drainage is crucial, as watermelons are susceptible to root rot in soggy soil.
Q: How often should I water my watermelon plants?
A: Watermelons need consistent moisture, especially during fruit development. Water deeply and regularly, aiming for about 1-2 inches of water per week. Avoid overhead watering, as this can promote fungal diseases. Instead, water at the base of the plants, using a soaker hose or drip irrigation system. During hot, dry weather, you may need to water more frequently. Check the soil moisture regularly and adjust your watering schedule accordingly.
Q: What are some common pests and diseases that affect watermelons, and how can I control them?
A: Common pests that can affect watermelons include aphids, squash bugs, and cucumber beetles. These pests can damage the leaves and stems of the plants, and they can also transmit diseases. To control these pests, you can use insecticidal soap, neem oil, or other organic pesticides. You can also handpick the pests off the plants. Common diseases that can affect watermelons include powdery mildew, downy mildew, and fusarium wilt. To prevent these diseases, ensure good air circulation around the plants, avoid overhead watering, and use disease-resistant varieties. If you notice signs of disease, treat the plants with a fungicide.
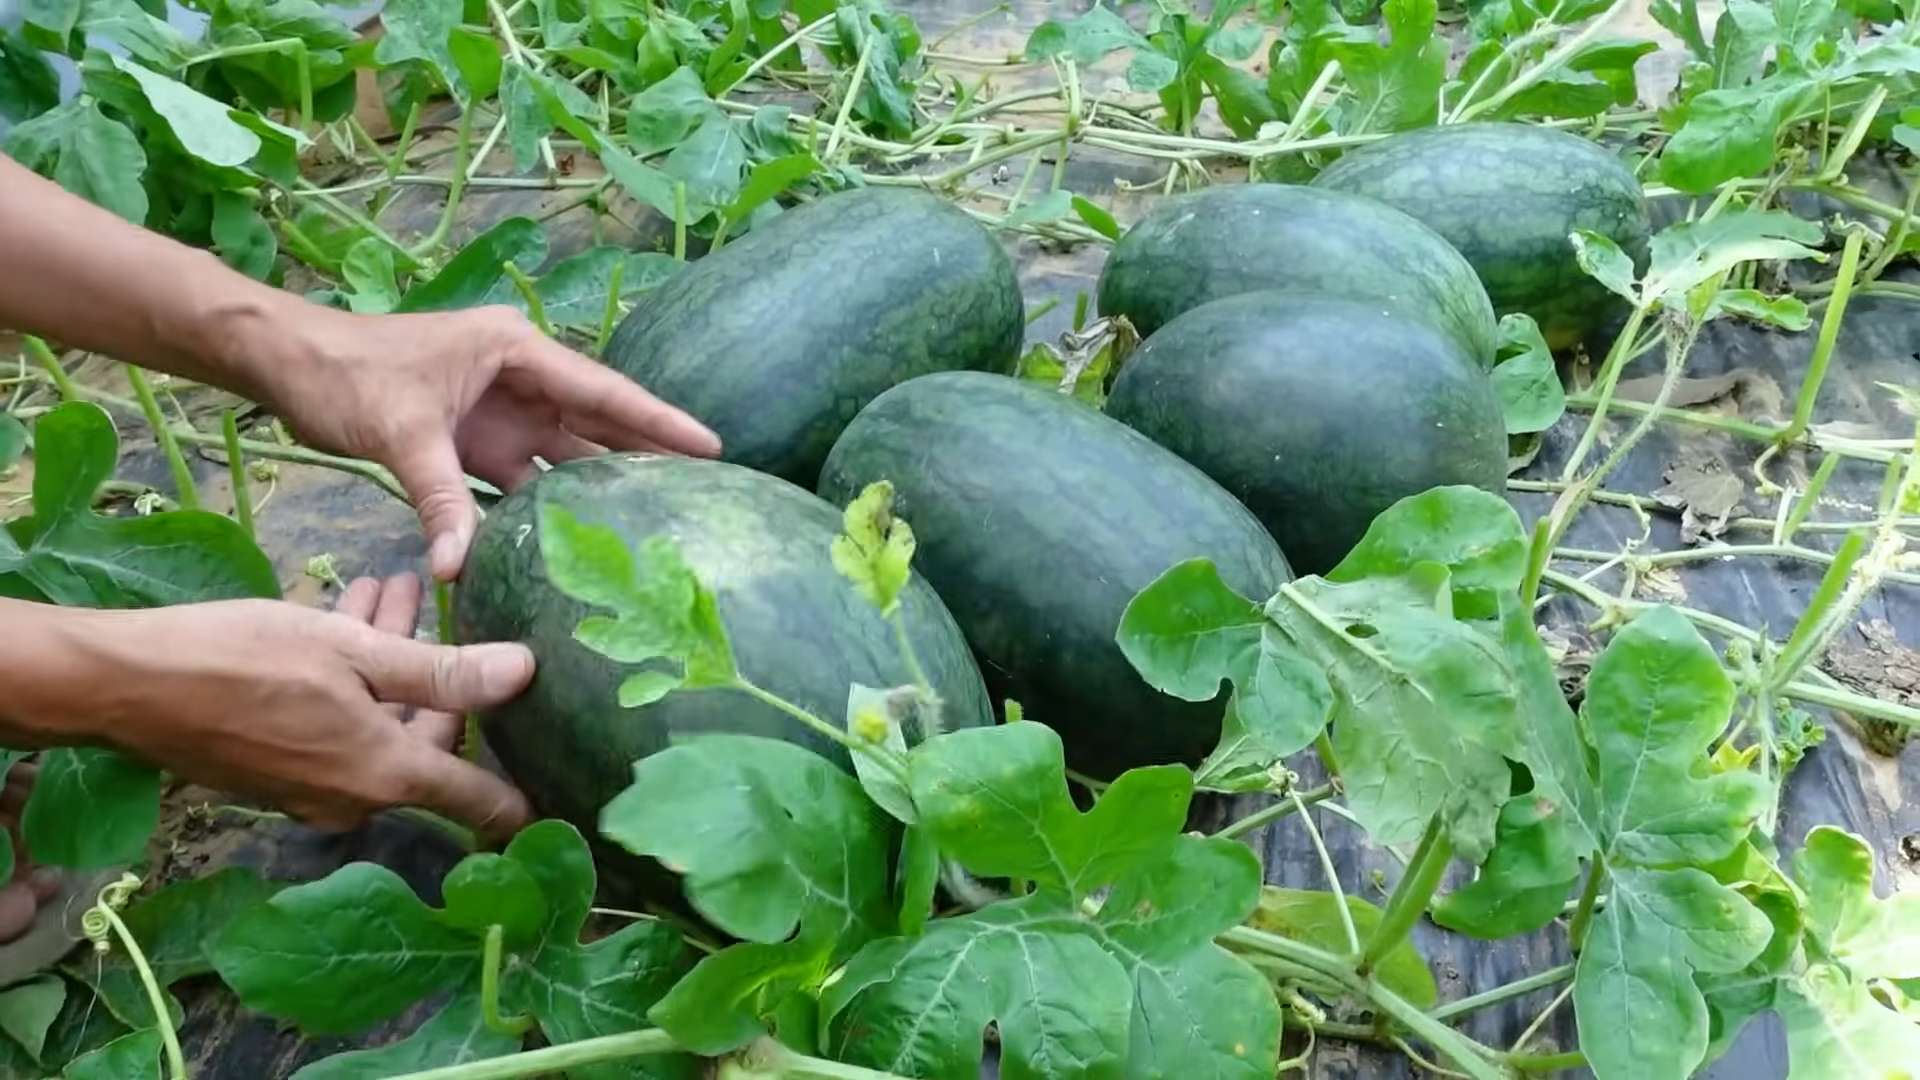
Q: When is the best time to harvest my watermelons?
A: Knowing when to harvest your watermelons can be tricky, but there are a few telltale signs to look for. First, the tendril closest to the watermelon should be brown and dry. Second, the underside of the watermelon (where it rests on the ground) should be yellow or cream-colored. Finally, when you thump the watermelon, it should sound hollow and deep. If all of these signs are present, your watermelon is likely ripe and ready to harvest.
Q: Can I grow watermelons in containers?
A: Yes, you can grow watermelons in containers, but you’ll need to choose a large container (at least 20 gallons) and select a smaller variety like Sugar Baby or Bush Sugar Baby. Make sure the container has good drainage, and use a high-quality potting mix. You’ll also need to provide regular watering and fertilization. Container-grown watermelons may not produce as many fruits as those grown in the ground, but they can still provide a satisfying harvest.
Q: What kind of fertilizer should I use for watermelons?
A: Watermelons are heavy feeders, so they need regular fertilization. Before planting, amend your soil with compost or well-rotted manure. During the growing season, fertilize your watermelons every 2-3 weeks with a balanced fertilizer (e.g., 10-10-10). As the fruits begin to develop, switch to a fertilizer that is higher in phosphorus and potassium (e.g., 5-10-10) to promote fruit development. Avoid over-fertilizing, as this can lead to excessive foliage growth and reduced fruit production.
Q: How can I improve pollination for my watermelons?
A: Watermelons require pollination to set fruit. If you’re not seeing many bees or other pollinators in your garden, you may need to hand-pollinate the flowers. To do this, use a small paintbrush to transfer pollen from the male flowers to the female flowers. The male flowers have a long, thin stem, while the female flowers have a small, immature watermelon at the base. Hand-pollinate in the morning, when the flowers are open. You can also attract more pollinators to your garden by planting flowers that are rich in nectar and pollen.
Q: What are some creative ways to use my homegrown watermelons?
A: Beyond simply slicing and enjoying your homegrown watermelons, there are countless creative ways to use them. You can make refreshing watermelon juice, smoothies, or cocktails. You can also grill watermelon slices for a smoky, caramelized flavor. Watermelon rind can be pickled or candied. And, of course, you can use watermelon to make a variety of salads, salsas, and desserts. Don’t be afraid to experiment and get creative in the kitchen!
Leave a Comment