
Grow Bags Zucchini Beginners, listen up! Have you ever dreamed of harvesting plump, juicy zucchini right from your own backyard, even if you’re short on space or gardening experience? I’m here to tell you that dream is totally achievable, and it’s easier than you think! Forget sprawling gardens and back-breaking labor; we’re diving into the wonderful world of grow bags and zucchini cultivation, a match made in gardening heaven.
For centuries, humans have cultivated zucchini, tracing its roots back to the Americas. While the zucchini we know and love today is a relatively modern Italian creation, its ancestor, the squash, has been a staple food source for indigenous populations for millennia. Now, we’re taking this versatile vegetable and adapting its cultivation to suit modern lifestyles.
Why grow bags zucchini beginners? Well, life gets busy! Many of us live in apartments, condos, or homes with limited yard space. Grow bags offer a fantastic solution, providing a portable and manageable garden that can thrive on balconies, patios, or even sunny windowsills. Plus, zucchini plants are notoriously prolific, and sometimes, their sprawling vines can take over a traditional garden. Grow bags help contain their growth, making them perfect for smaller spaces. I’m excited to share my favorite tips and tricks for successfully growing zucchini in grow bags, ensuring you’ll be enjoying fresh, homegrown zucchini all season long!
Growing Zucchini in Grow Bags: A Beginner’s Guide
Hey there, fellow gardening enthusiasts! So, you’re thinking about growing zucchini in grow bags? Awesome choice! It’s a fantastic way to enjoy fresh, homegrown zucchini even if you don’t have a huge garden. I’ve had great success with this method, and I’m excited to share my tips and tricks with you. Let’s dive in!
Choosing the Right Grow Bag and Soil
First things first, we need to talk about the foundation of our zucchini success: the grow bag and the soil. This is crucial, so pay close attention!
* Grow Bag Size: Zucchini plants are hungry and thirsty, and they need room to spread their roots. I recommend using a grow bag that’s at least 20 gallons in size. A 25-gallon bag is even better! Anything smaller, and you’ll be constantly watering and fertilizing. Trust me, bigger is better in this case.
* Grow Bag Material: Fabric grow bags are my go-to. They allow for excellent drainage and aeration, which is super important for preventing root rot. Plus, they’re lightweight and easy to move around. Avoid plastic pots if possible, as they can overheat and don’t breathe as well.
* Soil Mix: Zucchini needs rich, well-draining soil. I like to create my own mix using equal parts:
* Compost: This provides essential nutrients and improves soil structure.
* Potting Mix: This provides good drainage and aeration.
* Coco Coir or Peat Moss: This helps retain moisture.
You can also buy a pre-made vegetable garden mix, but make sure it’s high-quality and well-draining. Avoid using garden soil directly in your grow bags, as it can become compacted and doesn’t drain well.
Planting Your Zucchini
Now for the fun part – getting those zucchini seeds or seedlings into the grow bag!
1. Prepare the Grow Bag: Fill your grow bag with your chosen soil mix, leaving about 2-3 inches of space at the top. This will make watering easier and prevent soil from splashing out.
2. Sowing Seeds (Optional): If you’re starting from seeds, sow 2-3 seeds per grow bag, about 1 inch deep. Water gently and keep the soil consistently moist. Once the seedlings emerge, thin them to one strong plant per bag. I usually start my seeds indoors a few weeks before the last expected frost.
3. Planting Seedlings: If you’re using seedlings (which is what I usually do for a head start), gently remove the seedling from its container. Loosen the roots slightly, and plant the seedling in the center of the grow bag, at the same depth it was in the original container.
4. Water Thoroughly: After planting, water the grow bag thoroughly until water drains out the bottom. This helps settle the soil and ensures the roots are well-hydrated.
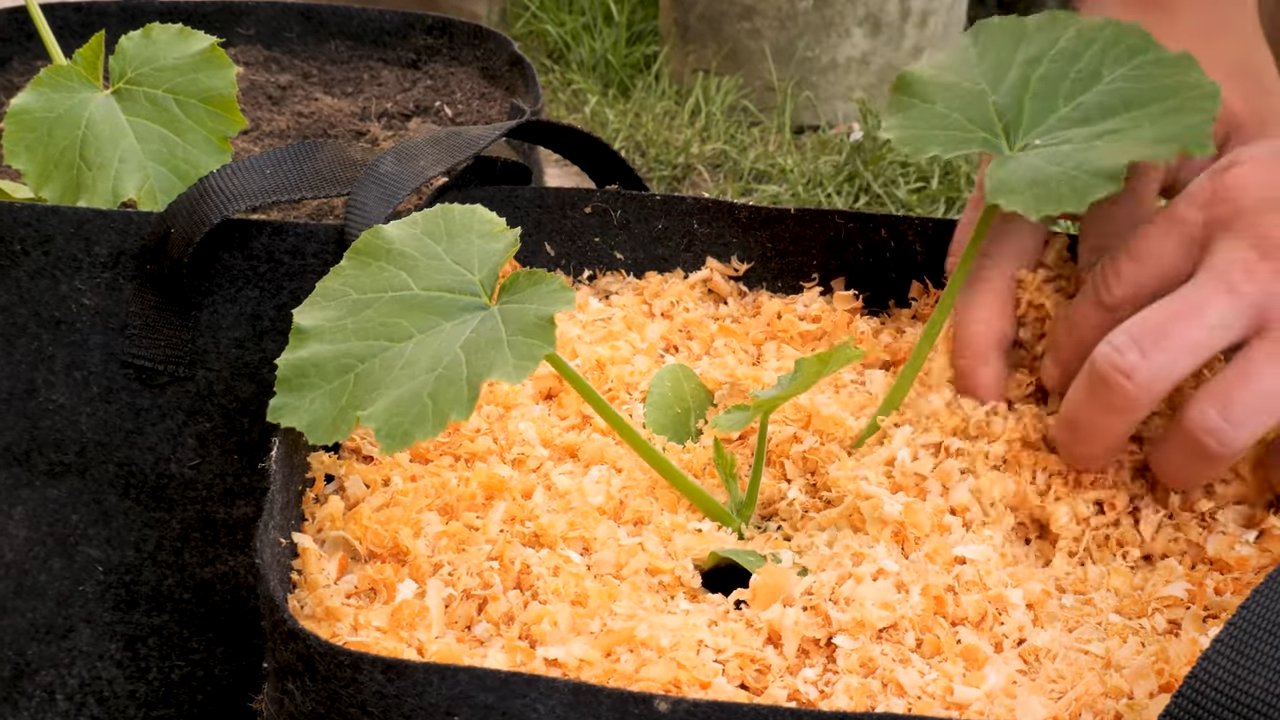
5. Mulch (Optional): Adding a layer of mulch around the base of the plant can help retain moisture, suppress weeds, and regulate soil temperature. I like to use straw or wood chips.
Caring for Your Zucchini Plants
Okay, so you’ve got your zucchini planted. Now comes the ongoing care to ensure a bountiful harvest.
* Watering: Zucchini plants are thirsty! Water deeply and regularly, especially during hot, dry weather. Check the soil moisture by sticking your finger about an inch into the soil. If it feels dry, it’s time to water. Avoid overhead watering, as this can lead to fungal diseases. Instead, water at the base of the plant.
* Fertilizing: Zucchini are heavy feeders, so they need regular fertilization. I like to use a balanced organic fertilizer, such as a 5-5-5 or 10-10-10, every 2-3 weeks. You can also use a liquid fertilizer, such as fish emulsion or seaweed extract, diluted according to the package instructions.
* Sunlight: Zucchini needs at least 6-8 hours of sunlight per day. Choose a location for your grow bag that gets plenty of sun.
* Pest and Disease Control: Keep an eye out for common zucchini pests, such as squash bugs, squash vine borers, and aphids. You can handpick pests off the plants, use insecticidal soap, or apply neem oil. For fungal diseases, such as powdery mildew, ensure good air circulation and avoid overhead watering. You can also use a fungicide if necessary.
* Pollination: Zucchini plants have separate male and female flowers. The female flowers need to be pollinated in order to produce fruit. If you’re not seeing any fruit develop, you may need to hand-pollinate the flowers. To do this, use a small paintbrush to transfer pollen from the male flower to the female flower. The male flower has a long, thin stem, while the female flower has a small zucchini fruit behind it.
Harvesting Your Zucchini
The moment we’ve all been waiting for – harvesting those delicious zucchini!
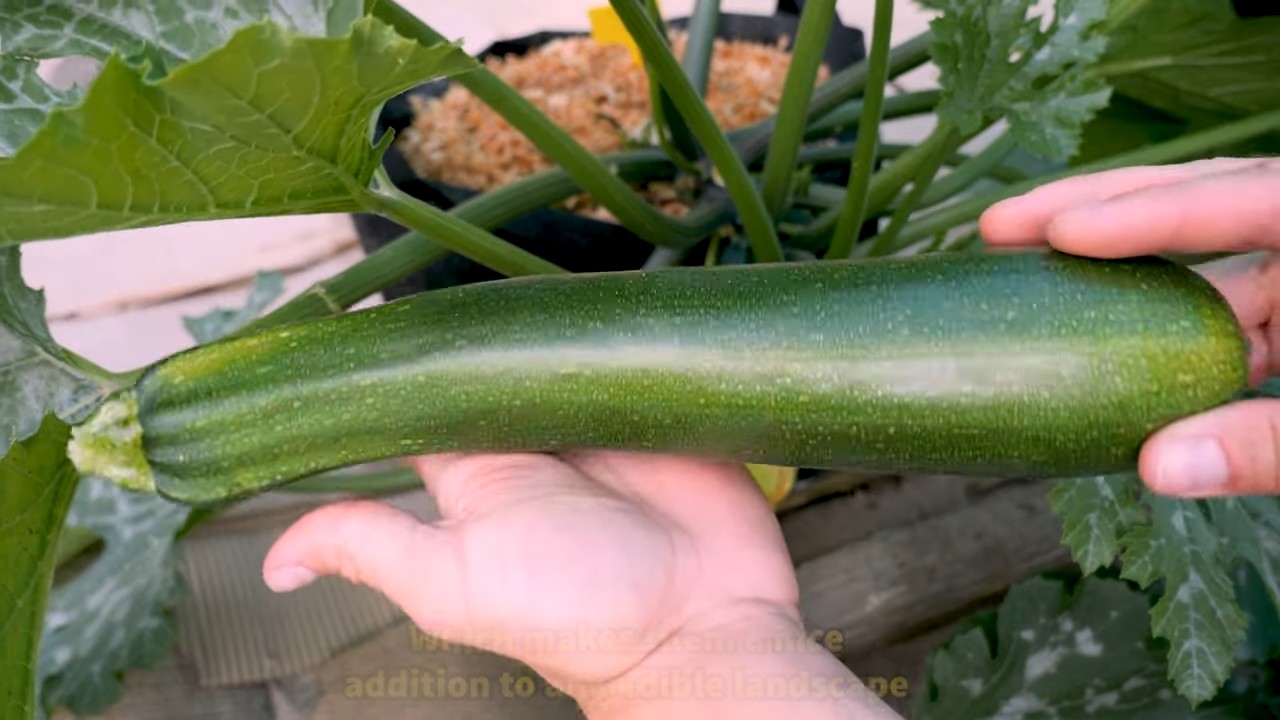
* Harvest Time: Zucchini grows quickly! You’ll typically start harvesting about 50-60 days after planting. The ideal size for harvesting is when the zucchini is about 6-8 inches long.
* How to Harvest: Use a sharp knife or pruning shears to cut the zucchini from the plant. Be careful not to damage the plant.
* Regular Harvesting: The more you harvest, the more zucchini the plant will produce. So, check your plants regularly and harvest any zucchini that are ready. If you let them get too big, they’ll become seedy and less flavorful.
Troubleshooting Common Problems
Even with the best care, you might encounter some problems along the way. Here are a few common issues and how to address them:
* Yellowing Leaves: This could be a sign of overwatering, underwatering, nutrient deficiency, or pest infestation. Check the soil moisture, fertilize if necessary, and inspect the plant for pests.
* Powdery Mildew: This fungal disease appears as a white, powdery coating on the leaves. Improve air circulation, avoid overhead watering, and apply a fungicide if necessary.
* Blossom End Rot: This is caused by a calcium deficiency and appears as a dark, sunken spot on the blossom end of the zucchini. Ensure consistent watering and fertilize with a calcium-rich fertilizer.
* Lack of Fruit Production: This could be due to poor pollination, lack of sunlight, or nutrient deficiency. Hand-pollinate the flowers, ensure the plant gets enough sunlight, and fertilize regularly.
Maximizing Your Zucchini Harvest
Want to take your zucchini growing game to the next level? Here are a few extra tips:
* Succession Planting: Plant new zucchini seeds or seedlings every 2-3 weeks to extend your harvest season.
* Companion Planting: Plant zucchini alongside beneficial plants, such as marigolds, nasturtiums, and basil, to deter pests and attract pollinators.
* Vertical Growing: Train your zucchini plants to grow vertically on a trellis or fence to save space and improve air circulation.
* Pruning: Prune away any yellowing or damaged leaves to improve air circulation and encourage new growth.
Dealing with Zucchini Overload
Let’s be honest, zucchini plants are prolific! You’ll likely end up with more zucchini than you know what to do with. Here are a few ideas for using up your harvest:
* Zucchini Bread: A classic for a reason!
* Zucchini Noodles (Zoodles): A healthy and delicious alternative to pasta.
* Grilled Zucchini: Simple and flavorful.
* Zucchini Fritters: A tasty appetizer or side dish.
* Zucchini Soup: A creamy and comforting soup.
* Freezing Zucchini: Shred or slice zucchini and freeze it for later use.
Growing zucchini in grow bags is a rewarding experience. With a little bit of care and attention, you can enjoy a bountiful harvest of fresh, delicious zucchini all summer long. Happy gardening!
Conclusion
So, there you have it! Growing zucchini in grow bags is not just a viable option for beginners; it’s a game-changer. We’ve explored how this method simplifies the process, offering a controlled environment, improved drainage, and the flexibility to move your plants to the sunniest spot. Forget wrestling with heavy garden soil or worrying about poor drainage in traditional garden beds. With grow bags, you’re setting yourself up for a bountiful zucchini harvest with minimal fuss.
But why is this DIY trick a must-try? It boils down to accessibility and control. For apartment dwellers, those with limited yard space, or anyone simply looking for an easier way to cultivate delicious zucchini, grow bags are the answer. They eliminate many of the common challenges associated with in-ground gardening, such as soil compaction, weed infestations, and pest problems. Plus, the improved aeration and drainage in grow bags promote healthier root development, leading to stronger, more productive plants.
Don’t be afraid to experiment! While we’ve focused on zucchini, the principles of grow bag gardening apply to a wide range of vegetables and herbs. Consider trying different sizes of grow bags to accommodate various zucchini varieties. Some bush varieties might thrive in smaller bags, while larger, vining types will appreciate the extra space of a larger bag. You can also explore different soil mixes to find what works best for your local climate and growing conditions. Adding compost or other organic matter to your grow bag soil will further enhance its fertility and water retention.
Another exciting variation is companion planting within your grow bags. Marigolds, for example, are known to deter pests and attract beneficial insects, making them an excellent companion for zucchini. Basil is another great choice, as it can help repel squash bugs and improve the overall health of your plants.
Ready to embark on your zucchini-growing adventure? We wholeheartedly encourage you to give this DIY grow bag method a try. It’s a rewarding experience that will not only provide you with fresh, delicious zucchini but also connect you with the natural world in a meaningful way.
And most importantly, we want to hear about your experiences! Share your tips, tricks, and triumphs in the comments below. Let us know what worked for you, what challenges you faced, and any variations you tried. Your feedback will help other beginners learn and grow, creating a thriving community of zucchini enthusiasts. So, grab your grow bags, seeds, and soil, and get ready to enjoy the satisfaction of harvesting your own homegrown zucchini! Remember, successful gardening is a journey of learning and experimentation. Embrace the process, have fun, and don’t be afraid to get your hands dirty. Happy growing!
Frequently Asked Questions (FAQ)
What size grow bag is best for zucchini?
The ideal grow bag size for zucchini is generally between 10 and 20 gallons. A 10-gallon bag is suitable for smaller, bush-type zucchini varieties, while a 20-gallon bag provides ample space for larger, vining varieties to spread their roots. The larger the bag, the more soil volume you provide, which translates to better water retention and nutrient availability for your plants. If you’re unsure about the size, it’s always better to err on the side of larger, as zucchini plants are heavy feeders and need plenty of room to grow. Consider the mature size of the specific zucchini variety you’re planting when making your decision.
What type of soil should I use in my grow bag for zucchini?
A well-draining and nutrient-rich soil mix is crucial for successful zucchini growth in grow bags. A good starting point is a mix of equal parts potting soil, compost, and perlite or vermiculite. The potting soil provides a base for your plants to grow, the compost adds essential nutrients and improves water retention, and the perlite or vermiculite enhances drainage and aeration. Avoid using garden soil directly in your grow bags, as it can be too heavy and compact, hindering root development. You can also amend your soil mix with slow-release fertilizer to provide a steady supply of nutrients throughout the growing season.
How often should I water zucchini in grow bags?
Watering frequency depends on several factors, including the weather, the size of your grow bag, and the stage of growth of your zucchini plants. Generally, you should water your zucchini plants deeply whenever the top inch of soil feels dry to the touch. During hot, sunny weather, you may need to water daily, while during cooler, cloudy weather, you may only need to water every few days. Be sure to check the soil moisture regularly to avoid overwatering, which can lead to root rot. Grow bags tend to dry out faster than traditional garden beds, so it’s important to monitor the moisture levels closely.
Do I need to fertilize zucchini grown in grow bags?
Yes, zucchini plants are heavy feeders and require regular fertilization to produce a bountiful harvest. Start by incorporating slow-release fertilizer into your soil mix at planting time. Then, supplement with liquid fertilizer every 2-3 weeks throughout the growing season. Choose a fertilizer that is high in phosphorus and potassium, as these nutrients are essential for fruit development. You can also use organic fertilizers, such as compost tea or fish emulsion, to provide a natural source of nutrients. Be careful not to over-fertilize, as this can lead to excessive foliage growth and reduced fruit production.
How do I protect my zucchini plants in grow bags from pests and diseases?
Grow bags can actually help reduce pest and disease problems by providing a more controlled environment. However, it’s still important to take preventative measures. Regularly inspect your plants for signs of pests, such as squash bugs, squash vine borers, and aphids. Handpick any pests you find or use insecticidal soap or neem oil to control infestations. To prevent diseases, ensure good air circulation around your plants and avoid overhead watering. Mulching around the base of your plants can also help prevent soilborne diseases. If you notice any signs of disease, such as powdery mildew or leaf spot, treat promptly with an appropriate fungicide.
Can I move my zucchini grow bags?
One of the biggest advantages of using grow bags is their portability. You can easily move your zucchini plants to follow the sun or to protect them from extreme weather conditions. However, keep in mind that grow bags can become quite heavy when filled with soil and water, so it’s best to move them before they become too large. If you have a particularly large or heavy grow bag, you can use a hand truck or dolly to move it more easily. Be careful not to damage the plants when moving the bags.
What are the best zucchini varieties to grow in grow bags?
Many zucchini varieties thrive in grow bags. Bush varieties, such as Black Beauty, Spacemiser, and Eight Ball, are particularly well-suited for smaller grow bags. Vining varieties, such as Costata Romanesco and Tromboncino, can also be grown in grow bags, but they will require larger bags and some form of support, such as a trellis or stake. Consider the size and growth habit of the specific variety you’re planting when choosing a grow bag size and location.
How long does it take to grow zucchini in grow bags?
Zucchini plants typically take 50-65 days to mature and produce fruit. However, the exact time frame can vary depending on the variety, the growing conditions, and the climate. You can start harvesting zucchini when the fruits are about 6-8 inches long. Regular harvesting will encourage the plant to produce more fruit.
Can I reuse grow bags for zucchini next year?
Yes, grow bags can be reused for several years if properly cared for. After harvesting your zucchini, remove the old plants and soil from the bags. Wash the bags thoroughly with soap and water to remove any dirt or debris. Allow the bags to dry completely before storing them in a cool, dry place. Before reusing the bags, consider amending the soil with fresh compost or fertilizer to replenish nutrients.

Leave a Comment