
Grow Bush Beans Easily and transform your garden into a thriving, bountiful space! Have you ever dreamed of stepping outside your back door and harvesting fresh, crisp beans for dinner? It’s easier than you think, and this DIY guide is your ticket to making that dream a reality. For generations, bush beans have been a staple in gardens worldwide, offering a compact and productive alternative to their vining cousins. Their ease of cultivation has made them a favorite among home gardeners, from small urban plots to sprawling rural landscapes.
But why should you learn to grow bush beans easily? In today’s world, knowing where your food comes from and having control over its quality is more important than ever. Plus, let’s be honest, store-bought beans just don’t compare to the flavor of freshly picked, homegrown ones. This DIY article will provide you with simple, effective tricks and hacks to maximize your yield, minimize common problems, and enjoy a continuous harvest of delicious bush beans all season long. I’m excited to share my favorite tips and techniques with you, so let’s get started!
Grow Bush Beans Like a Pro: A Simple DIY Guide
Hey there, fellow gardening enthusiasts! I’m so excited to share my foolproof method for growing bush beans. They’re incredibly rewarding, producing a ton of delicious beans in a relatively small space. Plus, they’re super easy to grow, even if you’re a beginner. Let’s dive in!
Choosing Your Bush Bean Variety
Before we get our hands dirty, let’s talk about bean varieties. Bush beans come in a rainbow of colors and flavors, so picking the right one is key. Here are a few of my favorites:
* Provider: This is a classic for a reason! It’s super reliable, early-maturing, and produces tons of dark green beans.
* Blue Lake Bush: These beans are known for their exceptional flavor and tenderness. They’re perfect for canning or freezing.
* Contender: As the name suggests, this variety is a tough one, tolerating cooler temperatures and still producing a good yield.
* Roma II: If you love flat, Italian-style beans, Roma II is your go-to. They’re incredibly flavorful and perfect for salads or sauteing.
* Golden Wax: For a pop of color, try Golden Wax beans. They’re bright yellow and have a mild, buttery flavor.
Once you’ve chosen your variety, it’s time to gather your supplies!
Gathering Your Supplies
Here’s what you’ll need to get started:
* Bush bean seeds: Obviously! Make sure they’re fresh and from a reputable source.
* Well-draining soil: Bush beans aren’t picky, but they do need soil that drains well. Amend your soil with compost or other organic matter if needed.
* Gardening gloves: To keep your hands clean and protected.
* Hand trowel or garden fork: For preparing the soil and planting the seeds.
* Watering can or hose: For keeping your beans hydrated.
* Optional:
* Row covers: To protect your seedlings from pests and frost.
* Organic fertilizer: To give your beans an extra boost.
* Mulch: To help retain moisture and suppress weeds.
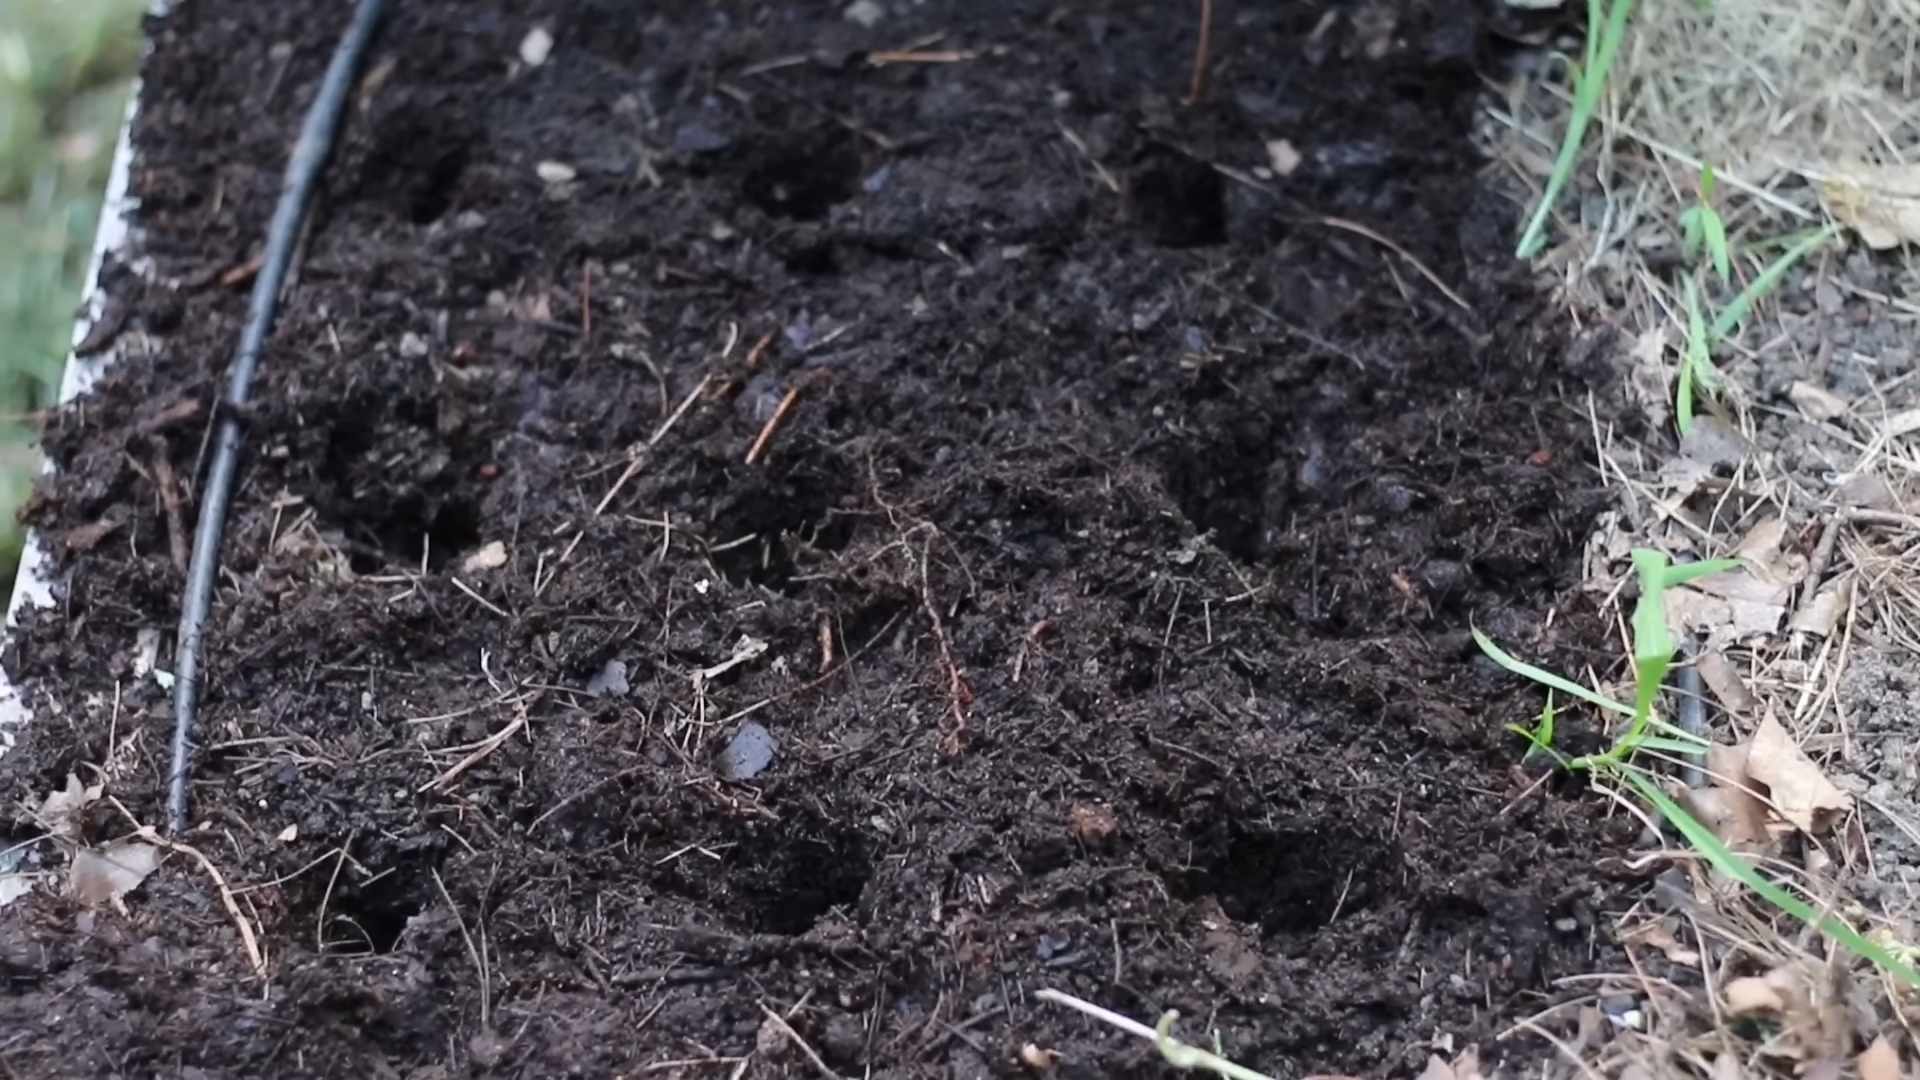
Preparing the Soil
Bush beans thrive in well-drained soil that’s rich in organic matter. Here’s how I prepare my soil:
1. Clear the area: Remove any weeds, rocks, or debris from the planting area.
2. Loosen the soil: Use a garden fork or hand trowel to loosen the soil to a depth of about 6-8 inches. This will help the roots penetrate easily.
3. Amend the soil: Incorporate compost, aged manure, or other organic matter into the soil. This will improve drainage, fertility, and water retention. I usually add a generous layer of compost, about 2-3 inches thick.
4. Level the surface: Rake the soil smooth to create a level planting surface.
Planting Your Bush Bean Seeds
Now for the fun part – planting! Bush beans are best planted directly in the garden after the last frost.
1. Check the soil temperature: Bush beans germinate best when the soil temperature is above 60°F (15°C). You can use a soil thermometer to check the temperature.
2. Sow the seeds: Plant the seeds about 1 inch deep and 2-3 inches apart in rows that are 18-24 inches apart. I like to use my finger to make small holes, drop in the seeds, and then cover them with soil.
3. Water gently: Water the soil gently after planting to help the seeds settle in. Be careful not to overwater, as this can cause the seeds to rot.
4. Optional: Cover the planting area with row covers to protect the seedlings from pests and frost.
Caring for Your Bush Bean Plants
Once your bush beans have sprouted, it’s important to provide them with the right care to ensure a bountiful harvest.
1. Water regularly: Bush beans need consistent moisture, especially during flowering and pod development. Water deeply whenever the top inch of soil feels dry. Avoid overhead watering, as this can promote fungal diseases. I prefer to use a soaker hose or drip irrigation to water my beans.
2. Weed regularly: Keep the planting area free of weeds, as they can compete with the beans for nutrients and water. Hand-pull weeds carefully to avoid disturbing the bean plants’ roots.
3. Fertilize if needed: Bush beans don’t require a lot of fertilizer, but you can give them a boost with an organic fertilizer if needed. Look for a fertilizer that’s low in nitrogen and high in phosphorus and potassium. I usually side-dress my beans with a small amount of fertilizer a few weeks after they emerge.
4. Pest control: Keep an eye out for common bean pests, such as aphids, bean beetles, and spider mites. If you spot any pests, take action immediately. I prefer to use organic pest control methods, such as insecticidal soap or neem oil. You can also hand-pick pests off the plants.
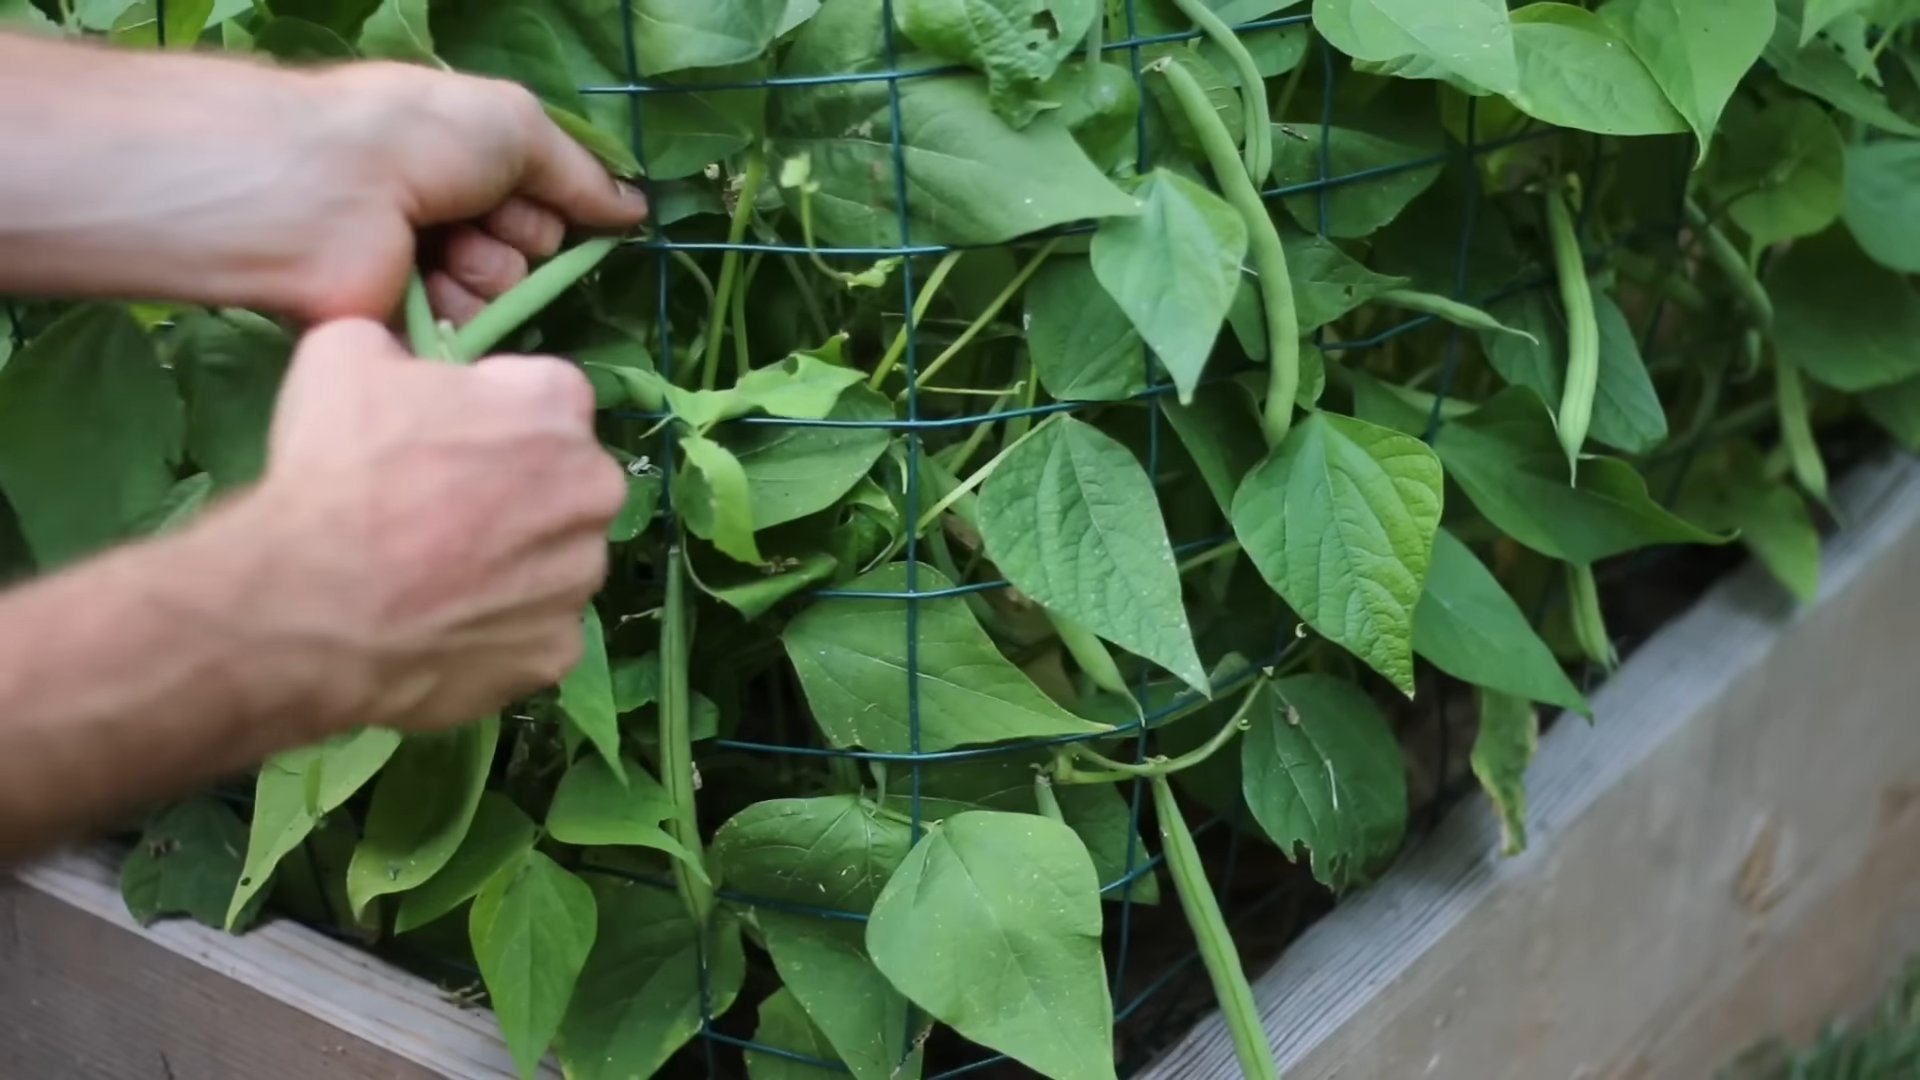
5. Support: Bush beans typically don’t need support, but if your plants are getting top-heavy with beans, you can provide them with some support using stakes or a trellis. This will help prevent the plants from falling over and rotting.
Harvesting Your Bush Beans
The moment you’ve been waiting for – harvesting! Bush beans are typically ready to harvest about 50-60 days after planting.
1. Check for ripeness: The beans are ready to harvest when the pods are firm, plump, and snap easily when bent. Avoid letting the pods get too large and tough.
2. Harvest regularly: Harvest the beans every few days to encourage continued production. The more you harvest, the more beans the plants will produce.
3. Pick carefully: Gently snap the beans off the plant, being careful not to damage the stems or leaves.
4. Enjoy your harvest: Bush beans are delicious fresh, steamed, sauteed, or added to soups and stews. You can also freeze or can them for later use.
Troubleshooting Common Problems
Even with the best care, you may encounter some problems when growing bush beans. Here are a few common issues and how to address them:
* Poor germination: If your seeds aren’t germinating, it could be due to cold soil, overwatering, or old seeds. Make sure the soil temperature is above 60°F (15°C), avoid overwatering, and use fresh seeds.
* Yellowing leaves: Yellowing leaves can be a sign of nutrient deficiency, overwatering, or disease. Check the soil drainage, fertilize if needed, and treat any diseases promptly.
* Pest infestations: As mentioned earlier, keep an eye out for common bean pests and take action immediately if you spot any.
* Disease: Bush beans are susceptible to several diseases, such as bean rust, powdery mildew, and anthracnose. Prevent diseases by providing good air circulation, avoiding overhead watering, and using disease-resistant varieties. If you spot any signs of disease, treat the plants with an appropriate fungicide.
Extending the Harvest
Want to enjoy fresh bush beans for as long as possible? Here are a few tips for extending the harvest:
* Succession planting: Plant a new batch of seeds every 2-3 weeks to ensure a continuous supply of beans.
* Choose early-maturing varieties: Select varieties that mature quickly to get a head start on the season.
* Use row covers: Row covers can protect your plants from frost and extend the growing season.
* Harvest regularly: As mentioned earlier, harvesting regularly encourages continued production.
Saving Seeds
If you want to save seeds from your bush beans for next year, here’s how:
1. Choose healthy plants: Select healthy plants that produce high-quality beans.
2. Allow some pods to mature: Let some of the pods on the plants dry out completely on the vine.
3. Harvest the dry pods: Once the pods are dry and brittle, harvest them from the plants.
4. Shell the seeds: Shell the seeds from the pods and discard any damaged or discolored seeds.
5. Dry the seeds: Spread the seeds out on a tray and let them dry completely for a few days.
6. Store the seeds: Store the dried seeds in an airtight container in a cool, dry place.
Bush Beans in Containers
Don’t have a garden? No problem! Bush beans can also be grown in containers.
1. Choose a large container: Select a container that’s at least 12 inches in diameter and 12 inches deep.
2. Use well-draining potting mix: Fill the container
Conclusion
So, there you have it! Growing bush beans doesn’t have to be a daunting task. This simple DIY trick, focusing on proper soil preparation and consistent watering, unlocks a world of fresh, homegrown goodness right in your backyard or even on your balcony. Forget those expensive, often less-than-fresh beans from the grocery store. Imagine stepping outside and harvesting plump, vibrant bush beans whenever you need them. The taste difference alone is worth the effort!
This method is a must-try because it’s not only cost-effective but also incredibly rewarding. You’ll know exactly where your food comes from and what went into growing it – no harmful pesticides or questionable practices. Plus, it’s a fantastic way to connect with nature and enjoy the satisfaction of nurturing something from seed to table.
But don’t stop there! Feel free to experiment with different varieties of bush beans. Try planting Blue Lake bush beans for their classic flavor and high yields, or perhaps Contender bush beans for their early maturity and resistance to common diseases. You can also explore adding companion plants like marigolds to deter pests or basil to improve the flavor of your beans. Consider succession planting, sowing new seeds every few weeks, to ensure a continuous harvest throughout the growing season. Another variation is to use different types of supports, even though bush beans are naturally compact, a small trellis or stakes can help keep the plants upright and improve air circulation, reducing the risk of fungal diseases.
We’re confident that once you try this DIY trick for growing bush beans easily, you’ll be hooked. It’s a simple, effective, and incredibly satisfying way to enjoy fresh, healthy produce. Don’t just take our word for it – give it a try! We encourage you to start small, perhaps with just a few plants, and see the magic unfold.
And most importantly, we want to hear about your experience! Share your successes, your challenges, and any variations you try in the comments below. Let’s create a community of bush bean enthusiasts and learn from each other. What variety did you choose? What challenges did you face? What tips and tricks did you discover along the way? Your feedback will not only help other readers but also inspire us to continue sharing valuable gardening tips and tricks. So, get your hands dirty, plant those seeds, and let the bush bean adventure begin! We can’t wait to hear your stories.
Frequently Asked Questions (FAQ)
What exactly are bush beans, and how are they different from pole beans?
Bush beans are a variety of common bean that grows in a compact, bush-like form, typically reaching a height of 1-2 feet. They don’t require staking or trellising, making them ideal for small gardens or container gardening. Pole beans, on the other hand, are vining beans that can grow up to 10 feet tall and require a trellis or other support structure to climb. Bush beans generally mature faster than pole beans, offering a quicker harvest. The choice between bush and pole beans often comes down to available space and personal preference.
What kind of soil is best for growing bush beans?
Bush beans thrive in well-drained soil that is rich in organic matter. The ideal soil pH is between 6.0 and 7.0. Before planting, amend your soil with compost or well-rotted manure to improve its fertility and drainage. Avoid heavy clay soils, as they can become waterlogged and hinder root development. If you have clay soil, consider adding sand and organic matter to improve its texture. A soil test can help you determine the pH and nutrient levels of your soil, allowing you to make necessary amendments.
How often should I water my bush beans?
Bush beans need consistent moisture, especially during flowering and pod development. Water deeply and regularly, aiming to keep the soil consistently moist but not waterlogged. A good rule of thumb is to water when the top inch of soil feels dry to the touch. Avoid overhead watering, as it can promote fungal diseases. Instead, water at the base of the plants. Mulching around the plants can help retain moisture and suppress weeds. During hot, dry weather, you may need to water more frequently.
What are some common pests and diseases that affect bush beans, and how can I prevent them?
Common pests that affect bush beans include aphids, bean beetles, and spider mites. Diseases include bean rust, powdery mildew, and anthracnose. To prevent pest and disease problems, choose disease-resistant varieties, practice crop rotation, and keep your garden clean and free of debris. Inspect your plants regularly for signs of pests or diseases and take action promptly. Insecticidal soap or neem oil can be effective for controlling many common pests. Ensure good air circulation around your plants to reduce the risk of fungal diseases. Avoid overwatering and provide adequate drainage.
How do I know when my bush beans are ready to harvest?
Bush beans are typically ready to harvest about 50-60 days after planting. The pods should be firm, plump, and snap easily when bent. Avoid letting the pods become too large or tough, as they will lose their flavor and tenderness. Harvest your beans regularly to encourage continued production. Use scissors or pruning shears to avoid damaging the plants.
Can I grow bush beans in containers?
Yes, bush beans are well-suited for container gardening. Choose a container that is at least 12 inches deep and wide to provide adequate space for the roots to grow. Use a high-quality potting mix and ensure that the container has drainage holes. Water regularly and fertilize as needed. Place the container in a sunny location that receives at least 6-8 hours of sunlight per day.
What kind of fertilizer should I use for bush beans?
Bush beans are legumes, which means they can fix nitrogen from the air into the soil. Therefore, they don’t require a lot of nitrogen fertilizer. However, they do benefit from phosphorus and potassium. Use a balanced fertilizer with a lower nitrogen content, such as a 5-10-10 or 10-20-20 fertilizer. Apply the fertilizer according to the package directions. You can also amend your soil with bone meal to provide phosphorus and wood ash to provide potassium. Avoid over-fertilizing, as this can lead to excessive foliage growth and reduced pod production.
How can I save seeds from my bush beans for next year?
To save seeds from your bush beans, allow some of the pods to mature fully on the plant. The pods will become dry and brittle. Once the pods are completely dry, harvest them and shell the beans. Spread the beans out on a screen or tray to dry completely for a few weeks. Store the dried beans in an airtight container in a cool, dry place. Label the container with the variety and date.
What are some good companion plants for bush beans?
Good companion plants for bush beans include marigolds, nasturtiums, rosemary, and thyme, which help deter pests. Carrots, cucumbers, and radishes also make good companions. Avoid planting bush beans near onions or garlic, as they can inhibit growth.
My bush bean plants are flowering, but I’m not getting any beans. What could be the problem?
There are several reasons why your bush bean plants might be flowering but not producing beans. One possibility is that the plants are not getting enough water or nutrients. Another possibility is that the flowers are not being pollinated. You can try hand-pollinating the flowers by gently brushing them with a small paintbrush. High temperatures can also interfere with pollination. Ensure your plants are getting adequate water and nutrients, and consider providing shade during the hottest part of the day.

Leave a Comment