
Grow carrots in small spaces? Absolutely! You don’t need acres of land to enjoy the sweet, earthy crunch of homegrown carrots. Forget the sprawling farm – we’re bringing the garden to you, no matter how tiny your balcony, patio, or windowsill might be.
For centuries, carrots have been a staple crop, evolving from their wild, often purple, ancestors to the vibrant orange roots we know and love today. Historically, they were valued not just for their taste, but also for their medicinal properties. Now, we’re taking this time-honored vegetable and adapting its cultivation to modern, space-conscious living.
Are you tired of bland, store-bought carrots that lack that fresh-from-the-earth flavor? Do you dream of snipping your own carrots for salads, snacks, or roasting, but feel limited by your lack of garden space? Well, this DIY guide is your answer! I’m going to share some clever tricks and hacks that will empower you to grow carrots in small spaces successfully. From choosing the right containers and soil to mastering the art of succession planting, we’ll cover everything you need to know to harvest a bountiful crop of delicious carrots, even if all you have is a sunny corner and a little bit of determination. Let’s get growing!
Growing Carrots in Small Spaces: A DIY Guide
Hey there, fellow gardening enthusiasts! Dreaming of fresh, crunchy carrots but short on space? Don’t worry, you don’t need acres of land to enjoy homegrown goodness. I’m going to show you how to grow carrots successfully, even if you only have a balcony, patio, or a tiny corner in your yard. Let’s get started!
Choosing the Right Carrot Variety
First things first, not all carrots are created equal, especially when it comes to container gardening. Longer varieties need deeper containers, which might not be ideal for small spaces. Here’s what I recommend:
* Short and Round Varieties: These are your best bet! Think ‘Thumbelina,’ ‘Paris Market,’ or ‘Little Finger.’ They mature quickly and don’t need a ton of depth.
* Half-Long Varieties: ‘Nantes’ or ‘Danvers Half Long’ can also work, but make sure your container is deep enough (at least 8-10 inches).
* Avoid Long Varieties: Unless you have a very deep container, steer clear of ‘Imperator’ types, as they need a lot of room to stretch out.
Preparing Your Container and Soil
The right container and soil are crucial for happy carrots. Here’s what you need to know:
* Container Size: As a general rule, aim for a container that’s at least 8 inches deep for short varieties and 10-12 inches deep for half-long varieties. The wider the container, the more carrots you can grow! A 12-inch diameter pot can comfortably house 5-7 carrot plants.
* Drainage: This is non-negotiable! Carrots hate soggy feet. Make sure your container has plenty of drainage holes. If not, drill some yourself.
* Soil Mix: Forget garden soil; it’s too heavy and compacts easily. Instead, use a well-draining potting mix specifically designed for containers. I like to mix equal parts of:
* Peat moss or coco coir (for moisture retention)
* Perlite or vermiculite (for drainage and aeration)
* Compost (for nutrients)
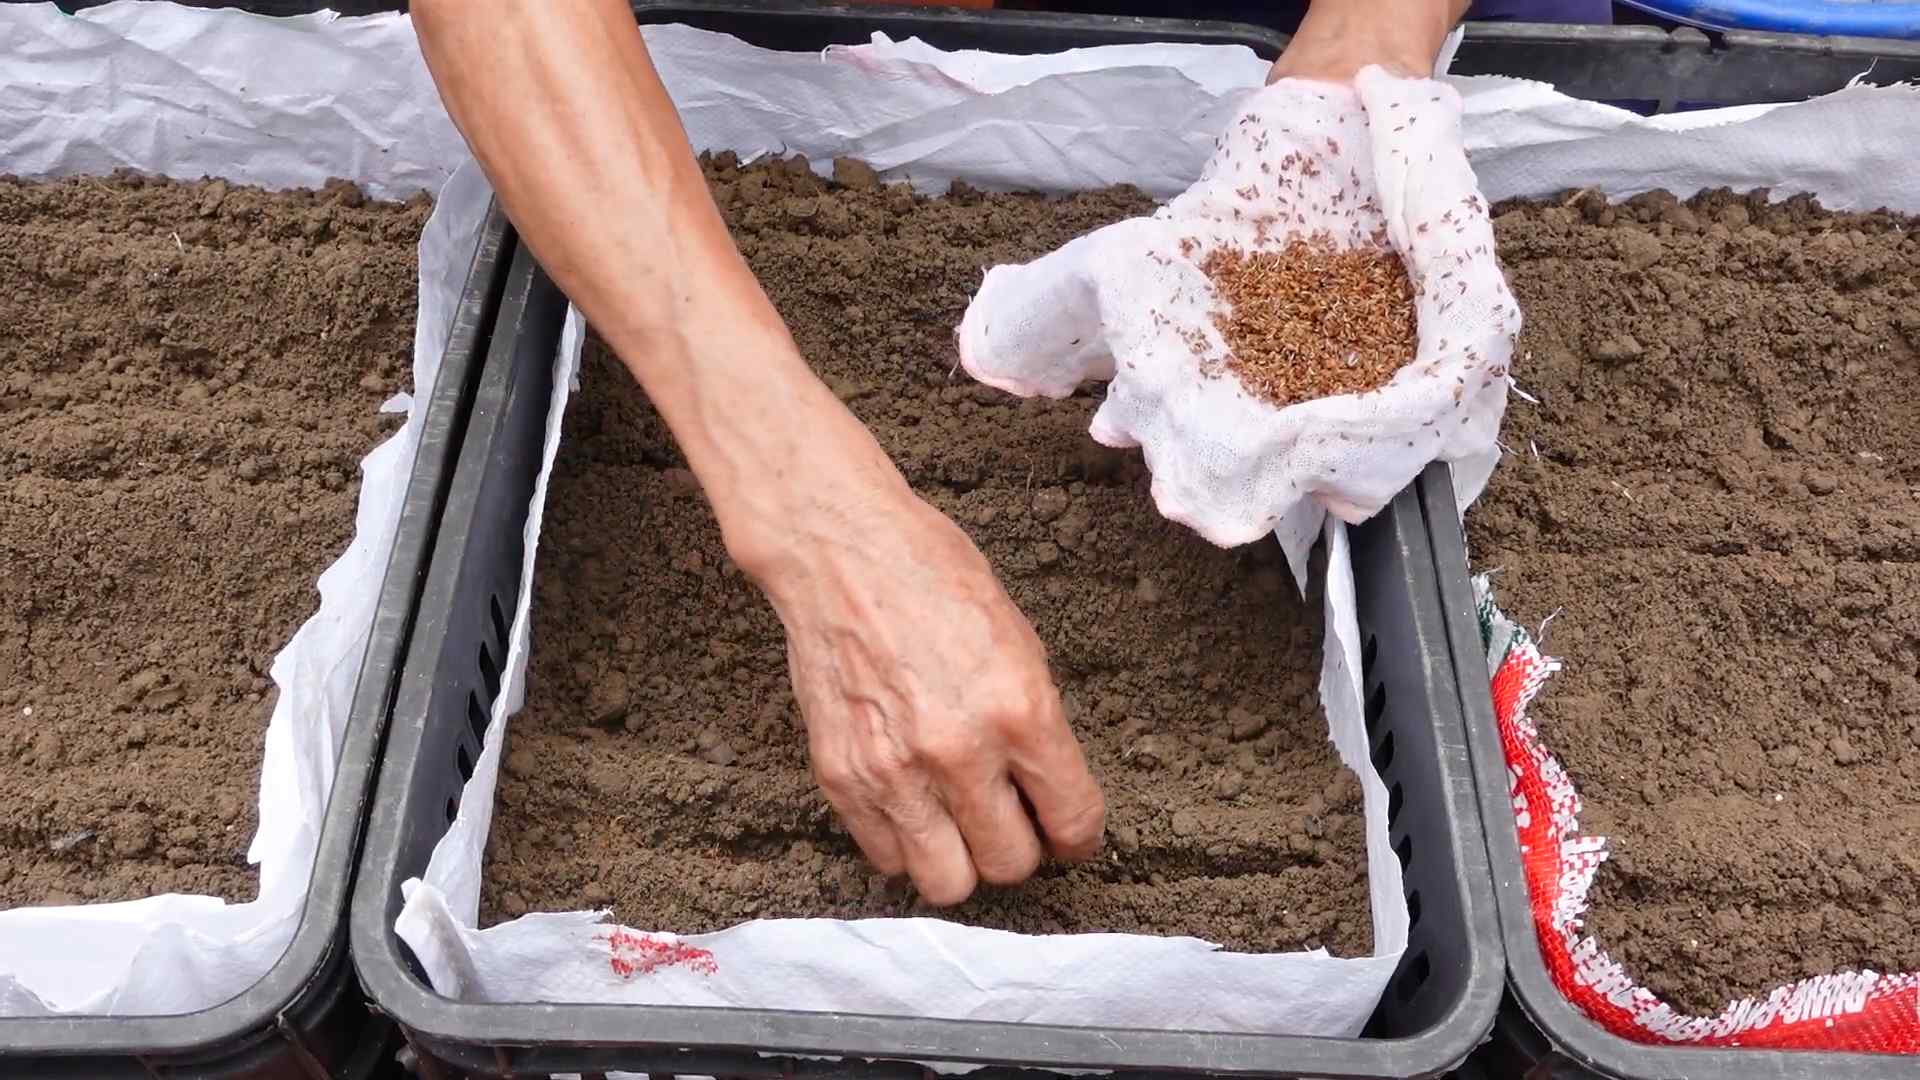
Planting Your Carrot Seeds
Now for the fun part! Here’s how to sow your carrot seeds:
1. Moisten the Soil: Before planting, thoroughly moisten your potting mix. It should be damp but not soggy.
2. Sow the Seeds: Carrot seeds are tiny, so be careful not to sow them too thickly. Sprinkle the seeds evenly over the surface of the soil, spacing them about ½ inch apart.
3. Cover Lightly: Gently cover the seeds with a thin layer (about ¼ inch) of potting mix.
4. Water Gently: Use a watering can with a gentle rose or a spray bottle to water the seeds. Avoid blasting them with a strong stream of water, as this can dislodge them.
5. Keep Moist: The key to successful germination is consistent moisture. Keep the soil consistently damp (but not waterlogged) until the seedlings emerge. You can cover the container with plastic wrap or a humidity dome to help retain moisture.
6. Provide Light: Place the container in a sunny location. Carrots need at least 6 hours of sunlight per day. If you don’t have enough natural light, you can supplement with a grow light.
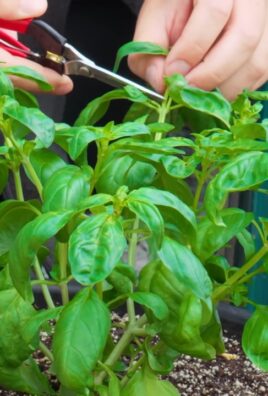
Thinning Your Carrot Seedlings
This is a crucial step that many beginners overlook. If you don’t thin your seedlings, they’ll compete for resources and you’ll end up with stunted, misshapen carrots.
1. Wait for True Leaves: Once your seedlings have developed their first set of true leaves (the leaves that look like miniature carrot tops), it’s time to thin.
2. Thin Carefully: Using small scissors or tweezers, carefully snip off the weakest seedlings at the soil line. Aim to space the remaining seedlings about 1-2 inches apart.
3. Don’t Disturb the Roots: Be gentle when thinning to avoid disturbing the roots of the remaining seedlings.
4. Water After Thinning: Water the container gently after thinning to help the remaining seedlings settle in.
Caring for Your Carrots
Now that your carrots are growing, here’s how to keep them happy and healthy:
* Watering: Water regularly, especially during dry spells. Carrots need consistent moisture to develop properly. Check the soil moisture regularly by sticking your finger into the soil. If the top inch feels dry, it’s time to water. Avoid overwatering, as this can lead to root rot.
* Fertilizing: Carrots are not heavy feeders, but they do benefit from occasional fertilization. Use a balanced, water-soluble fertilizer diluted to half strength. Fertilize every 2-3 weeks. Alternatively, you can amend the soil with slow-release fertilizer granules at planting time.
* Weeding: Keep your container free of weeds, as they can compete with your carrots for nutrients and water. Hand-pull any weeds that appear.
* Sunlight: Ensure your carrots are getting at least 6 hours of sunlight per day.
* Pest Control: Carrots are generally pest-resistant, but they can sometimes be bothered by carrot rust flies or aphids. Inspect your plants regularly for signs of pests. If you find any, you can try spraying them with insecticidal soap or neem oil.
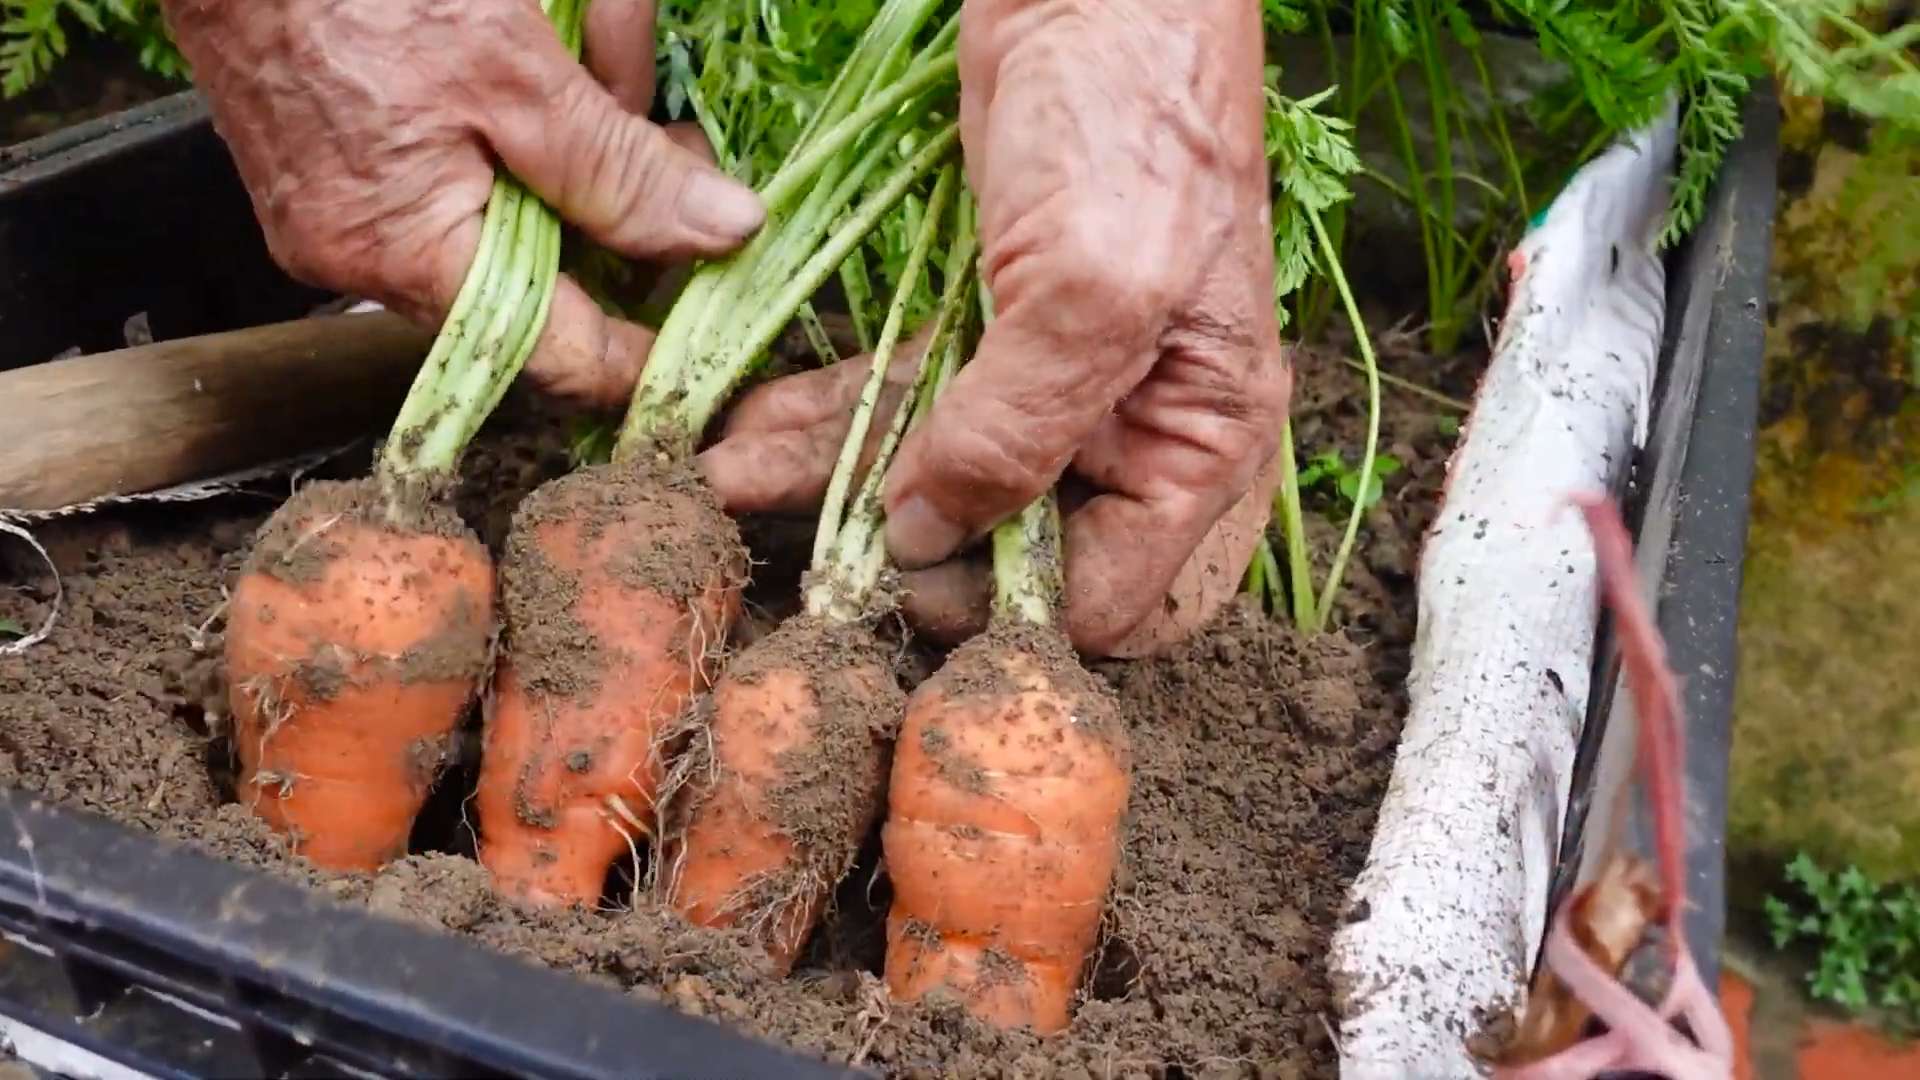
Harvesting Your Carrots
The moment you’ve been waiting for! Here’s how to know when your carrots are ready to harvest:
* Check the Seed Packet: The seed packet will tell you the approximate number of days to maturity. This is a good guideline, but it’s not always accurate.
* Check the Size: Gently brush away some of the soil around the base of the carrot to check its size. If it’s the size you want, it’s probably ready to harvest.
* Pull Carefully: To harvest, gently loosen the soil around the carrot with a trowel or fork. Then, grasp the carrot by the base of the leaves and pull straight up. If the carrot is stubborn, wiggle it gently until it comes loose.
* Enjoy! Wash your freshly harvested carrots and enjoy them raw, roasted, or in your favorite recipes.
Troubleshooting Common Problems
Even with the best care, you might encounter some problems along the way. Here are some common issues and how to fix them:
* Forked or Misshapen Carrots: This is usually caused by rocky or compacted soil. Make sure your soil is loose and free of rocks.
* Small Carrots: This can be caused by overcrowding, lack of sunlight, or poor soil. Thin your seedlings properly, ensure they’re getting enough sunlight, and fertilize regularly.
* Bitter Carrots: This can be caused by inconsistent watering or hot weather. Water regularly and provide shade during the hottest part of the day.
* Root Rot: This is caused by overwatering. Make sure your container has good drainage and avoid overwatering.
Extra Tips for Success
Here are a few extra tips to help you grow the best carrots possible:
* Succession Planting: Sow a new batch of seeds every 2-3 weeks to ensure a continuous harvest throughout the growing season.
* Companion Planting: Plant carrots with onions, garlic, or rosemary to help deter pests.
* Rotate Your Crops: Avoid planting carrots in the same container year after year. This can help prevent soilborne diseases.
* Have Fun! Gardening should be enjoyable. Don’t be afraid to experiment and learn from your mistakes.
Choosing the Right Location
Sunlight is your friend! Carrots need at least 6 hours of direct sunlight each day to thrive. A south-facing balcony or patio is ideal. If you don’t have a spot that gets full sun, consider using a grow light to supplement.
Dealing with Pests and Diseases
While carrots are relatively pest-resistant, they can sometimes be bothered by certain critters. Here’s what to watch out for:
* Carrot Rust Fly: This is a common pest that lays its eggs near the base of the carrot plants. The larvae then burrow into the roots, causing damage. To prevent carrot rust fly, cover your plants with a row cover or netting. You can also try companion planting with onions or garlic, which are known to deter the flies.
* Aphids: These tiny insects can suck the sap from your carrot plants, weakening them. You can control aphids by spraying them with insecticidal soap or neem oil.
* Leaf Spot Diseases: These fungal diseases can cause spots to appear on the leaves of your carrot plants. To prevent leaf spot diseases, avoid overhead watering and ensure good air circulation. If you see signs of disease, remove the affected leaves and spray the plants with a fungicide.
Extending Your Harvest
Want to enjoy fresh carrots for as long as possible? Here are a few tips:
* Cold Frames:
Conclusion
So, there you have it! Growing carrots in small spaces is not only achievable, it’s downright rewarding. We’ve explored the simple yet effective methods that transform balconies, patios, and even windowsills into thriving miniature carrot farms. Forget the sprawling garden – with a little ingenuity and the right approach, you can enjoy the unparalleled taste of homegrown carrots, bursting with freshness and flavor, no matter how limited your space.
Why is this DIY trick a must-try? Because it empowers you to take control of your food source, even in the most urban environments. Imagine the satisfaction of harvesting your own sweet, crisp carrots, knowing exactly where they came from and what went into their growth. It’s a connection to nature, a sustainable practice, and a delicious addition to your meals, all rolled into one compact package. Plus, it’s a fantastic way to introduce children to the joys of gardening and the importance of healthy eating.
But the beauty of this method lies in its adaptability. Feel free to experiment with different carrot varieties. Nantes carrots are a classic choice, but consider trying round varieties like Parisian carrots, which are particularly well-suited for container gardening due to their smaller size. You can also play around with different container sizes and materials. Terracotta pots offer excellent drainage, while plastic containers are lightweight and retain moisture well. Just ensure your chosen container has adequate drainage holes.
Consider companion planting to maximize your small space. Marigolds can deter pests, while basil can improve the flavor of your carrots. Interplanting with radishes is another clever trick, as radishes germinate quickly and help break up the soil, making it easier for carrot seedlings to emerge.
Don’t be afraid to get creative with your soil mix. While a standard potting mix will work, amending it with compost or well-rotted manure will provide your carrots with the nutrients they need to thrive. You can also add a slow-release fertilizer to ensure a steady supply of essential elements.
Growing carrots in small spaces is more than just a gardening project; it’s an opportunity to connect with nature, cultivate your own food, and add a touch of green to your urban landscape.
We wholeheartedly encourage you to give this DIY trick a try. It’s a simple, affordable, and incredibly rewarding experience. And most importantly, we want to hear about your journey! Share your successes, your challenges, and your unique variations in the comments below. Let’s build a community of small-space carrot growers and inspire others to embrace the joys of homegrown produce. What are you waiting for? Grab your seeds, your soil, and your containers, and let’s get growing!
FAQ
What is the best type of container to use for growing carrots in small spaces?
The ideal container for growing carrots should be at least 12 inches deep to accommodate the root growth. The width will depend on how many carrots you want to grow. A good rule of thumb is to allow at least 3 inches of space between each carrot. Terracotta pots are a popular choice because they allow for good drainage and airflow, which can help prevent root rot. However, plastic containers are also suitable and tend to retain moisture better, which can be beneficial in hot climates. Regardless of the material, ensure the container has adequate drainage holes to prevent waterlogging. Fabric pots are another excellent option, as they promote air pruning of the roots, leading to healthier and more robust plants.
How often should I water my container carrots?
Watering frequency depends on several factors, including the weather, the type of container, and the soil mix. Generally, you should aim to keep the soil consistently moist but not waterlogged. Check the soil moisture by sticking your finger about an inch deep into the soil. If it feels dry, it’s time to water. In hot, dry weather, you may need to water daily, while in cooler, wetter weather, you may only need to water every few days. Avoid overwatering, as this can lead to root rot. When watering, water deeply and slowly, allowing the water to soak into the soil and reach the roots.
What kind of soil is best for growing carrots in containers?
Carrots prefer loose, well-draining soil that is rich in organic matter. A good potting mix is a great starting point. You can amend it with compost, well-rotted manure, or other organic materials to improve its fertility and drainage. Avoid using heavy clay soil, as it can compact and hinder root growth. You can also add perlite or vermiculite to the soil mix to improve drainage and aeration. A slightly acidic to neutral pH (around 6.0 to 7.0) is ideal for carrot growth.
How much sunlight do carrots need when grown in containers?
Carrots need at least 6 hours of sunlight per day to thrive. Choose a location that receives plenty of direct sunlight, such as a sunny balcony, patio, or windowsill. If you don’t have a spot that gets full sun, you can supplement with grow lights. Rotate the containers regularly to ensure that all sides of the plants receive adequate sunlight.
What are some common pests and diseases that affect container carrots, and how can I prevent them?
Common pests that can affect container carrots include carrot rust flies, aphids, and nematodes. Diseases include leaf blight and root rot. To prevent pests, consider using row covers or netting to protect your plants. You can also attract beneficial insects, such as ladybugs and lacewings, which prey on aphids. To prevent diseases, ensure good air circulation around your plants and avoid overwatering. Use a well-draining soil mix and consider adding a fungicide to the soil if you live in a humid climate. Regularly inspect your plants for signs of pests or diseases and take action promptly if you notice any problems. Companion planting with marigolds can also help deter pests.
When and how should I harvest my container carrots?
Carrots are typically ready to harvest 60-80 days after planting, depending on the variety. You can check the size of the carrots by gently brushing away the soil around the top of the root. If they are the desired size, you can harvest them. To harvest, gently loosen the soil around the carrot and pull it straight up. If the soil is dry, water it thoroughly before harvesting to make it easier to pull the carrots. You can also use a garden fork to gently lift the carrots out of the soil.
Can I grow carrots in containers indoors?
Yes, you can grow carrots in containers indoors, but you’ll need to provide them with adequate light. A sunny windowsill that receives at least 6 hours of direct sunlight per day is ideal. If you don’t have enough natural light, you can supplement with grow lights. Choose a container that is at least 12 inches deep and use a well-draining soil mix. Water regularly and fertilize every few weeks. Be sure to monitor for pests and diseases, as indoor plants can be more susceptible to problems.
What are some good companion plants for carrots in containers?
Several plants can benefit carrots when grown together in containers. Marigolds deter pests, basil improves flavor, and radishes help break up the soil. Other good companion plants include rosemary, sage, and onions. Avoid planting carrots near fennel, as it can inhibit their growth. Companion planting can help improve the health and yield of your carrot crop.
Leave a Comment