
Grow Luffa Backyard Trick: Unlock the Secrets to Bountiful Luffa Sponges! Have you ever dreamed of growing your own natural sponges right in your backyard? It sounds like something out of a fairytale, doesn’t it? Well, it’s not! With the right know-how, you can cultivate these amazing gourds and enjoy the satisfaction of harvesting your own sustainable cleaning tools.
Luffa, also spelled loofah, has a rich history, dating back centuries in Asia and Africa, where it was not only used for bathing and cleaning but also in traditional medicine and even as a food source when young. Imagine, a plant that can cleanse your body, your home, and even nourish you! For generations, people have relied on the luffa’s natural fibers, appreciating its gentle exfoliating properties and eco-friendly nature.
In today’s world, where we’re all striving to reduce our reliance on synthetic materials and embrace sustainable living, learning how to grow luffa backyard trick is more relevant than ever. Think about it: ditching those plastic shower poufs and disposable sponges for a homegrown, biodegradable alternative. Not only is it better for the environment, but it’s also incredibly rewarding to nurture a plant from seed to sponge. I’m excited to share some simple yet effective DIY tricks that will help you successfully grow luffa backyard trick, even if you’re a beginner gardener. Let’s get started and transform your backyard into a luffa haven!
Grow Your Own Luffa Sponges: A Backyard Adventure!
Hey there, fellow gardeners! Ever thought about growing your own sponges? Yep, you read that right! I’m going to walk you through how to cultivate luffa (also spelled loofah) right in your backyard. It’s a surprisingly rewarding experience, and you’ll never have to buy another synthetic sponge again! Plus, it’s a fantastic conversation starter. Let’s get started!
What You’ll Need:
Before we dive in, let’s gather our supplies. Here’s a list of everything you’ll need to successfully grow luffa:
* Luffa Seeds: You can find these online or at most garden centers. Make sure you’re getting *Luffa aegyptiaca* or *Luffa acutangula* seeds, as these are the varieties that produce the best sponges.
* Seed Starting Trays or Pots: For starting your seeds indoors.
* Seed Starting Mix: A light, well-draining mix is ideal.
* A Sunny Location: Luffa plants need at least 6-8 hours of direct sunlight per day.
* Well-Draining Soil: Luffa thrives in rich, fertile soil that drains well. Amend your soil with compost or aged manure if needed.
* A Strong Trellis or Support System: Luffa vines can grow incredibly long and heavy, so a sturdy trellis is essential. Think about a fence, arbor, or even a custom-built structure.
* Watering Can or Hose: For regular watering.
* Fertilizer: A balanced fertilizer or compost tea to feed your plants.
* Pruning Shears: For trimming the vines as needed.
* Gloves: To protect your hands.
* Patience: Luffa takes a while to mature, so be prepared to wait!
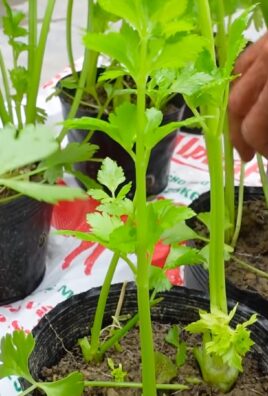
Starting Your Luffa Seeds Indoors (Recommended)
Luffa has a long growing season, so starting your seeds indoors gives them a head start, especially if you live in a cooler climate.
1. Soak the Seeds: Before planting, soak your luffa seeds in warm water for 24 hours. This helps soften the hard outer shell and encourages germination. I usually put them in a small bowl on the counter.
2. Prepare Your Seed Starting Trays: Fill your seed starting trays or pots with seed starting mix. Moisten the mix thoroughly but don’t let it get soggy.
3. Plant the Seeds: Plant the seeds about 1 inch deep in the soil. I usually plant 2-3 seeds per cell or pot to increase my chances of germination.
4. Provide Warmth: Luffa seeds need warmth to germinate. The ideal temperature is between 70-80°F (21-27°C). You can use a heat mat under your seed starting trays to provide consistent warmth.
5. Keep the Soil Moist: Water the seeds gently to keep the soil consistently moist but not waterlogged. I use a spray bottle to avoid disturbing the seeds.
6. Wait for Germination: Germination can take anywhere from 7-21 days, so be patient. Once the seedlings emerge, provide them with plenty of light. A grow light is ideal, but a sunny windowsill can also work.
7. Thin the Seedlings: If you planted multiple seeds per cell, thin them out to one strong seedling per cell once they have a few true leaves.
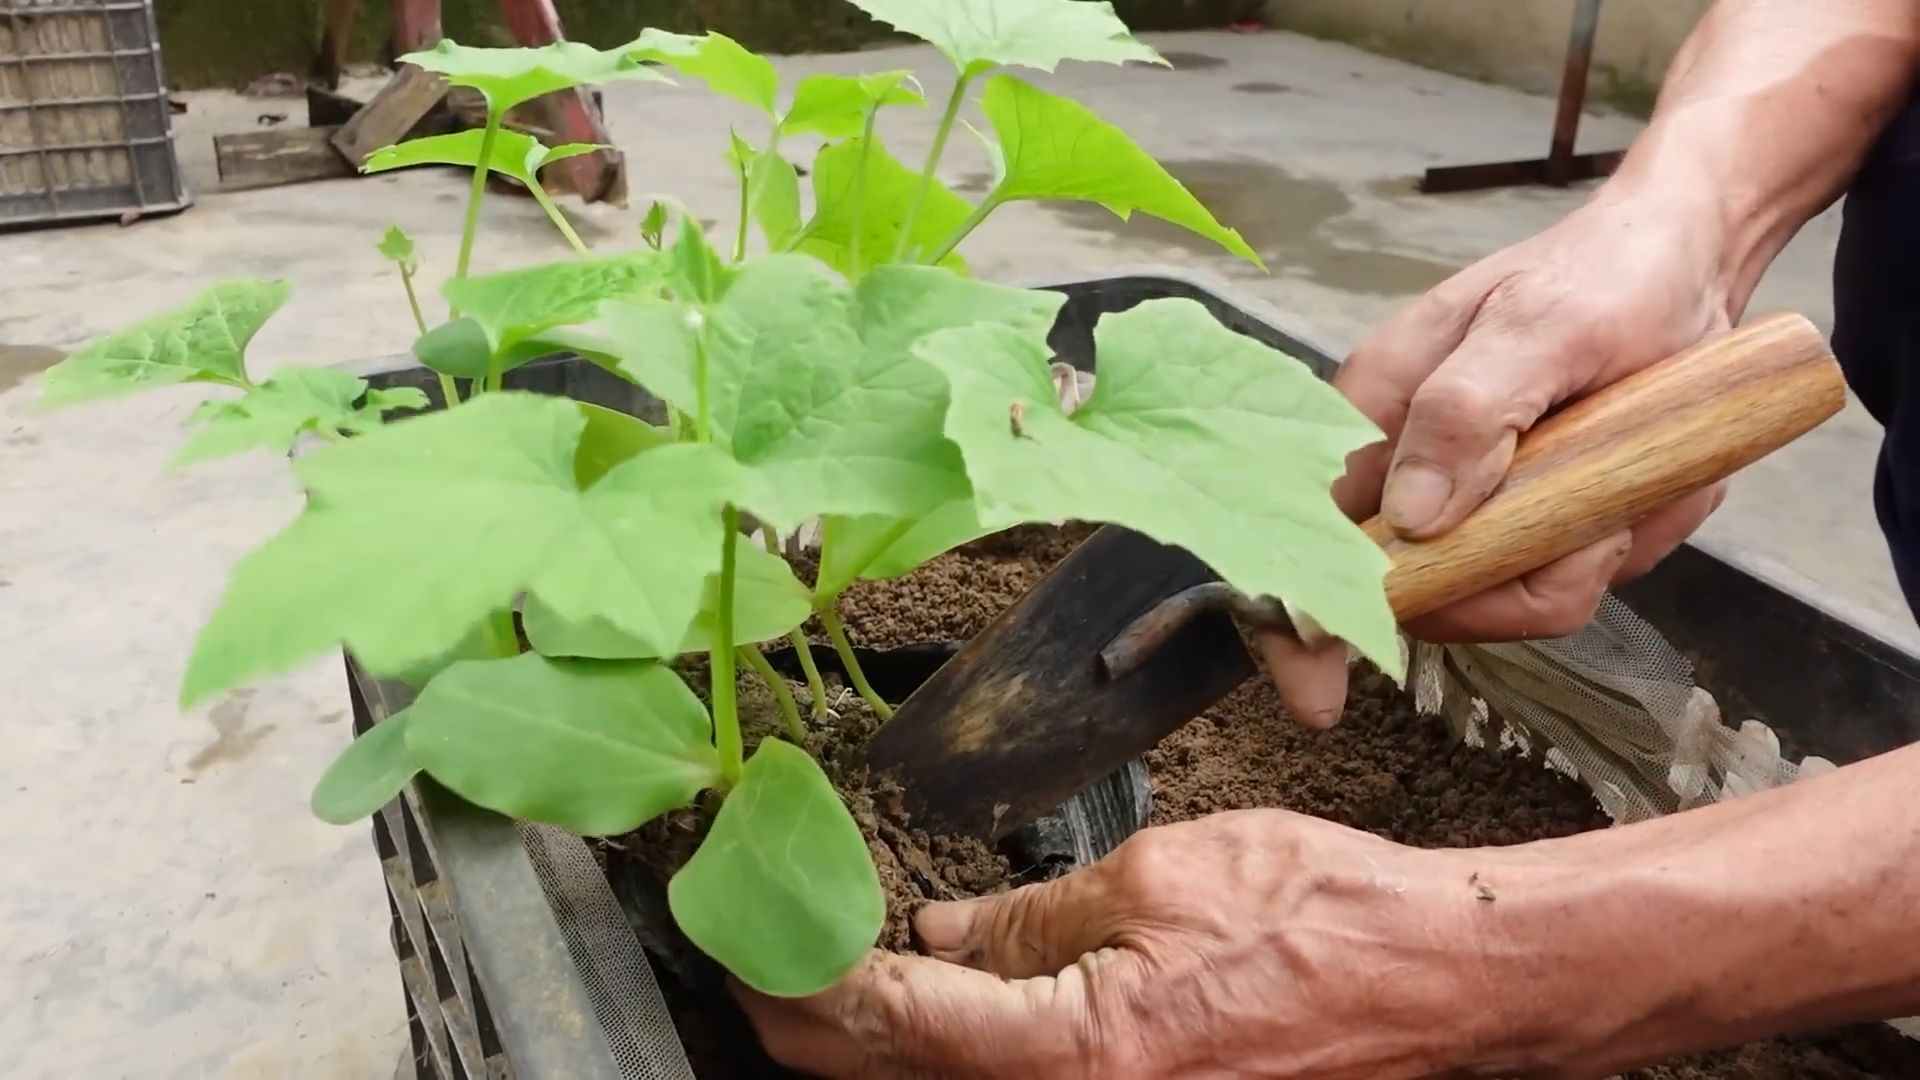
Transplanting Your Luffa Seedlings Outdoors
Once the danger of frost has passed and the soil has warmed up, it’s time to transplant your luffa seedlings outdoors.
1. Harden Off the Seedlings: Before transplanting, you need to harden off your seedlings. This means gradually exposing them to outdoor conditions over a period of 7-10 days. Start by placing them outside in a sheltered location for a few hours each day, gradually increasing the amount of time they spend outdoors.
2. Prepare the Planting Site: Choose a sunny location with well-draining soil. Amend the soil with compost or aged manure to improve its fertility.
3. Install Your Trellis: Before planting, make sure your trellis or support system is in place. Luffa vines can grow very long and heavy, so you’ll need a sturdy structure to support them. I’ve used everything from cattle panels to repurposed fencing.
4. Transplant the Seedlings: Dig holes that are slightly larger than the root balls of your seedlings. Gently remove the seedlings from their pots and place them in the holes. Backfill with soil and water thoroughly. Space the plants about 2-3 feet apart.
5. Mulch Around the Plants: Apply a layer of mulch around the plants to help retain moisture, suppress weeds, and regulate soil temperature. Straw, wood chips, or shredded leaves are all good options.
Caring for Your Luffa Plants
Now that your luffa plants are in the ground, it’s time to provide them with the care they need to thrive.
1. Water Regularly: Luffa plants need consistent moisture, especially during hot, dry weather. Water deeply and regularly, especially when the fruits are developing. Aim for at least 1 inch of water per week.
2. Fertilize: Feed your luffa plants with a balanced fertilizer or compost tea every 2-3 weeks. This will help promote healthy growth and abundant fruit production.
3. Prune the Vines: Luffa vines can grow very aggressively, so you may need to prune them to keep them under control. Trim back any excessive growth and remove any dead or diseased leaves.
4. Train the Vines: As the vines grow, train them to climb up your trellis or support system. You can use twine or plant ties to help guide them.
5. Watch for Pests and Diseases: Luffa plants are generally pest and disease resistant, but they can be susceptible to certain problems, such as squash bugs, vine borers, and powdery mildew. Inspect your plants regularly and take action if you notice any signs of trouble. Neem oil is a great organic solution for many common garden pests.
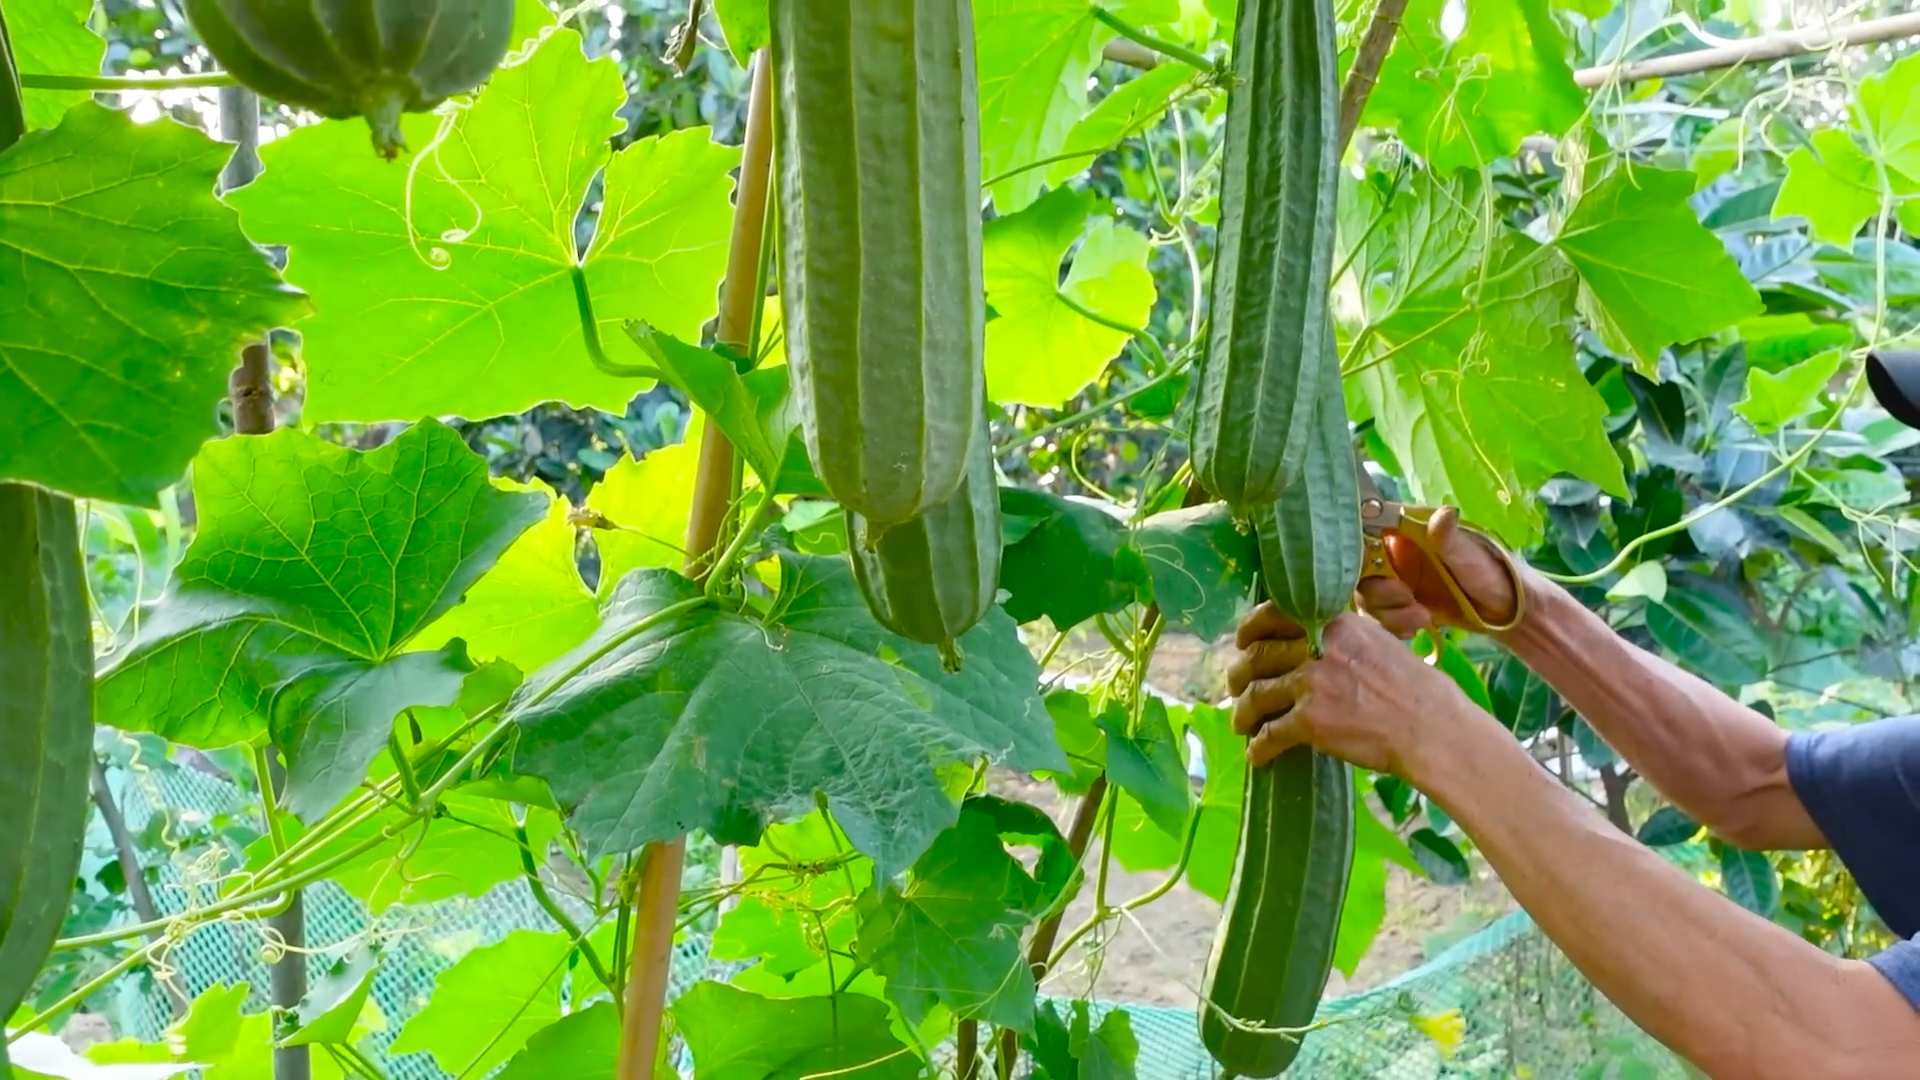
Harvesting and Processing Your Luffa Sponges
This is the most exciting part! Harvesting your own homegrown sponges.
1. Wait for Maturity: Luffa fruits are ready to harvest when they turn yellow or brown and feel lightweight. The skin will become dry and brittle. This usually happens in the late fall.
2. Harvest the Fruits: Cut the fruits from the vine using pruning shears. Leave a few inches of stem attached.
3. Dry the Fruits: Allow the fruits to dry completely. You can do this by hanging them in a well-ventilated area or by placing them on a screen. This can take several weeks. I usually hang mine in the garage.
4. Remove the Skin: Once the fruits are completely dry, the skin will become brittle and easy to remove. You can crack the skin by gently squeezing the fruit or by tapping it on a hard surface. Then, peel off the skin to reveal the sponge inside.
5. Remove the Seeds: Shake out the seeds from the sponge. You can save these seeds for planting next year.
6. Wash the Sponge: Rinse the sponge thoroughly with water to remove any remaining debris. You can also soak it in a solution of water and bleach to disinfect it.
7. Dry the Sponge Again: Allow the sponge to dry completely before using it.
8. Enjoy Your Homemade Luffa Sponge! Now you can enjoy your very own homegrown luffa sponge! Use it in the shower, for washing dishes, or for any other cleaning tasks.
Tips for Success:
* Choose the Right Variety: *Luffa aegyptiaca* and *Luffa acutangula* are the best varieties for sponge production.
* Provide Plenty of Sunlight: Luffa plants need at least 6-8 hours of direct sunlight per day.
* Ensure Good Drainage: Luffa thrives in well-draining soil.
* Provide a Strong Trellis: Luffa vines can grow very long and heavy, so a sturdy trellis is essential.
* Water Regularly: Luffa plants need consistent moisture, especially during hot, dry weather.
* Fertilize Regularly: Feed your luffa plants with a balanced fertilizer or compost tea every 2-3 weeks.
* Be Patient: Luffa takes a while to mature, so be prepared to wait!
Troubleshooting:
* Poor Germination: If your luffa seeds aren’t germinating, make sure they’re getting enough warmth and moisture. You can also try scarifying the seeds by gently rubbing them with sandpaper before soaking them.
* Slow Growth: If your luffa plants are growing slowly
Conclusion
So, there you have it! The backyard luffa growing trick that will transform your garden and provide you with an endless supply of natural sponges. Forget those synthetic, mass-produced sponges that end up in landfills. With a little effort and this simple method, you can cultivate your own sustainable and eco-friendly cleaning tools right in your backyard.
This isn’t just about saving money; it’s about connecting with nature, reducing your environmental footprint, and experiencing the satisfaction of growing something truly useful. Imagine the conversations you’ll have when guests admire your lush luffa vines and learn that you’re the source of their next bath sponge!
The beauty of this DIY project lies in its adaptability. While we’ve outlined a basic method, feel free to experiment with different trellis designs, soil amendments, and even companion planting. Try growing your luffa alongside nitrogen-fixing plants like beans or peas to naturally enrich the soil. Consider adding a layer of mulch around the base of your plants to retain moisture and suppress weeds.
For those in cooler climates, starting your luffa seeds indoors several weeks before the last frost is highly recommended. This will give your seedlings a head start and ensure a longer growing season. You can also explore different luffa varieties. Some produce larger, coarser sponges, while others yield finer, more delicate ones. Experiment to find the variety that best suits your needs and preferences.
Don’t be afraid to get creative with your luffa harvest, too! Beyond using them as bath and kitchen sponges, consider crafting unique gifts for friends and family. Luffa slices can be incorporated into soaps, used as exfoliating pads, or even transformed into decorative items. The possibilities are endless!
We’re confident that once you try this backyard luffa growing trick, you’ll be hooked. It’s a rewarding and sustainable way to add a touch of nature to your daily routine. So, grab some seeds, prepare your garden, and get ready to experience the joy of growing your own luffa sponges.
We’d love to hear about your experiences! Share your photos, tips, and challenges in the comments below. Let’s build a community of luffa growers and inspire others to embrace this eco-friendly alternative. Happy growing!
Frequently Asked Questions (FAQ)
What exactly is a luffa, and how does it become a sponge?
A luffa (also spelled loofah) is a vegetable, specifically the fruit of a vine in the cucumber family (Cucurbitaceae). When the fruit matures and dries on the vine, the outer skin is removed, revealing the fibrous interior. This fibrous structure is what we use as a natural sponge. It’s completely plant-based and biodegradable, making it a sustainable alternative to synthetic sponges.
How long does it take to grow a luffa sponge?
Luffa plants require a long growing season, typically 150-200 days from seed to harvest. This means you’ll need to start your seeds indoors in cooler climates or choose a variety that matures more quickly. The exact time will depend on your climate, the specific luffa variety you’re growing, and the growing conditions. Be patient, and you’ll be rewarded with a bountiful harvest!
What are the ideal growing conditions for luffa?
Luffa plants thrive in warm, sunny locations with well-drained soil. They need at least 6-8 hours of direct sunlight per day. The soil should be rich in organic matter and slightly acidic to neutral in pH (around 6.0-7.0). Consistent watering is essential, especially during hot weather. Providing a sturdy trellis or support structure is crucial, as the vines can grow quite long and heavy.
How do I know when my luffa is ready to harvest?
The best time to harvest your luffa is when the fruit turns yellow or brown and feels lightweight. The skin should be dry and brittle. If you shake the luffa, you should hear the seeds rattling inside. If you wait too long, the luffa may become too dry and the fibers will become brittle. If you harvest too early, the fibers may not be fully developed.
What’s the best way to process a luffa after harvesting?
Once harvested, remove the outer skin by gently cracking it and peeling it away. You may need to soak the luffa in water for a few minutes to soften the skin. After removing the skin, shake out the seeds. You can save these seeds for planting next year. Rinse the luffa thoroughly with water to remove any remaining pulp or debris. Allow the luffa to dry completely in a well-ventilated area. This may take several days or even weeks, depending on the humidity.
Can I eat luffa?
Yes, young luffa fruits can be eaten like zucchini or squash. They have a mild, slightly sweet flavor. However, once the fruit matures and becomes fibrous, it’s no longer suitable for consumption. Only the young, tender fruits are edible.
What are some common problems when growing luffa, and how can I prevent them?
Some common problems include pests like squash bugs and vine borers, as well as diseases like powdery mildew. To prevent these problems, practice good garden hygiene, such as removing dead leaves and debris. You can also use organic pest control methods, such as insecticidal soap or neem oil. Ensure good air circulation around your plants to prevent powdery mildew.
Can I grow luffa in containers?
Yes, you can grow luffa in containers, but you’ll need a large container (at least 20 gallons) and a sturdy trellis. Make sure the container has good drainage. Container-grown luffa may require more frequent watering and fertilization than those grown in the ground.
How can I use my luffa sponges?
Luffa sponges are incredibly versatile. They can be used for bathing, exfoliating, washing dishes, scrubbing vegetables, and even cleaning your car. They’re also great for crafting and DIY projects. Just be sure to rinse your luffa sponge thoroughly after each use and allow it to dry completely to prevent the growth of bacteria. You can even sanitize your luffa sponge by microwaving it for a minute or soaking it in a diluted bleach solution.
How often should I replace my luffa sponge?
With proper care, a luffa sponge can last for several months. However, it’s important to replace it when it starts to show signs of wear and tear or if it develops an unpleasant odor. Since luffa is biodegradable, you can simply compost your old sponges.
Is growing luffa a good way to practice sustainable living?
Absolutely! Growing your own luffa is a fantastic way to reduce your reliance on synthetic products and embrace a more sustainable lifestyle. It’s a low-impact, eco-friendly alternative to mass-produced sponges, and it allows you to connect with nature and appreciate the bounty of your own backyard. Plus, you’ll be reducing waste and contributing to a healthier planet. This **grow luffa backyard trick** is a win-win for you and the environment.
Leave a Comment