
Grow sweeter watermelons? Absolutely! Imagine biting into a juicy, intensely sweet watermelon you nurtured yourself. It’s not just a summer dream; it’s an achievable reality with a few clever tricks and DIY hacks. For generations, gardeners have sought the secret to unlocking the sweetest potential of their watermelons, passing down tips and techniques like treasured family recipes. From ancient Egypt, where watermelons were depicted in hieroglyphics and placed in tombs of pharaohs, to modern backyard gardens, the quest for the perfect watermelon has been a constant.
But why is growing sweeter watermelons so important? Store-bought watermelons often lack the vibrant flavor we crave. They might be watery, bland, or simply not as satisfying as we hoped. This DIY guide is your key to bypassing those disappointments. I’m going to share simple, effective methods to elevate your watermelon game. You’ll learn how to optimize sunlight, soil conditions, and watering techniques to coax out the sweetest, most flavorful watermelons you’ve ever tasted. Get ready to impress your friends and family with your homegrown sweetness!
How to Grow the Sweetest Watermelons You’ve Ever Tasted
Okay, let’s talk watermelons! I love a juicy, sweet watermelon on a hot summer day, and I’m going to share my secrets for growing watermelons that are so sweet, they’ll practically melt in your mouth. It’s not just about luck; it’s about understanding what these thirsty fruits need to thrive.
Choosing the Right Variety
First things first, the variety of watermelon you choose plays a HUGE role in its sweetness. Some varieties are naturally sweeter than others. Here are a few of my favorites:
* ‘Sugar Baby’: This is a classic for a reason. It’s a smaller melon, perfect for smaller gardens, and consistently delivers a super sweet flavor.
* ‘Crimson Sweet’: Another popular choice, ‘Crimson Sweet’ is known for its vibrant red flesh and high sugar content. It’s also relatively disease-resistant.
* ‘Black Diamond’: If you want a big, impressive watermelon, ‘Black Diamond’ is the way to go. It’s not always the *absolute* sweetest, but it’s reliably good and has a beautiful dark green rind.
* ‘Yellow Crimson’: For something different, try ‘Yellow Crimson’. It has yellow flesh that’s surprisingly sweet and refreshing.
* ‘Moon and Stars’: This heirloom variety is not only delicious but also visually stunning, with yellow “moon” and “star” markings on its dark green rind.
When selecting your seeds or seedlings, make sure to buy from a reputable source to ensure you’re getting the variety you expect.
Preparing the Soil: The Foundation for Sweetness
Watermelons are heavy feeders, meaning they need a lot of nutrients to produce those big, sweet fruits. Proper soil preparation is absolutely crucial.
* Sunlight: Watermelons need at least 6-8 hours of direct sunlight per day. Choose a location in your garden that gets plenty of sun.
* Soil Type: Watermelons prefer well-drained, sandy loam soil. If your soil is heavy clay, you’ll need to amend it.
* Soil pH: The ideal soil pH for watermelons is between 6.0 and 6.8. You can test your soil pH with a home testing kit or by sending a sample to your local agricultural extension office.
* Nutrient Enrichment: This is where the magic happens! Watermelons need plenty of organic matter and specific nutrients to develop their sweetness.
Step-by-Step Planting Guide
1. Test and Amend Your Soil: A few weeks before planting, test your soil pH. If it’s too acidic (below 6.0), add lime to raise the pH. If it’s too alkaline (above 6.8), add sulfur to lower the pH.
2. Add Organic Matter: Dig in plenty of compost, well-rotted manure, or other organic matter to improve soil drainage and fertility. I usually aim for a 3-4 inch layer worked into the top 12 inches of soil.
3. Fertilize: Watermelons benefit from a balanced fertilizer at planting time. I like to use a fertilizer with an NPK ratio of 10-10-10 or something similar. Follow the instructions on the fertilizer package for application rates. You can also add bone meal to provide phosphorus, which is essential for root development.
4. Create Mounds or Rows: Watermelons grow best on raised mounds or rows. This helps with drainage and warms the soil more quickly. Create mounds that are about 12 inches high and 3-4 feet wide. If you’re planting in rows, space the rows about 6-8 feet apart.
5. Planting Seeds or Seedlings:
* From Seed: Sow seeds directly into the mounds or rows after the last frost, when the soil has warmed to at least 70°F (21°C). Plant seeds about 1 inch deep and 2-3 feet apart.
* From Seedlings: If you’re starting with seedlings, harden them off for a week before transplanting them into the garden. Dig a hole slightly larger than the root ball, gently remove the seedling from its container, and place it in the hole. Backfill with soil and water thoroughly. Space seedlings 2-3 feet apart.
6. Water Thoroughly: After planting, water the seedlings or seeds thoroughly. Keep the soil consistently moist, but not waterlogged, until the plants are established.
7. Mulch: Apply a layer of mulch around the plants to help retain moisture, suppress weeds, and keep the soil cool. I like to use straw or shredded leaves. Black plastic mulch can also be used to warm the soil and promote faster growth, especially in cooler climates.
Watering: The Key to Juicy Sweetness
Watermelons need consistent watering, especially during fruit development. Inconsistent watering can lead to bland, less sweet melons.
* Deep Watering: Water deeply and infrequently, rather than shallowly and frequently. This encourages the roots to grow deeper, making the plants more drought-tolerant.
* Water at the Base: Avoid watering the foliage, as this can promote fungal diseases. Water at the base of the plants, using a soaker hose or drip irrigation system if possible.
* Monitor Soil Moisture: Check the soil moisture regularly by sticking your finger into the soil. If the top inch or two of soil is dry, it’s time to water.
* Reduce Watering Before Harvest: About two weeks before harvest, reduce watering to concentrate the sugars in the fruit. This will help to make the watermelons even sweeter.
Fertilizing for Maximum Sweetness
While you fertilized at planting time, watermelons need additional feeding throughout the growing season to maximize sweetness.
* Side-Dressing: When the vines start to run, side-dress the plants with a nitrogen-rich fertilizer. This will promote vigorous growth. I like to use fish emulsion or compost tea.
* Potassium Boost: As the fruits begin to develop, switch to a fertilizer that is higher in potassium. Potassium is essential for sugar production and fruit development. Wood ash is a great natural source of potassium. You can also use a commercial fertilizer with a high potassium content.
* Foliar Feeding: Foliar feeding can also be beneficial, especially during periods of stress. Spray the leaves with a diluted solution of seaweed extract or fish emulsion.
Pollination: Ensuring Fruit Set
Watermelons are pollinated by bees, so it’s important to attract pollinators to your garden.
* Plant Flowers: Plant flowers that attract bees, such as sunflowers, zinnias, and lavender.
* Avoid Pesticides: Avoid using pesticides that can harm bees. If you must use pesticides, apply them in the evening when bees are less active.
* Hand-Pollination: If you’re having trouble with pollination, you can hand-pollinate the flowers. Use a small paintbrush to transfer pollen from the male flowers to the female flowers. Female flowers have a small fruit behind the flower, while male flowers do not.
Pest and Disease Control
Watermelons can be susceptible to various pests and diseases. Here are a few common problems and how to deal with them:
* Squash Bugs: These pests can suck the sap from the leaves and stems, weakening the plants. Hand-pick them off the plants or use insecticidal soap.
* Cucumber Beetles: These beetles can spread diseases and damage the leaves and fruits. Use row covers to protect the plants or spray with neem oil.
* Aphids: These small insects can suck the sap from the leaves, causing them to curl and yellow. Spray with insecticidal soap or release ladybugs, which are natural predators of aphids.
* Powdery Mildew: This fungal disease can cause a white powdery coating on the leaves. Improve air circulation and spray with a fungicide.
* Anthracnose: This fungal disease can cause lesions on the leaves, stems, and fruits. Avoid overhead watering and spray with a fungicide.
Pruning for Better Fruit
While not always necessary, pruning watermelons can help to improve fruit size and sweetness.
* Remove Suckers: Remove any suckers that grow from the base of the plant. These suckers will steal energy from the main vines.
* Limit Fruit: If you want to grow larger, sweeter watermelons, limit the number of fruits per vine. Remove any fruits that are not developing properly. I usually aim for 2-3 watermelons per vine.
* Pinch Back Vines: Once the vines have reached a certain length (usually 6-8 feet), pinch back the tips to encourage the plant to focus its energy on fruit development.
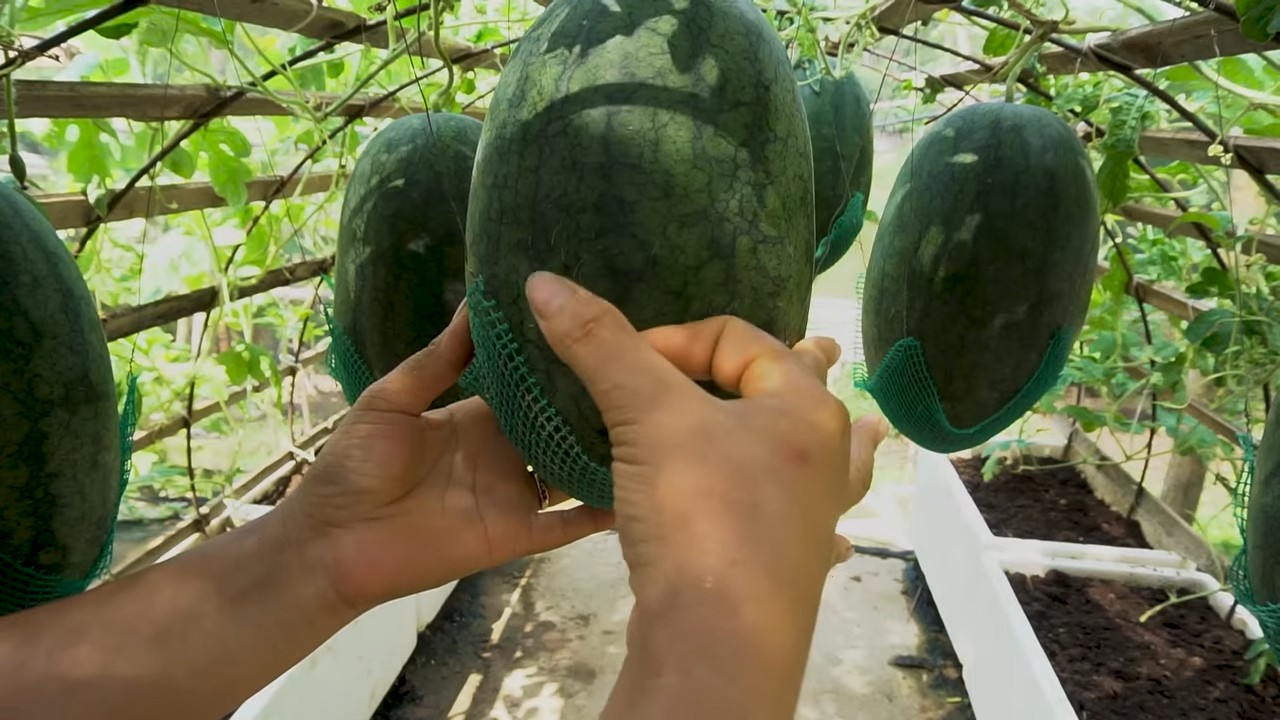
Harvesting: Knowing When It’s Ripe
Knowing when to harvest a watermelon is crucial for getting the sweetest flavor. Here are a few signs that a watermelon is ripe:
* The Tendril:
Conclusion
So, there you have it! The secret to unlocking the sweetest, most intensely flavored watermelons you’ve ever tasted lies within this simple, yet effective DIY trick. Forget bland, watery disappointments. This method, focusing on strategic pruning and targeted nutrient delivery, is a game-changer for any home gardener serious about maximizing the sweetness of their watermelon harvest.
Why is this a must-try? Because it’s about more than just sweetness; it’s about unlocking the full potential of your watermelon plants. By directing the plant’s energy towards fewer, more robust fruits, you’re concentrating the sugars and nutrients, resulting in a flavor explosion that store-bought watermelons simply can’t match. It’s about taking control of the growing process and reaping the rewards of your efforts with each juicy, satisfying bite.
But don’t stop there! Experiment with variations to tailor the technique to your specific growing conditions and preferences. Consider using different types of organic fertilizers to boost sweetness, such as those rich in potassium and phosphorus. You could also try companion planting with herbs like basil or marigolds, which are known to attract beneficial insects and deter pests, further enhancing the health and vigor of your watermelon plants. Another variation is to experiment with different pruning techniques. Some gardeners prefer to leave only one watermelon per vine, while others find that two or three can still produce excellent results. The key is to observe your plants closely and adjust your approach accordingly.
Remember, the success of this DIY trick hinges on consistent care and attention. Regular watering, proper sunlight exposure, and diligent pest control are all essential for healthy watermelon growth. But with a little effort and dedication, you’ll be amazed at the difference this simple technique can make.
We’re confident that once you try this method, you’ll never look at watermelon growing the same way again. The satisfaction of harvesting a perfectly ripe, incredibly sweet watermelon that you’ve nurtured from seed to fruit is truly unparalleled.
So, what are you waiting for? Grab your gardening gloves, head out to your watermelon patch, and put this DIY trick to the test. We’re eager to hear about your experiences! Share your results, tips, and variations in the comments below. Let’s create a community of watermelon enthusiasts who are dedicated to growing the sweetest, most delicious watermelons imaginable. Let us know if this DIY trick helped you grow sweeter watermelons. Happy growing!
Frequently Asked Questions (FAQ)
Q: How does pruning help make watermelons sweeter?
A: Pruning directs the plant’s energy. Watermelon plants naturally produce numerous vines and fruits. However, if left unpruned, the plant’s energy is spread thinly across all these potential fruits. By selectively pruning away excess vines and flowers, you force the plant to concentrate its resources – water, nutrients, and sunlight – into fewer fruits. This concentrated energy translates into higher sugar content and a more intense flavor in the remaining watermelons. It’s like focusing a magnifying glass on a single point – the intensity increases dramatically.
Q: When is the best time to start pruning my watermelon plants?
A: The ideal time to begin pruning is when your watermelon plants have developed several true leaves and have started to produce side shoots or vines. This is typically a few weeks after transplanting or direct sowing. You want to prune before the plant puts too much energy into developing numerous fruits, allowing you to direct its resources more effectively. Look for the first female flowers (those with a small swelling behind the flower, indicating a developing fruit) and prune accordingly.
Q: How much of the watermelon plant should I prune?
A: The extent of pruning depends on your goals and the variety of watermelon you’re growing. A general guideline is to leave only one or two of the strongest, healthiest vines per plant. Remove any other side shoots or vines that are emerging from the main stem. Also, remove any flowers that appear after the first few fruits have set. This ensures that the plant focuses its energy on developing the existing watermelons rather than producing more. Be sure to use clean, sharp pruning shears to avoid damaging the plant.
Q: What kind of fertilizer should I use to boost watermelon sweetness?
A: Fertilizers rich in potassium and phosphorus are particularly beneficial for enhancing watermelon sweetness. Potassium plays a crucial role in sugar transport within the plant, while phosphorus supports overall plant health and fruit development. Look for fertilizers with a higher ratio of potassium and phosphorus compared to nitrogen. Organic options like bone meal, wood ash, and compost tea are excellent choices. Avoid over-fertilizing with nitrogen, as this can promote excessive vegetative growth at the expense of fruit production and sweetness.
Q: How often should I fertilize my watermelon plants?
A: Fertilize your watermelon plants every 2-3 weeks during the growing season, starting when the first fruits begin to set. Follow the instructions on your chosen fertilizer for the correct application rate. Avoid fertilizing too close to harvest, as this can affect the flavor of the watermelons. A soil test can help you determine the specific nutrient needs of your soil and guide your fertilization strategy.
Q: How do I know when my watermelon is ripe and ready to harvest?
A: Several indicators can help you determine when your watermelon is ripe. First, look at the tendril closest to the fruit stem. When this tendril turns brown and dries out, it’s a good sign that the watermelon is nearing maturity. Second, check the underside of the watermelon where it rests on the ground. This spot, known as the ground spot, should turn from white to a creamy yellow color. Finally, give the watermelon a gentle thump. A ripe watermelon will produce a deep, hollow sound. If it sounds dull or flat, it’s likely not ready yet.
Q: Can I use this DIY trick for all types of watermelons?
A: Yes, this DIY trick can be applied to most types of watermelons. However, the specific pruning techniques and fertilization strategies may need to be adjusted based on the variety you’re growing. For example, smaller, personal-sized watermelons may require less pruning than larger varieties. Research the specific needs of your chosen watermelon variety to optimize your growing approach.
Q: What if I don’t have a lot of space for growing watermelons?
A: Even if you have limited space, you can still grow watermelons using this DIY trick. Consider growing smaller, bush-type watermelon varieties that are specifically bred for container gardening. You can also train the vines to grow vertically on a trellis or fence to save space. Be sure to provide adequate support for the developing fruits to prevent them from breaking off the vine.
Q: What are some common pests and diseases that affect watermelons, and how can I prevent them?
A: Common pests that affect watermelons include aphids, squash bugs, and vine borers. Diseases include powdery mildew, fusarium wilt, and anthracnose. To prevent these problems, practice good garden hygiene by removing plant debris and weeds regularly. Use row covers to protect young plants from pests. Choose disease-resistant watermelon varieties. Ensure proper air circulation around the plants to prevent fungal diseases. Consider using organic pest control methods like insecticidal soap or neem oil.
Q: What if my watermelons are still not sweet after trying this trick?
A: Several factors can contribute to a lack of sweetness in watermelons, even after implementing this DIY trick. Insufficient sunlight, inadequate watering, and poor soil quality can all affect sugar production. Make sure your watermelon plants are receiving at least 6-8 hours of direct sunlight per day. Water deeply and regularly, especially during hot, dry weather. Amend your soil with compost or other organic matter to improve its fertility and drainage. Also, consider the variety of watermelon you’re growing. Some varieties are naturally sweeter than others. If you’ve tried all these measures and your watermelons are still not sweet, it may be worth trying a different variety next season.
Leave a Comment