
Apple cider vinegar salt mix – sounds like a salad dressing gone wrong, right? But trust me, this simple concoction is a game-changer for your home garden! I know, I know, DIY projects can sometimes feel like a chore, but what if I told you this one could save you time, money, and a whole lot of frustration?
For centuries, gardeners have sought natural and effective ways to combat weeds and pests without resorting to harsh chemicals. While the exact origins of using vinegar and salt in gardening are a bit murky, the practice likely stems from observing their natural properties. Vinegar, with its acetic acid, acts as a desiccant, drying out unwanted plants. Salt, similarly, disrupts the water balance in plant cells.
Let’s face it, nobody enjoys spending hours pulling weeds or battling stubborn pests that are munching on your precious plants. That’s where this apple cider vinegar salt mix comes in. It’s an easy, eco-friendly alternative to commercial herbicides and pesticides, and it’s something you can whip up with ingredients you probably already have in your pantry. I’m going to show you how to create this powerful solution and use it effectively to keep your garden thriving. Get ready to say goodbye to unwanted guests and hello to a healthier, happier garden!
DIY Natural Weed Killer: Apple Cider Vinegar & Salt Powerhouse
Hey there, fellow DIY enthusiasts! Tired of those pesky weeds popping up in your garden and driveway cracks? And are you like me, wanting to avoid harsh chemicals? Well, you’re in the right place! I’m going to share my go-to, super effective, and totally natural weed killer recipe using just two simple ingredients: apple cider vinegar and salt. Trust me, this stuff works wonders!
Why Apple Cider Vinegar and Salt?
Before we dive into the how-to, let’s quickly chat about why this combination is so powerful.
* Apple Cider Vinegar (ACV): The acetic acid in ACV is what does the trick. It essentially draws moisture out of the weed, causing it to dehydrate and eventually die. The higher the acidity, the better it works. I usually opt for a 5% acidity ACV, which you can find at most grocery stores.
* Salt: Salt acts as a desiccant, meaning it also helps to dry out the weed. Plus, it disrupts the plant’s ability to absorb water and nutrients from the soil. It’s like a double whammy for those unwanted plants!
What You’ll Need
Okay, let’s gather our supplies. This is a pretty straightforward project, so you probably already have most of these things lying around:
* Apple Cider Vinegar (5% acidity or higher)
* Table Salt (or any kind of salt you have on hand)
* Spray Bottle (a sturdy one is best)
* Measuring Cup
* Measuring Spoons
* Gloves (optional, but recommended to protect your hands)
* Eye Protection (optional, but a good idea to prevent splashes)
* Funnel (makes pouring easier)
Mixing the Magic Potion: Step-by-Step Instructions
Alright, let’s get down to business! Here’s how I mix up my weed-killing concoction:
1. Prepare Your Work Area: I like to do this outside or in a well-ventilated area, just in case. Lay down some newspaper or an old towel to protect your surfaces from any spills.
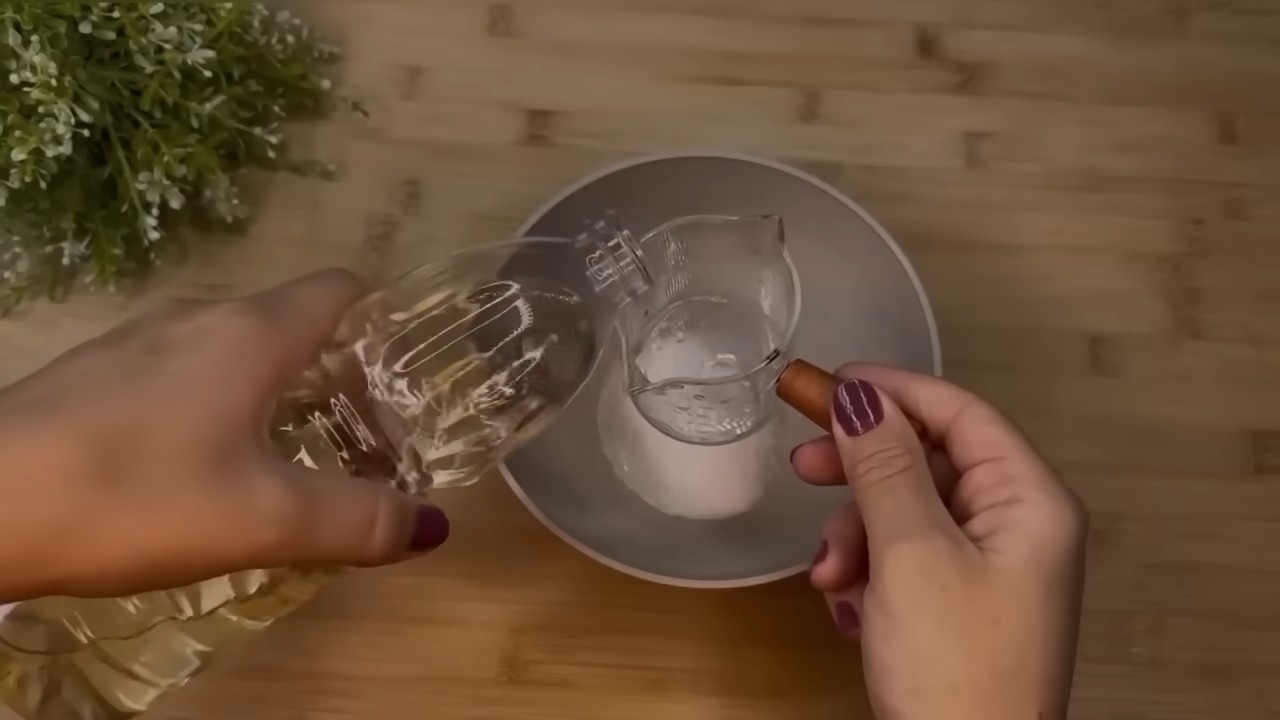
2. Measure the Apple Cider Vinegar: Pour 1 gallon (128 ounces) of apple cider vinegar into your spray bottle. This is my go-to amount, but you can adjust it depending on how much area you need to cover. If you’re starting small, try halving or quartering the recipe.
3. Add the Salt: Now, for the salt! I usually add about 1 cup of salt per gallon of ACV. Pour the salt into the spray bottle.
4. Shake it Up! This is the most important part! Put the lid on the spray bottle tightly and shake vigorously until the salt is completely dissolved. This might take a few minutes, so be patient. You don’t want any salt crystals clogging up your sprayer.
5. Optional: Add a Surfactant (Dish Soap): While not strictly necessary, adding a tablespoon of dish soap can help the mixture stick to the weeds better. This is especially helpful for weeds with waxy leaves. If you choose to add dish soap, do it after the salt is dissolved and shake gently to avoid creating too many bubbles.
Applying the Weed Killer: Targeting Those Pesky Plants
Now that you have your weed-killing solution ready, it’s time to put it to work! Here’s how I apply it for the best results:
1. Choose a Sunny Day: This mixture works best on a sunny day when the weeds are actively growing. The sun will help to dry out the weeds faster.
2. Spray Directly on the Weeds: Aim the spray bottle directly at the weeds you want to eliminate. Make sure to thoroughly saturate the leaves and stems. You want to see the mixture dripping off the plant.
3. Avoid Spraying Desirable Plants: This is crucial! This mixture will kill any plant it comes into contact with, so be very careful not to spray your flowers, vegetables, or grass. I sometimes use a piece of cardboard as a shield to protect nearby plants.
4. Be Patient: It might take a few days to see the full effects of the weed killer. The weeds will start to wilt and turn brown as they dry out.
5. Reapply if Necessary: Some stubborn weeds might require a second application. If you don’t see any improvement after a few days, spray them again.
Important Considerations and Tips
Okay, before you go wild spraying weeds, here are a few extra things to keep in mind:
* Soil Salinity: Repeated use of salt can increase the salinity of the soil, which can be harmful to other plants. I recommend using this method sparingly and only in areas where you don’t plan to grow anything else.
* Vinegar Strength: While 5% acidity ACV works well, you can also use horticultural vinegar, which has a higher acidity (around 20%). Horticultural vinegar is more potent and will kill weeds faster, but it’s also more corrosive and requires extra caution. Always wear gloves and eye protection when using horticultural vinegar.
* Weed Type: This mixture works best on young, actively growing weeds. It might not be as effective on mature weeds with deep roots.
* Weather Conditions: Avoid spraying on windy days, as the mixture can drift and damage other plants. Also, avoid spraying before rain, as the rain will wash away the mixture.
* Safety First: While this is a natural weed killer, it’s still important to take precautions. Wear gloves and eye protection to avoid skin and eye irritation. Keep the mixture away from children and pets.
* Test in an Inconspicuous Area: Before spraying a large area, test the mixture on a small, inconspicuous area to make sure it doesn’t damage any desirable plants.
* Alternative Additives: Some people add other ingredients to their weed killer mixtures, such as lemon juice (for extra acidity) or essential oils (for added weed-killing power). Feel free to experiment and see what works best for you.
Dealing with Different Types of Weeds
Not all weeds are created equal! Some are easier to kill than others. Here’s my experience with different types of weeds and how to tackle them:
* Annual Weeds (e.g., Crabgrass, Chickweed): These weeds are generally easier to kill with the ACV and salt mixture. Just one or two applications should do the trick.
* Perennial Weeds (e.g., Dandelions, Thistle): These weeds have deep roots and can be more difficult to eradicate. You might need to reapply the mixture several times, and you might even need to dig them up to get rid of them completely.
* Grassy Weeds (e.g., Bermuda Grass): Grassy weeds can be tough to kill without harming your lawn. Be very careful when spraying these weeds, and consider using a targeted herbicide if necessary.
* Poison Ivy/Oak: While the ACV and salt mixture can help to kill poison ivy and oak, it’s important to wear protective clothing and gloves when handling these plants. Also, be aware that the dead plants can still cause a rash, so dispose of them carefully.
Troubleshooting: What to Do If It’s Not Working
Sometimes, even the best DIY weed killer doesn’t work perfectly. Here are a few common problems and how to fix them:
* Weeds Aren’t Dying: If the weeds aren’t dying, make sure you’re using a strong enough concentration of ACV and salt. You might need to increase the amount of salt or use horticultural vinegar. Also, make sure you’re spraying the weeds thoroughly and on a sunny day.
* Spray Bottle is Clogged: If your spray bottle is clogged, it’s probably because the salt wasn’t completely dissolved. Try shaking the bottle again or straining the mixture through a cheesecloth to remove any undissolved salt.
* Desirable Plants are Damaged: If you accidentally sprayed your desirable plants, rinse them off with water immediately. Hopefully, this will minimize the damage.
Long-Term Weed Prevention
Killing weeds is only half the battle. To keep them from coming back, here are a few long-term weed prevention strategies I use:
* Mulch: Mulch is your best friend! It blocks sunlight from reaching the soil, which prevents weed seeds from germinating. I use a variety of mulches, including wood chips, straw, and shredded leaves.
* Ground Cover Plants: Planting ground cover plants can also help to suppress weeds. Choose plants that are dense and spread quickly.
* Healthy Lawn: A healthy lawn is less susceptible to weeds. Make sure to fertilize your lawn regularly and water it deeply but infrequently.
* Hand-Pulling: Sometimes, the best way to get rid of weeds is to pull them by hand. This is especially effective for small weeds that haven’t had a chance to spread.
* Pre-Emergent Herbicides:

Conclusion
So, there you have it! This simple yet incredibly effective apple cider vinegar salt mix is more than just a DIY trick; it’s a game-changer for anyone seeking a natural and affordable solution for a multitude of household and personal care needs. We’ve explored its versatility, from tackling stubborn stains and odors to providing a soothing skin treatment. The beauty of this concoction lies in its simplicity – just two readily available ingredients, apple cider vinegar and salt, working synergistically to deliver impressive results.
Why is this a must-try? Because it empowers you to ditch harsh chemicals and embrace a more sustainable and eco-friendly approach. It’s cost-effective, reducing your reliance on expensive store-bought products. And most importantly, it’s incredibly effective, delivering noticeable improvements in various applications.
But don’t just take our word for it! We encourage you to experiment and discover the full potential of this apple cider vinegar salt mix.
Here are a few suggestions and variations to get you started:
* **Infused Cleaning Power:** Add a few drops of your favorite essential oil, such as lemon, lavender, or tea tree, to the mix for an extra boost of fragrance and antibacterial properties. This is particularly useful when using the mix as a household cleaner.
* **Skin Soothing Bath:** For a relaxing and detoxifying bath, add a cup of the apple cider vinegar salt mix to warm bathwater. Soak for 20-30 minutes to soothe sore muscles and soften skin.
* **Foot Soak Relief:** Tired, achy feet? A foot soak with this mix can work wonders. Use a smaller concentration and soak your feet for 15-20 minutes to reduce swelling and relieve discomfort.
* **Scalp Treatment:** Dilute the mix further with water and use it as a scalp rinse after shampooing. This can help to balance the pH of your scalp, reduce dandruff, and promote healthy hair growth. Be sure to test a small area first to ensure no irritation.
* **Vary the Salt:** While regular table salt works fine, consider using Epsom salt for its added magnesium benefits, especially in bath and foot soak applications. Sea salt is another great option, offering trace minerals that can be beneficial for the skin.
We’re confident that once you experience the benefits of this apple cider vinegar salt mix, you’ll wonder how you ever lived without it. It’s a versatile, affordable, and natural solution that deserves a place in every home.
So, go ahead, give it a try! We’re eager to hear about your experiences. Share your tips, tricks, and success stories in the comments below. Let’s build a community of DIY enthusiasts who are passionate about natural and effective solutions. We believe that this simple mix can make a big difference in your life, and we can’t wait to see what you discover!
Frequently Asked Questions
What exactly is the apple cider vinegar salt mix good for?
The apple cider vinegar salt mix is incredibly versatile. It can be used as a natural cleaner for various surfaces in your home, helping to remove stains, odors, and grime. It’s also effective as a skin treatment, helping to soothe irritation, exfoliate dead skin cells, and balance pH levels. Furthermore, it can be used in bath soaks and foot soaks to relieve muscle soreness, reduce swelling, and promote relaxation. The specific applications depend on the concentration and method of use.
What type of apple cider vinegar should I use?
For most applications, raw, unfiltered apple cider vinegar with “the mother” is recommended. “The mother” is a colony of beneficial bacteria that adds to the vinegar’s health benefits. However, for cleaning purposes, regular pasteurized apple cider vinegar can also be used effectively. The key is to ensure that you’re using genuine apple cider vinegar, not just apple-flavored vinegar.
What kind of salt is best for the mix?
Regular table salt works perfectly well for most cleaning applications. However, for skin treatments and bath soaks, consider using Epsom salt or sea salt. Epsom salt contains magnesium, which can help to relax muscles and reduce inflammation. Sea salt contains trace minerals that can be beneficial for the skin. The choice of salt depends on your specific needs and preferences.
What is the ideal ratio of apple cider vinegar to salt?
The ideal ratio depends on the intended use. For general cleaning, a 1:1 ratio of apple cider vinegar to salt is a good starting point. For skin treatments, it’s best to dilute the mix further with water to avoid irritation. For bath soaks, a cup of the mix per tub of water is usually sufficient. Experiment with different ratios to find what works best for you. Always test a small area first, especially when using the mix on your skin.
How do I store the apple cider vinegar salt mix?
Store the mix in a clean, airtight container in a cool, dark place. A glass jar is ideal. The mix should last for several months without losing its effectiveness. If you notice any changes in color or odor, discard the mix.
Can I use this mix on all surfaces?
While the apple cider vinegar salt mix is generally safe for most surfaces, it’s always a good idea to test it on a small, inconspicuous area first. Avoid using it on delicate surfaces such as marble, granite, or waxed wood, as the acidity of the vinegar can damage them.
Is the apple cider vinegar salt mix safe for my skin?
The apple cider vinegar salt mix can be beneficial for the skin, but it’s important to use it with caution. Always dilute the mix with water before applying it to your skin. Avoid using it on open wounds or irritated skin. If you experience any redness, itching, or burning, discontinue use immediately. It’s always best to consult with a dermatologist before using any new skin treatment, especially if you have sensitive skin.
Can I use this mix to get rid of weeds?
Yes, the apple cider vinegar salt mix can be an effective natural weed killer. The vinegar dries out the weeds, and the salt dehydrates them. However, be careful when using it around desirable plants, as it can also harm them. Apply the mix directly to the weeds, avoiding contact with other plants.
How often can I use the apple cider vinegar salt mix?
The frequency of use depends on the application. For cleaning, you can use the mix as needed. For skin treatments, it’s best to use it sparingly, no more than once or twice a week. For bath soaks, you can soak for 20-30 minutes, once or twice a week. Pay attention to your body’s response and adjust the frequency accordingly.
What if I don’t have apple cider vinegar? Can I use white vinegar instead?
While apple cider vinegar is preferred due to its added benefits and milder scent, white vinegar can be used as a substitute, especially for cleaning purposes. However, white vinegar is more acidic than apple cider vinegar, so you may need to dilute it further with water. Keep in mind that the results may not be exactly the same.


Leave a Comment