
Growing Blueberries in Pots might seem like a challenge, but trust me, it’s totally achievable, even if you don’t have a sprawling backyard! Have you ever dreamed of stepping outside and plucking juicy, sun-ripened blueberries straight from your own plant? Well, stop dreaming and start doing! This guide is packed with simple, effective DIY tricks and hacks that will transform your patio, balcony, or even a sunny windowsill into a blueberry bonanza.
Blueberries have a rich history, deeply rooted in North American indigenous cultures, where they were not only a vital food source but also held medicinal and spiritual significance. Today, we appreciate them for their delicious flavor and incredible health benefits. But let’s face it, not everyone has the ideal acidic soil that blueberries crave. That’s where container gardening comes in!
I know what you’re thinking: “Can I really grow blueberries in a pot?” Absolutely! This DIY guide will walk you through everything you need to know, from selecting the right pot and soil to providing the perfect amount of sunlight and water. We’ll cover common pitfalls and share insider tips to ensure your blueberry plants thrive. Imagine the satisfaction of harvesting your own organic blueberries, knowing you nurtured them from tiny plants to bountiful producers. So, let’s ditch the store-bought berries and embark on this exciting journey of growing blueberries in pots – you’ll be amazed at how easy and rewarding it is!

Grow Onions Easily: A Beginner’s Guide to Bountiful Bulbs
Okay, so you want to grow onions? Awesome! It’s easier than you might think, and there’s nothing quite like the taste of a homegrown onion. I’m going to walk you through everything you need to know, from choosing the right type to harvesting your delicious bulbs. Let’s get started!
Choosing Your Onions: Sets, Seeds, or Transplants?
Before we get our hands dirty, we need to decide how we’re going to start our onions. You have three main options: sets, seeds, and transplants. Each has its pros and cons, so let’s break them down:
* **Onion Sets:** These are small, immature onion bulbs that have already started growing. They’re the easiest and fastest way to get a harvest. I usually recommend these for beginners because they’re pretty foolproof. You just pop them in the ground, and they take off!
* **Onion Seeds:** Starting from seed gives you the widest variety of onion types to choose from. However, it requires more time and effort. You’ll need to start the seeds indoors several weeks before the last frost. It’s a bit more work, but the reward of growing exactly the variety you want is worth it for some.
* **Onion Transplants:** These are young onion plants that have already been started for you. They’re a good middle ground between sets and seeds. You get a head start without having to deal with the initial germination process.
For this guide, I’m going to focus on using onion sets because they’re the simplest for beginners.
Preparing Your Garden Bed: Location, Location, Location!
Onions need a sunny spot with well-drained soil. They’re heavy feeders, so you’ll want to enrich the soil with plenty of organic matter. Here’s what I do to get my garden bed ready:
* **Sunlight:** Choose a location that gets at least 6-8 hours of direct sunlight per day. Onions need plenty of sunshine to thrive.
* **Soil Drainage:** Onions hate wet feet! Make sure your soil drains well. If you have heavy clay soil, amend it with compost, aged manure, or other organic matter to improve drainage.
* **Soil pH:** Onions prefer a slightly acidic to neutral soil pH, around 6.0 to 7.0. You can test your soil pH with a soil testing kit.
* **Fertilizing:** Before planting, work in a generous amount of compost or aged manure into the soil. I also like to add a slow-release organic fertilizer formulated for vegetables. This gives the onions a good boost of nutrients right from the start.
* **Weed Removal:** Clear the area of any weeds. Onions don’t compete well with weeds, so it’s important to start with a clean slate.
Planting Your Onion Sets: Getting Them in the Ground
Now for the fun part – planting! Here’s how to plant your onion sets:
1. **Timing is Key:** Plant your onion sets in early spring as soon as the soil can be worked. In my area, that’s usually around March or April. You want to give them plenty of time to grow before the summer heat sets in.
2. **Spacing:** Space the onion sets about 4-6 inches apart in rows that are 12-18 inches apart. This gives them enough room to grow without overcrowding.
3. **Planting Depth:** Plant the sets about 1 inch deep, with the pointy end facing up. You just want the top of the set to be barely covered with soil.
4. **Watering:** Water the newly planted sets thoroughly. This helps settle the soil around the roots and gets them off to a good start.
5. **Mulching:** Apply a layer of mulch around the onions. This helps retain moisture, suppress weeds, and regulate soil temperature. I like to use straw or shredded leaves.
Caring for Your Onions: Watering, Weeding, and Feeding
Once your onions are planted, it’s important to give them the care they need to thrive. Here’s what I do to keep my onions happy and healthy:
1. **Watering:** Onions need consistent moisture, especially during bulb formation. Water deeply whenever the top inch of soil feels dry. Avoid overwatering, as this can lead to rot.
2. **Weeding:** Keep the area around your onions free of weeds. Weeds compete with onions for nutrients and water. Hand-pull weeds regularly or use a hoe to cultivate the soil.
3. **Fertilizing:** Onions are heavy feeders, so you’ll need to fertilize them regularly. About a month after planting, side-dress the onions with a nitrogen-rich fertilizer. I like to use fish emulsion or blood meal. Repeat this every 2-3 weeks throughout the growing season.
4. **Pest and Disease Control:** Onions are relatively pest-free, but they can be susceptible to onion maggots and thrips. Keep an eye out for these pests and take action if you see them. You can use insecticidal soap or neem oil to control them. Also, watch out for fungal diseases like downy mildew and purple blotch. Ensure good air circulation around the plants and avoid overhead watering to prevent these diseases. If you see signs of disease, treat with a fungicide.
5. **Bolting Prevention:** Sometimes, onions will send up a flower stalk, which is called bolting. This usually happens when the onions experience stress, such as a sudden change in temperature. If your onions bolt, the bulb will stop growing and become tough and bitter. To prevent bolting, try to keep the onions consistently watered and fertilized. If you see a flower stalk, cut it off as soon as possible.
Harvesting Your Onions: Knowing When They’re Ready
Harvesting is the most rewarding part of growing onions! Here’s how to know when your onions are ready to harvest:
1. **Timing:** Onions are typically ready to harvest in late summer or early fall, about 100-120 days after planting.
2. **Signs of Maturity:** The tops of the onions will start to turn yellow and fall over. This is a sign that the bulbs are mature and ready to be harvested.
3. **Harvesting:** Once the tops have fallen over, gently loosen the soil around the onions with a garden fork. Then, carefully pull the onions out of the ground.
4. **Curing:** After harvesting, you’ll need to cure the onions to help them store longer. To cure onions, spread them out in a single layer in a warm, dry, well-ventilated place for 2-3 weeks. The outer skins will dry and become papery.
5. **Storing:** Once the onions are cured, you can store them in a cool, dry, dark place. I like to store mine in mesh bags or old pantyhose. They should last for several months.
Troubleshooting: Common Onion Problems and Solutions
Even with the best care, you might encounter some problems when growing onions. Here are some common issues and how to fix them:
* **Small Bulbs:** If your onions are small, it could be due to several factors, such as poor soil, lack of sunlight, or insufficient watering. Make sure your onions are getting enough sunlight, water, and nutrients. Amend the soil with compost or fertilizer if needed.
* **Bolting:** As mentioned earlier, bolting can be caused by stress. Try to keep the onions consistently watered and fertilized. Cut off any flower stalks as soon as you see them.
* **Pest Infestations:** Onion maggots and thrips can damage onion plants. Use insecticidal soap or neem oil to control these pests.
* **Disease:** Fungal diseases like downy mildew and purple blotch can affect onions. Ensure good air circulation around the plants and avoid overhead watering. Treat with a fungicide if necessary.
* **Rotting:** Overwatering can lead to rot. Make sure your soil drains well and avoid overwatering.
Onion Varieties: Choosing the Right One for You
There are many different varieties of onions to choose from, each with its own unique flavor and characteristics. Here are a few popular varieties:
* **Yellow Onions:** These are the most common type of onion. They have a strong, pungent flavor and are good for cooking.
* **White Onions:** White onions have a milder flavor than yellow onions. They’re often used in Mexican and Southwestern cuisine.
* **Red Onions:** Red onions have a sweet, mild flavor and are often used in salads and sandwiches.
* **Sweet Onions:** Sweet onions, such as Vidalia and Walla Walla, have a very mild, sweet flavor. They’re great for eating raw or grilling.
* **Shallots:** Shallots are small, elongated onions with a delicate flavor. They’re often used in French cuisine.
Experiment with different varieties to find your favorites!
Enjoying Your Harvest: Cooking with Homegrown Onions
Now that you’ve grown your own onions, it’s time to enjoy the fruits (or rather, bulbs) of your labor
Conclusion
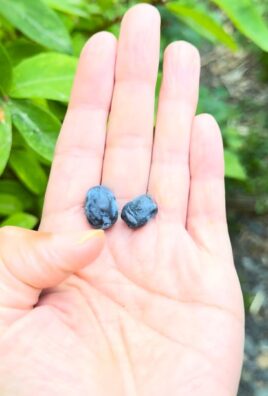
So, there you have it! Growing blueberries in pots is not only achievable, but it’s also a rewarding experience that brings the joy of fresh, homegrown berries right to your doorstep, even if you’re limited on space. We’ve walked through the essential steps, from selecting the right blueberry variety and pot size to preparing the acidic soil and providing consistent care.
Why is this DIY trick a must-try? Because it democratizes blueberry cultivation! No longer is a sprawling garden a prerequisite for enjoying these antioxidant-rich gems. Container gardening allows you to control the growing environment, protecting your plants from harsh weather, poor soil conditions, and even certain pests. Plus, the portability of pots means you can chase the sun, ensuring your blueberries receive the optimal amount of light for maximum fruit production.
But the beauty of this method lies in its adaptability. Feel free to experiment with different blueberry varieties to find your personal favorite. Consider adding companion plants like marigolds or basil to your pots to deter pests and attract beneficial insects. You can also adjust the soil mix to suit the specific needs of your chosen variety. For example, if you’re growing a rabbiteye blueberry, you might want to slightly increase the amount of organic matter in the soil.
Don’t be afraid to get creative with your container choices, either. While plastic pots are practical and affordable, terracotta pots can add a touch of rustic charm to your patio or balcony. Just remember that terracotta pots tend to dry out faster, so you’ll need to water your blueberries more frequently.
The key to success with growing blueberries in pots is consistent care and attention. Regularly check the soil moisture, fertilize as needed, and prune your plants annually to encourage healthy growth and abundant fruit production. With a little effort, you’ll be rewarded with a bountiful harvest of delicious, homegrown blueberries that you can enjoy fresh, in smoothies, or baked into your favorite treats.
We wholeheartedly encourage you to give this DIY trick a try. It’s a fun, educational, and ultimately delicious way to connect with nature and enjoy the fruits (literally!) of your labor. And most importantly, we want to hear about your experiences! Share your tips, tricks, and triumphs with us in the comments below. Let’s build a community of container blueberry growers and learn from each other. What varieties are you growing? What challenges have you faced? What successes have you celebrated? Your insights could be invaluable to other aspiring blueberry gardeners. So, grab your pots, soil, and blueberry plants, and let’s get growing! Remember, the journey of a thousand blueberries begins with a single pot. Happy gardening!
Frequently Asked Questions (FAQ)
What is the best type of blueberry to grow in a pot?
The best type of blueberry to grow in a pot depends on your climate and personal preferences. However, some varieties are particularly well-suited for container gardening.
* **Dwarf Varieties:** Look for dwarf or compact varieties like ‘Top Hat,’ ‘Sunshine Blue,’ or ‘Pink Popcorn.’ These varieties are naturally smaller and more manageable in pots.
* **Southern Highbush:** If you live in a warmer climate, Southern Highbush varieties like ‘O’Neal’ or ‘Emerald’ are good choices. They are adapted to milder winters and produce delicious berries.
* **Northern Highbush:** In colder climates, Northern Highbush varieties like ‘Bluecrop’ or ‘Duke’ are more suitable. They are cold-hardy and produce large, flavorful berries.
* **Rabbiteye:** Rabbiteye blueberries, such as ‘Brightwell’ or ‘Tifblue,’ are another option, especially in the Southeast. They are known for their vigor and disease resistance.
Consider your local climate and the specific characteristics of each variety when making your selection. Researching the chill hour requirements (the number of hours below a certain temperature needed for proper fruit set) is also crucial.
What size pot do I need for growing blueberries?
The size of the pot is crucial for the health and productivity of your blueberry plant. A pot that is too small will restrict root growth and limit the plant’s ability to absorb nutrients and water. A pot that is too large can lead to waterlogging and root rot.
* **For Young Plants (1-2 years old):** Start with a pot that is at least 15-20 inches in diameter and depth. This will provide enough space for the roots to develop.
* **For Mature Plants (3+ years old):** As your blueberry plant grows, you’ll need to transplant it into a larger pot. A mature blueberry plant will thrive in a pot that is at least 24 inches in diameter and depth.
* **Consider the Variety:** Dwarf varieties may be happy in slightly smaller pots, while larger varieties will need more space.
Remember that it’s always better to err on the side of a slightly larger pot than a pot that is too small.
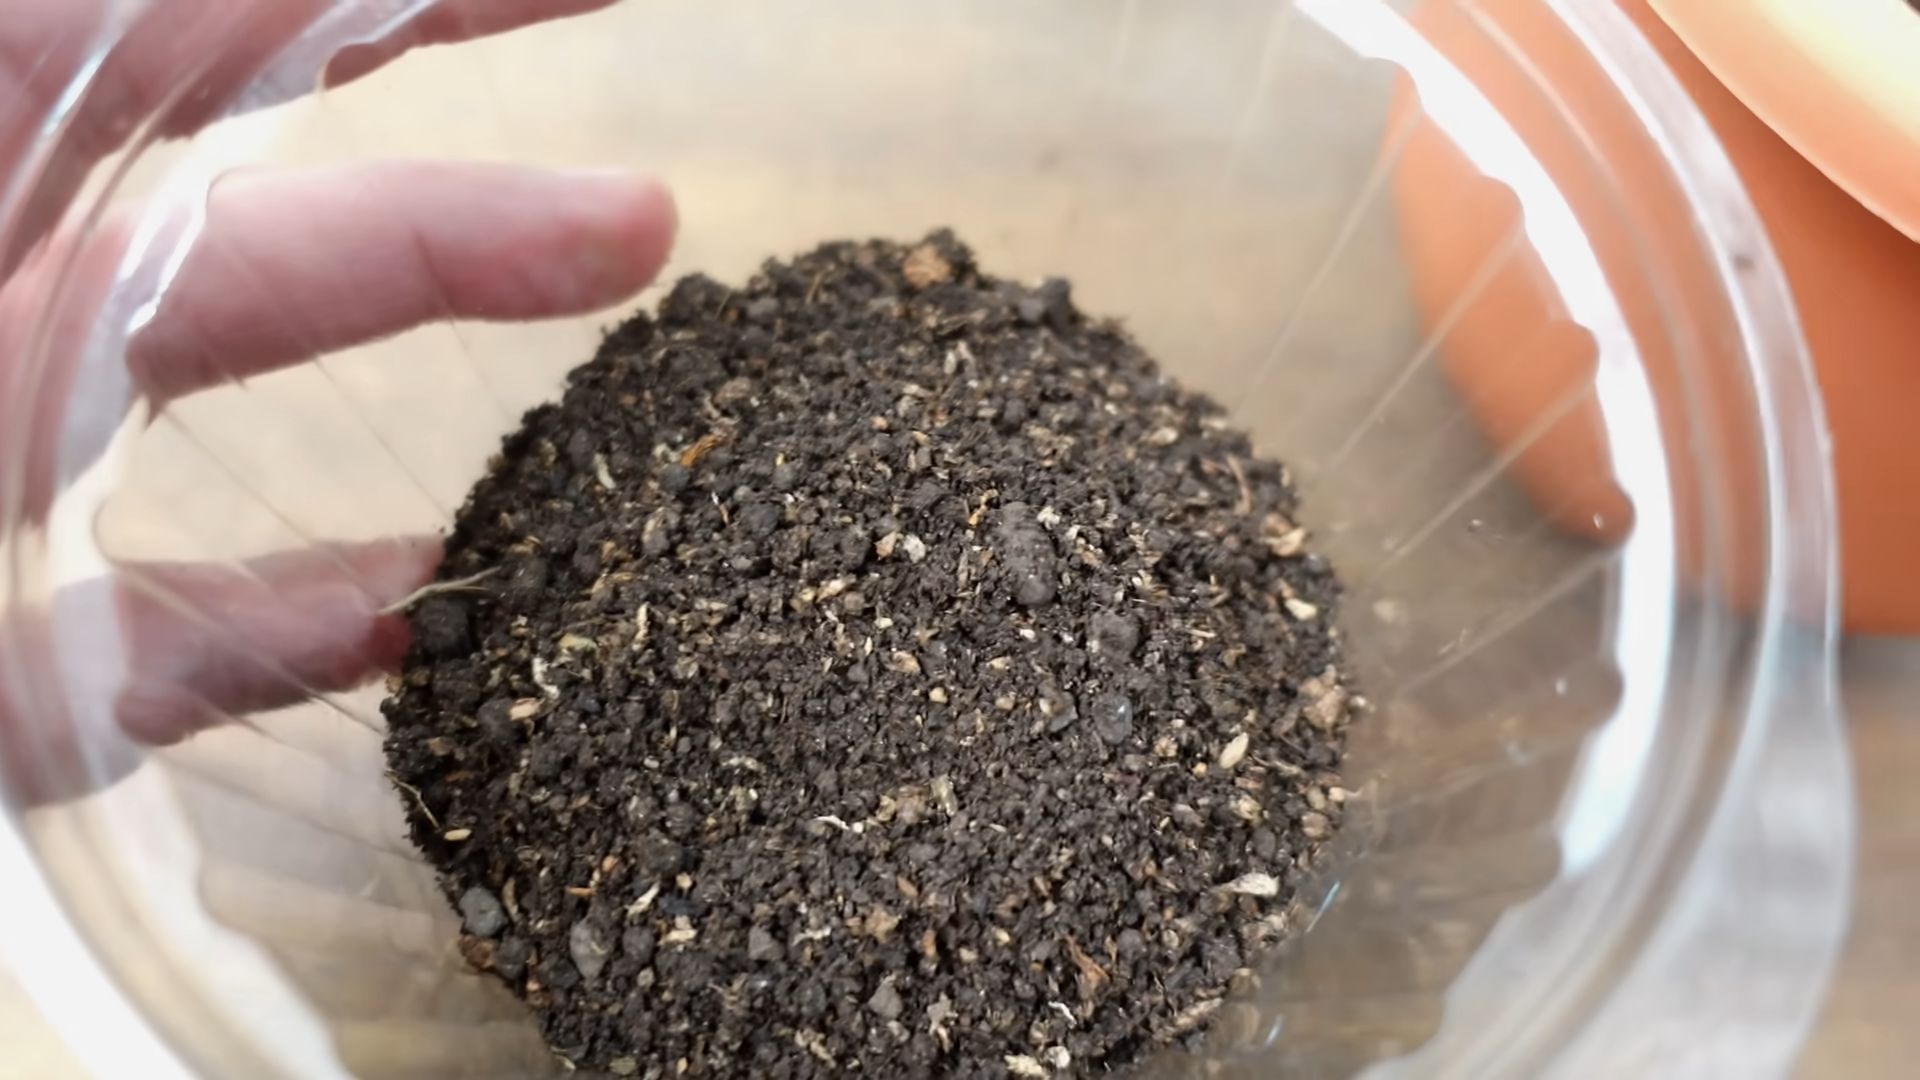
What type of soil is best for blueberries in pots?
Blueberries require acidic soil with a pH between 4.5 and 5.5. Most potting mixes are not acidic enough for blueberries, so you’ll need to amend the soil to create the right environment.
* **Use an Acidic Potting Mix:** Look for a potting mix specifically formulated for acid-loving plants like azaleas, rhododendrons, or camellias.
* **Amend with Peat Moss:** Peat moss is a great way to increase the acidity of the soil. Mix peat moss with your potting mix in a ratio of 1:1 or 2:1.
* **Add Sulfur:** You can also add elemental sulfur to the soil to lower the pH. Follow the instructions on the sulfur package carefully, as too much sulfur can be harmful to your plants.
* **Test the Soil pH:** Use a soil pH meter or a soil testing kit to check the pH of your soil. Adjust the soil as needed to maintain the desired pH range.
Proper soil acidity is essential for blueberry plants to absorb nutrients from the soil.
How often should I water my potted blueberries?
Watering is critical for the health of your potted blueberries. The frequency of watering will depend on several factors, including the weather, the size of the pot, and the type of soil.
* **Check the Soil Moisture:** The best way to determine if your blueberries need watering is to check the soil moisture. Stick your finger into the soil about an inch deep. If the soil feels dry, it’s time to water.
* **Water Deeply:** When you water, water deeply until water drains out of the bottom of the pot. This ensures that the entire root system is moistened.
* **Water Regularly:** During hot, dry weather, you may need to water your blueberries every day. In cooler weather, you may only need to water them every few days.
* **Avoid Overwatering:** Overwatering can lead to root rot, so be careful not to water too frequently. Allow the soil to dry out slightly between waterings.
How often should I fertilize my potted blueberries?
Blueberries need regular fertilization to thrive and produce abundant fruit.
* **Use an Acid-Loving Fertilizer:** Use a fertilizer specifically formulated for acid-loving plants. These fertilizers contain the nutrients that blueberries need to grow and produce fruit.
* **Fertilize in Spring:** Fertilize your blueberries in early spring, just as new growth begins to emerge.
* **Fertilize Again After Fruiting:** Fertilize again after the blueberry harvest to help the plant recover and prepare for the next growing season.
* **Follow the Instructions:** Follow the instructions on the fertilizer package carefully. Over-fertilizing can damage your plants.
How do I prune my potted blueberries?
Pruning is essential for maintaining the health and productivity of your blueberry plants.
* **Prune in Late Winter or Early Spring:** Prune your blueberries in late winter or early spring, before new growth begins.
* **Remove Dead, Damaged, or Diseased Branches:** Start by removing any dead, damaged, or diseased branches.
* **Thin Out Crowded Branches:** Thin out crowded branches to improve air circulation and light penetration.
* **Remove Low-Growing Branches:** Remove any branches that are growing close to the ground.
* **Encourage New Growth:** Prune back older, less productive branches to encourage new growth.
Proper pruning will help your blueberry plants produce more fruit and stay healthy for years to come.

Leave a Comment