
Growing Brussel Sprouts in a Small Space might seem like a daunting task, conjuring images of sprawling farms rather than cozy balconies. But fear not, fellow gardening enthusiasts! I’m here to tell you that delicious, homegrown Brussel sprouts are absolutely within your reach, even if your “garden” is more of a postage stamp than a pasture.
For centuries, these mini-cabbages have been a staple in European cuisine, with roots tracing back to, you guessed it, Brussels, Belgium. While traditionally grown in large fields, modern gardening techniques have opened up a world of possibilities for urban and small-space gardeners like us.
Why bother with the effort, you ask? Well, store-bought Brussel sprouts simply can’t compare to the fresh, nutty flavor of homegrown ones. Plus, knowing exactly where your food comes from and how it’s grown is incredibly rewarding. And let’s be honest, who wouldn’t want to impress their friends and family with a plate of perfectly roasted, homegrown Brussel sprouts? This DIY guide will equip you with the knowledge and tricks you need to successfully growing Brussel Sprouts in a Small Space, transforming your limited area into a thriving, veggie-producing haven. Get ready to roll up your sleeves and discover the joy of small-space gardening!
Growing Brussels Sprouts in a Small Space: A DIY Guide
Okay, so you’re itching to grow your own Brussels sprouts but you’re short on space? Don’t worry, I’ve got you covered! Growing these little cabbages on a stalk doesn’t require acres of land. With a little planning and some clever techniques, you can absolutely cultivate a thriving Brussels sprout patch, even in a small garden, balcony, or patio. Let’s dive in!
Choosing the Right Variety
First things first, not all Brussels sprouts are created equal, especially when space is a concern. We need to pick varieties that are more compact and mature relatively quickly.
* Consider ‘Early Dwarf Improved’: This variety is specifically bred for smaller gardens. It produces smaller sprouts on a more compact plant.
* Look for ‘Red Ball’: This is another good option, offering beautiful reddish-purple sprouts and a slightly smaller plant size compared to some of the larger varieties.
* Check Maturity Dates: Pay close attention to the “days to maturity” listed on the seed packet or plant label. Shorter maturity times mean you’ll be harvesting sooner and the plants won’t need to occupy your space for as long.
Preparing Your Growing Space
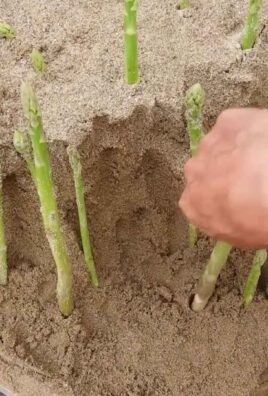
Brussels sprouts need a good amount of sunlight and well-draining soil. Let’s get your growing area ready:
* Sunlight is Key: Aim for at least 6 hours of direct sunlight per day. If you’re growing on a balcony or patio, observe how the sun moves throughout the day to choose the sunniest spot.
* Container Choice: If you’re using containers, choose ones that are at least 12 inches in diameter and 12 inches deep. This gives the roots enough room to spread out. Fabric pots are a great option because they allow for good drainage and air circulation.
* Soil Matters: Use a high-quality potting mix that’s well-draining and rich in organic matter. You can also amend your existing garden soil with compost or well-rotted manure to improve its fertility and drainage.
* Spacing: Even with compact varieties, Brussels sprouts need some space to breathe. If planting in the ground, space plants about 18-24 inches apart. In containers, you can usually get away with one plant per container.
Planting Your Brussels Sprouts
Now for the fun part – getting those little sprouts started!
1. Starting from Seed (Optional): You can start Brussels sprouts from seed indoors about 4-6 weeks before the last expected frost. Sow seeds about ½ inch deep in seed-starting trays or small pots. Keep the soil moist and provide plenty of light. Once the seedlings have a few sets of true leaves, you can transplant them into larger containers or directly into your garden.
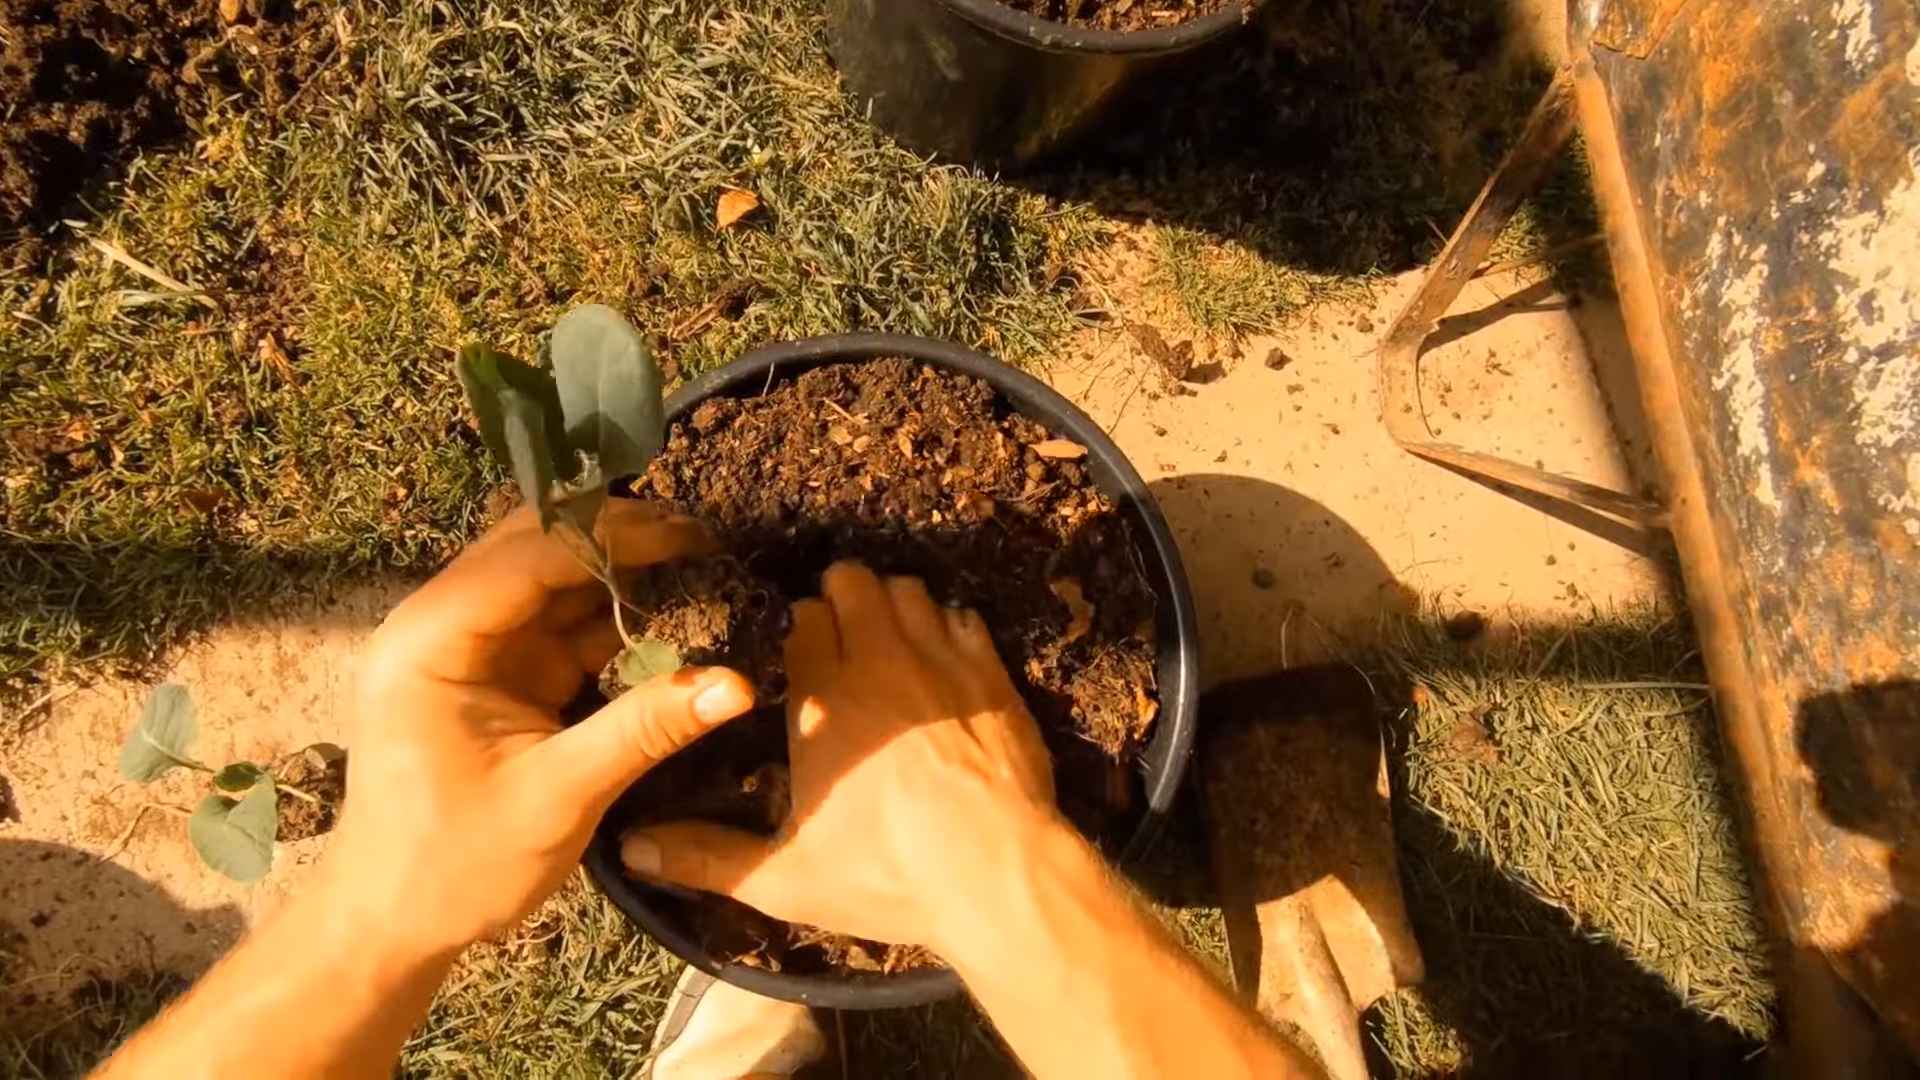
2. Transplanting Seedlings: If you purchased seedlings from a nursery, gently remove them from their containers and loosen the roots slightly. Dig a hole that’s slightly larger than the root ball and place the seedling in the hole. Backfill with soil and gently firm it around the base of the plant.
3. Water Thoroughly: After planting, water the Brussels sprouts thoroughly to help them establish their roots.
4. Mulch for Moisture: Add a layer of mulch around the base of the plants to help retain moisture and suppress weeds. Straw, wood chips, or shredded leaves work well.
Caring for Your Brussels Sprouts
Consistent care is crucial for healthy Brussels sprouts. Here’s what you need to do:
1. Watering: Brussels sprouts need consistent moisture, especially during hot, dry weather. Water deeply whenever the top inch of soil feels dry to the touch. Avoid overhead watering, as this can lead to fungal diseases.
2. Fertilizing: Brussels sprouts are heavy feeders, so they need regular fertilization. Use a balanced fertilizer (like 10-10-10) every 2-3 weeks, following the instructions on the package. You can also side-dress with compost or well-rotted manure.
3. Pest Control: Keep an eye out for common pests like cabbage worms, aphids, and flea beetles. Hand-picking pests, using insecticidal soap, or covering plants with row covers can help control infestations.
4. Support (If Needed): As Brussels sprouts grow taller, they may need some support to prevent them from falling over, especially in windy areas. You can use stakes or tomato cages to provide support.
5. Remove Yellowing Leaves: As the plant grows, the lower leaves will naturally turn yellow and die. Remove these leaves to improve air circulation and prevent disease.
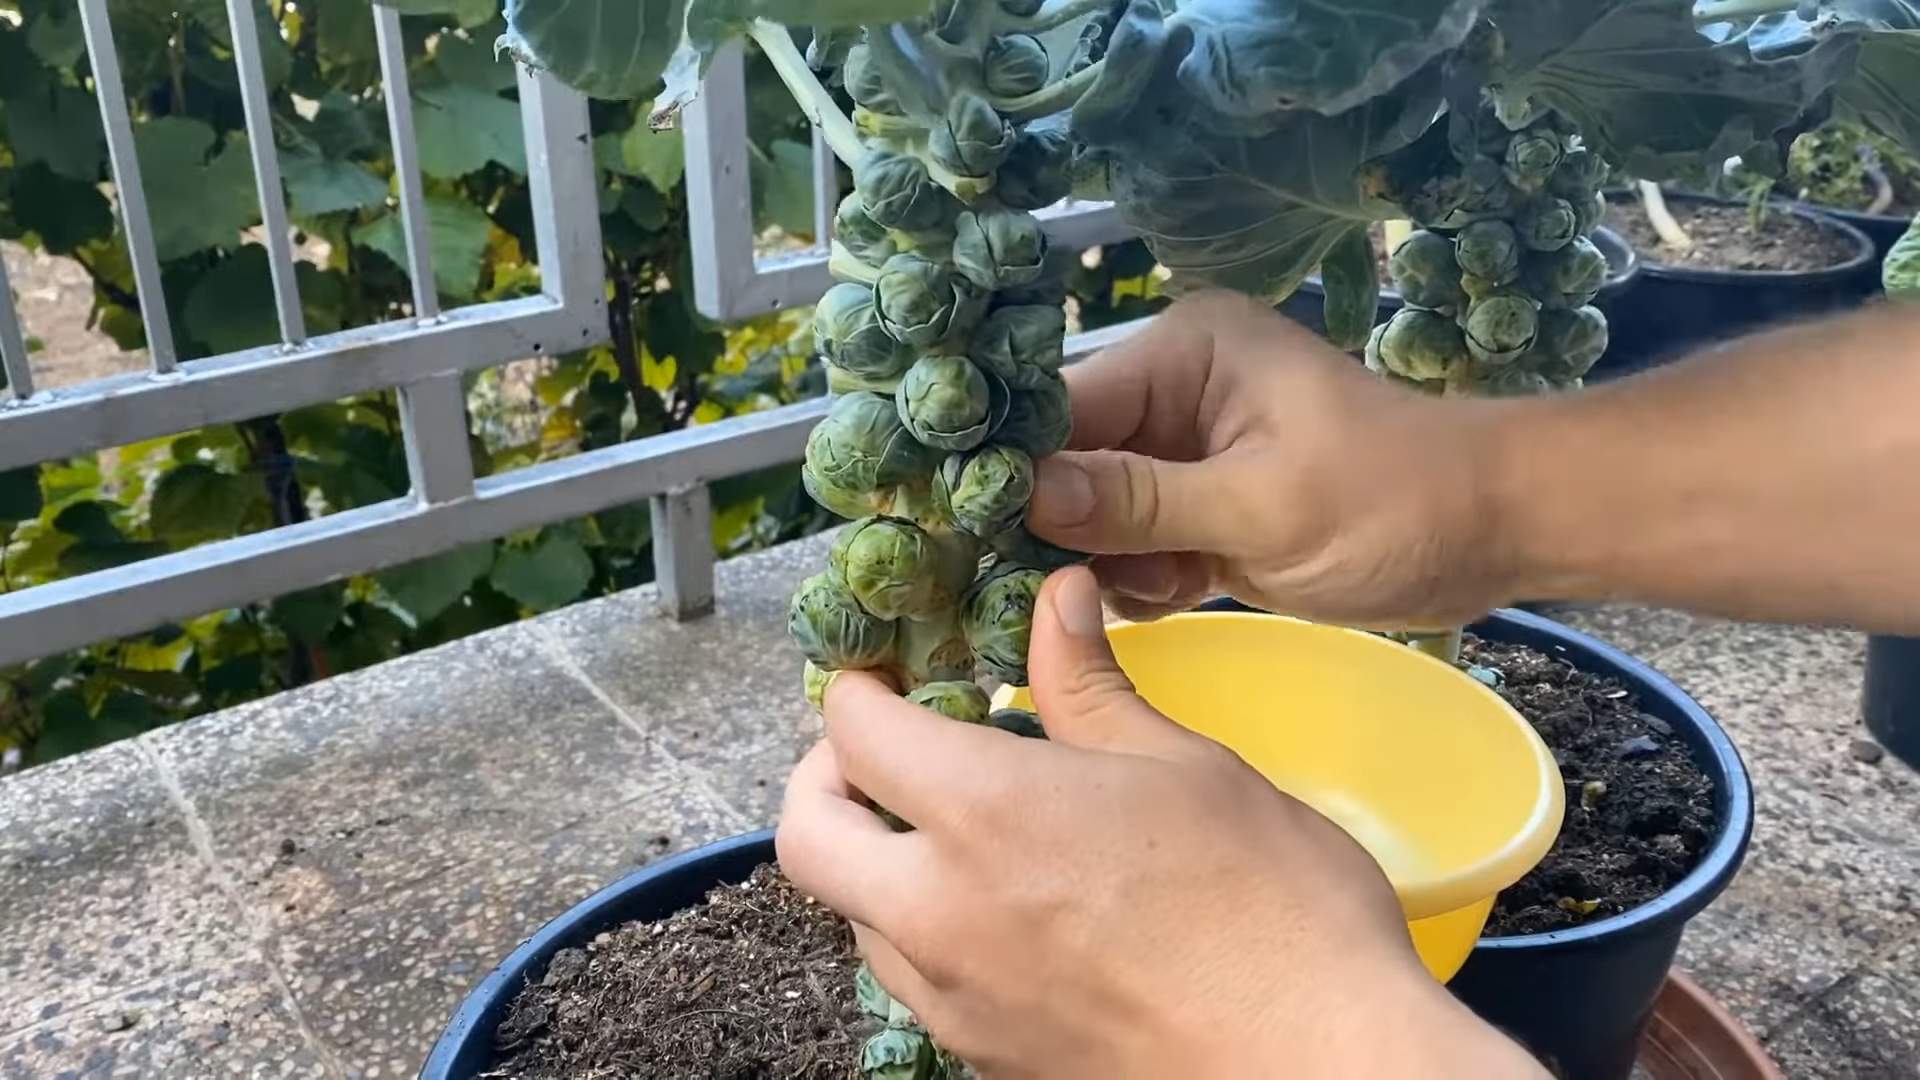
Harvesting Your Brussels Sprouts
The moment we’ve all been waiting for! Harvesting those delicious sprouts.
1. Timing is Everything: Brussels sprouts are typically ready to harvest in the fall or early winter, after a few light frosts. The sprouts should be firm, green, and about 1-2 inches in diameter.
2. Harvesting Technique: Start harvesting from the bottom of the stalk, working your way up. Twist or snap off the sprouts, leaving the upper sprouts to continue developing.
3. Continue Harvesting: You can continue harvesting Brussels sprouts over several weeks, as the sprouts mature.
4. Cold Weather Benefits: Brussels sprouts actually taste better after a frost, as the cold temperatures convert some of the starches into sugars.
Maximizing Space with Companion Planting
Companion planting is a fantastic way to make the most of your small space. Certain plants can actually benefit Brussels sprouts by deterring pests, improving soil health, or providing shade.
* Marigolds: These cheerful flowers deter nematodes and other soil pests.
* Nasturtiums: These edible flowers attract aphids away from your Brussels sprouts.
* Dill: Dill attracts beneficial insects that prey on cabbage worms.
* Chamomile: Chamomile is said to improve the flavor of Brussels sprouts.
* Mint: Plant mint in containers near your Brussels sprouts to deter cabbage moths. Be careful, mint can be invasive if planted directly in the ground.
* Avoid Planting Near: Avoid planting Brussels sprouts near strawberries, tomatoes, or pole beans, as these plants can compete for nutrients or attract pests.
Dealing with Common Problems
Even with the best care, you might encounter some problems while growing Brussels sprouts. Here’s how to troubleshoot some common issues:
* Sprouts Not Forming: This can be caused by insufficient sunlight, poor soil fertility, or inconsistent watering. Make sure your plants are getting enough sun, fertilize regularly, and water deeply whenever the soil feels dry.
* Sprouts are Loose and Leafy: This can be caused by hot weather or over-fertilizing with nitrogen. Try to provide some shade during the hottest part of the day and avoid using high-nitrogen fertilizers.
* Cabbage Worms: These green caterpillars can quickly devour your Brussels sprout leaves. Hand-pick them off the plants or use Bacillus thuringiensis (Bt), a natural insecticide.
* Aphids: These tiny insects suck the sap from plants, causing them to weaken. Spray plants with insecticidal soap or blast them off with a strong stream of water.
* Clubroot: This fungal disease causes swollen, distorted roots and stunted growth. Prevent clubroot by improving soil drainage, liming the soil to raise the pH, and practicing crop rotation.
Extending the Growing Season
If you live in an area with a short growing season, you can extend the harvest by using season extension techniques:
* Cold Frames: Cold frames are simple structures that protect plants from frost and cold temperatures. You can build your own cold frame or purchase a commercially made one.
* Row Covers: Row covers are lightweight fabrics that are placed over plants to protect them from frost, pests, and wind.
* Mulch: A thick layer of mulch around the base of the plants can help insulate the soil and protect the roots from freezing.
Vertical Gardening for Brussels Sprouts
If you’re really tight on space, consider vertical gardening techniques. While Brussels sprouts aren’t naturally climbing plants, you can use trellises or other supports to train them to grow vertically.
* Staking: Use sturdy stakes to support the main stem of the plant.
* Trellising: Attach the plant to a trellis using soft ties.
* Container Stacking: Stack containers vertically to create a tiered garden. Plant Brussels sprouts in the top containers and other smaller plants in the lower containers.
Saving Seeds (Advanced)
If you’re feeling adventurous, you can try saving seeds from your Brussels sprouts to plant next year. However, keep in mind that Brussels sprouts are cross-pollinated, so the seeds may not produce plants that are true to type.
1. Choose Healthy Plants: Select the healthiest and most productive plants to save seeds from.
2. Allow Plants to Bolt: Allow the plants to bolt (flower) in the spring.
3. Collect Seeds: Once the seed pods are dry and brown, collect them and extract
Conclusion
So, there you have it! Growing Brussel sprouts in a small space is not only achievable but also incredibly rewarding. This DIY trick, focusing on vertical growth and container gardening, unlocks the potential to enjoy fresh, homegrown Brussel sprouts even if you’re limited by a balcony, patio, or small backyard. Forget the store-bought, often bland, versions – imagine the vibrant flavor and satisfying crunch of Brussel sprouts you’ve nurtured yourself.
This method is a must-try because it maximizes your yield in a minimal footprint. By utilizing vertical supports and carefully selecting container sizes, you can cultivate a surprising number of Brussel sprouts plants in a relatively confined area. Plus, the controlled environment of container gardening allows you to tailor the soil composition, watering schedule, and sun exposure to perfectly suit the needs of your Brussel sprouts. This leads to healthier plants, more robust growth, and ultimately, a more bountiful harvest.
But the benefits don’t stop there. Growing your own Brussel sprouts is also a fantastic way to connect with nature, learn about the growing process, and reduce your reliance on commercially produced vegetables. It’s a sustainable and fulfilling activity that can bring joy and fresh produce to your table.
Ready to take your small-space gardening to the next level?
Consider these variations to personalize your Brussel sprouts growing experience:
* Companion Planting: Interplant your Brussel sprouts with herbs like rosemary, thyme, or sage. These herbs can help deter pests and attract beneficial insects, creating a healthier ecosystem in your container garden. Marigolds are also excellent companions for their pest-repelling properties.
* Succession Planting: Stagger your planting schedule by starting new seeds every few weeks. This will ensure a continuous harvest of Brussel sprouts throughout the growing season, rather than a single, overwhelming glut.
* Different Varieties: Experiment with different varieties of Brussel sprouts to discover your favorites. Some varieties are more compact and better suited for container gardening, while others offer unique flavors and textures. ‘Jade Cross’ and ‘Long Island Improved’ are popular choices for small spaces.
* Fertilizer Options: While the recipe suggests a balanced fertilizer, you can also explore organic options like compost tea or fish emulsion. These natural fertilizers provide essential nutrients while promoting soil health.
* Container Material: While plastic containers are readily available and affordable, consider using terracotta or fabric pots. Terracotta pots offer better drainage, while fabric pots promote air pruning of the roots, leading to healthier plants.
Don’t be intimidated by the prospect of growing your own Brussel sprouts. This DIY trick is designed to be simple, accessible, and rewarding for gardeners of all skill levels. With a little patience and attention, you’ll be harvesting delicious, homegrown Brussel sprouts in no time.
We encourage you to give this method a try and share your experience with us! Post photos of your Brussel sprouts plants, tell us about your successes and challenges, and let us know what variations you’ve tried. Your feedback will help us refine this guide and inspire other small-space gardeners to embrace the joy of growing their own food. Happy gardening!
Frequently Asked Questions (FAQ)
Q: What size container is best for growing Brussel sprouts in a small space?
A: For optimal growth, we recommend using a container that is at least 12 inches in diameter and 12 inches deep per plant. A 5-gallon bucket or a similarly sized pot works well. If you’re planning to grow multiple plants in a single container, ensure it’s large enough to accommodate their root systems without overcrowding. Overcrowding can lead to stunted growth and reduced yields.
Q: How much sunlight do Brussel sprouts need?
A: Brussel sprouts thrive in full sun, requiring at least 6-8 hours of direct sunlight per day. If you’re growing them indoors or in a partially shaded area, consider supplementing with grow lights to ensure they receive adequate light. Insufficient sunlight can result in leggy plants with small, loose sprouts.
Q: What type of soil is best for growing Brussel sprouts in containers?
A: A well-draining, nutrient-rich potting mix is ideal for growing Brussel sprouts in containers. Avoid using garden soil, as it can become compacted and hinder drainage. Look for a potting mix that contains a blend of peat moss, perlite, and vermiculite. You can also amend the potting mix with compost or aged manure to provide additional nutrients.
Q: How often should I water my Brussel sprouts plants?
A: Water your Brussel sprouts plants regularly, keeping the soil consistently moist but not waterlogged. The frequency of watering will depend on factors such as the weather, the size of the container, and the type of potting mix you’re using. Check the soil moisture level regularly by sticking your finger into the soil. If the top inch feels dry, it’s time to water.
Q: How do I fertilize my Brussel sprouts plants?
A: Brussel sprouts are heavy feeders and require regular fertilization to support their growth. Start fertilizing your plants about 2-3 weeks after transplanting them into their containers. Use a balanced fertilizer (e.g., 10-10-10) according to the package instructions. You can also use organic fertilizers such as compost tea or fish emulsion. Fertilize every 2-3 weeks throughout the growing season.
Q: How do I deal with pests and diseases on my Brussel sprouts plants?
A: Brussel sprouts can be susceptible to various pests and diseases, including aphids, cabbage worms, and clubroot. Regularly inspect your plants for signs of infestation or disease. If you spot any problems, take action immediately. You can use insecticidal soap or neem oil to control aphids and cabbage worms. To prevent clubroot, ensure your soil is well-draining and avoid planting Brussel sprouts in the same spot year after year. Crop rotation is key.
Q: When are Brussel sprouts ready to harvest?
A: Brussel sprouts are typically ready to harvest about 90-100 days after planting. The sprouts should be firm, tightly closed, and about 1-2 inches in diameter. Start harvesting from the bottom of the plant upwards, as the lower sprouts mature first. You can harvest the entire plant at once or harvest the sprouts individually as they ripen.
Q: Can I grow Brussel sprouts indoors?
A: While it’s possible to grow Brussel sprouts indoors, it can be challenging due to their high light requirements. If you’re growing them indoors, you’ll need to provide them with ample light using grow lights. You’ll also need to ensure they have adequate ventilation and humidity. Growing Brussel sprouts outdoors is generally easier and more successful.
Q: What are some common problems when growing Brussel sprouts and how can I fix them?
A: Some common problems include:
* Yellowing Leaves: This can indicate nutrient deficiency (especially nitrogen). Fertilize with a balanced fertilizer.
* Small Sprouts: This can be due to insufficient sunlight, poor soil, or lack of water. Ensure adequate sunlight, improve soil quality, and water regularly.
* Aphids or Cabbage Worms: Treat with insecticidal soap or neem oil. Regularly inspect plants and remove pests manually.
* Sprouts Not Tightening: This can be caused by warm weather. Brussel sprouts prefer cooler temperatures. Try to provide some shade during the hottest part of the day.
Q: Can I save seeds from my Brussel sprouts plants?
A: Yes, you can save seeds from your Brussel sprouts plants, but it’s important to note that Brussel sprouts are cross-pollinating, so the seeds may not produce plants that are true to type. If you want to save seeds, you’ll need to isolate your Brussel sprouts plants from other members of the Brassica family (e.g., cabbage, kale, broccoli) to prevent cross-pollination. Allow the plants to flower and produce seed pods. Once the seed pods are dry and brown, harvest them and extract the seeds. Store the seeds in a cool, dry place.
Leave a Comment