
Grow Celery at Home? Absolutely! Imagine stepping into your backyard and snipping fresh, crisp celery stalks for your salads, soups, or even a healthy snack. No more wilted, store-bought celery – just vibrant, homegrown goodness.
For centuries, celery has been cultivated for its medicinal properties and culinary uses. From ancient Greece, where it was used to crown victors in athletic games, to its modern-day role as a staple in kitchens worldwide, celery has a rich and fascinating history. But did you know that you don’t need acres of farmland to enjoy this crunchy vegetable?
In today’s world, where we’re all looking for ways to eat healthier and be more self-sufficient, learning to grow celery at home is a game-changer. It’s not just about saving money at the grocery store; it’s about connecting with nature, reducing your carbon footprint, and enjoying the unparalleled flavor of freshly harvested produce. Plus, let’s be honest, there’s something incredibly satisfying about nurturing a plant from seed to table. This DIY guide will provide you with simple, effective tricks and hacks to successfully grow celery, even if you have limited space or gardening experience. Let’s get started and unlock the secrets to a thriving celery patch right in your own backyard!
Growing Butternut Squash: A Beginner’s Guide to a Bountiful Harvest
Okay, so you want to grow butternut squash? Awesome! It’s totally doable, even if you’re a newbie gardener like I was. Butternut squash is delicious, versatile, and surprisingly rewarding to grow. I’m going to walk you through everything I’ve learned, from starting seeds to harvesting your own beautiful, tan-skinned squashes. Let’s get started!
Choosing the Right Variety and Location
Before we even think about seeds, let’s talk variety and location. Not all butternut squash are created equal, and your garden’s conditions will play a big role in your success.
* Variety Selection: Look for varieties that are well-suited to your climate and growing season. Some popular choices include ‘Waltham Butternut’ (a classic), ‘Butterscotch PMR’ (powdery mildew resistant), and ‘Early Butternut’ (for shorter growing seasons). I personally love ‘Waltham Butternut’ because it’s reliable and produces consistently delicious squash.
* Sunlight: Butternut squash are sun-worshippers! They need at least 6-8 hours of direct sunlight per day. The more, the better.
* Soil: Well-draining soil is crucial. Butternut squash don’t like to sit in soggy soil. Amend your soil with compost or well-rotted manure to improve drainage and fertility. They are heavy feeders, so rich soil is a must.
* Space: These plants are vines, and they can get BIG. Give them plenty of room to sprawl. Each plant needs at least 4-6 feet of space. If you’re short on space, consider growing them vertically on a trellis, but be prepared to support the heavy fruits as they develop.
Starting Your Butternut Squash Seeds
You have two options here: direct sowing or starting seeds indoors. I usually prefer starting seeds indoors because it gives me a head start and protects the seedlings from pests and unpredictable weather.
Starting Seeds Indoors (My Preferred Method)
1. Timing is Key: Start your seeds about 3-4 weeks before the last expected frost in your area. This gives them enough time to germinate and grow into healthy seedlings before transplanting them outdoors.
2. Gather Your Supplies: You’ll need seed starting trays or small pots (I like using biodegradable pots to minimize transplant shock), seed starting mix (not regular potting soil!), butternut squash seeds, and a spray bottle.
3. Sow the Seeds: Fill your seed starting trays or pots with seed starting mix. Make a small hole (about 1 inch deep) in the center of each cell or pot. Place 1-2 seeds in each hole and cover them gently with soil.
4. Water Carefully: Gently water the soil with a spray bottle to avoid disturbing the seeds. You want the soil to be moist, but not soggy.
5. Provide Warmth and Light: Butternut squash seeds need warmth to germinate. Place your seed starting trays or pots in a warm location, such as on top of a refrigerator or on a heat mat. Once the seeds germinate, move them under grow lights or to a sunny windowsill. If using a windowsill, rotate the trays regularly to prevent the seedlings from leaning towards the light.
6. Keep the Soil Moist: Check the soil moisture daily and water as needed to keep it consistently moist.
7. Thin the Seedlings: If you planted two seeds per cell or pot and both germinate, thin them out by snipping off the weaker seedling at the soil line. This will give the remaining seedling more room to grow.
Direct Sowing (If You Have a Longer Growing Season)
1. Wait for Warm Soil: Direct sowing is best done when the soil temperature is consistently above 60°F (15°C). This is usually a few weeks after the last expected frost.
2. Prepare the Soil: Amend the soil with compost or well-rotted manure to improve fertility and drainage.
3. Sow the Seeds: Sow the seeds directly into the ground, about 1 inch deep and 4-6 feet apart. Plant 2-3 seeds per hill.
4. Water Thoroughly: Water the soil thoroughly after planting.
5. Thin the Seedlings: Once the seedlings emerge, thin them out to one plant per hill.
Transplanting Your Butternut Squash Seedlings
Once your seedlings have developed a few sets of true leaves and the danger of frost has passed, it’s time to transplant them outdoors.
1. Harden Off the Seedlings: Before transplanting, you need to harden off the seedlings. This means gradually exposing them to outdoor conditions over a period of 7-10 days. Start by placing them outdoors in a sheltered location for a few hours each day, gradually increasing the amount of time they spend outdoors. This will help them acclimate to the sun, wind, and temperature changes.
2. Prepare the Planting Site: Choose a sunny location with well-draining soil. Amend the soil with compost or well-rotted manure.
3. Dig the Holes: Dig holes that are slightly larger than the root balls of your seedlings. Space the holes 4-6 feet apart.
4. Transplant Carefully: Gently remove the seedlings from their pots or trays. If you used biodegradable pots, you can plant the entire pot directly into the ground. Otherwise, carefully loosen the roots and place the seedlings in the holes.
5. Backfill and Water: Backfill the holes with soil and gently firm the soil around the seedlings. Water thoroughly.
6. Mulch: Apply a layer of mulch around the plants to help retain moisture, suppress weeds, and regulate soil temperature. I like using straw or shredded leaves.
Caring for Your Butternut Squash Plants
Now that your butternut squash plants are in the ground, it’s time to provide them with the care they need to thrive.
* Watering: Butternut squash need consistent watering, especially during dry periods. Water deeply and regularly, aiming for about 1 inch of water per week. Avoid watering the foliage, as this can promote fungal diseases. Drip irrigation or soaker hoses are ideal.
* Fertilizing: Butternut squash are heavy feeders, so they benefit from regular fertilization. Use a balanced fertilizer or a fertilizer specifically formulated for vegetables. Follow the instructions on the fertilizer package. I like to side-dress my plants with compost tea every few weeks.
* Weeding: Keep the area around your butternut squash plants free of weeds. Weeds compete with the plants for water and nutrients.
* Pest Control: Butternut squash can be susceptible to pests such as squash bugs, squash vine borers, and aphids. Inspect your plants regularly for signs of pests and take action promptly. Handpicking pests, using insecticidal soap, or applying neem oil are all effective control methods. I’ve found that covering young plants with row covers can help prevent squash vine borers from laying their eggs.
* Pollination: Butternut squash are pollinated by bees and other insects. If you’re not seeing a lot of bees in your garden, you may need to hand-pollinate the flowers. To hand-pollinate, use a small paintbrush to transfer pollen from the male flowers (which have a long, thin stem) to the female flowers (which have a small squash at the base).
* Pruning (Optional): While not essential, pruning can help improve air circulation and encourage fruit production. Remove any yellowing or diseased leaves. You can also prune the vines to encourage the plant to focus its energy on developing fruits.
Harvesting Your Butternut Squash
The moment you’ve been waiting for! Knowing when to harvest your butternut squash is crucial for getting the best flavor and storage life.
1. Timing is Everything: Butternut squash are typically ready to harvest in the fall, about 90-100 days after planting. The exact timing will depend on your climate and the variety you’re growing.
2. Look for These Signs: The skin of the squash should be hard and tough, and the color should be a deep tan. The stem should be dry and corky. If you press your fingernail into the skin, it should be difficult to make an indentation.
3. Harvest Carefully: Use a sharp knife or pruning shears to cut the squash from the vine, leaving about 2-3 inches of stem attached. This will help prevent rot.
4. Handle with Care: Butternut squash are delicate, so handle them with care to avoid bruising.
5. Curing: Curing the squash is essential for long-term storage. Place the harvested squash in a warm, dry, well-ventilated location for about 1-2 weeks. This will allow the skin to harden and the stem to dry out completely. I usually cure mine on a covered porch.
Storing Your Butternut Squash
Proper storage is key to enjoying your butternut squash harvest throughout the winter.
* Ideal Conditions: Store your cured
Conclusion
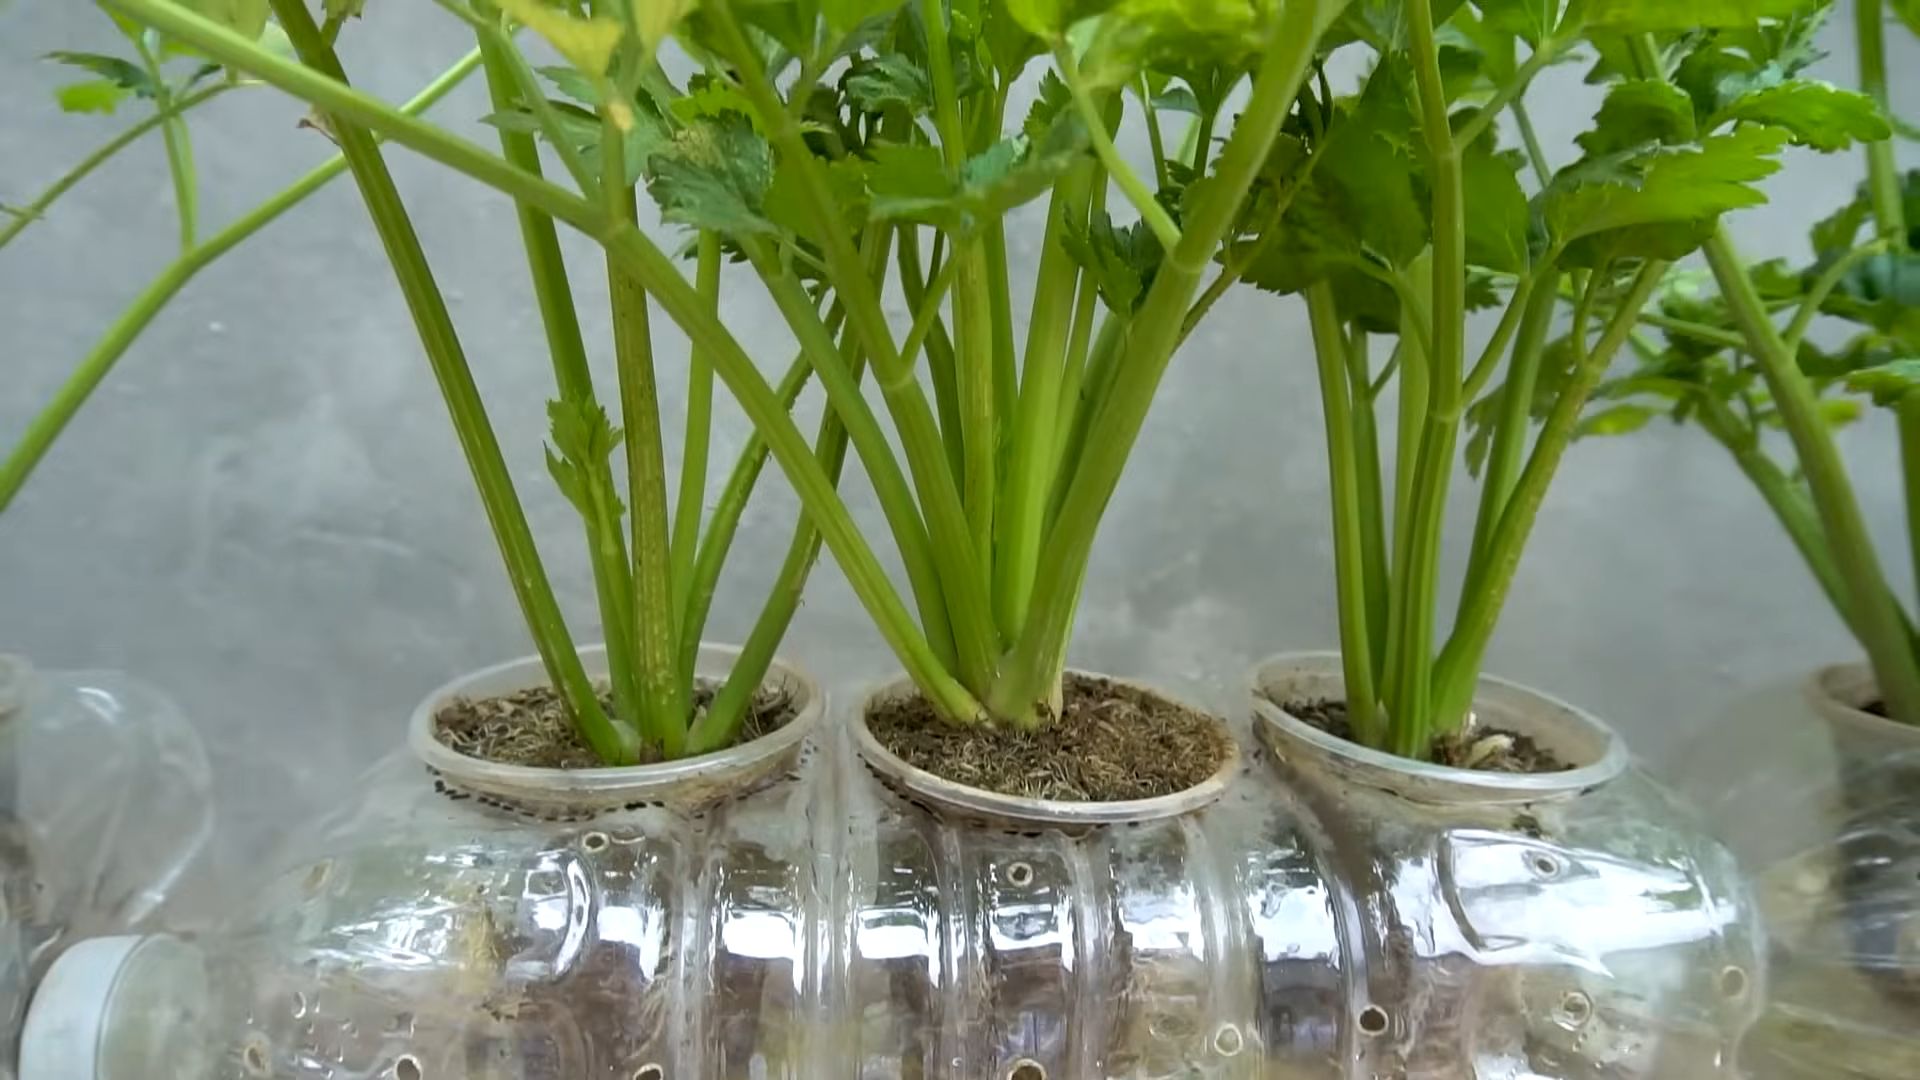
So, there you have it! Growing celery at home from the base of a store-bought stalk is not just a fun science experiment; it’s a genuinely rewarding way to reduce food waste, enjoy fresher produce, and connect with the natural world. It’s a simple, sustainable practice that can bring a little bit of green into your life, regardless of whether you have a sprawling garden or just a sunny windowsill.
Why is this DIY trick a must-try? Because it’s incredibly easy, cost-effective, and surprisingly satisfying. Think about it: instead of tossing that celery base into the compost bin, you’re giving it a second life, transforming it into a vibrant, leafy plant that can provide you with fresh celery for salads, soups, and snacks. It’s a small act with a big impact, both on your wallet and on the environment.
Beyond the basic method, there are plenty of ways to customize your celery-growing experience. For example, experiment with different varieties of celery. While the standard Pascal celery is readily available in most grocery stores, you might be able to find other varieties at farmers’ markets or specialty stores. These varieties may have different flavors, textures, and growth habits, adding an element of surprise and discovery to your gardening adventure.
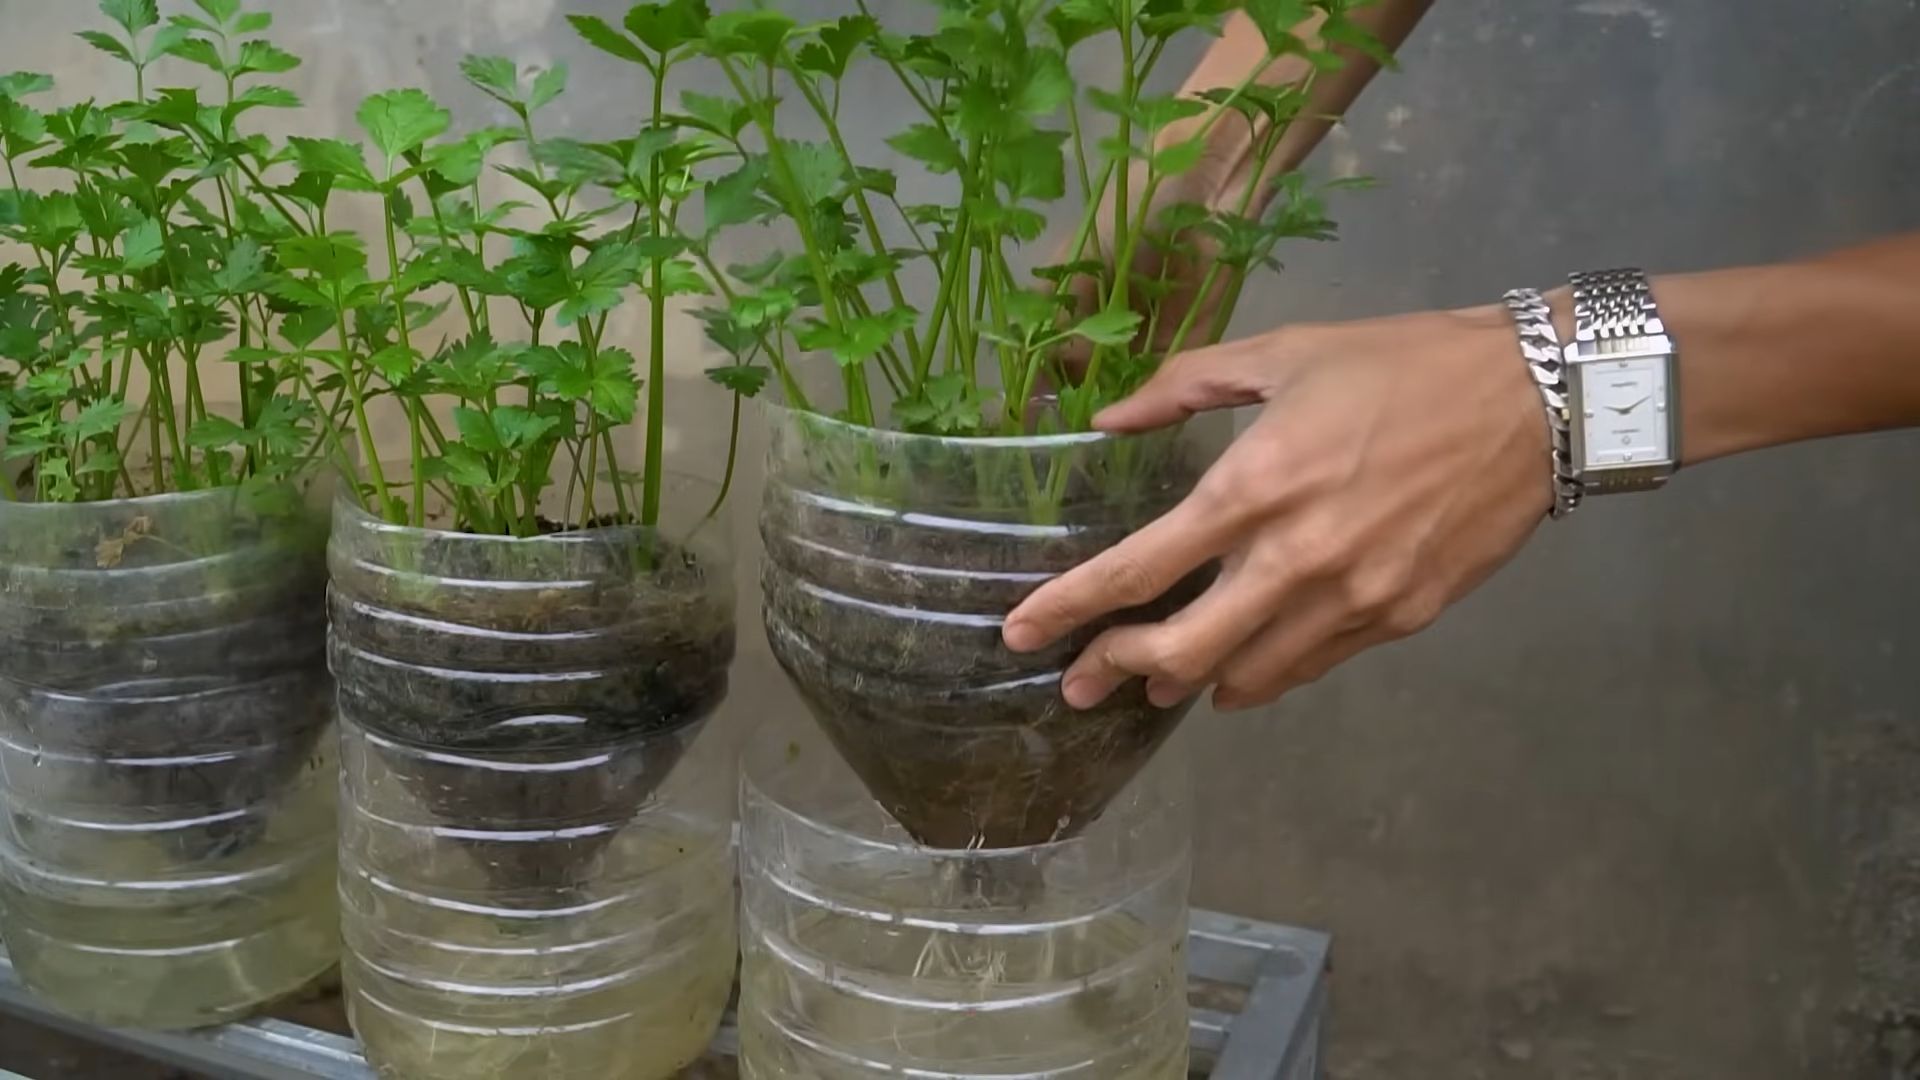
Another variation to consider is growing your celery in different types of containers. While a simple glass of water works well for the initial sprouting phase, you can eventually transplant your celery into a larger pot filled with soil. Experiment with different types of potting mix to see which one works best for your celery. You can also try growing your celery in a raised bed or even directly in your garden if you have the space.
Furthermore, consider companion planting. Celery is known to benefit from being planted alongside certain other plants, such as onions, garlic, and tomatoes. These companion plants can help to deter pests and improve the overall health of your celery. Research different companion planting strategies to find the best combination for your garden.
Don’t be afraid to experiment with different fertilizers as well. While celery is not a particularly heavy feeder, it can benefit from occasional fertilization. Try using a balanced liquid fertilizer or a compost tea to provide your celery with the nutrients it needs to thrive. Just be sure to follow the instructions on the fertilizer label and avoid over-fertilizing, as this can damage your plants.
The key to success with this DIY trick is patience and observation. Celery can be a bit slow to get started, so don’t be discouraged if you don’t see results immediately. Keep an eye on your celery, water it regularly, and provide it with plenty of sunlight. With a little bit of care and attention, you’ll be rewarded with a bountiful harvest of fresh, homegrown celery.
We wholeheartedly encourage you to give this DIY trick a try. It’s a fun, educational, and rewarding experience that anyone can enjoy. And once you’ve successfully grown your own celery, we’d love to hear about it! Share your experiences, tips, and photos with us in the comments below. Let’s create a community of home gardeners who are passionate about growing their own food and reducing food waste. Let us know if you have successfully managed to grow celery at home.
Frequently Asked Questions (FAQ)
1. How long does it take to grow celery from a base?
The time it takes to grow celery from a base can vary depending on several factors, including the variety of celery, the growing conditions, and your level of experience. In general, you can expect to see new growth within a week or two of placing the celery base in water. However, it may take several months for the celery to fully mature and be ready for harvest.
Initially, you’ll see small roots emerging from the bottom of the base and new leaves sprouting from the top. As the plant grows, you’ll need to transplant it into a larger container filled with soil. Once transplanted, the celery will continue to grow and develop, eventually forming a full-sized stalk.
Be patient and provide your celery with the care it needs, and you’ll be rewarded with a bountiful harvest of fresh, homegrown celery.
2. What kind of water is best for growing celery from a base?
The best type of water to use for growing celery from a base is clean, fresh water. Tap water is generally fine, but if your tap water is heavily chlorinated, it’s best to let it sit out for a few hours before using it to allow the chlorine to dissipate. You can also use filtered water or bottled water if you prefer.
Avoid using water that is too hot or too cold, as this can shock the celery and hinder its growth. Room temperature water is ideal.
Change the water every day or two to prevent the growth of bacteria and algae. This will help to keep your celery healthy and promote strong root growth.
3. How much sunlight does celery need to grow?
Celery needs plenty of sunlight to grow properly. Aim to provide your celery with at least six hours of direct sunlight per day. If you’re growing your celery indoors, place it near a sunny window where it will receive ample sunlight. You may also need to supplement with artificial light if you don’t have enough natural light.
If you’re growing your celery outdoors, choose a location that receives full sun. Be sure to protect your celery from strong winds, as this can damage the delicate leaves.
4. What kind of soil is best for growing celery?
Celery prefers a rich, well-drained soil that is high in organic matter. A good potting mix for celery should contain a blend of peat moss, perlite, and vermiculite. You can also add compost or other organic matter to improve the soil’s fertility and drainage.
The soil should be slightly acidic, with a pH between 6.0 and 6.8. You can test the pH of your soil using a soil testing kit, which is available at most garden centers. If your soil is too alkaline, you can amend it with sulfur or peat moss to lower the pH.
5. How often should I water my celery?
Celery needs consistent moisture to thrive. Water your celery regularly, keeping the soil evenly moist but not waterlogged. The frequency of watering will depend on the weather conditions and the type of soil you’re using. In general, you should water your celery every day or two, or whenever the top inch of soil feels dry to the touch.
Be sure to water your celery deeply, allowing the water to penetrate the entire root zone. Avoid watering the leaves, as this can promote the growth of fungal diseases.
6. How do I know when my celery is ready to harvest?
Celery is ready to harvest when the stalks are at least 6-8 inches long and have a firm, crisp texture. The exact time of harvest will depend on the variety of celery and the growing conditions.
To harvest your celery, simply cut the stalks at the base of the plant using a sharp knife. You can harvest the entire plant at once, or you can harvest individual stalks as needed.
After harvesting, store your celery in the refrigerator to keep it fresh. Celery can be stored in the refrigerator for up to two weeks.
7. Can I grow celery indoors year-round?
Yes, you can grow celery indoors year-round, provided you have the right growing conditions. Celery needs plenty of sunlight, consistent moisture, and a rich, well-drained soil. If you can provide these conditions, you can enjoy fresh, homegrown celery even in the middle of winter.
You may need to supplement with artificial light if you don’t have enough natural light. You’ll also need to be careful to avoid overwatering, as this can lead to root rot.
8. What are some common problems when growing celery, and how can I fix them?
Some common problems when growing celery include pests, diseases, and nutrient deficiencies.
Pests that can affect celery include aphids, celery loopers, and spider mites. You can control these pests by spraying your celery with insecticidal soap or neem oil.
Diseases that can affect celery include early blight, late blight, and pink rot. You can prevent these diseases by providing your celery with good air circulation and avoiding overwatering. If your celery does develop a disease, you can treat it with a fungicide.
Nutrient deficiencies can also affect celery. If your celery is not growing well, it may be lacking in essential nutrients. You can correct nutrient deficiencies by fertilizing your celery with a balanced fertilizer.
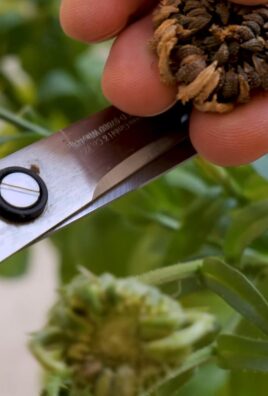
9. Is it possible to grow celery from seed instead of a base?
Yes, it is absolutely possible to grow celery from seed. However, it’s generally considered more challenging than regrowing from a base. Celery seeds are very small and require specific conditions to germinate successfully. They need consistent moisture, warm temperatures (around 70-75°F), and light to germinate. Starting seeds indoors several weeks before the last expected frost is recommended.
Growing from a base is a quicker and easier way to get a celery plant started, especially for beginners. However, growing from seed allows you to choose from a wider variety of celery types and can be a rewarding experience for more experienced gardeners.
10. Will the celery grown from a base taste the same as store-bought celery?
The taste of celery grown from a base can vary slightly compared to store-bought celery. Several factors influence the flavor, including the variety of celery


Leave a Comment