
Growing Green Beans in Pots might seem like a challenge if you’re short on space, but trust me, it’s totally doable and incredibly rewarding! Imagine stepping onto your balcony or patio and harvesting fresh, crisp green beans for dinner – all thanks to your own little container garden. For centuries, people have cultivated food in limited spaces, from ancient rooftop gardens in bustling cities to medieval monastery plots. This resourceful approach to gardening is more relevant than ever today, as urban living and a desire for fresh, locally-sourced food become increasingly popular.
But why bother with growing green beans in pots? Well, for starters, it gives you control over the soil quality and growing conditions, minimizing pests and diseases. Plus, it’s a fantastic way to enjoy the satisfaction of growing your own food, even if you only have a small balcony or patio. In this article, I’m going to share some simple, effective DIY tricks and hacks that will help you successfully grow a bountiful harvest of green beans in pots. Get ready to unleash your inner gardener and enjoy the delicious taste of homegrown goodness!
Growing Green Beans in Pots: A Beginner’s Guide
Hey there, fellow gardening enthusiasts! I’m so excited to share my experience with growing green beans in pots. It’s surprisingly easy and rewarding, even if you don’t have a sprawling backyard. I’ve had great success with this method, and I’m confident you can too. Let’s dive in!
Choosing the Right Green Bean Variety
Before we get our hands dirty, let’s talk about bean varieties. Not all green beans are created equal, especially when it comes to container gardening. You’ll want to choose bush beans over pole beans.
* **Bush Beans:** These are compact and well-suited for pots. They grow to about 2 feet tall and don’t require a trellis. Some popular bush bean varieties include ‘Blue Lake Bush,’ ‘Contender,’ and ‘Provider.’
* **Pole Beans:** These are climbers and need a trellis or support structure to grow. While you *can* grow them in pots, it requires a larger container and more effort to set up the support system. For simplicity, I highly recommend sticking with bush beans for your first container gardening adventure.
I personally love ‘Blue Lake Bush’ because they produce a ton of beans and have a fantastic flavor. ‘Contender’ is another great choice, known for its early and abundant yields.
Gathering Your Supplies
Okay, now for the fun part – gathering our supplies! Here’s what you’ll need:
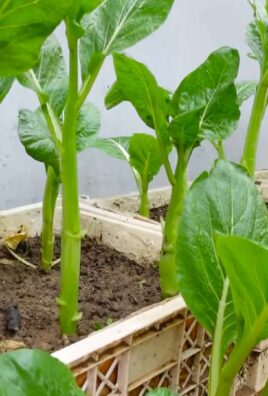
* **Pots:** Choose pots that are at least 12 inches in diameter and 12 inches deep. This gives the bean plants enough room for their roots to grow. I prefer using plastic pots because they’re lightweight and retain moisture well, but terracotta pots work too, just be mindful that they dry out faster.
* **Potting Mix:** Don’t use garden soil in your pots! It’s too heavy and doesn’t drain well. Instead, opt for a high-quality potting mix. I usually go for a mix that contains peat moss, perlite, and vermiculite. This combination provides good drainage and aeration, which is crucial for healthy bean plants.
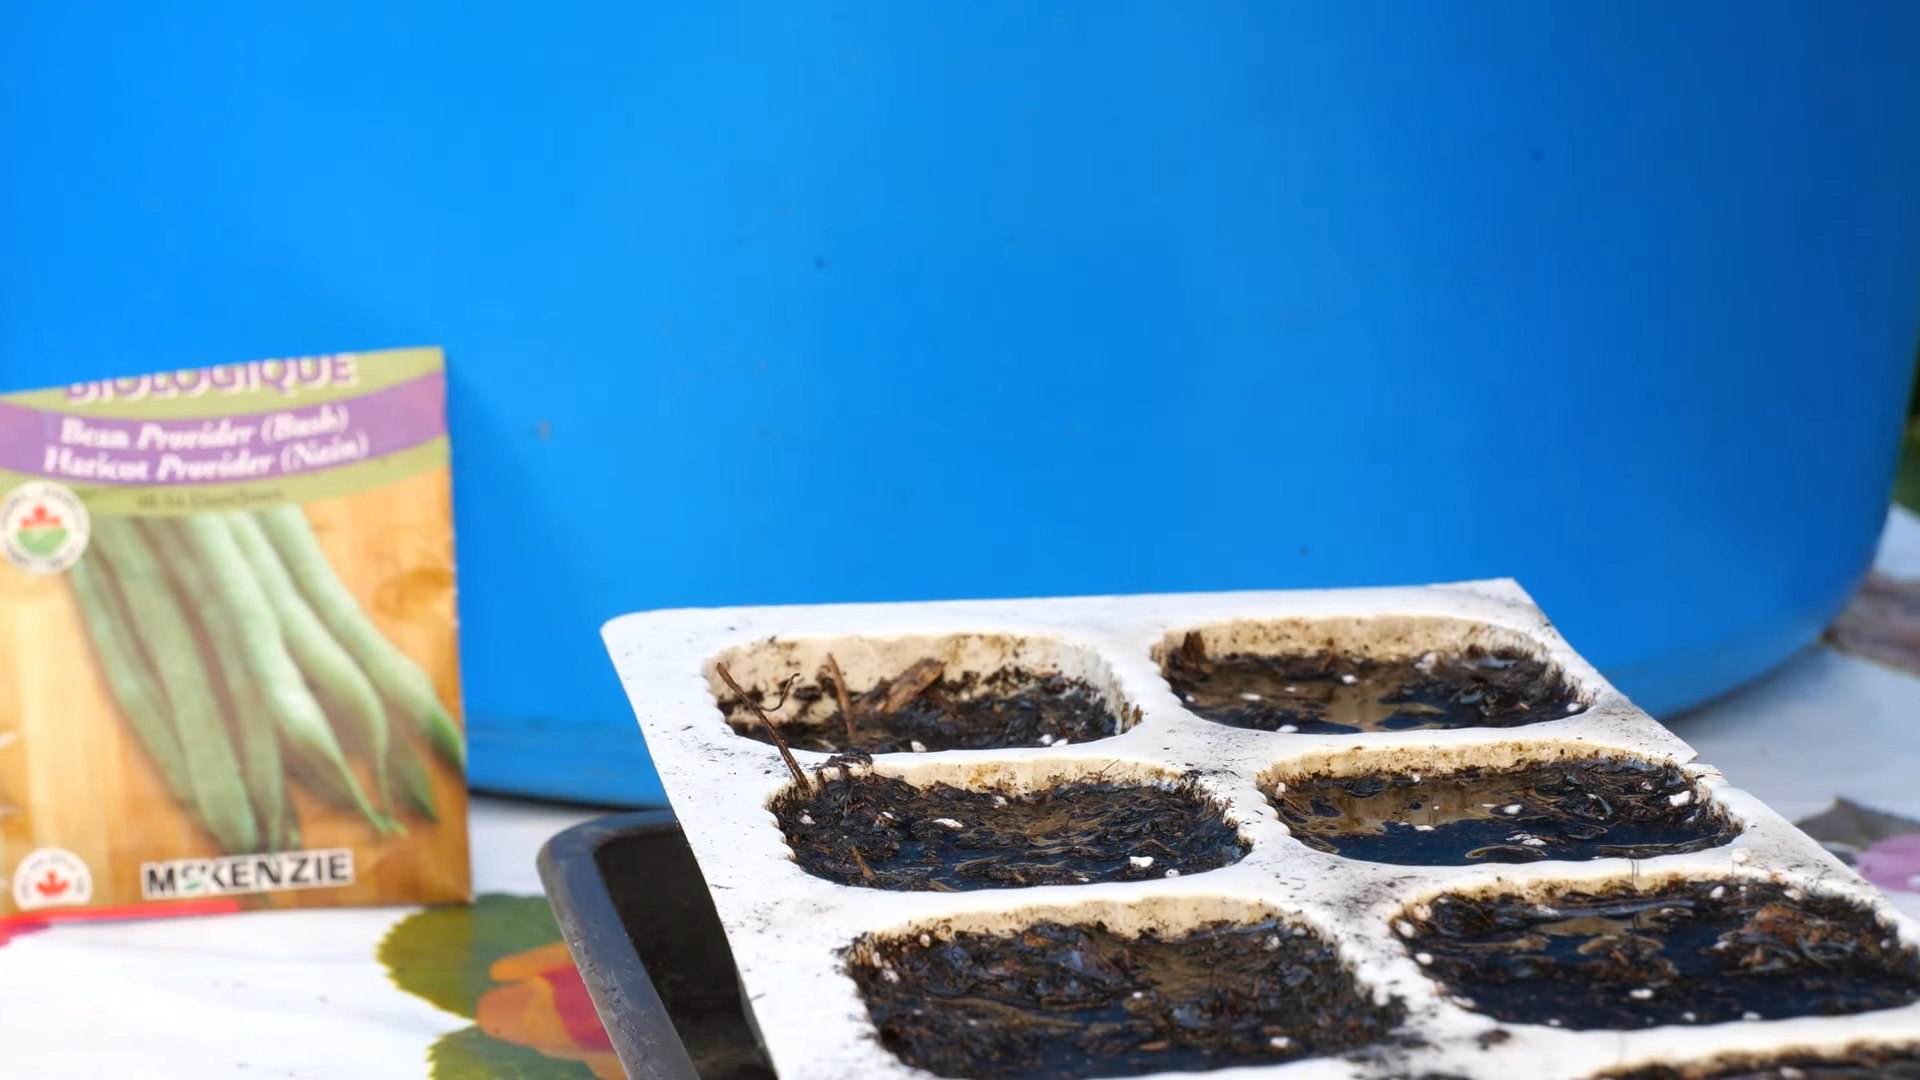
* **Green Bean Seeds:** Of course, you’ll need green bean seeds! You can find these at your local garden center or online.
* **Watering Can or Hose:** You’ll need a way to water your plants regularly.
* **Fertilizer (Optional):** While not essential, a balanced fertilizer can help your bean plants thrive. I like to use a liquid fertilizer diluted to half strength.
* **Small Trowel or Shovel:** For filling the pots with potting mix and planting the seeds.
* **Mulch (Optional):** Mulch helps retain moisture and suppress weeds. I like to use straw or wood chips.
Planting Your Green Bean Seeds
Now for the main event – planting those seeds!
1. **Fill the Pots:** Start by filling your pots with potting mix, leaving about an inch or two of space at the top.
2. **Sow the Seeds:** Sow the green bean seeds about 1 inch deep and 2-3 inches apart. I usually plant 3-4 seeds per pot to ensure good germination.
3. Cover the Seeds: Gently cover the seeds with potting mix.
4. **Water Thoroughly:** Water the pots thoroughly until the water drains out of the bottom. This helps settle the soil and provides the seeds with the moisture they need to germinate.
5. **Place in a Sunny Location:** Place the pots in a location that receives at least 6-8 hours of sunlight per day. Green beans need plenty of sunlight to grow and produce beans.
6. **Keep the Soil Moist:** Keep the soil consistently moist, but not soggy. Water when the top inch of soil feels dry to the touch.
Caring for Your Green Bean Plants
Once your green bean seeds have germinated and the seedlings have emerged, it’s time to start caring for your plants.
1. **Watering:** Water your green bean plants regularly, especially during hot, dry weather. I usually water them in the morning so the foliage has time to dry before nightfall, which helps prevent fungal diseases.
2. **Fertilizing (Optional):** If you choose to fertilize, do so every 2-3 weeks with a balanced liquid fertilizer diluted to half strength. Avoid over-fertilizing, as this can lead to excessive foliage growth and fewer beans.
3. **Weeding:** Keep the pots free of weeds. Weeds compete with your green bean plants for nutrients and water.
4. **Pest Control:** Keep an eye out for pests such as aphids, bean beetles, and spider mites. If you notice any pests, you can try spraying them with insecticidal soap or neem oil. I prefer to use organic pest control methods whenever possible.
5. **Mulching (Optional):** Add a layer of mulch around the base of the plants to help retain moisture and suppress weeds.
6. Support (If Needed): While bush beans don’t typically need support, if your plants start to get leggy or fall over, you can provide them with some support by staking them or using a small tomato cage.
Harvesting Your Green Beans
The best part of growing green beans is, of course, harvesting them!
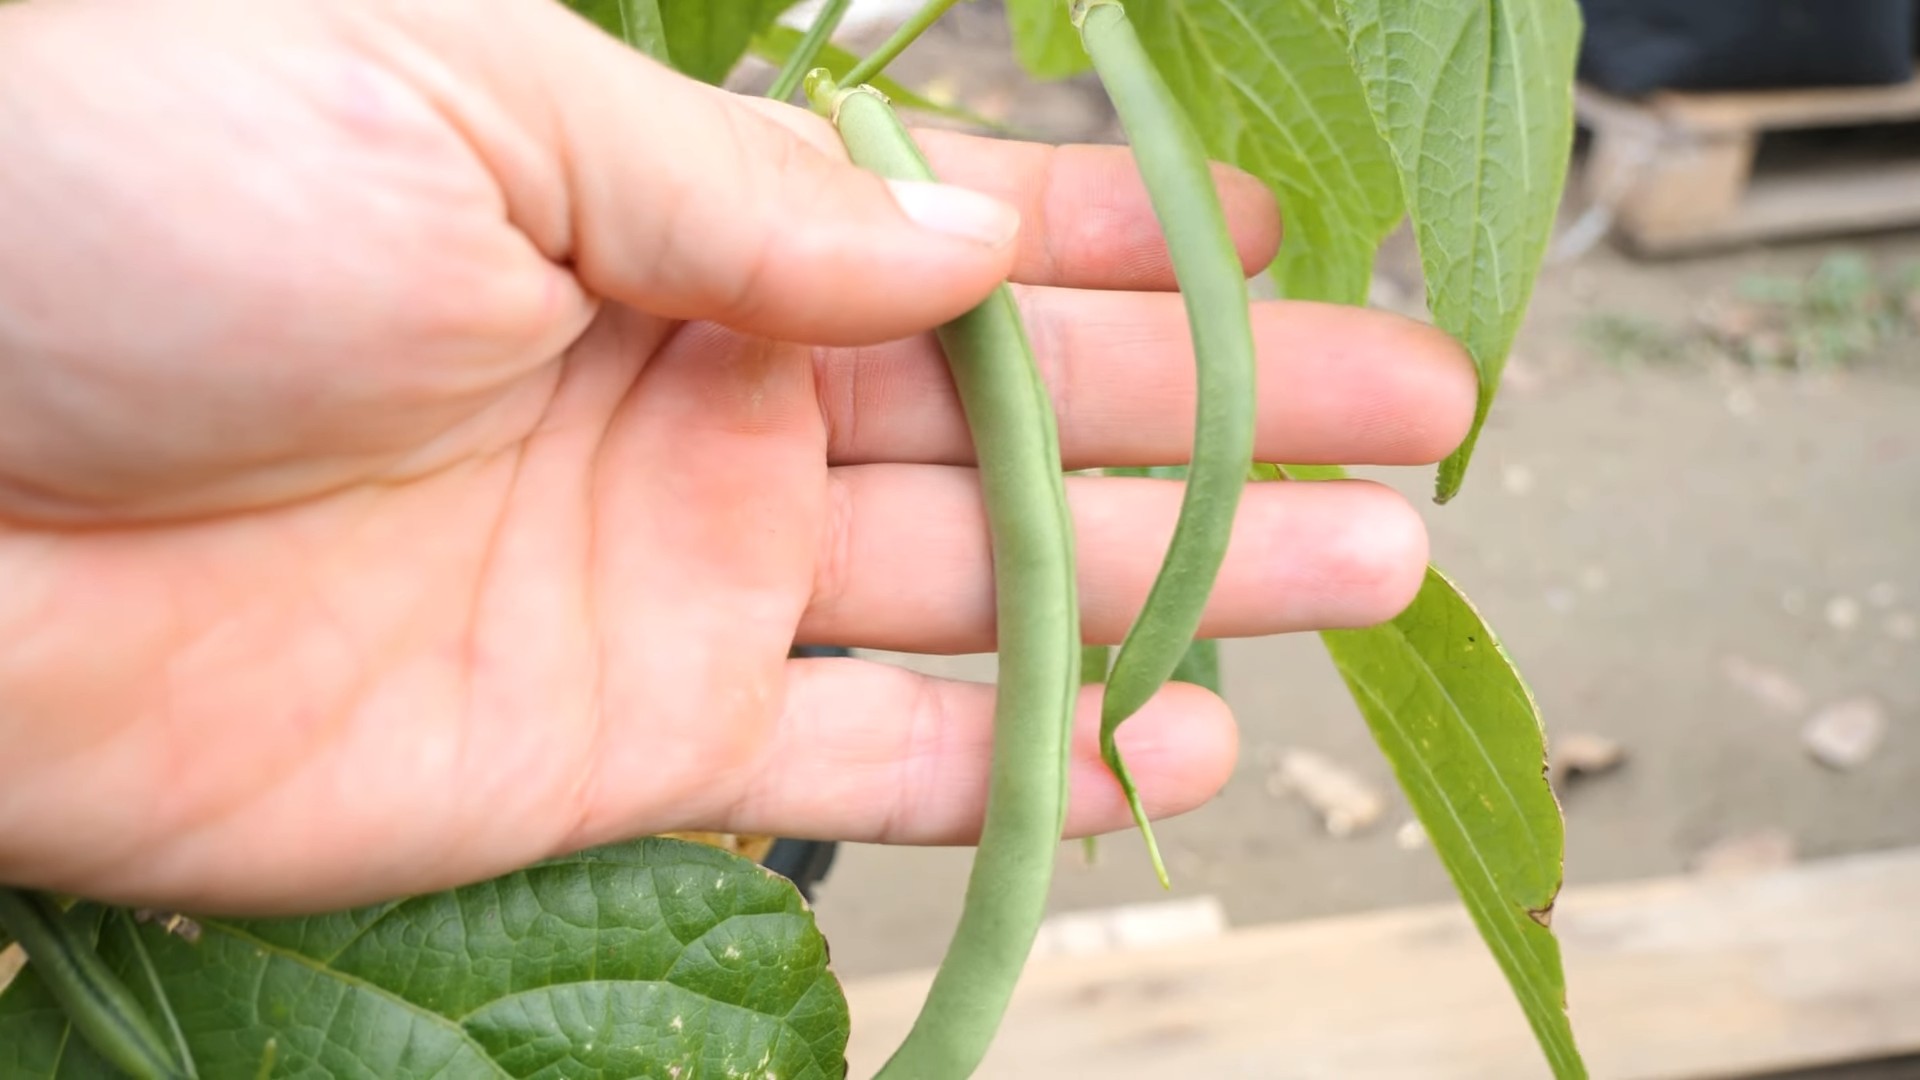
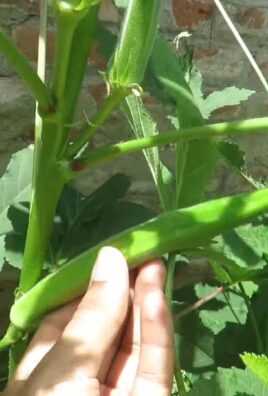
1. **Harvest Time:** Green beans are typically ready to harvest about 50-60 days after planting. The beans should be firm, crisp, and about the size of a pencil.
2. **Harvesting Technique:** To harvest the beans, gently snap them off the plant. Be careful not to damage the plant.
3. **Regular Harvesting:** Harvest your green beans regularly to encourage the plant to produce more beans. I usually harvest every 2-3 days.
4. **Enjoy Your Harvest:** Enjoy your fresh, homegrown green beans! You can eat them raw, steamed, sautéed, or added to soups and stews.
Troubleshooting
Even with the best care, you might encounter some problems while growing green beans in pots. Here are a few common issues and how to address them:
* **Yellowing Leaves:** This could be a sign of overwatering, underwatering, or nutrient deficiency. Check the soil moisture and adjust your watering accordingly. If the soil is consistently moist, you may be overwatering. If the soil is dry, you may be underwatering. If the leaves are yellowing all over, it could be a sign of nutrient deficiency. Try fertilizing with a balanced fertilizer.
* **Lack of Flowers or Beans:** This could be due to insufficient sunlight, over-fertilizing, or extreme temperatures. Make sure your plants are getting at least 6-8 hours of sunlight per day. Avoid over-fertilizing, as this can lead to excessive foliage growth and fewer flowers. Green beans prefer temperatures between 60-80°F.
* **Pests:** As mentioned earlier, aphids, bean beetles, and spider mites can be a problem. Use insecticidal soap or neem oil to control these pests.
* **Diseases:** Fungal diseases such as powdery mildew and rust can al
Hey there, fellow gardening enthusiasts! I’m so excited to share my experience with growing green beans in pots. It’s surprisingly easy and rewarding, even if you don’t have a sprawling backyard. I’ve had great success with this method, and I’m confident you can too. Let’s dive in!
Choosing the Right Green Bean Variety
Before we get our hands dirty, let’s talk about bean varieties. Not all green beans are created equal, especially when it comes to container gardening. You’ll want to choose bush beans over pole beans.
* **Bush Beans:** These are compact and well-suited for pots. They grow to about 2 feet tall and don’t require a trellis. Some popular bush bean varieties include ‘Blue Lake Bush,’ ‘Contender,’ and ‘Provider.’
* **Pole Beans:** These are climbers and need a trellis or support structure to grow. While you *can* grow them in pots, it requires a larger container and more effort to set up the support system. For simplicity, I highly recommend sticking with bush beans for your first container gardening adventure.
I personally love ‘Blue Lake Bush’ because they produce a ton of beans and have a fantastic flavor. ‘Contender’ is another great choice, known for its early and abundant yields.
Gathering Your Supplies
Okay, now for the fun part – gathering our supplies! Here’s what you’ll need:
* **Pots:** Choose pots that are at least 12 inches in diameter and 12 inches deep. This gives the bean plants enough room for their roots to grow. I prefer using plastic pots because they’re lightweight and retain moisture well, but terracotta pots work too, just be mindful that they dry out faster.
* **Potting Mix:** Don’t use garden soil in your pots! It’s too heavy and doesn’t drain well. Instead, opt for a high-quality potting mix. I usually go for a mix that contains peat moss, perlite, and vermiculite. This combination provides good drainage and aeration, which is crucial for healthy bean plants.
* **Green Bean Seeds:** Of course, you’ll need green bean seeds! You can find these at your local garden center or online.
* **Watering Can or Hose:** You’ll need a way to water your plants regularly.
* **Fertilizer (Optional):** While not essential, a balanced fertilizer can help your bean plants thrive. I like to use a liquid fertilizer diluted to half strength.
* **Small Trowel or Shovel:** For filling the pots with potting mix and planting the seeds.
* **Mulch (Optional):** Mulch helps retain moisture and suppress weeds. I like to use straw or wood chips.
Planting Your Green Bean Seeds
Now for the main event – planting those seeds!
1. **Fill the Pots:** Start by filling your pots with potting mix, leaving about an inch or two of space at the top.
2. **Sow the Seeds:** Sow the green bean seeds about 1 inch deep and 2-3 inches apart. I usually plant 3-4 seeds per pot to ensure good germination.
3. Cover the Seeds: Gently cover the seeds with potting mix.
4. **Water Thoroughly:** Water the pots thoroughly until the water drains out of the bottom. This helps settle the soil and provides the seeds with the moisture they need to germinate.
5. **Place in a Sunny Location:** Place the pots in a location that receives at least 6-8 hours of sunlight per day. Green beans need plenty of sunlight to grow and produce beans.
6. **Keep the Soil Moist:** Keep the soil consistently moist, but not soggy. Water when the top inch of soil feels dry to the touch.
Caring for Your Green Bean Plants
Once your green bean seeds have germinated and the seedlings have emerged, it’s time to start caring for your plants.
1. **Watering:** Water your green bean plants regularly, especially during hot, dry weather. I usually water them in the morning so the foliage has time to dry before nightfall, which helps prevent fungal diseases.
2. **Fertilizing (Optional):** If you choose to fertilize, do so every 2-3 weeks with a balanced liquid fertilizer diluted to half strength. Avoid over-fertilizing, as this can lead to excessive foliage growth and fewer beans.
3. **Weeding:** Keep the pots free of weeds. Weeds compete with your green bean plants for nutrients and water.
4. **Pest Control:** Keep an eye out for pests such as aphids, bean beetles, and spider mites. If you notice any pests, you can try spraying them with insecticidal soap or neem oil. I prefer to use organic pest control methods whenever possible.
5. **Mulching (Optional):** Add a layer of mulch around the base of the plants to help retain moisture and suppress weeds.
6. Support (If Needed): While bush beans don’t typically need support, if your plants start to get leggy or fall over, you can provide them with some support by staking them or using a small tomato cage.
Harvesting Your Green Beans
The best part of growing green beans is, of course, harvesting them!
1. **Harvest Time:** Green beans are typically ready to harvest about 50-60 days after planting. The beans should be firm, crisp, and about the size of a pencil.
2. **Harvesting Technique:** To harvest the beans, gently snap them off the plant. Be careful not to damage the plant.
3. **Regular Harvesting:** Harvest your green beans regularly to encourage the plant to produce more beans. I usually harvest every 2-3 days.
4. **Enjoy Your Harvest:** Enjoy your fresh, homegrown green beans! You can eat them raw, steamed, sautéed, or added to soups and stews.
Troubleshooting
Even with the best care, you might encounter some problems while growing green beans in pots. Here are a few common issues and how to address them:
* **Yellowing Leaves:** This could be a sign of overwatering, underwatering, or nutrient deficiency. Check the soil moisture and adjust your watering accordingly. If the soil is consistently moist, you may be overwatering. If the soil is dry, you may be underwatering. If the leaves are yellowing all over, it could be a sign of nutrient deficiency. Try fertilizing with a balanced fertilizer.
* **Lack of Flowers or Beans:** This could be due to insufficient sunlight, over-fertilizing, or extreme temperatures. Make sure your plants are getting at least 6-8 hours of sunlight per day. Avoid over-fertilizing, as this can lead to excessive foliage growth and fewer flowers. Green beans prefer temperatures between 60-80°F.
* **Pests:** As mentioned earlier, aphids, bean beetles, and spider mites can be a problem. Use insecticidal soap or neem oil to control these pests.
* **Diseases:** Fungal diseases such as powdery mildew and rust can also affect green bean plants. To prevent these diseases, water your plants in the morning so the foliage has time to dry before nightfall. Avoid overcrowding the plants to improve air circulation. If you notice any signs of disease, remove the affected leaves and spray the plants with a fungicide.
Tips for Success
Here are a few extra tips to help you succeed with growing green beans in pots:
* Choose the Right Pot Size: As mentioned earlier, use pots that are at least 12 inches in diameter and 12 inches deep.
* Use High-Quality Potting Mix: Don’t use garden soil in your pots! It’s too heavy and doesn’t drain well.
* Provide Plenty of Sunlight: Green beans need at least 6-8 hours of sunlight per day.
* Water Regularly: Keep the soil consistently moist, but not soggy.
* Fertilize (Optional): Fertilize every 2-3 weeks with a balanced liquid fertilizer diluted to half strength.
* Harvest Regularly: Harvest your green beans regularly to encourage the plant to produce more beans.
* Succession Planting: To extend your harvest, plant new seeds every 2-3 weeks.
Enjoying Your Homegrown Green Beans
There’s nothing quite like the taste of fresh, homegrown green beans. Here are a few ways to enjoy your harvest:
* **Raw:** Green beans can be eaten raw as a snack or added to salads.
* **Steamed:** Steaming is a healthy way to cook green beans.
* **Sautéed:** Sautéed green beans are a delicious side dish.
* **Roasted:** Roasting green beans brings out their natural sweetness.
* **Pickled:** Pickled green beans are a great way to preserve your harvest.
* **Frozen:** You can also freeze green beans for later use.
Growing green beans in pots is a fun and rewarding experience. With a little bit of care and attention, you can enjoy a bountiful harvest of fresh, homegrown green beans. Happy gardening!
Conclusion
So, there you have it! Growing green beans in pots is not only achievable, but it’s also incredibly rewarding. We’ve walked through the entire process, from selecting the right pot and soil to nurturing your plants and harvesting those crisp, delicious beans. But why should you bother with this DIY project?
Simply put, growing your own green beans offers a level of freshness and satisfaction you just can’t find at the grocery store. Imagine stepping out onto your balcony or patio and picking a handful of vibrant green beans, still warm from the sun, to add to your dinner. The taste is unparalleled, the texture is perfect, and you know exactly where your food came from. Plus, it’s a fantastic way to connect with nature, even if you live in an urban environment.
Beyond the taste and convenience, growing green beans in pots is also a space-saving solution for those with limited garden space. Whether you have a small balcony, a sunny windowsill, or just a patio, you can enjoy the benefits of homegrown vegetables. It’s also a great project for beginners, as green beans are relatively easy to grow and don’t require a lot of specialized equipment or knowledge.
Ready to take your green bean game to the next level? Consider experimenting with different varieties. Bush beans are generally more compact and well-suited for containers, but you can also try growing pole beans if you provide them with a trellis or support structure. Explore heirloom varieties for unique flavors and colors, or try planting a mix of different types for a diverse harvest.
Another fun variation is to companion plant your green beans with other herbs and vegetables. Marigolds can help deter pests, while basil can improve the flavor of your beans. Experiment with different combinations to see what works best for you.
Don’t be afraid to get creative with your container gardening. Use recycled materials like old buckets or tubs, or decorate your pots to add a personal touch to your garden. The possibilities are endless!
Ultimately, the best way to learn is by doing. So, grab a pot, some soil, and a packet of green bean seeds, and get started today. You’ll be amazed at how easy and rewarding it is to grow your own fresh, delicious green beans.
We’re confident that you’ll love the experience of growing green beans in pots. But don’t just take our word for it! We encourage you to try this DIY trick for yourself and share your experience with us. Post photos of your green bean plants on social media using #HomeGrownGreenBeans, or leave a comment below to let us know how it went. We can’t wait to see your success stories!
Frequently Asked Questions (FAQ)
What is the best type of green bean to grow in pots?
The best type of green bean to grow in pots is generally a bush bean variety. Bush beans are more compact and don’t require a trellis or support structure, making them ideal for container gardening. Some popular bush bean varieties include Blue Lake Bush, Contender, and Provider. However, you can also grow pole beans in pots if you provide them with a trellis or other support. Just make sure your pot is large enough to accommodate the roots and the support structure.
How big of a pot do I need for growing green beans?
The size of the pot you need will depend on the type of green bean you’re growing. For bush beans, a pot that is at least 12 inches in diameter and 12 inches deep is recommended. This will provide enough space for the roots to grow and develop. If you’re growing pole beans, you’ll need a larger pot, at least 18 inches in diameter and 18 inches deep, to accommodate the larger root system and the trellis or support structure. Make sure the pot has drainage holes to prevent waterlogging.
What kind of soil should I use for growing green beans in pots?
Use a well-draining potting mix that is rich in organic matter. Avoid using garden soil, as it can be too heavy and compact for container gardening. A good potting mix will provide the necessary nutrients and drainage for your green beans to thrive. You can also amend the potting mix with compost or other organic matter to improve its fertility.
How often should I water my green bean plants in pots?
Water your green bean plants regularly, especially during hot, dry weather. The soil should be kept consistently moist, but not waterlogged. Check the soil moisture by sticking your finger into the soil. If the top inch of soil feels dry, it’s time to water. Water deeply, until water drains out of the drainage holes in the bottom of the pot. Avoid watering the foliage, as this can promote fungal diseases.
How much sunlight do green beans need?
Green beans need at least 6-8 hours of sunlight per day to thrive. Choose a location for your pots that receives plenty of sunlight. If you don’t have a sunny spot, you can supplement with grow lights.
How do I fertilize my green bean plants in pots?
Fertilize your green bean plants every 2-3 weeks with a balanced fertilizer. Look for a fertilizer that is specifically formulated for vegetables. Follow the instructions on the fertilizer package for application rates. You can also use organic fertilizers, such as compost tea or fish emulsion.
What are some common pests and diseases that affect green beans?
Some common pests that affect green beans include aphids, bean beetles, and spider mites. You can control these pests with insecticidal soap or neem oil. Common diseases that affect green beans include powdery mildew and bean rust. You can prevent these diseases by providing good air circulation and avoiding overhead watering. If your plants do develop a disease, you can treat them with a fungicide.
When should I harvest my green beans?
Harvest your green beans when they are young and tender, about 5-7 days after the flowers have faded. The pods should be firm and snap easily when bent. Harvest regularly to encourage continued production. Overripe beans will be tough and stringy.
Can I grow green beans indoors?
Yes, you can grow green beans indoors, but it can be challenging. You’ll need to provide them with plenty of light, either from a sunny window or grow lights. You’ll also need to pollinate the flowers by hand, as there won’t be any bees or other pollinators indoors.
How do I save seeds from my green bean plants?
To save seeds from your green bean plants, allow some of the pods to mature and dry on the plant. Once the pods are completely dry, remove the seeds and store them in a cool, dry place. Be aware that if you grew a hybrid variety, the seeds may not produce plants that are true to type.
Leave a Comment