
Growing Leeks at Home might seem intimidating, but trust me, it’s easier than you think! Imagine stepping outside your back door and snipping fresh, flavorful leeks to add to your soup, stew, or even a gourmet pizza. Forget those bland, overpriced leeks from the grocery store – with a few simple tricks, you can cultivate your own delicious supply right in your backyard or even on your balcony.
Leeks have a rich history, dating back to ancient Egypt, where they were prized for their culinary and medicinal properties. The Romans, known for their sophisticated palates, spread the love of leeks throughout Europe. Today, they remain a staple in cuisines worldwide, adding a delicate oniony flavor that elevates countless dishes.
But why bother with DIY growing leeks at home? Well, for starters, you’ll have access to fresher, more flavorful leeks than you can typically find in stores. Plus, you’ll know exactly what’s gone into growing them – no harmful pesticides or chemicals! In this article, I’m going to share some simple, effective DIY tricks and hacks that will help you successfully grow leeks at home, even if you’re a complete beginner. Get ready to unleash your inner gardener and enjoy the satisfaction of harvesting your own homegrown leeks!
Growing Leeks at Home: A Beginner’s Guide
Okay, so you want to grow leeks at home? Awesome! Leeks are surprisingly easy to cultivate, and nothing beats the flavor of freshly harvested, homegrown leeks. Plus, they’re super versatile in the kitchen. I’m going to walk you through everything you need to know, from starting seeds to harvesting your delicious leeks. Let’s get started!
Choosing Your Leek Variety
First things first, let’s talk about leek varieties. There are tons of options out there, but here are a few popular choices that I’ve had success with:
* ‘American Flag’: This is a classic, reliable variety known for its long, white shanks and mild flavor. It’s a great all-around choice.
* ‘Giant Musselburgh’: As the name suggests, this variety produces large, thick leeks. It’s very hardy and can withstand colder temperatures.
* ‘King Richard’: This is an early-maturing variety, perfect if you want to harvest your leeks sooner rather than later.
* ‘Bandit’: A beautiful variety with dark green leaves and a long white shank. It’s known for its excellent flavor and disease resistance.
Consider your climate and how long your growing season is when choosing a variety. Seed packets will usually provide information about maturity times.
Starting Leek Seeds Indoors (Recommended)
While you *can* direct sow leek seeds, I highly recommend starting them indoors. This gives them a head start and protects them from early-season pests and diseases.
When to Start Seeds:
* Start your leek seeds about 8-10 weeks before the last expected frost in your area. This will give them plenty of time to develop before transplanting them outdoors.
Materials You’ll Need:
* Leek seeds (of course!)
* Seed starting trays or small pots
* Seed starting mix (a light, well-draining mix is essential)
* Spray bottle filled with water
* Grow lights (optional, but highly recommended)
* Heat mat (optional, but can speed up germination)
Step-by-Step Instructions:
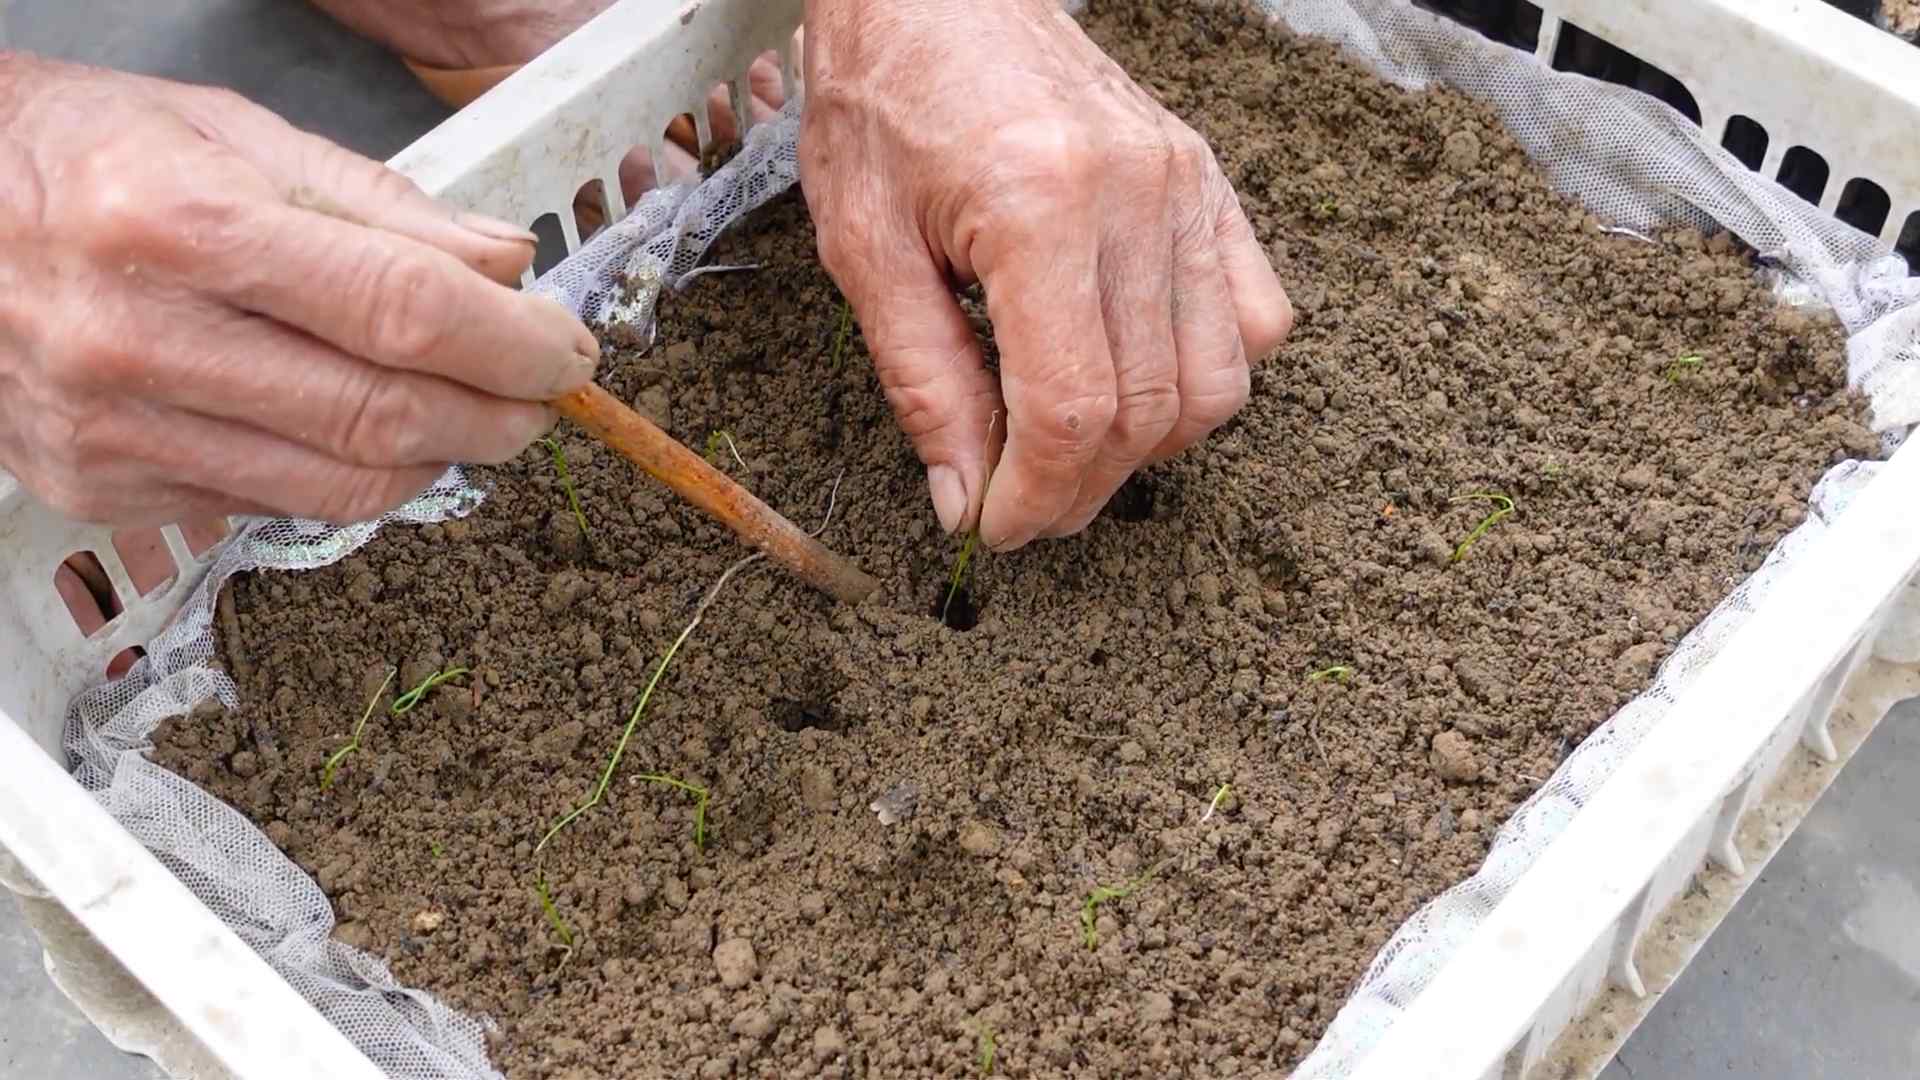
1. Prepare Your Seed Starting Trays: Fill your seed starting trays or pots with seed starting mix. Gently press down on the mix to remove any air pockets.
2. Sow the Seeds: Sow 2-3 leek seeds per cell or pot. Plant them about ¼ inch deep.
3. Water Gently: Use a spray bottle to gently water the soil. You want to moisten the soil without disturbing the seeds.
4. Provide Warmth and Light: Place your seed starting trays on a heat mat (if using) and under grow lights (if using). If you don’t have grow lights, place them in a sunny window.
5. Keep the Soil Moist: Keep the soil consistently moist, but not soggy. Check the soil daily and water as needed.
6. Germination: Leek seeds typically germinate in 7-14 days.
7. Thin Seedlings (Optional): Once the seedlings have emerged, you can thin them to one seedling per cell or pot if you sowed multiple seeds. I usually just leave them and carefully separate them when transplanting.
8. Harden Off Seedlings: About a week before you plan to transplant your leeks outdoors, you’ll need to harden them off. This means gradually exposing them to outdoor conditions. Start by placing them outside for an hour or two each day, gradually increasing the amount of time they spend outdoors.
Preparing Your Garden Bed
Leeks need well-drained soil that is rich in organic matter. Here’s how to prepare your garden bed:
Choosing a Location:
* Leeks need at least 6 hours of sunlight per day. Choose a location in your garden that receives plenty of sun.
Soil Preparation:
1. Amend the Soil: Dig in plenty of compost or well-rotted manure to improve the soil’s drainage and fertility. Leeks are heavy feeders, so they need nutrient-rich soil.
2. Check the pH: Leeks prefer a soil pH of 6.0-7.0. You can test your soil’s pH using a soil testing kit. If your soil is too acidic, you can add lime to raise the pH.
3. Create Trenches or Holes: This is the key to getting those long, blanched leek shanks. You have two options:
* Trenches: Dig trenches that are about 6 inches deep and 6 inches wide. Space the trenches about 12 inches apart.
* Individual Holes: Dig individual holes that are about 6 inches deep and 6 inches wide. Space the holes about 6 inches apart.
Transplanting Your Leek Seedlings
Now comes the fun part – transplanting your leek seedlings into your prepared garden bed!
When to Transplant:
* Transplant your leek seedlings outdoors after the last expected frost. The seedlings should be about 6-8 inches tall.
Step-by-Step Instructions:
1. Carefully Remove Seedlings: Gently remove the leek seedlings from their seed starting trays or pots. Be careful not to damage the roots. If you sowed multiple seeds per cell, carefully separate the seedlings.
2. Plant in Trenches or Holes:
* Trenches: Place the leek seedlings in the trenches, spacing them about 6 inches apart.
* Individual Holes: Place one leek seedling in each hole.
3. Backfill with Soil: Gently backfill the trenches or holes with soil, leaving about 2-3 inches of the leek seedlings exposed.
4. Water Thoroughly: Water the leek seedlings thoroughly after transplanting.
Caring for Your Leeks
Once your leeks are transplanted, they’ll need regular care to thrive.
Watering:
* Leeks need consistent moisture, especially during dry periods. Water them deeply once or twice a week, or more often if the soil is dry.
Weeding:
* Keep the area around your leeks free of weeds. Weeds can compete with the leeks for nutrients and water.
Fertilizing:
* Leeks are heavy feeders, so they’ll benefit from regular fertilization. Side-dress them with compost or a balanced fertilizer every 2-3 weeks.
Blanching:
* To get those long, white shanks that are so desirable, you’ll need to blanch your leeks. This means excluding light from the lower part of the plant. As the leeks grow, gradually fill in the trenches with soil. If you planted in individual holes, you can hill up the soil around the base of the plants. You can also use cardboard tubes or other materials to block out the light.
Pest and Disease Control:
* Leeks are generally pest-resistant, but they can be susceptible to onion thrips and leek moths. Check your plants regularly for signs of pests and take action if necessary. You can use insecticidal soap or neem oil to control pests.
* Leeks can also be susceptible to fungal diseases, such as rust and white rot. To prevent fungal diseases, make sure your plants have good air circulation and avoid overhead watering.
Harvesting Your Leeks
The moment you’ve been waiting for! Harvesting your homegrown leeks.
When to Harvest:
* You can harvest leeks at any size, but they’re typically ready to harvest when they’re about 1-2 inches in diameter.
How to Harvest:
1. Loosen the Soil: Use a garden fork or trowel to loosen the soil around the leek.
2. Gently Pull: Gently pull the leek from the ground.
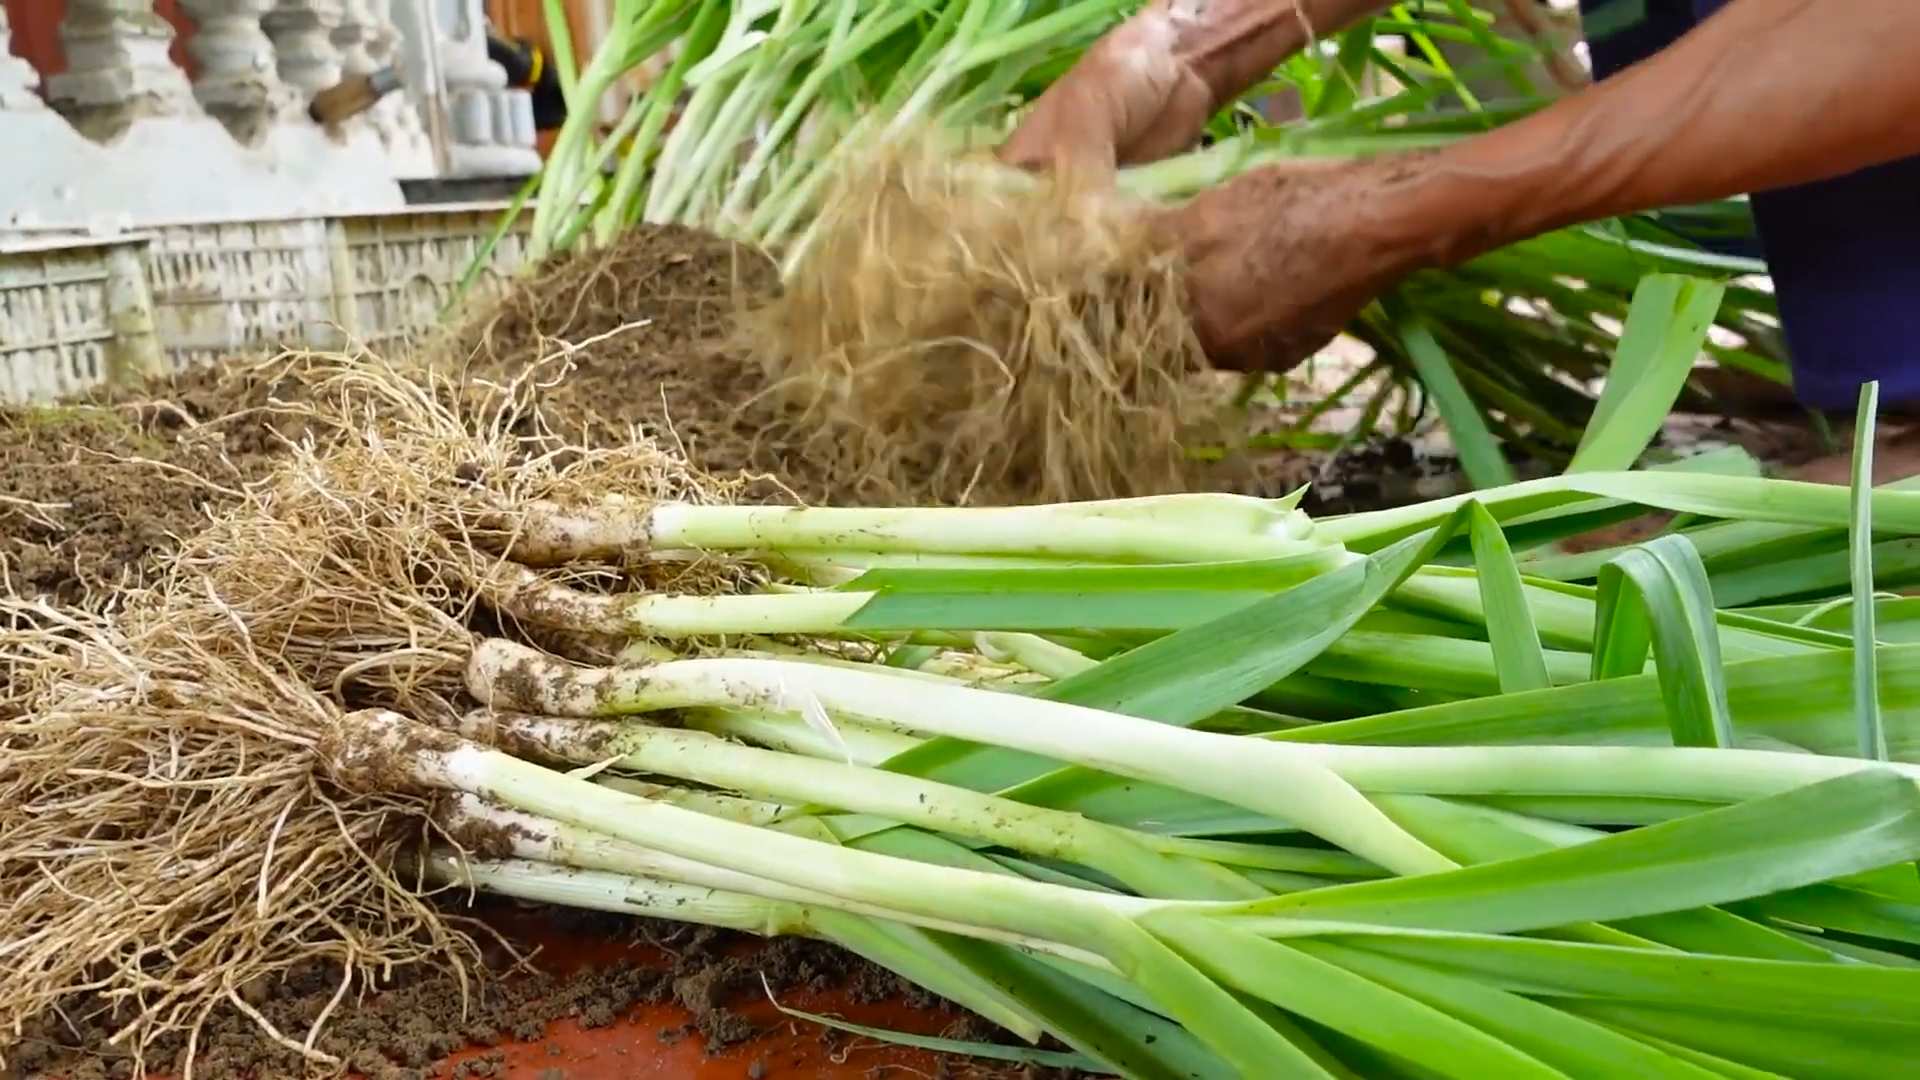
3. Clean the Leek: Remove any excess soil from the leek.
4. Trim the Roots and Leaves: Trim the roots and the top of the leaves.
Storing Your Leeks
To keep your leeks fresh for as long as possible, store them properly.
Short-Term Storage:
* Store leeks in the refrigerator for up to 1-2 weeks. Wrap them loosely in plastic wrap or place them in a plastic bag.
Long-Term Storage:
* Leeks can be frozen for longer storage. To freeze leeks, blanch them in boiling water for 2-3 minutes, then plunge them into ice water to stop the cooking process. Drain the leeks and pat them dry. Place them in freezer bags or containers and freeze.
Okay, so you want to grow leeks at home? Awesome! Leeks are surprisingly easy to cultivate, and nothing beats the flavor of freshly harvested, homegrown leeks. Plus, they’re super versatile in the kitchen. I’m going to walk you through everything you need to know, from starting seeds to harvesting your delicious leeks. Let’s get started!
Choosing Your Leek Variety
First things first, let’s talk about leek varieties. There are tons of options out there, but here are a few popular choices that I’ve had success with:
* ‘American Flag’: This is a classic, reliable variety known for its long, white shanks and mild flavor. It’s a great all-around choice.
* ‘Giant Musselburgh’: As the name suggests, this variety produces large, thick leeks. It’s very hardy and can withstand colder temperatures.
* ‘King Richard’: This is an early-maturing variety, perfect if you want to harvest your leeks sooner rather than later.
* ‘Bandit’: A beautiful variety with dark green leaves and a long white shank. It’s known for its excellent flavor and disease resistance.
Consider your climate and how long your growing season is when choosing a variety. Seed packets will usually provide information about maturity times.
Starting Leek Seeds Indoors (Recommended)
While you *can* direct sow leek seeds, I highly recommend starting them indoors. This gives them a head start and protects them from early-season pests and diseases.
When to Start Seeds:
* Start your leek seeds about 8-10 weeks before the last expected frost in your area. This will give them plenty of time to develop before transplanting them outdoors.
Materials You’ll Need:
* Leek seeds (of course!)
* Seed starting trays or small pots
* Seed starting mix (a light, well-draining mix is essential)
* Spray bottle filled with water
* Grow lights (optional, but highly recommended)
* Heat mat (optional, but can speed up germination)
Step-by-Step Instructions:
1. Prepare Your Seed Starting Trays: Fill your seed starting trays or pots with seed starting mix. Gently press down on the mix to remove any air pockets.
2. Sow the Seeds: Sow 2-3 leek seeds per cell or pot. Plant them about ¼ inch deep.
3. Water Gently: Use a spray bottle to gently water the soil. You want to moisten the soil without disturbing the seeds.
4. Provide Warmth and Light: Place your seed starting trays on a heat mat (if using) and under grow lights (if using). If you don’t have grow lights, place them in a sunny window.
5. Keep the Soil Moist: Keep the soil consistently moist, but not soggy. Check the soil daily and water as needed.
6. Germination: Leek seeds typically germinate in 7-14 days.
7. Thin Seedlings (Optional): Once the seedlings have emerged, you can thin them to one seedling per cell or pot if you sowed multiple seeds. I usually just leave them and carefully separate them when transplanting.
8. Harden Off Seedlings: About a week before you plan to transplant your leeks outdoors, you’ll need to harden them off. This means gradually exposing them to outdoor conditions. Start by placing them outside for an hour or two each day, gradually increasing the amount of time they spend outdoors.
Preparing Your Garden Bed
Leeks need well-drained soil that is rich in organic matter. Here’s how to prepare your garden bed:
Choosing a Location:
* Leeks need at least 6 hours of sunlight per day. Choose a location in your garden that receives plenty of sun.
Soil Preparation:
1. Amend the Soil: Dig in plenty of compost or well-rotted manure to improve the soil’s drainage and fertility. Leeks are heavy feeders, so they need nutrient-rich soil.
2. Check the pH: Leeks prefer a soil pH of 6.0-7.0. You can test your soil’s pH using a soil testing kit. If your soil is too acidic, you can add lime to raise the pH.
3. Create Trenches or Holes: This is the key to getting those long, blanched leek shanks. You have two options:
* Trenches: Dig trenches that are about 6 inches deep and 6 inches wide. Space the trenches about 12 inches apart.
* Individual Holes: Dig individual holes that are about 6 inches deep and 6 inches wide. Space the holes about 6 inches apart.
Transplanting Your Leek Seedlings
Now comes the fun part – transplanting your leek seedlings into your prepared garden bed!
When to Transplant:
* Transplant your leek seedlings outdoors after the last expected frost. The seedlings should be about 6-8 inches tall.
Step-by-Step Instructions:
1. Carefully Remove Seedlings: Gently remove the leek seedlings from their seed starting trays or pots. Be careful not to damage the roots. If you sowed multiple seeds per cell, carefully separate the seedlings.
2. Plant in Trenches or Holes:
* Trenches: Place the leek seedlings in the trenches, spacing them about 6 inches apart.
* Individual Holes: Place one leek seedling in each hole.
3. Backfill with Soil: Gently backfill the trenches or holes with soil, leaving about 2-3 inches of the leek seedlings exposed.
4. Water Thoroughly: Water the leek seedlings thoroughly after transplanting.
Caring for Your Leeks
Once your leeks are transplanted, they’ll need regular care to thrive.
Watering:
* Leeks need consistent moisture, especially during dry periods. Water them deeply once or twice a week, or more often if the soil is dry.
Weeding:
* Keep the area around your leeks free of weeds. Weeds can compete with the leeks for nutrients and water.
Fertilizing:
* Leeks are heavy feeders, so they’ll benefit from regular fertilization. Side-dress them with compost or a balanced fertilizer every 2-3 weeks.
Blanching:
* To get those long, white shanks that are so desirable, you’ll need to blanch your leeks. This means excluding light from the lower part of the plant. As the leeks grow, gradually fill in the trenches with soil. If you planted in individual holes, you can hill up the soil around the base of the plants. You can also use cardboard tubes or other materials to block out the light.
Pest and Disease Control:
* Leeks are generally pest-resistant, but they can be susceptible to onion thrips and leek moths. Check your plants regularly for signs of pests and take action if necessary. You can use insecticidal soap or neem oil to control pests.
* Leeks can also be susceptible to fungal diseases, such as rust and white rot. To prevent fungal diseases, make sure your plants have good air circulation and avoid overhead watering.
Harvesting Your Leeks
The moment you’ve been waiting for! Harvesting your homegrown leeks.
When to Harvest:
* You can harvest leeks at any size, but they’re typically ready to harvest when they’re about 1-2 inches in diameter.
How to Harvest:
1. Loosen the Soil: Use a garden fork or trowel to loosen the soil around the leek.
2. Gently Pull: Gently pull the leek from the ground.
3. Clean the Leek: Remove any excess soil from the leek.
4. Trim the Roots and Leaves: Trim the roots and the top of the leaves.
Storing Your Leeks
To keep your leeks fresh for as long as possible, store them properly.
Short-Term Storage:
* Store leeks in the refrigerator for up to 1-2 weeks. Wrap them loosely in plastic wrap or place them in a plastic bag.
Long-Term Storage:
* Leeks can be frozen for longer storage. To freeze leeks, blanch them in boiling water for 2-3 minutes, then plunge them into ice water to stop the cooking process. Drain the leeks and pat them dry. Place them in freezer bags or containers and freeze.
Troubleshooting Common Leek Growing Problems
Even with the best care, you might encounter a few problems when growing leeks. Here are some common issues and how to address them:
* Yellowing Leaves: This could be a sign of nutrient deficiency, overwatering, or underwatering. Check
Conclusion
So, there you have it! Growing leeks at home is not only achievable, but it’s also a deeply rewarding experience that connects you to your food in a tangible way. Forget those bland, overpriced leeks from the supermarket. Imagine the satisfaction of harvesting plump, flavorful leeks from your own backyard, knowing exactly where they came from and how they were grown. This isn’t just about saving money (though that’s a definite perk!); it’s about embracing a more sustainable and delicious lifestyle.
This DIY approach to growing leeks offers a level of control and customization you simply can’t get with store-bought produce. You can choose the specific variety that best suits your taste and climate, experiment with different planting techniques, and tailor your care to ensure optimal growth. Plus, the process itself is incredibly therapeutic. There’s something undeniably calming about nurturing a plant from seed to harvest.
Why is this a must-try? Because it’s fresh, flavorful, and fulfilling! You’ll be amazed at the difference in taste between homegrown leeks and those you find in the grocery store. The subtle sweetness and delicate oniony flavor are amplified when the leeks are freshly harvested.
Ready to take your leek-growing game to the next level? Consider these variations:
* **Succession Planting:** Plant leek seeds every few weeks to ensure a continuous harvest throughout the growing season.
* **Container Gardening:** If you’re short on space, leeks can thrive in large containers. Just make sure they have adequate drainage.
* **Companion Planting:** Plant leeks alongside carrots to deter carrot root flies and onion flies. Marigolds are also great companions, helping to repel nematodes.
* **Blanching Variations:** Experiment with different blanching methods. Instead of mounding soil, try using cardboard tubes or even old plastic bottles to exclude light and create longer, whiter shanks.
Don’t be intimidated if you’re a beginner gardener. Growing leeks is surprisingly straightforward, and the rewards are well worth the effort. With a little patience and attention, you’ll be enjoying homegrown leeks in no time.
We wholeheartedly encourage you to give this DIY trick a try. Start small, learn as you go, and don’t be afraid to experiment. The journey of growing your own food is an adventure in itself. Once you’ve experienced the joy of harvesting your own leeks, you’ll never look at them the same way again.
And most importantly, we want to hear about your experience! Share your tips, tricks, and triumphs in the comments below. Let’s build a community of leek-loving gardeners and inspire others to embrace the joys of homegrown produce. What variety did you choose? What challenges did you face? What delicious dishes did you create with your homegrown leeks? Your insights could be invaluable to other aspiring gardeners. Let’s cultivate a thriving community around this fantastic DIY project. So, grab your seeds, get your hands dirty, and get ready to enjoy the unparalleled flavor of homegrown leeks!
Frequently Asked Questions (FAQ)
What is the best time of year to plant leeks?
The ideal time to plant leeks depends on your climate. In general, you can start seeds indoors 8-10 weeks before the last expected frost. If you live in a warmer climate with mild winters, you can plant seeds directly outdoors in the fall for a spring harvest. For cooler climates, start seeds indoors in late winter or early spring for transplanting outdoors after the last frost.
How much sunlight do leeks need?
Leeks thrive in full sun, which means they need at least 6-8 hours of direct sunlight per day. If you’re growing them indoors, make sure they’re near a sunny window or under grow lights. Insufficient sunlight can result in leggy, weak plants.
What kind of soil is best for growing leeks?
Leeks prefer well-drained, fertile soil that is rich in organic matter. Before planting, amend your soil with compost or well-rotted manure to improve drainage and nutrient content. A slightly acidic to neutral soil pH (around 6.0 to 7.0) is ideal.
How often should I water my leeks?
Leeks need consistent moisture, especially during hot, dry weather. Water deeply whenever the top inch of soil feels dry to the touch. Avoid overwatering, which can lead to root rot. Mulching around the plants can help retain moisture and suppress weeds.
How do I blanch leeks?
Blanching leeks is essential for developing their characteristic white shanks. As the leeks grow, gradually mound soil around the base of the plants, covering the lower portion of the stems. This excludes light, preventing chlorophyll production and resulting in a tender, milder-flavored white shank. You can also use cardboard tubes or plastic bottles to blanch the leeks.
What are some common pests and diseases that affect leeks?
Leeks can be susceptible to pests such as onion flies, thrips, and leek moths. Diseases like rust and white rot can also be a problem. To prevent these issues, practice crop rotation, keep your garden clean and free of debris, and use organic pest control methods if necessary. Companion planting with carrots can help deter onion flies.
How long does it take for leeks to mature?
Leeks typically take 120-150 days to mature from seed. However, you can start harvesting them when they are about 1 inch in diameter, even if they haven’t reached their full size. The longer you leave them in the ground, the larger they will grow.
How do I harvest leeks?
To harvest leeks, gently loosen the soil around the base of the plant with a garden fork or trowel. Carefully pull the leek out of the ground, being careful not to damage the roots. Trim off the roots and any damaged leaves.
Can I store leeks after harvesting?
Yes, you can store leeks in the refrigerator for up to two weeks. Wrap them loosely in plastic wrap or store them in a plastic bag. You can also freeze leeks for longer storage. Blanch them briefly in boiling water, then cool them in an ice bath before freezing.
What are some ways to use homegrown leeks?
Homegrown leeks are incredibly versatile and can be used in a variety of dishes. They can be added to soups, stews, and casseroles. They can also be sautéed, grilled, or roasted. Leeks are a delicious addition to quiches, frittatas, and omelets. Try using them in place of onions in your favorite recipes for a milder, sweeter flavor. Leek and potato soup is a classic and comforting dish that showcases the unique flavor of leeks.
Leave a Comment