
Growing Marigolds Successfully is easier than you might think, and I’m here to show you how! Have you ever admired those vibrant, cheerful blooms and wished you could have a garden bursting with their sunny disposition? Well, you absolutely can! This DIY guide is packed with simple tricks and hacks that will transform even the most novice gardener into a marigold-growing pro.
Marigolds have a rich history, dating back to ancient Aztec cultures where they were used for medicinal and ceremonial purposes. Their bright colors and hardy nature have made them a beloved flower worldwide, symbolizing passion and creativity in some cultures. But beyond their beauty and symbolism, marigolds are incredibly beneficial for your garden. They act as natural pest repellents, attracting beneficial insects and deterring unwanted critters.
Let’s face it, gardening can sometimes feel overwhelming. Pests, diseases, and unpredictable weather can quickly turn your green dreams into a brown nightmare. That’s why I’m so excited to share these easy-to-implement DIY tricks for growing marigolds successfully. These aren’t complicated, time-consuming projects; they’re simple adjustments to your gardening routine that will yield big results. Imagine a garden filled with vibrant marigolds, naturally protected from pests, and thriving with minimal effort. This guide will show you exactly how to achieve that, making your gardening experience more enjoyable and rewarding. So, grab your gardening gloves, and let’s get started!
Growing Marigolds Successfully: A DIY Guide
Hey there, fellow gardening enthusiasts! I’m so excited to share my tried-and-true methods for growing vibrant, healthy marigolds. These cheerful flowers are not only beautiful but also incredibly beneficial for your garden, acting as natural pest repellents and attracting pollinators. Let’s dive into the secrets of successful marigold cultivation!
Choosing Your Marigold Variety
Before we get our hands dirty, let’s talk about the different types of marigolds. There are two main categories: African marigolds (Tagetes erecta) and French marigolds (Tagetes patula).
* **African Marigolds:** These are the tall, stately ones, often reaching 1-3 feet in height. They produce large, pom-pom-like blooms in shades of yellow, orange, and gold. They’re fantastic for adding height and drama to your garden.
* **French Marigolds:** These are smaller and bushier, typically growing 6-12 inches tall. They have smaller, more delicate flowers, often with intricate patterns and bi-color combinations. French marigolds are excellent for edging, borders, and containers.
* **Signet Marigolds:** These are less common, but I highly recommend them! They have a citrusy scent and edible petals. They are smaller and bushier than French Marigolds.
Consider your garden space and desired aesthetic when choosing your marigold variety. I personally love planting a mix of both African and French marigolds for a diverse and colorful display.
Starting Your Marigolds: Seeds vs. Seedlings
You have two options for starting your marigolds: from seeds or from seedlings purchased at a nursery. Both methods have their advantages.
* **Starting from Seeds:** This is the more economical option, and it allows you to choose from a wider variety of cultivars. You can start seeds indoors 6-8 weeks before the last expected frost or direct sow them into the garden after the danger of frost has passed.
* **Buying Seedlings:** This is the quicker and easier option, especially if you’re short on time or space. Seedlings are already established, so you’ll get a head start on blooming.
I usually start my marigolds from seeds indoors to get a jump start on the growing season. Here’s how I do it:
Starting Marigolds from Seeds Indoors
1. **Gather Your Supplies:** You’ll need seed starting trays or small pots, seed starting mix (a light, well-draining soil), marigold seeds, a spray bottle, and a heat mat (optional but recommended).
2. **Prepare the Seed Starting Mix:** Moisten the seed starting mix with water until it’s damp but not soggy. Fill the seed starting trays or pots with the moistened mix.
3. **Sow the Seeds:** Sow the marigold seeds about ¼ inch deep in the soil. I usually plant 2-3 seeds per cell or pot to increase the chances of germination.
4. **Water Gently:** Use a spray bottle to gently water the seeds. Avoid overwatering, as this can lead to damping off, a fungal disease that can kill seedlings.
5. **Provide Warmth and Light:** Place the seed starting trays or pots on a heat mat (if using) and under grow lights or in a sunny window. Marigolds need warmth and light to germinate. The ideal temperature for germination is around 70-75°F (21-24°C).
6. **Keep the Soil Moist:** Check the soil moisture daily and water as needed to keep it consistently moist but not soggy.
7. **Thin Seedlings (If Necessary):** Once the seedlings have emerged and have a few sets of true leaves, thin them to one seedling per cell or pot. Choose the strongest, healthiest seedling and snip off the others at the soil line.
8. **Harden Off Seedlings:** Before transplanting the seedlings outdoors, you’ll need to harden them off. This process gradually acclimates the seedlings to outdoor conditions. Start by placing the seedlings outdoors in a sheltered location for a few hours each day, gradually increasing the amount of time they spend outdoors over the course of a week or two.
Transplanting Marigolds Outdoors
Once the danger of frost has passed and the soil has warmed up, it’s time to transplant your marigolds outdoors.
1. **Choose a Sunny Location:** Marigolds thrive in full sun, so choose a location that receives at least 6-8 hours of sunlight per day.
2. **Prepare the Soil:** Marigolds prefer well-draining soil that is rich in organic matter. Amend the soil with compost or other organic matter before planting.
3. **Dig Holes:** Dig holes that are slightly larger than the root balls of the seedlings. Space the holes according to the mature size of the marigold variety you’re planting. For African marigolds, space them 12-18 inches apart. For French marigolds, space them 6-12 inches apart.
4. **Remove Seedlings from Pots:** Gently remove the seedlings from their pots, being careful not to damage the roots.
5. **Plant the Seedlings:** Place the seedlings in the holes and backfill with soil. Gently firm the soil around the base of the plants.
6. **Water Thoroughly:** Water the newly transplanted marigolds thoroughly.
7. **Mulch:** Apply a layer of mulch around the base of the plants to help retain moisture, suppress weeds, and regulate soil temperature. I like to use straw or shredded bark mulch.
Caring for Your Marigolds
Once your marigolds are planted, they’re relatively low-maintenance. Here are a few tips for keeping them healthy and blooming:
* **Watering:** Water marigolds regularly, especially during dry spells. Avoid overwatering, as this can lead to root rot. Allow the soil to dry out slightly between waterings.
* **Fertilizing:** Marigolds don’t need a lot of fertilizer, but a light feeding every few weeks can help promote blooming. Use a balanced fertilizer or a fertilizer specifically formulated for flowering plants. I prefer using a liquid fertilizer diluted to half strength.
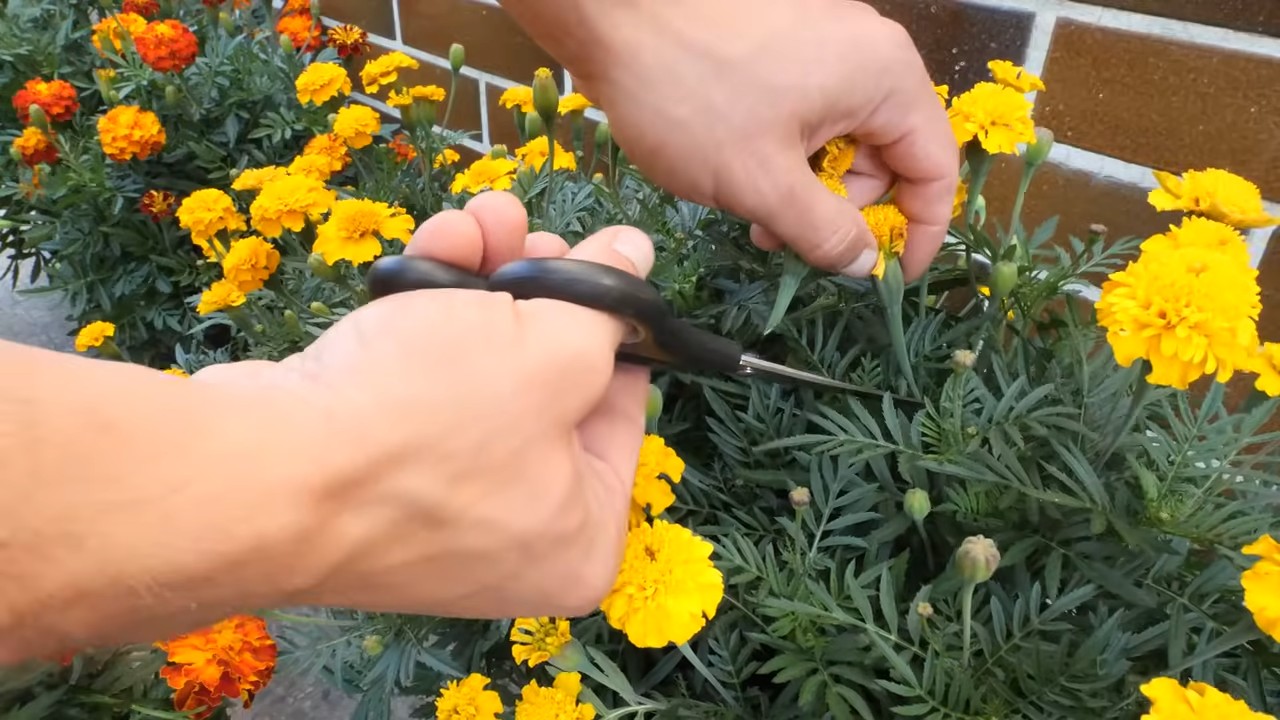
* **Deadheading:** Deadheading, or removing spent flowers, encourages the plants to produce more blooms. Simply pinch or snip off the faded flowers just below the flower head.
* **Pest Control:** Marigolds are relatively pest-resistant, but they can occasionally be bothered by aphids, spider mites, or slugs. If you notice any pests, treat them with insecticidal soap or neem oil. I’ve found that companion planting marigolds with other plants, like tomatoes and basil, helps to deter pests naturally.
* **Disease Prevention:** To prevent fungal diseases, avoid overwatering and ensure good air circulation around the plants. If you notice any signs of disease, such as powdery mildew or leaf spot, treat the plants with a fungicide.
Harvesting Marigold Seeds
If you want to save seeds from your marigolds to plant next year, here’s how to do it:
1. **Allow Flowers to Dry on the Plant:** Let the flowers dry completely on the plant. The petals will turn brown and crispy.
2. **Collect the Seeds:** Once the flowers are dry, gently pull them off the plant and break them open. You’ll find small, black seeds inside.
3. **Dry the Seeds:** Spread the seeds out on a paper towel and let them dry completely for a few days.
4. **Store the Seeds:** Store the dried seeds in an airtight container in a cool, dark, and dry place. They should remain viable for several years.
Troubleshooting Common Marigold Problems
Even with the best care, you might encounter a few problems when growing marigolds. Here are some common issues and how to address them:
* **Leggy Growth:** If your marigolds are tall and spindly with few flowers, they’re likely not getting enough sunlight. Move them to a sunnier location or provide supplemental lighting.
* **Lack of Blooms:** Several factors can contribute to a lack of blooms, including insufficient sunlight, overwatering, or over-fertilizing. Make sure your marigolds are getting enough sunlight and water them properly. Avoid using fertilizers that are high in nitrogen, as this can promote foliage growth at the expense of blooms.
* **Yellowing Leaves:** Yellowing leaves can be a sign of overwatering, nutrient deficiency, or pest infestation. Check the soil moisture and adjust your watering accordingly. If the soil is dry, water the plants thoroughly. If the soil is soggy, allow it to dry out before watering again. If you suspect a nutrient deficiency, fertilize the plants with a balanced fertilizer. Inspect the plants for pests and treat them as needed.
* **Powdery Mildew:** Powdery mildew is a fungal disease that appears as a white, powdery coating on the leaves. It’s most common in humid conditions. To prevent powdery mildew, ensure good air circulation around the plants and avoid overhead watering. If you notice powdery mildew, treat the plants with a fungicide.
Marigolds in Companion Planting
Marigolds are fantastic companion plants! Their strong scent repels many common

Conclusion
So, there you have it! Mastering the art of growing marigolds successfully isn’t about complicated techniques or expensive equipment. It’s about understanding their basic needs and employing a few clever, DIY tricks to give them the best possible start and continued flourishing. We’ve explored how to create the perfect soil mix, optimize sunlight exposure, and even craft your own natural pest control solutions – all designed to help you cultivate vibrant, healthy marigolds that will brighten your garden and your day.
Why is this DIY approach a must-try? Because it empowers you to take control of your gardening process. You’re not just passively following instructions; you’re actively participating in creating the ideal environment for your marigolds. This hands-on experience fosters a deeper connection with your plants and allows you to tailor your approach to their specific needs. Plus, it’s incredibly rewarding to see the fruits (or rather, the flowers!) of your labor, knowing that you played a direct role in their success.
But the journey doesn’t end here! Feel free to experiment with variations on these techniques. For instance, instead of using coffee grounds, try incorporating eggshells into your soil mix for an extra boost of calcium. Or, if you’re dealing with particularly stubborn pests, consider adding a few drops of essential oils like peppermint or rosemary to your homemade insecticidal soap. The possibilities are endless!
We encourage you to embrace these DIY methods and discover the joy of growing marigolds successfully. Don’t be afraid to get your hands dirty, to experiment, and to learn from your experiences. Gardening is a journey of continuous discovery, and we’re confident that these tips will set you on the right path.
Most importantly, we want to hear about your experiences! Share your successes, your challenges, and any variations you’ve tried in the comments below. Let’s create a community of marigold enthusiasts who can learn from each other and inspire others to embrace the beauty and simplicity of DIY gardening. Your insights could be invaluable to someone just starting out, and together, we can all become more successful marigold growers. So, grab your gardening gloves, get creative, and let’s grow some amazing marigolds!
Frequently Asked Questions (FAQ)
What are the most common problems when growing marigolds, and how can these DIY tricks help?
The most common problems include pest infestations (like aphids and spider mites), fungal diseases (like powdery mildew), and poor soil conditions. Our DIY tricks directly address these issues. The homemade insecticidal soap tackles pests naturally, while ensuring good air circulation and proper watering techniques helps prevent fungal diseases. The DIY soil mix ensures your marigolds have the nutrients they need to thrive, making them more resistant to disease and pests in the first place. By using these DIY methods, you’re proactively creating a healthier environment for your plants, reducing the likelihood of these problems arising.
Can I use these DIY tricks for other types of flowers or vegetables?
Absolutely! Many of these techniques are applicable to a wide range of plants. For example, the DIY soil mix can be adapted for other flowering plants or vegetables by adjusting the proportions of compost, perlite, and other amendments to suit their specific needs. The homemade insecticidal soap is generally safe for most plants, but it’s always a good idea to test it on a small area first to ensure there’s no adverse reaction. The principles of providing adequate sunlight and good air circulation are universal for plant health.
How often should I apply the homemade insecticidal soap?
The frequency of application depends on the severity of the infestation. For mild infestations, spraying once a week may be sufficient. For more severe infestations, you may need to spray every other day for a week or two. Always monitor your plants closely and adjust the frequency accordingly. Remember to spray in the early morning or late evening to avoid burning the leaves in direct sunlight.
What if I don’t have all the ingredients for the DIY soil mix? Can I substitute anything?
Yes, you can make substitutions based on what you have available. For example, if you don’t have perlite, you can use vermiculite or coarse sand to improve drainage. If you don’t have compost, you can use well-rotted manure or other organic matter to provide nutrients. The key is to ensure that the soil is well-draining, nutrient-rich, and has good aeration.
How much sunlight do marigolds really need?
Marigolds thrive in full sun, which means they need at least six hours of direct sunlight per day. If they don’t get enough sunlight, they may become leggy, produce fewer flowers, and be more susceptible to diseases. If you live in a particularly hot climate, you may need to provide some afternoon shade to prevent the flowers from scorching.
Is it really necessary to deadhead marigolds?
Yes, deadheading is crucial for encouraging continuous blooming. When you remove the spent flowers, you’re preventing the plant from putting its energy into seed production and redirecting it towards producing more flowers. Simply pinch or cut off the dead flowers just below the flower head, where the stem meets the plant.
How can I attract pollinators to my marigolds?
Marigolds are naturally attractive to pollinators, but you can further enhance their appeal by planting them alongside other pollinator-friendly plants, such as lavender, salvia, and bee balm. Avoid using pesticides, as these can harm beneficial insects. Providing a shallow dish of water with pebbles for the pollinators to land on can also help attract them to your garden.
Can I grow marigolds in containers?
Absolutely! Marigolds are well-suited for container gardening. Choose a pot that is at least 6 inches in diameter and has good drainage holes. Use the DIY soil mix or a high-quality potting mix. Water regularly, especially during hot weather, and fertilize every few weeks with a balanced fertilizer.
How do I know if I’m overwatering or underwatering my marigolds?
Overwatering can lead to root rot, which can kill your plants. Signs of overwatering include yellowing leaves, wilting, and a musty smell coming from the soil. Underwatering can cause the leaves to become dry and crispy. To check the moisture level, stick your finger into the soil about an inch deep. If the soil feels dry, it’s time to water. If it feels wet, wait a day or two and check again.
What are the best varieties of marigolds to grow?
There are many different varieties of marigolds to choose from, each with its own unique characteristics. Some popular varieties include French marigolds (Tagetes patula), African marigolds (Tagetes erecta), and signet marigolds (Tagetes tenuifolia). French marigolds are smaller and more compact, while African marigolds are taller and produce larger flowers. Signet marigolds have a citrusy scent and are edible. Experiment with different varieties to find the ones that you like best. Remember that growing marigolds successfully is a journey, and each variety offers a unique experience.


Leave a Comment