
Growing Okra in Pots might seem like a challenge, but trust me, it’s totally achievable, even if you’re short on space! Have you ever dreamt of stepping outside your door and harvesting fresh, vibrant okra for your gumbo or stir-fry? Well, dream no more! This guide is packed with simple, effective DIY tricks and hacks that will transform your balcony, patio, or even a sunny windowsill into a thriving okra oasis.
Okra, also known as “lady’s fingers,” has a rich history, tracing back to ancient Ethiopia and Egypt. It’s been a culinary staple in African, Asian, and Southern American cuisines for centuries. Beyond its delicious flavor, okra is packed with nutrients, making it a healthy and rewarding addition to your diet.
But why bother with growing okra in pots? Well, not everyone has access to a sprawling garden. Apartment dwellers, urban gardeners, and those with limited mobility can all enjoy the satisfaction of growing their own food. Plus, container gardening allows you to control the soil quality, sunlight exposure, and watering, leading to healthier, more productive plants. I’m here to show you that with a few simple steps and a little know-how, you can successfully cultivate this Southern favorite right at home. Let’s get started!
Growing Asparagus: A Beginner’s Guide to a Bountiful Harvest
Asparagus! Just the word conjures up images of spring dinners and delicious side dishes. And guess what? You can grow your own! It might seem intimidating, but trust me, with a little patience and the right know-how, you’ll be harvesting your own spears in no time. This guide will walk you through everything you need to know to successfully grow asparagus in your garden.
Choosing Your Asparagus Variety
Before we get our hands dirty, let’s talk about choosing the right asparagus variety. This is important because different varieties have different characteristics, like disease resistance and spear size.
* ‘Jersey Knight’: This is a popular all-male hybrid known for its high yield and disease resistance. It’s a great choice for beginners.
* ‘Jersey Giant’: Another all-male hybrid, ‘Jersey Giant’ produces large, thick spears.
* ‘Purple Passion’: If you want something a little different, ‘Purple Passion’ offers beautiful purple spears that turn green when cooked. It’s also sweeter than green varieties.
* ‘Mary Washington’: An older variety, ‘Mary Washington’ is still a reliable choice, especially if you’re looking for something readily available.
I personally recommend starting with ‘Jersey Knight’ or ‘Jersey Giant’ – they’re both reliable and produce excellent spears.
Preparing the Asparagus Bed
Asparagus is a perennial, meaning it will come back year after year. So, it’s crucial to choose the right location and prepare the bed properly. This is a long-term investment, so let’s do it right!
* Sunlight: Asparagus needs at least 6-8 hours of sunlight per day. Choose a sunny spot in your garden.
* Soil: Asparagus prefers well-drained soil that is rich in organic matter. Sandy loam is ideal, but you can amend clay or sandy soil to make it suitable.
* Drainage: Good drainage is essential. Asparagus crowns will rot in soggy soil.
* Weed Control: Clear the area of all weeds, including their roots. Asparagus doesn’t compete well with weeds, especially when it’s young.
Step-by-Step Planting Guide
Now for the fun part – planting! You can start asparagus from seed, but it takes a long time (up to three years) to get a harvest. I recommend buying one-year-old crowns. They’re readily available at nurseries and online, and they’ll give you a head start.
1. Dig a Trench: Dig a trench that is about 12 inches wide and 6-8 inches deep. If you’re planting multiple rows, space them about 4 feet apart.
2. Amend the Soil: Mix compost or well-rotted manure into the soil you removed from the trench. This will provide nutrients and improve drainage. I usually use a generous amount of compost – the more, the merrier!
3. Create Mounds: Create small mounds of soil along the bottom of the trench, spacing them about 12-18 inches apart. These mounds will support the asparagus crowns.
4. Place the Crowns: Place the asparagus crowns on top of the mounds, spreading the roots out like a spider. Make sure the crown is facing upwards.
5. Cover the Crowns: Gently cover the crowns with about 2-3 inches of soil. Water thoroughly.
6. Gradually Fill the Trench: As the asparagus spears emerge, gradually fill in the trench with soil. This will encourage the crowns to develop a strong root system. Over the growing season, you’ll completely fill the trench.
7. Mulch: Apply a layer of mulch around the asparagus plants to help retain moisture, suppress weeds, and regulate soil temperature. I like to use straw or wood chips.
Caring for Your Asparagus Patch
Once your asparagus is planted, it’s important to provide proper care to ensure a healthy and productive patch.
* Watering: Asparagus needs consistent moisture, especially during dry periods. Water deeply and regularly, especially when the spears are actively growing.
* Fertilizing: Fertilize your asparagus patch in early spring with a balanced fertilizer. You can also side-dress with compost throughout the growing season. I usually use a 10-10-10 fertilizer, following the instructions on the package.
* Weed Control: Keep the area around your asparagus plants free of weeds. Hand-pull weeds regularly, or use a hoe to cultivate the soil. Be careful not to damage the asparagus crowns.
* Pest and Disease Control: Asparagus is relatively pest-resistant, but it can be susceptible to asparagus beetles and crown rot. Inspect your plants regularly for signs of pests or disease. If you find asparagus beetles, hand-pick them off the plants or use an insecticidal soap. To prevent crown rot, ensure good drainage and avoid overwatering.
Harvesting Your Asparagus
Patience is key when it comes to harvesting asparagus. You shouldn’t harvest any spears during the first two years after planting. This allows the plants to establish a strong root system.
* Year 1 & 2: Resist the urge to harvest! Let the spears grow into ferns. This is crucial for building the plant’s energy reserves.
* Year 3: You can begin harvesting lightly in the third year. Harvest for about 2-3 weeks.
* Year 4 and Beyond: In subsequent years, you can harvest for 6-8 weeks.
How to Harvest:
1. Harvest when the spears are about 6-8 inches tall.
2. Cut the spears at ground level with a sharp knife. Be careful not to damage the surrounding spears or the crown.
3. Harvest spears every day or two during peak season.
Maintaining Your Asparagus Patch
To keep your asparagus patch healthy and productive for years to come, it’s important to provide ongoing maintenance.
* Fall Cleanup: In the fall, after the ferns have turned brown, cut them back to ground level. This will help prevent disease and pests from overwintering in the patch.
* Mulching: Apply a fresh layer of mulch in the fall to protect the crowns from winter cold and to suppress weeds.
* Dividing: After several years, your asparagus patch may become overcrowded. If this happens, you can divide the crowns in early spring. Dig up the crowns and separate them into smaller clumps, making sure each clump has healthy roots and buds. Replant the clumps in a new location.
Troubleshooting Common Asparagus Problems
Even with the best care, you may encounter some problems when growing asparagus. Here are some common issues and how to address them:
* Thin Spears: Thin spears can be a sign of nutrient deficiency or overcrowding. Fertilize your asparagus patch and consider dividing the crowns if they are overcrowded.
* Yellowing Ferns: Yellowing ferns can be caused by a variety of factors, including nutrient deficiency, disease, or pest infestation. Check the soil pH and nutrient levels, and inspect the plants for signs of pests or disease.
* Asparagus Beetles: Asparagus beetles are small, colorful beetles that can damage asparagus spears and ferns. Hand-pick the beetles off the plants or use an insecticidal soap.
* Crown Rot: Crown rot is a fungal disease that can cause the crowns to rot. Ensure good drainage and avoid overwatering to prevent crown rot.
Enjoying Your Homegrown Asparagus
The best part of growing your own asparagus is, of course, enjoying the delicious harvest! Asparagus is incredibly versatile and can be prepared in many different ways.
* Steamed: Steaming is a simple and healthy way to cook asparagus.
* Roasted: Roasting asparagus brings out its natural sweetness.
* Grilled: Grilled asparagus is a perfect addition to any barbecue.
* Sautéed: Sautéed asparagus is a quick and easy side dish.
* In Soups and Salads: Asparagus can also be added to soups and salads for extra flavor and nutrients.
My personal favorite is roasting asparagus with a little olive oil, salt, and pepper. It’s simple, delicious, and lets the flavor of the asparagus shine through.
Extra Tips for Success
Here are a few extra tips to help you succeed in growing asparagus:
* Test Your Soil: Before planting, test your soil to determine its pH and nutrient levels. This will help you amend the soil properly.
* Choose a Well-Drained Location: Good drainage is essential for asparagus. Avoid planting in areas that are prone to flooding.
* Be Patient: Asparagus takes time to establish. Don’t get discouraged if you don’t get a harvest right away.
* Enjoy the Process: Growing your own asparagus is a rewarding experience. Enjoy the process and savor
Conclusion
So, there you have it! Growing okra in pots isn’t just a possibility; it’s a rewarding and surprisingly simple way to enjoy fresh, homegrown okra, even if you’re limited on space. We’ve walked through the essentials, from selecting the right pot and soil to nurturing your plants and harvesting those delicious pods. But why is this DIY trick a must-try?
Firstly, the convenience is unparalleled. Imagine stepping onto your balcony or patio and picking fresh okra for your gumbo or stir-fry. No more trips to the grocery store hoping to find okra that hasn’t been sitting for days. You control the freshness and quality.
Secondly, growing okra in pots allows for greater control over the growing environment. You can easily move your plants to chase the sun, protect them from unexpected frosts, or shield them from excessive rain. This is particularly beneficial for those living in areas with unpredictable weather patterns.
Thirdly, it’s incredibly satisfying! There’s something deeply fulfilling about nurturing a plant from seed to harvest. Watching your okra plants thrive and produce those beautiful, edible pods is a testament to your green thumb (or soon-to-be green thumb!).
But the journey doesn’t end here! Feel free to experiment with different okra varieties. Clemson Spineless is a classic choice, but why not try Burgundy okra for its stunning red pods or Emerald okra for its compact growth habit? You can also experiment with different companion plants in the same pot, such as basil or marigolds, to deter pests and attract pollinators. Consider adding a trellis or stake to support taller varieties as they grow.
Don’t be afraid to adjust the watering schedule based on your local climate and the specific needs of your plants. Remember to fertilize regularly with a balanced fertilizer to ensure healthy growth and abundant pod production.
Ultimately, growing okra in pots is a fantastic way to connect with nature, enjoy fresh produce, and add a touch of beauty to your outdoor space. It’s a project that’s accessible to gardeners of all skill levels, and the rewards are well worth the effort.
We wholeheartedly encourage you to give this DIY trick a try. Start small, learn as you go, and don’t be discouraged by the occasional setback. Gardening is a journey of discovery, and every mistake is an opportunity to learn and grow.
Once you’ve harvested your first batch of homegrown okra, we’d love to hear about your experience! Share your photos, tips, and stories in the comments below. Let’s create a community of potted okra enthusiasts and inspire others to embark on this rewarding gardening adventure. Let us know what worked for you, what challenges you faced, and any creative variations you tried. Together, we can unlock the secrets to successful okra cultivation in pots and enjoy the delicious fruits (or rather, pods!) of our labor. Happy gardening!
Frequently Asked Questions (FAQ)
What is the best size pot for growing okra?
The ideal pot size for growing okra is at least 10-15 gallons. Okra plants have deep taproots, so a larger pot provides ample space for root development, which is crucial for healthy growth and abundant pod production. While you might be tempted to use a smaller pot, restricting the root system can lead to stunted growth and reduced yields. A larger pot also helps retain moisture, reducing the frequency of watering. Remember to choose a pot with drainage holes to prevent waterlogging, which can be detrimental to okra plants.
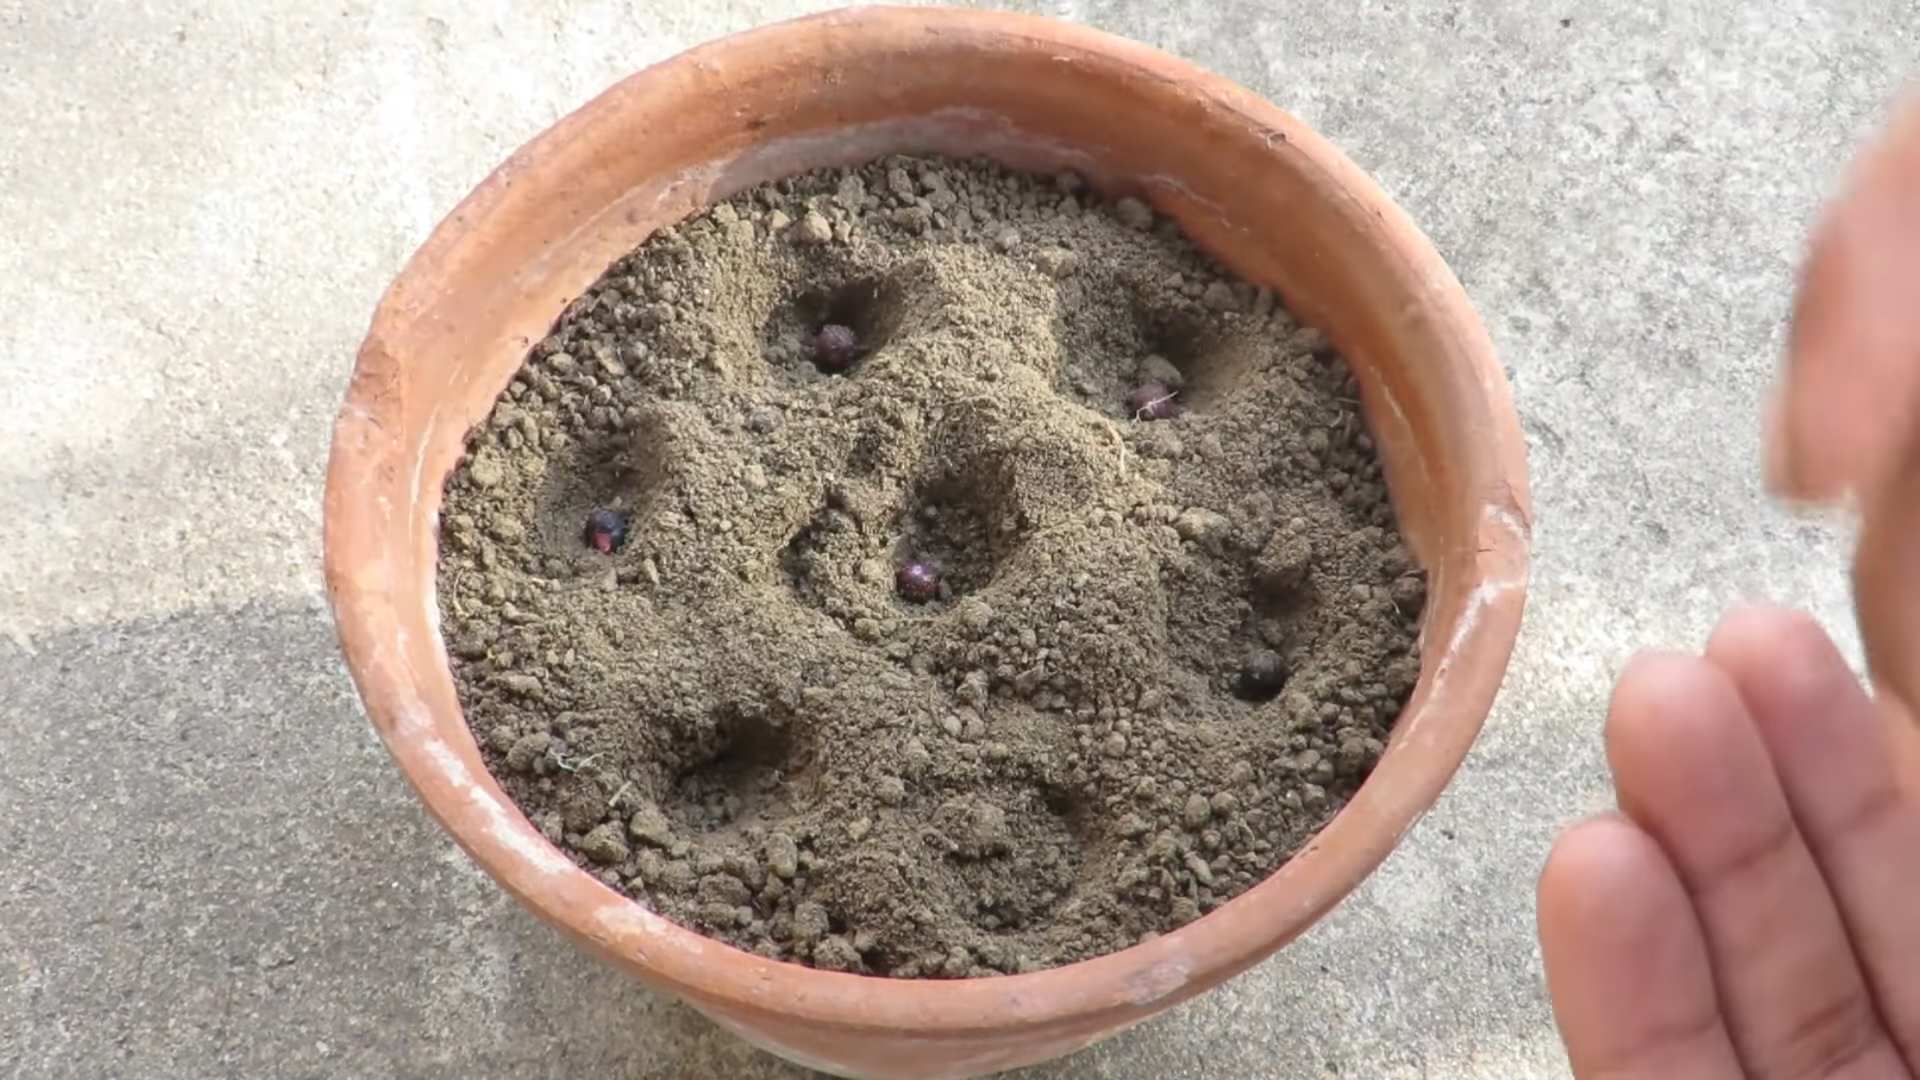
What type of soil is best for growing okra in pots?
Okra thrives in well-draining, fertile soil. A good potting mix should be a blend of peat moss, perlite, and vermiculite. This combination provides excellent drainage, aeration, and moisture retention. Avoid using garden soil in pots, as it tends to compact and doesn’t drain well. You can also amend your potting mix with compost or aged manure to provide essential nutrients. A slightly acidic to neutral pH (around 6.0 to 7.0) is ideal for okra growth. Consider adding a slow-release fertilizer to the potting mix at planting time to provide a steady supply of nutrients throughout the growing season.
How often should I water my potted okra plants?
Watering frequency depends on several factors, including the size of the pot, the weather conditions, and the stage of plant growth. Generally, you should water your okra plants deeply whenever the top inch of soil feels dry to the touch. During hot, dry weather, you may need to water daily. Avoid overwatering, as this can lead to root rot. Ensure that the pot has adequate drainage to prevent water from pooling at the bottom. Mulching around the base of the plant can help retain moisture and reduce the need for frequent watering. Check the soil moisture regularly and adjust your watering schedule accordingly.
How much sunlight does okra need?
Okra requires at least 6-8 hours of direct sunlight per day to thrive. Choose a sunny location for your potted okra plants, such as a south-facing balcony or patio. If you live in an area with intense afternoon sun, you may need to provide some shade during the hottest part of the day to prevent leaf scorch. Insufficient sunlight can lead to leggy growth, reduced flowering, and poor pod production. If you’re growing okra indoors, supplement with grow lights to ensure adequate light exposure. Rotate the pot regularly to ensure that all sides of the plant receive equal sunlight.
When should I fertilize my okra plants?
Start fertilizing your okra plants about 2-3 weeks after transplanting or when the seedlings have developed a few sets of true leaves. Use a balanced fertilizer (e.g., 10-10-10) diluted to half strength. Fertilize every 2-3 weeks throughout the growing season. You can also use a fertilizer specifically formulated for vegetables. Avoid over-fertilizing, as this can lead to excessive foliage growth at the expense of pod production. Consider using a foliar spray of seaweed extract to provide micronutrients and promote overall plant health. Stop fertilizing about a month before the first expected frost.
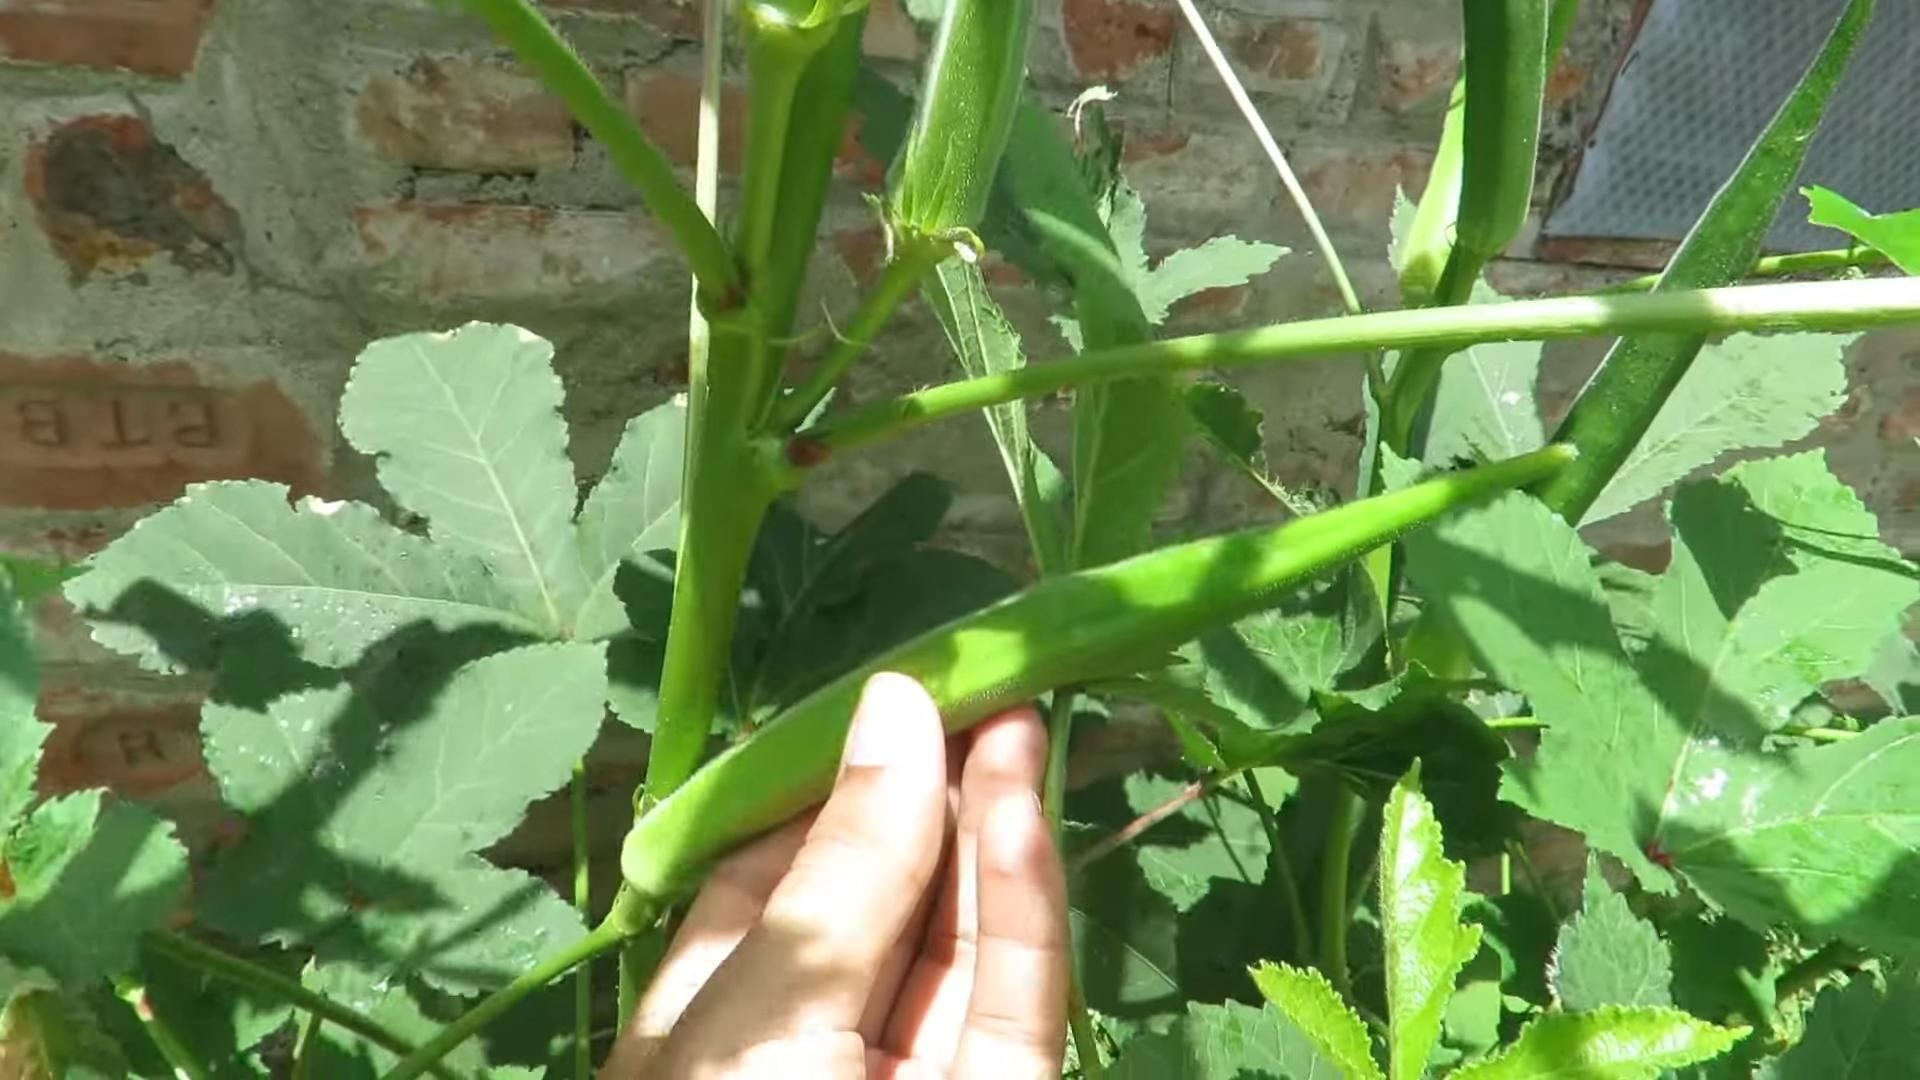
How do I harvest okra pods?
Okra pods are typically ready to harvest 50-60 days after planting. Harvest the pods when they are 2-4 inches long and still tender. Use a sharp knife or pruning shears to cut the pods from the plant. Wear gloves when harvesting okra, as the pods can be prickly and irritating to the skin. Harvest regularly, every 1-2 days, to encourage continuous pod production. Overripe pods become tough and fibrous. If you miss a few pods and they become too large, remove them from the plant to redirect energy to new pod development.
What are some common pests and diseases that affect okra?
Common pests that affect okra include aphids, flea beetles, and spider mites. These pests can be controlled with insecticidal soap or neem oil. Diseases that can affect okra include powdery mildew and root rot. Powdery mildew can be treated with a fungicide. Root rot can be prevented by ensuring good drainage and avoiding overwatering. Regularly inspect your plants for signs of pests or diseases and take action promptly to prevent them from spreading. Companion planting with herbs like basil and marigolds can help deter pests.
Can I grow okra indoors?
While okra prefers to be grown outdoors, it is possible to grow it indoors with adequate light and care. Choose a sunny location near a window or supplement with grow lights. Ensure that the pot is large enough to accommodate the plant’s root system. Provide good air circulation to prevent fungal diseases. Pollinate the flowers manually using a small brush to transfer pollen from one flower to another. Indoor-grown okra may not produce as many pods as outdoor-grown okra, but it can still be a rewarding experience.
What are some good companion plants for okra?
Good companion plants for okra include basil, marigolds, peppers, and tomatoes. Basil and marigolds help deter pests, while peppers and tomatoes provide shade and support. Avoid planting okra near beans or cabbage, as they can compete for nutrients. Companion planting can improve the overall health and productivity of your okra plants.
How do I save okra seeds for next year?
To save okra seeds, allow a few pods to mature fully on the plant. The pods will become dry and brown. Once the pods are completely dry, harvest them and remove the seeds. Store the seeds in an airtight container in a cool, dry place. Okra seeds can remain viable for several years if stored properly.
Leave a Comment