
Indoor Radicchio Growing: Your Guide to a Vibrant Harvest
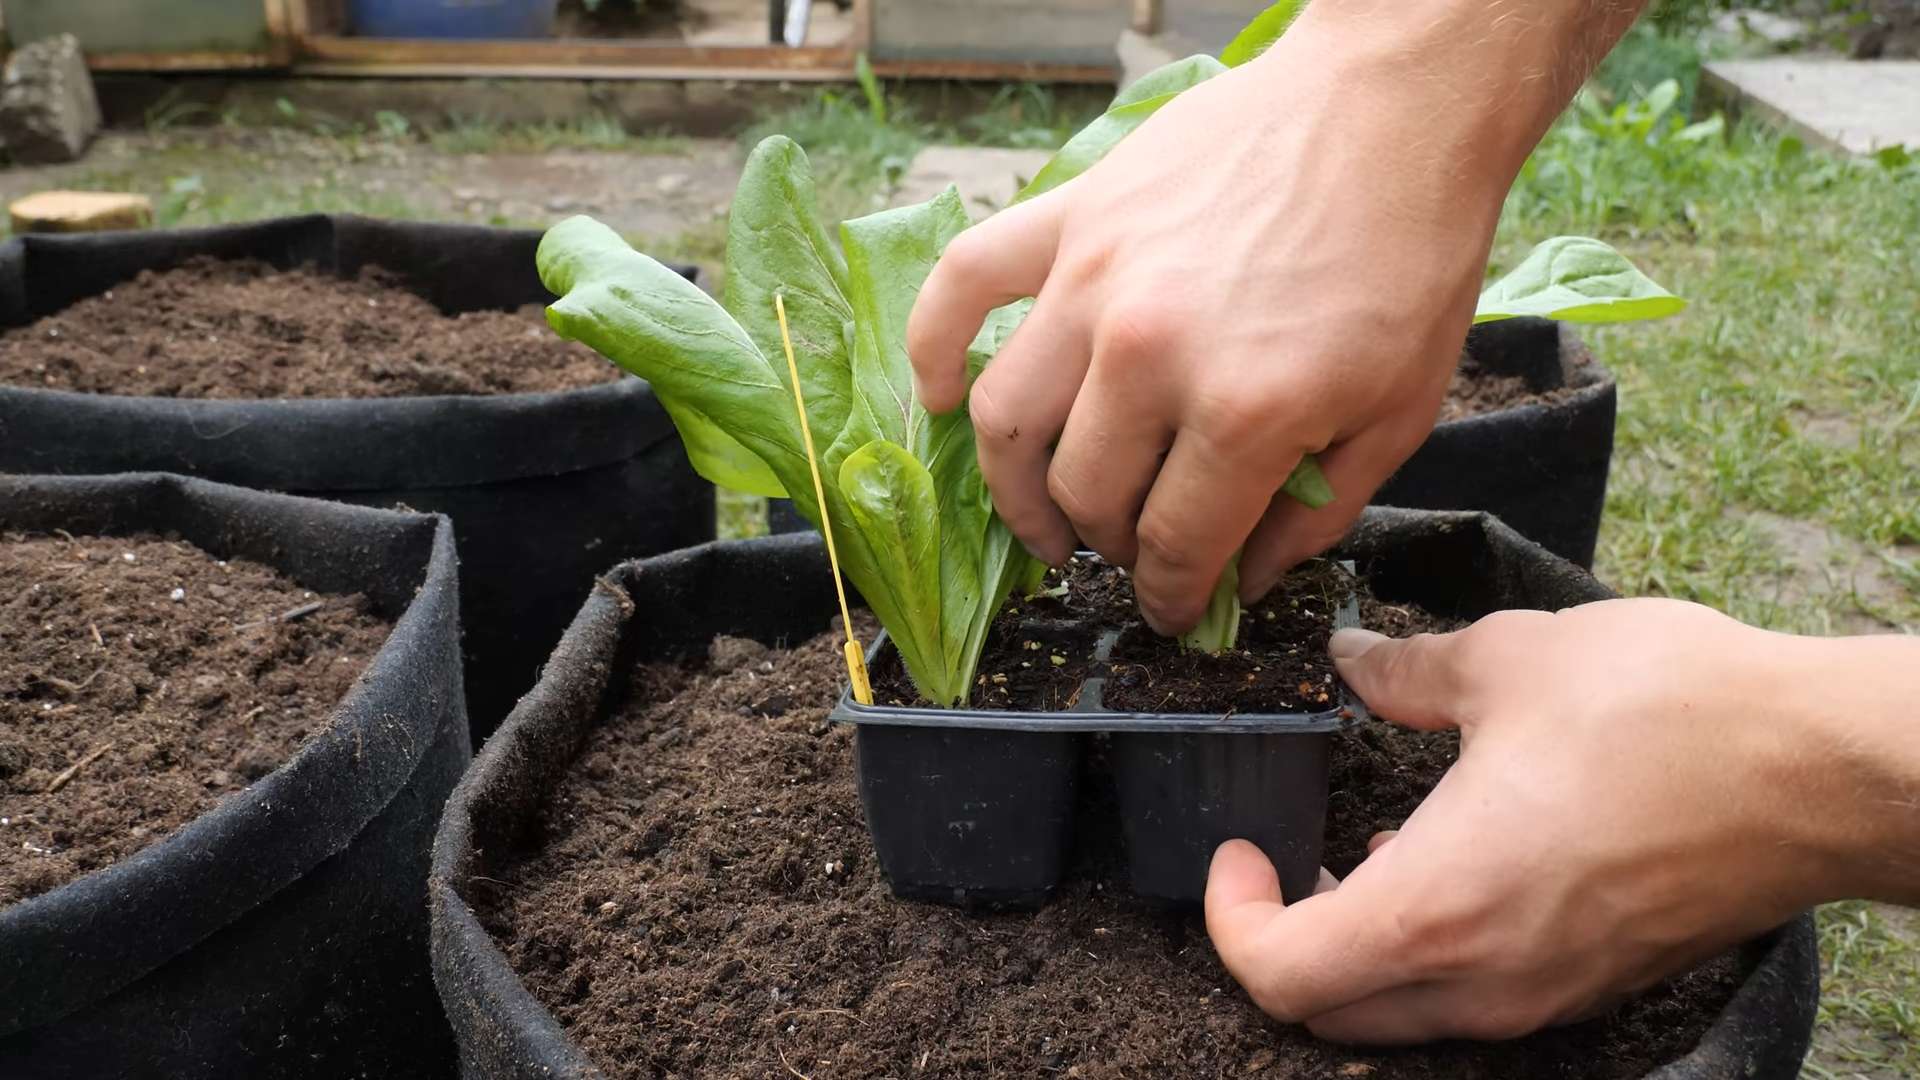
Indoor radicchio growing might sound intimidating, but I promise you, it’s easier than you think! I’ve always loved the vibrant, slightly bitter taste of radicchio, but the cost and sometimes questionable freshness of store-bought varieties always left me wanting more. That’s why I decided to take matters into my own hands and explore the world of indoor radicchio growing. This journey led me to discover some amazing DIY tricks and hacks that I’m thrilled to share with you today.
Historically, radicchio cultivation has been deeply rooted in Italian culture, where it’s a staple in many regional dishes. However, access to fresh, flavorful radicchio isn’t always easy, especially if you don’t live near a farmer’s market or have a garden. This is where indoor radicchio growing becomes a game-changer. It allows you to enjoy this delicious and nutritious leafy green year-round, regardless of the weather outside.
Why should you bother with indoor radicchio growing? Well, imagine biting into a crisp, perfectly tender leaf, knowing you nurtured it from seed to plate. It’s incredibly rewarding! Beyond the satisfaction, you’ll also be enjoying fresher, tastier radicchio, free from pesticides and preservatives. Plus, you’ll save money in the long run by growing your own. This article will guide you through simple, effective techniques, from seed starting to harvesting, ensuring your indoor radicchio growing experience is a success.
Get Ready to Grow Your Own Delicious Radicchio!
Let’s dive into the practical tips and tricks that will transform your kitchen into a thriving radicchio garden. Prepare to be amazed by how easy and rewarding indoor radicchio growing can be!
Growing Artichokes: A DIY Guide to a Delicious Harvest
I’ve always loved artichokes, those majestic, thistle-like vegetables. The tender hearts, the satisfying dip in melted butter… pure deliciousness! So, I decided to take on the challenge of growing my own. It’s more rewarding than you might think, and this guide will walk you through the process.
Choosing Your Artichoke Variety and Location
- Select a variety suited to your climate. Artichokes need a long, warm growing season (at least 100 frost-free days). Research varieties that thrive in your region. Some popular choices include ‘Green Globe’, ‘Imperial Star’, and ‘Violetta’.
- Find a sunny spot. Artichokes need at least six to eight hours of direct sunlight daily. A south-facing location is ideal in the Northern Hemisphere.
- Prepare the soil. Artichokes prefer well-drained, fertile soil with a slightly acidic pH (6.0-7.0). Amend heavy clay soil with compost or other organic matter to improve drainage and aeration. Sandy soil may need the addition of organic matter to retain moisture.
- Consider spacing. Allow ample space between plants. Mature artichoke plants can grow quite large, so give them room to spread. Spacing of 3-4 feet apart is generally recommended.
Planting Your Artichokes
- Start from seed or crowns. You can start artichokes from seed, but it’s a slower process. Starting with crowns (the base of the plant) is generally easier and faster, resulting in a quicker harvest. You can purchase crowns from nurseries or garden centers.
- Plant in spring or fall. The best time to plant artichokes depends on your climate. In areas with mild winters, fall planting allows the plants to establish themselves before the next growing season. In colder climates, spring planting is recommended after the last frost.
- Dig planting holes. Dig holes twice as wide and as deep as the artichoke crowns. This allows for good root development.
- Amend the soil in the holes. Add a generous amount of compost or well-rotted manure to each hole to enrich the soil and improve drainage.
- Plant the crowns. Place the crowns in the holes, ensuring the growing points are at or slightly above ground level. Gently spread the roots.
- Backfill the holes. Carefully fill the holes with soil, gently firming it around the crowns to eliminate air pockets.
- Water thoroughly. After planting, water deeply to settle the soil and help the crowns establish themselves.
Ongoing Care and Maintenance
- Water regularly. Artichokes need consistent moisture, especially during dry periods. Aim for about 1 inch of water per week, either through rainfall or supplemental irrigation. Deep, infrequent watering is better than shallow, frequent watering.
- Fertilize appropriately. Feed your artichokes regularly with a balanced fertilizer. A slow-release fertilizer is ideal. Follow the package instructions for application rates.
- Mulch around the plants. Applying a layer of mulch (such as straw or shredded bark) helps retain soil moisture, suppress weeds, and regulate soil temperature.
- Control pests and diseases. Monitor your plants for pests a
I’ve always loved artichokes, those majestic, thistle-like vegetables. The tender hearts, the satisfying dip in melted butter… pure deliciousness! So, I decided to take on the challenge of growing my own. It’s more rewarding than you might think, and this guide will walk you through the process.
Choosing Your Artichoke Variety and Location
- Select a variety suited to your climate. Artichokes need a long, warm growing season (at least 100 frost-free days). Research varieties that thrive in your region. Some popular choices include ‘Green Globe’, ‘Imperial Star’, and ‘Violetta’.
- Find a sunny spot. Artichokes need at least six to eight hours of direct sunlight daily. A south-facing location is ideal in the Northern Hemisphere.
- Prepare the soil. Artichokes prefer well-drained, fertile soil with a slightly acidic pH (6.0-7.0). Amend heavy clay soil with compost or other organic matter to improve drainage and aeration. Sandy soil may need the addition of organic matter to retain moisture.
- Consider spacing. Allow ample space between plants. Mature artichoke plants can grow quite large, so give them room to spread. Spacing of 3-4 feet apart is generally recommended.
Planting Your Artichokes
- Start from seed or crowns. You can start artichokes from seed, but it’s a slower process. Starting with crowns (the base of the plant) is generally easier and faster, resulting in a quicker harvest. You can purchase crowns from nurseries or garden centers.
- Plant in spring or fall. The best time to plant artichokes depends on your climate. In areas with mild winters, fall planting allows the plants to establish themselves before the next growing season. In colder climates, spring planting is recommended after the last frost.
- Dig planting holes. Dig holes twice as wide and as deep as the artichoke crowns. This allows for good root development.
- Amend the soil in the holes. Add a generous amount of compost or well-rotted manure to each hole to enrich the soil and improve drainage.
- Plant the crowns. Place the crowns in the holes, ensuring the growing points are at or slightly above ground level. Gently spread the roots.
- Backfill the holes. Carefully fill the holes with soil, gently firming it around the crowns to eliminate air pockets.
- Water thoroughly. After planting, water deeply to settle the soil and help the crowns establish themselves.
Ongoing Care and Maintenance
- Water regularly. Artichokes need consistent moisture, especially during dry periods. Aim for about 1 inch of water per week, either through rainfall or supplemental irrigation. Deep, infrequent watering is better than shallow, frequent watering.
- Fertilize appropriately. Feed your artichokes regularly with a balanced fertilizer. A slow-release fertilizer is ideal. Follow the package instructions for application rates.
- Mulch around the plants. Applying a layer of mulch (such as straw or shredded bark) helps retain soil moisture, suppress weeds, and regulate soil temperature.
- Control pests and diseases. Monitor your plants for pests and diseases. Common artichoke pests include aphids and caterpillars. Diseases such as crown rot can be a problem in poorly drained soils. Address any issues promptly using appropriate organic or chemical controls.
- Harvesting. Artichokes are ready for harvest when the buds are firm and the bracts (the outer leaves) are tightly closed. Cut the buds with a sharp knife, leaving about an inch of stem attached. Harvesting encourages the production of more buds.
Overwintering Artichokes
Protecting Your Plants in Cold Climates
In areas with freezing winters, artichokes need protection to survive. Here’s how to do it:
- Cut back the plants. In late fall, cut back the foliage to about 6-12 inches above the ground.
- Mound soil around the base. Pile several inches of soil around the base of the plants to protect the crowns from freezing temperatures.
- Apply mulch. Add a thick layer of mulch (such as straw or leaves) over the soil mound for added insulation.
- Consider a protective covering. In extremely cold climates, you may need to cover the plants with a row cover or other protective material.
Spring Care After Winter
Once the danger of frost has passed, remove the soil mound and mulch. Inspect the plants for any damage. You may need to prune away any dead or damaged stems. Water and fertilize as needed to encourage new growth.
Troubleshooting Common Artichoke Problems
Yellowing Leaves
Yellowing leaves can indicate several problems, including nutrient deficiencies, overwatering, or pest infestations. Check your soil’s pH and nutrient levels. Adjust watering practices and treat any pest problems.
Small Buds
Small buds may result from insufficient sunlight, poor soil conditions, or lack of nutrients. Ensure your plants receive adequate sunlight and amend the soil as needed.
Lack of Flower Production
If your artichokes aren’t producing flowers, it could be due to insufficient sunlight, poor soil drainage, or improper fertilization. Review your growing conditions and make adjustments as necessary.
Growing artichokes is a rewarding experience. With a little patience and attention, you’ll be enjoying the fruits (or rather, the buds!) of your labor in no time. Remember to adapt these instructions to your specific climate and growing conditions for the best results.
Conclusion
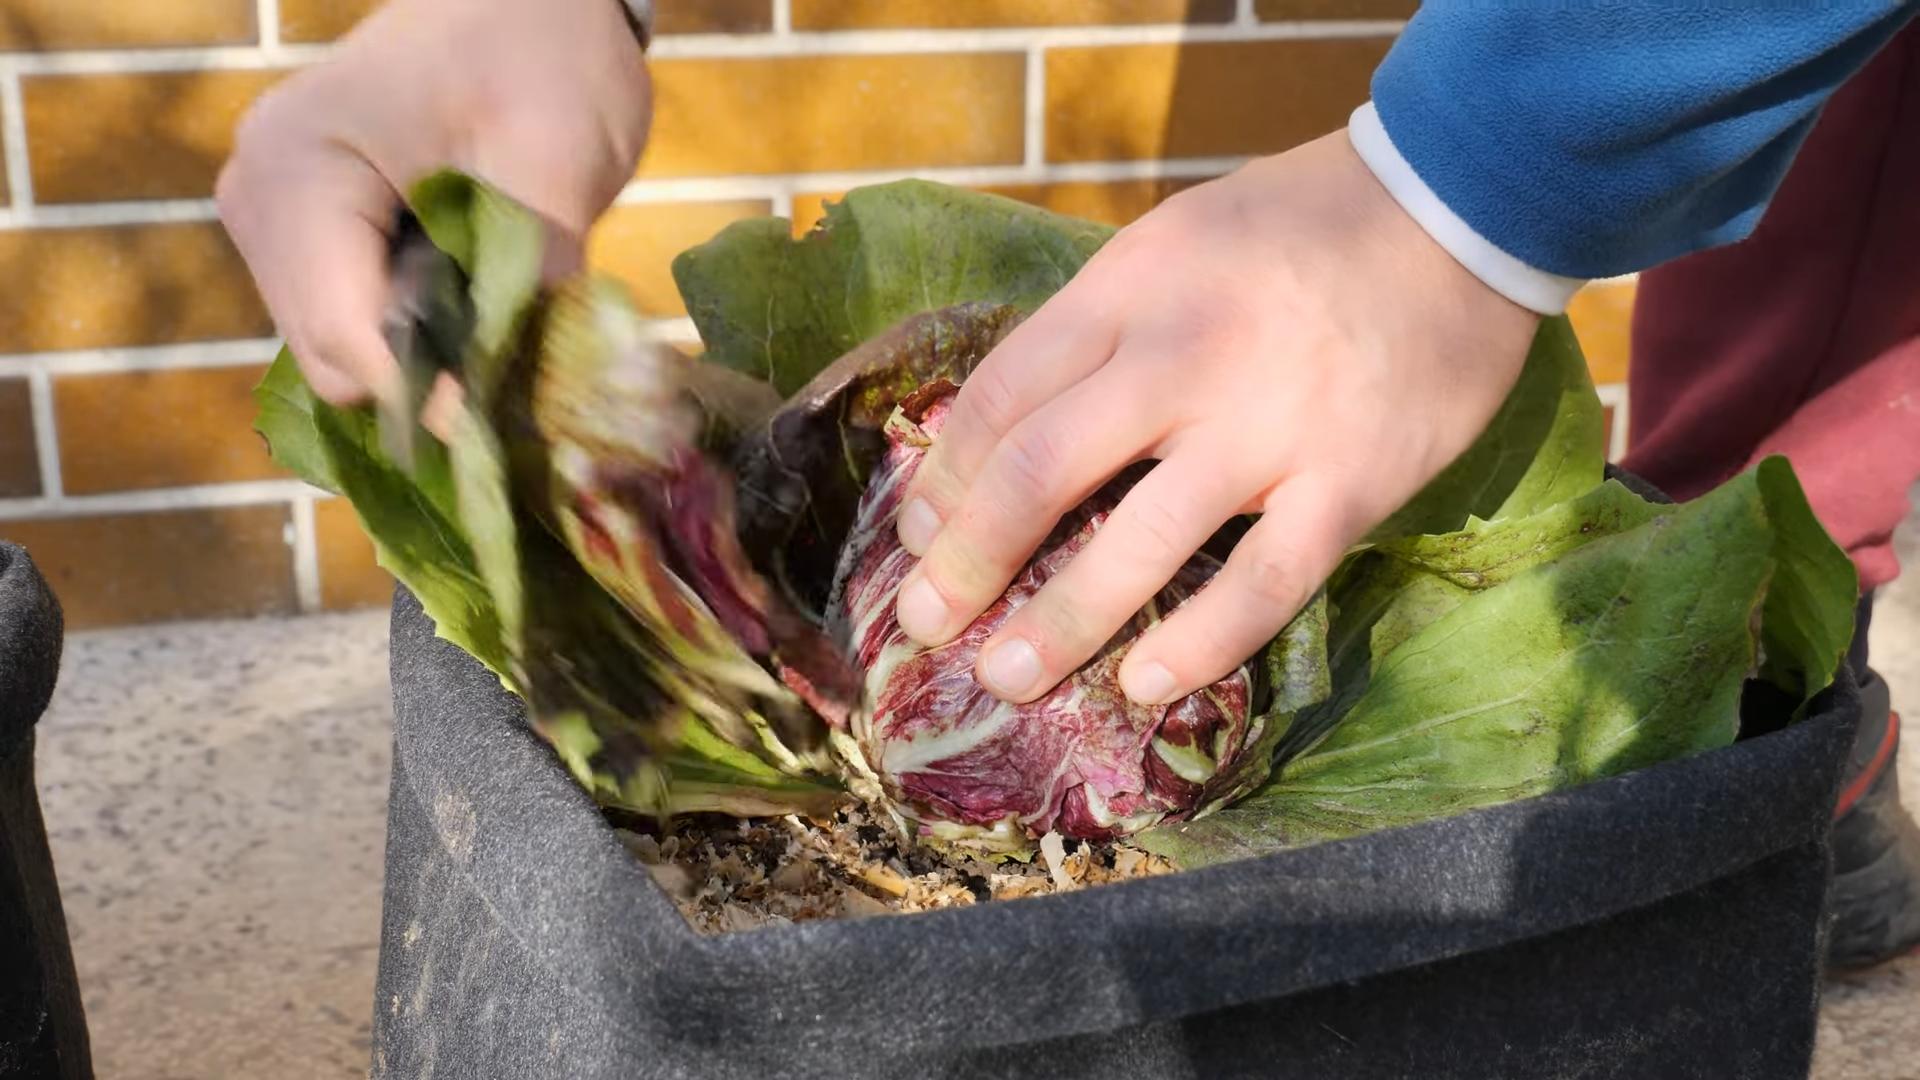
So there you have it – a comprehensive guide to successfully growing your own radicchio indoors! This DIY method offers a rewarding experience, allowing you to enjoy fresh, vibrant radicchio leaves all year round, regardless of the weather outside. The ability to control the growing environment ensures optimal conditions for healthy growth, resulting in superior flavor and texture compared to store-bought radicchio. This indoor radicchio growing technique is a must-try for several reasons: it’s cost-effective, environmentally friendly (reducing your carbon footprint from transportation), and incredibly satisfying. The process itself is surprisingly simple, requiring minimal specialized equipment and readily available materials. You’ll be amazed at how quickly your seedlings sprout and develop into mature heads of radicchio, ready to be harvested and enjoyed in your favorite salads, pasta dishes, or as a delicious side.
Beyond the basic method outlined, there are numerous exciting variations you can explore. Experiment with different types of radicchio, such as the red-leafed Chioggia or the pale-green Castelfranco. Try using different growing mediums, such as coco coir or a pre-mixed seed-starting mix, to see which yields the best results for you. Consider supplementing your grow lights with a timer to mimic natural daylight cycles for even more optimal growth. You can also experiment with different container sizes, from small pots to larger hydroponic systems, depending on your space and ambition. Don’t be afraid to get creative and personalize your indoor radicchio garden to suit your needs and preferences. The possibilities are endless!
We strongly encourage you to try this indoor radicchio growing technique and share your experience with us. Whether you’re a seasoned gardener or a complete beginner, this project is accessible to everyone. Post your photos on social media using #IndoorRadicchioGrowing and tag us – we’d love to see your thriving radicchio plants! Your success story might inspire others to embark on their own indoor gardening adventures. Remember, the journey is just as rewarding as the delicious harvest. So, grab your seeds, get your supplies together, and get ready to experience the joy of growing your own fresh, flavorful radicchio indoors. You won’t regret it!
Frequently Asked Questions
What type of light is best for indoor radicchio growing?
Radicchio needs ample light to thrive indoors. A full-spectrum grow light is ideal, mimicking natural sunlight. Aim for at least 6-8 hours of light per day. LED grow lights are a popular and energy-efficient choice. You can also supplement natural sunlight with grow lights, especially during shorter winter days.
What kind of soil or growing medium is recommended?
A well-draining potting mix is essential for successful radicchio cultivation. Avoid heavy clay soils that retain too much moisture, as this can lead to root rot. A seed-starting mix or a blend of potting soil and perlite or vermiculite works well. Coco coir is another excellent option, providing good aeration and water retention.
How often should I water my radicchio plants?
Keep the soil consistently moist but not soggy. Water thoroughly when the top inch of soil feels dry to the touch. Avoid overwatering, which can lead to fungal diseases. The frequency of watering will depend on factors such as the size of your container, the type of growing medium, and the ambient temperature and humidity.
How long does it take for radicchio to mature indoors?
The time it takes for radicchio to mature indoors varies depending on the variety and growing conditions. Generally, you can expect to harvest your radicchio anywhere from 60 to 90 days after sowing the seeds. Ensure your plants receive adequate light and water for optimal growth.
What are the common problems encountered when growing radicchio indoors?
Common issues include insufficient light, leading to leggy growth and poor head formation; overwatering, resulting in root rot; and pest infestations, such as aphids or whiteflies. Regular monitoring of your plants and prompt action to address any problems are crucial for success. Using preventative measures like insecticidal soap can help minimize pest issues.
Can I grow radicchio from seed or cuttings?
Radicchio is most commonly grown from seed. Starting from seed allows for better control over the growing process and ensures a healthy, vigorous plant. While propagation from cuttings is possible, it’s less common for radicchio.
What are the best varieties of radicchio for indoor growing?
Many radicchio varieties are suitable for indoor cultivation. Chioggia radicchio, with its distinctive concentric rings of red and white, is a popular choice. Castelfranco radicchio, with its lighter green leaves and slightly bitter taste, is another excellent option. Choose varieties known for their compact growth habit for better suitability to indoor spaces.
What should I do with my harvested radicchio?
Once harvested, store your radicchio in a plastic bag in the refrigerator’s crisper drawer for up to a week to maintain its freshness. You can also blanch and freeze your radicchio for longer storage. Remember to wash your radicchio thoroughly before consumption.
My radicchio leaves are turning yellow. What could be the cause?
Yellowing leaves can indicate several problems, including nutrient deficiencies, overwatering, underwatering, or pest infestations. Check your watering practices, ensure your growing medium provides adequate nutrients, and inspect your plants for any signs of pests. Addressing the underlying cause will help restore your radicchio’s health.
Can I reuse the same soil for growing radicchio next season?
While you can reuse the soil, it’s generally recommended to replace it with fresh potting mix each season. Reusing soil can increase the risk of disease and pest infestations. Disposing of old soil properly helps prevent the spread of pathogens.

Leave a Comment