
Long bean small space gardening might sound like an impossible dream, especially if you’re living in an apartment or have a tiny backyard. But guess what? I’m here to tell you that fresh, homegrown long beans are totally within your reach, no sprawling farm required! For centuries, cultures around the world have cultivated beans in even the most limited spaces, from ancient terrace gardens to modern-day balcony farms. This resourceful approach to food production highlights the enduring human desire to connect with nature and enjoy fresh produce, regardless of spatial constraints.
Are you tired of bland, store-bought vegetables that lack that vibrant, homegrown flavor? Do you crave the satisfaction of nurturing a plant from seed to table? Then this DIY guide is exactly what you need. I’ll walk you through simple, effective techniques for successful long bean small space gardening, covering everything from choosing the right container and soil to providing proper support and pest control. Imagine stepping outside your door and harvesting a handful of crisp, delicious long beans for your next stir-fry or salad. It’s easier than you think, and I’m excited to show you how!
Growing Long Beans in Small Spaces: A DIY Guide
Hey there, fellow gardening enthusiasts! So, you’re itching to grow some delicious, yard-long beans but are short on space? Don’t worry, I’ve got you covered! I’ve successfully grown these beauties in containers on my tiny balcony, and I’m here to share all my secrets. It’s easier than you think, and the reward of fresh, homegrown long beans is totally worth it. Let’s get started!
What You’ll Need
Before we dive in, let’s gather our supplies. This will make the whole process smoother and more enjoyable.
* Long Bean Seeds: Choose a variety that suits your climate. ‘Chinese Red Noodle’ and ‘Yard Long’ are popular choices. I personally love the ‘Chinese Red Noodle’ for its vibrant color and delicious flavor.
* Large Containers: You’ll need containers that are at least 12 inches deep and 12 inches in diameter. Bigger is always better, as long beans have extensive root systems. I prefer using fabric pots because they allow for better drainage and aeration.
* Well-Draining Potting Mix: This is crucial! Long beans don’t like soggy roots. A mix of compost, perlite, and peat moss works wonders. I usually make my own mix, but you can also buy a pre-made potting mix specifically for vegetables.
* Trellis or Support Structure: Long beans are climbers, so they need something to climb on. A trellis, bamboo stakes, or even a sturdy tomato cage will do the trick. I’ve even used old ladders before – get creative!
* Fertilizer: A balanced, slow-release fertilizer is ideal. You can also use liquid fertilizer every few weeks. I like to use fish emulsion – it’s organic and my plants seem to love it.
* Watering Can or Hose: For, well, watering! A gentle watering can is best, especially when the seedlings are young.
* Gardening Gloves: To keep your hands clean and protected.
* Hand Trowel: For planting and transplanting.
* Optional: Mulch (straw, wood chips, or shredded leaves) to help retain moisture and suppress weeds.
Phase 1: Sowing the Seeds
Okay, let’s get those seeds in the ground (or rather, in the container!).
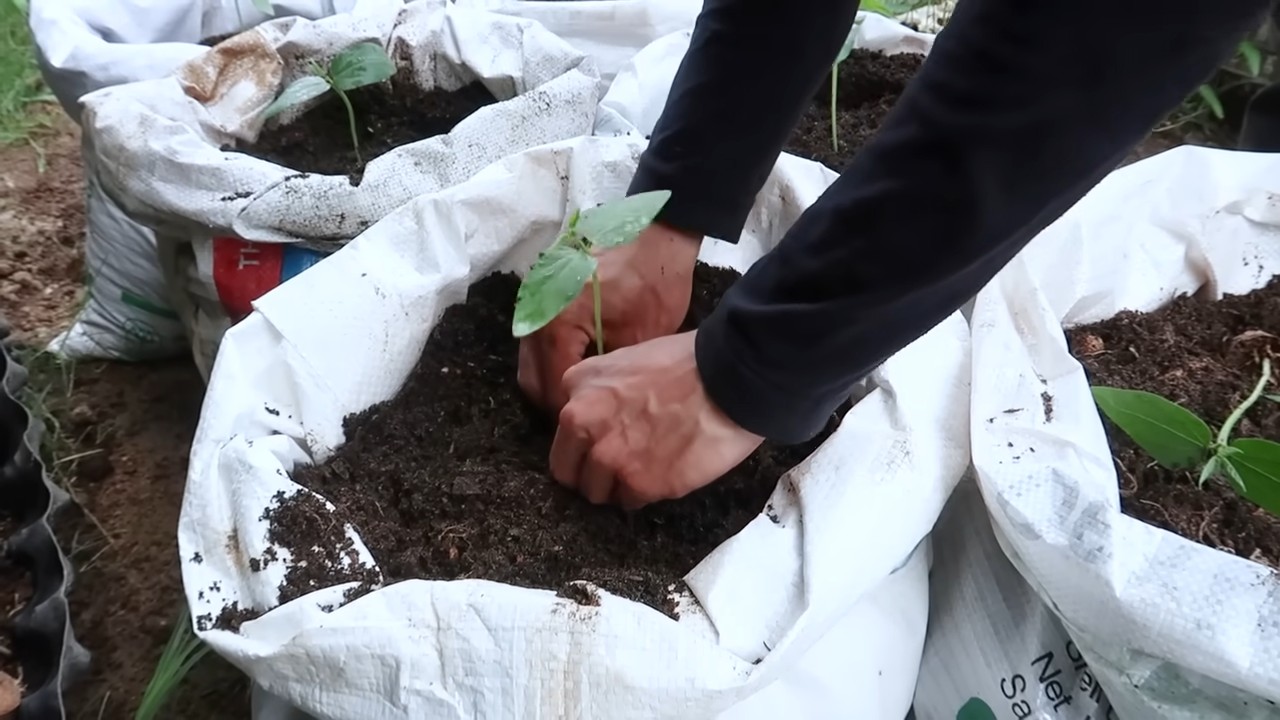
1. Prepare the Containers: Fill your containers with the well-draining potting mix, leaving about an inch or two of space at the top.
2. Sow the Seeds: Make small holes about 1 inch deep and 2-3 inches apart. Place 2-3 seeds in each hole. This ensures that at least one seed will germinate.
3. Cover the Seeds: Gently cover the seeds with potting mix and lightly pat down the soil.
4. Water Thoroughly: Water the containers gently but thoroughly until the water drains out of the bottom.
5. Find a Sunny Spot: Place the containers in a warm, sunny location. Long beans need at least 6-8 hours of sunlight per day. My balcony faces south, so it’s perfect!
6. Keep the Soil Moist: Keep the soil consistently moist, but not waterlogged. Check the soil moisture daily and water when the top inch feels dry.
Phase 2: Nurturing the Seedlings
Once your seeds sprout (usually within 7-14 days), it’s time to give those little seedlings some extra TLC.
1. Thin the Seedlings: Once the seedlings have a few true leaves, thin them out to one strong seedling per hole. Snip off the weaker seedlings at the soil level with scissors to avoid disturbing the roots of the remaining seedling.
2. Provide Support: As the seedlings grow, they’ll start to vine. Provide them with a trellis or other support structure to climb on. Gently guide the vines onto the support. I like to use soft twine to tie them loosely to the trellis.
3. Fertilize Regularly: Start fertilizing the seedlings with a balanced, slow-release fertilizer or liquid fertilizer every few weeks. Follow the instructions on the fertilizer package.
4. Water Consistently: Continue to water the seedlings consistently, keeping the soil moist but not waterlogged.
5. Monitor for Pests and Diseases: Keep an eye out for pests like aphids, spider mites, and bean beetles. You can usually control these pests with insecticidal soap or neem oil. Also, watch out for diseases like powdery mildew. Good air circulation and proper watering can help prevent diseases.
Phase 3: Harvesting Your Bounty
This is the most exciting part! Harvesting your own homegrown long beans is incredibly rewarding.
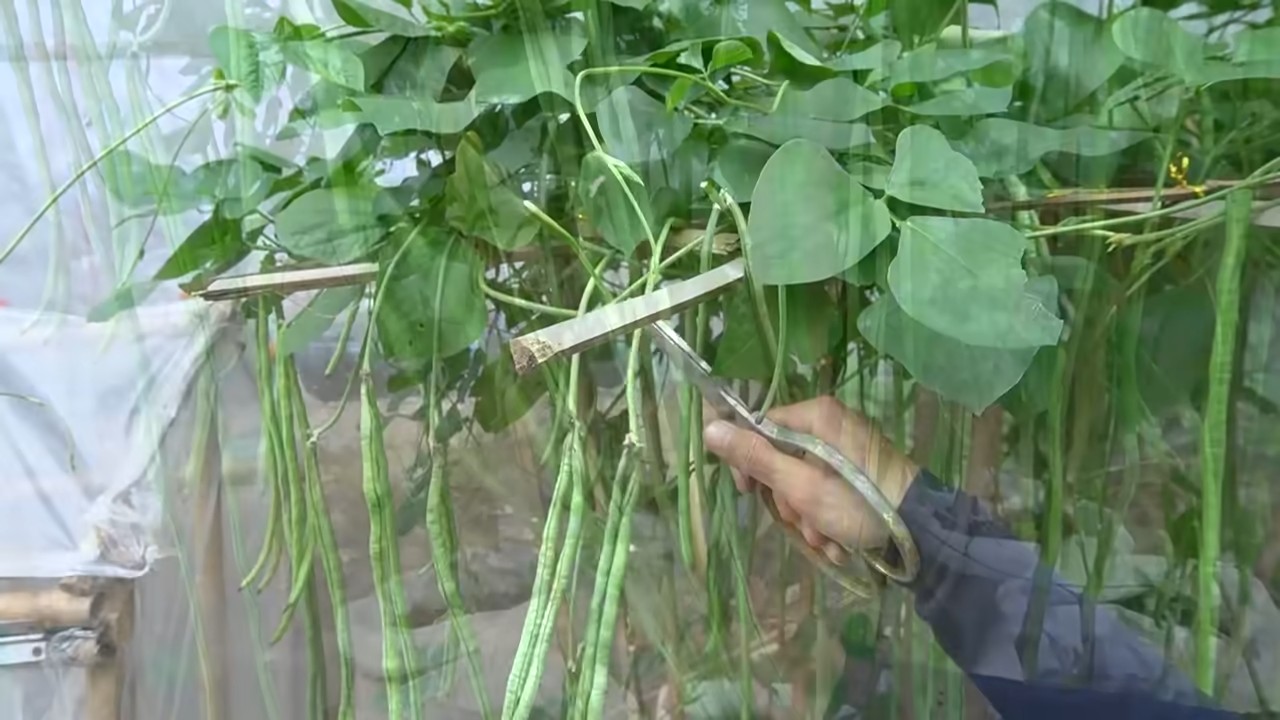
1. Harvest When Tender: Harvest the long beans when they are young and tender, usually about 12-18 inches long. They should be firm and snap easily when bent.
2. Harvest Regularly: Harvest the beans regularly to encourage more production. The more you harvest, the more beans the plant will produce.
3. Use Scissors or Pruners: Use scissors or pruners to cut the beans from the vine, leaving a small stem attached.
4. Enjoy Your Harvest: Enjoy your fresh, homegrown long beans in stir-fries, salads, soups, or steamed as a side dish. They’re incredibly versatile and delicious! I love adding them to my stir-fries with garlic and ginger.
Troubleshooting Tips
Even with the best care, you might encounter some challenges along the way. Here are a few common problems and how to fix them:
* Poor Germination: If your seeds aren’t germinating, make sure the soil is warm enough and consistently moist. You can also try soaking the seeds in water for 24 hours before planting.
* Yellowing Leaves: Yellowing leaves can be a sign of nutrient deficiency. Try fertilizing with a balanced fertilizer. It could also be a sign of overwatering, so make sure the soil is draining well.
* Pest Infestations: As mentioned earlier, keep an eye out for pests and treat them promptly with insecticidal soap or neem oil.
* Lack of Flowers or Beans: If your plants are growing well but not producing flowers or beans, it could be due to a lack of sunlight or pollination. Make sure your plants are getting enough sunlight and consider hand-pollinating the flowers.
* Slow Growth: Slow growth can be caused by a variety of factors, including poor soil, lack of nutrients, or insufficient sunlight. Make sure your plants have well-draining soil, are fertilized regularly, and are getting enough sunlight.
Extra Tips for Success
Here are a few extra tips that I’ve learned over the years that can help you grow even more long beans:
* Choose the Right Variety: Select a long bean variety that is well-suited to your climate and growing conditions.
* Improve Soil Drainage: Long beans need well-draining soil to thrive. If your soil is heavy or clay-like, amend it with compost, perlite, or sand to improve drainage.
* Provide Adequate Support: Make sure your trellis or support structure is strong enough to support the weight of the mature plants and the beans.
* Water Deeply and Regularly: Water your long beans deeply and regularly, especially during hot, dry weather.
* Mulch Around the Plants: Mulching around the plants helps to retain moisture, suppress weeds, and regulate soil temperature.
* Pinch Back the Growing Tips: Pinching back the growing tips of the vines can encourage branching and more bean production.
* Succession Planting: Plant new seeds every few weeks to extend your harvest season.
* Companion Planting: Plant long beans with companion plants like marigolds, basil, and rosemary to help deter pests and attract beneficial insects.
Growing long beans in small spaces is totally achievable with a little planning and effort. I hope this guide has given you the confidence to give it a try. Happy gardening, and enjoy your delicious, homegrown long beans! I know I will!
Conclusion
So, there you have it! Growing long beans in a small space isn’t just a pipe dream; it’s an achievable reality with a little ingenuity and the right approach. This DIY trick, focusing on vertical gardening and strategic container placement, unlocks the potential for a bountiful harvest even if you’re limited to a balcony, patio, or tiny backyard.
Why is this a must-try? Because it’s empowering! It puts fresh, delicious, and organically grown long beans right at your fingertips. Imagine stepping outside and snipping off exactly what you need for dinner, knowing you nurtured it from seed to table. Beyond the culinary benefits, it’s incredibly rewarding to connect with nature and witness the miracle of growth, especially in an urban environment. Plus, it’s a fantastic way to reduce your carbon footprint by minimizing your reliance on store-bought produce.
But the beauty of this DIY method lies in its adaptability. Feel free to experiment with different container sizes and materials. Terracotta pots offer excellent drainage, while repurposed buckets can be a budget-friendly option. Consider adding companion plants like marigolds or basil to deter pests naturally and enhance the overall health of your long bean plants. You can also explore different varieties of long beans, each with its unique flavor and texture. Some popular choices include the yardlong bean, the asparagus bean, and the Chinese long bean.
Don’t be afraid to get creative with your support structures. While bamboo stakes and trellises are classic choices, you can also use repurposed materials like old ladders, metal fencing, or even sturdy branches. The key is to provide a strong and stable framework for your long beans to climb and thrive.
We’ve covered the essentials, but the real magic happens when you put this knowledge into practice. So, grab your seeds, prepare your containers, and get ready to embark on your long bean gardening adventure. Remember to be patient, observant, and willing to learn from your experiences. Gardening is a journey, not a destination, and every season brings new opportunities for growth and discovery.
We’re confident that this DIY trick will transform your small space into a thriving long bean haven. But don’t just take our word for it! We encourage you to try it out for yourself and share your results with us. Post photos of your long bean plants, share your tips and tricks, and let us know what worked best for you. Together, we can create a community of small-space gardeners who are passionate about growing their own food and connecting with nature. Happy gardening!
Frequently Asked Questions (FAQ)
What is the best time of year to plant long beans?
Long beans are warm-weather crops, so the best time to plant them is after the last frost in your area. The soil temperature should be at least 65°F (18°C) for optimal germination. In most regions, this typically falls between late spring and early summer. If you live in a warmer climate with a longer growing season, you may be able to plant long beans multiple times throughout the year. Check your local planting calendar for specific recommendations based on your region’s climate.
What kind of soil is best for growing long beans in containers?
Long beans thrive in well-draining, fertile soil that is rich in organic matter. A good potting mix for containers should consist of a blend of compost, peat moss (or coconut coir), and perlite or vermiculite. This combination provides the necessary nutrients, moisture retention, and drainage for healthy root development. Avoid using garden soil in containers, as it can become compacted and hinder drainage. You can also amend your potting mix with slow-release fertilizer to provide a steady supply of nutrients throughout the growing season.
How much sunlight do long beans need?
Long beans require at least 6-8 hours of direct sunlight per day to produce a bountiful harvest. Choose a location for your containers that receives ample sunlight throughout the day. If you live in a particularly hot climate, you may need to provide some afternoon shade to prevent the plants from overheating. Insufficient sunlight can result in stunted growth, reduced flowering, and lower yields.
How often should I water my long bean plants?
Water your long bean plants regularly, especially during hot and dry weather. The soil should be kept consistently moist but not waterlogged. Check the soil moisture by sticking your finger about an inch deep into the soil. If it feels dry, it’s time to water. Water deeply and thoroughly, allowing the water to drain out of the bottom of the container. Avoid overhead watering, as this can promote fungal diseases.
Do long beans need fertilizer?
Yes, long beans benefit from regular fertilization, especially during the flowering and fruiting stages. Use a balanced fertilizer with an NPK ratio of 10-10-10 or 5-10-5. You can also use organic fertilizers like compost tea or fish emulsion. Apply fertilizer according to the package instructions, typically every 2-3 weeks. Avoid over-fertilizing, as this can lead to excessive foliage growth and reduced flowering.
How do I provide support for my long bean plants?
Long beans are climbing plants and require a sturdy support structure to grow vertically. You can use bamboo stakes, trellises, netting, or even repurposed materials like old ladders or metal fencing. The support structure should be at least 6-8 feet tall to accommodate the long vines. Train the vines to climb the support structure by gently guiding them and tying them loosely with twine or plant ties.
How do I deal with pests and diseases on my long bean plants?
Long beans can be susceptible to pests like aphids, spider mites, and bean beetles. Regularly inspect your plants for signs of infestation and take action promptly. You can use insecticidal soap, neem oil, or horticultural oil to control pests. You can also introduce beneficial insects like ladybugs and lacewings to your garden to help control pest populations naturally. To prevent diseases, ensure good air circulation around your plants and avoid overhead watering. If you notice any signs of disease, remove the affected leaves or plants immediately.
When are long beans ready to harvest?
Long beans are typically ready to harvest about 60-90 days after planting. Harvest the beans when they are young, tender, and about 12-18 inches long. Use scissors or pruning shears to cut the beans from the vine, leaving a short stem attached. Harvest regularly to encourage continued production. Overripe beans can become tough and stringy.
Can I save seeds from my long bean plants?
Yes, you can save seeds from your long bean plants for future planting. Allow some of the beans to mature fully on the vine until they are dry and brown. Remove the seeds from the pods and allow them to dry completely before storing them in an airtight container in a cool, dry place. Keep in mind that seeds saved from hybrid varieties may not produce plants that are true to type.
What are some companion plants for long beans?
Companion planting can help improve the health and productivity of your long bean plants. Some good companion plants for long beans include marigolds, basil, rosemary, and nasturtiums. Marigolds and basil help deter pests, while rosemary can improve the flavor of the beans. Nasturtiums attract beneficial insects and can also be used as a trap crop to lure pests away from the long beans. Avoid planting long beans near onions or garlic, as these can inhibit their growth.
Leave a Comment