
Natural Peroxide Cleaners DIY: Unlock the power of a sparkling clean home without harsh chemicals! Are you tired of store-bought cleaners filled with ingredients you can’t pronounce? Do you yearn for a simpler, more eco-friendly way to keep your living space fresh and hygienic? Well, you’re in the right place! For generations, resourceful individuals have sought natural alternatives to conventional cleaning products, and hydrogen peroxide has consistently emerged as a star player.
The use of peroxide for cleaning and disinfecting can be traced back decades, with its gentle yet effective properties making it a staple in households worldwide. It’s a far cry from the heavily marketed, chemical-laden products that dominate store shelves today. But why should you embrace natural peroxide cleaners DIY? Because it’s not just about cleaning; it’s about creating a healthier environment for you, your family, and the planet. I’m going to show you how to ditch the mystery ingredients and create powerful, all-natural cleaning solutions using simple ingredients you probably already have in your pantry. Get ready to discover the secrets to a sparkling clean home, the natural way!
DIY Natural Peroxide Cleaners: A Sparkling Home, Naturally!
Hey there, fellow cleaning enthusiasts! I’m so excited to share my favorite DIY natural peroxide cleaner recipes with you. I’ve been using these for years, and they’re not only incredibly effective but also much gentler on the environment (and my wallet!) than store-bought alternatives. Peroxide is a fantastic natural bleaching agent and disinfectant, making it a powerhouse ingredient for a sparkling clean home. Let’s dive in!
Understanding Hydrogen Peroxide
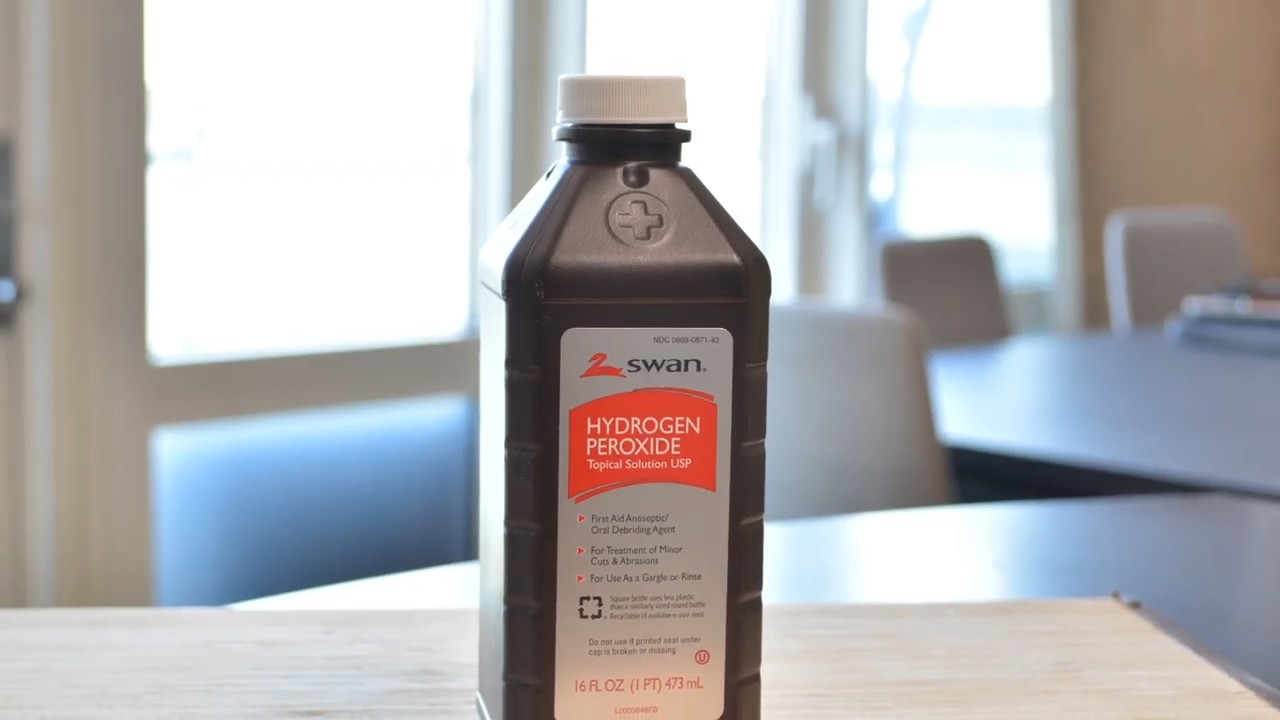
Before we get started, let’s quickly talk about hydrogen peroxide. You’ll typically find it in a 3% solution at your local drugstore. This is the perfect concentration for most cleaning tasks. Higher concentrations exist, but they require extreme caution and are generally not necessary for home cleaning. Always store hydrogen peroxide in a dark, cool place, as light can degrade its effectiveness. And remember, always test any cleaner on an inconspicuous area first to ensure it doesn’t damage the surface.
General Safety Tips
* Always wear gloves: While 3% hydrogen peroxide is relatively safe, prolonged exposure can irritate your skin.
* Avoid mixing with vinegar or bleach: Mixing hydrogen peroxide with vinegar can create peracetic acid, which can be irritating and potentially harmful. Mixing it with bleach creates chlorine gas, which is extremely dangerous.
* Store properly: Keep hydrogen peroxide in its original dark bottle and out of reach of children and pets.
* Ventilate: Ensure good ventilation when using any cleaning product, even natural ones.
DIY All-Purpose Peroxide Cleaner
This is my go-to cleaner for almost everything! It’s fantastic for countertops, sinks, toilets, and even floors (test a small area first, especially on hardwood).
Ingredients:
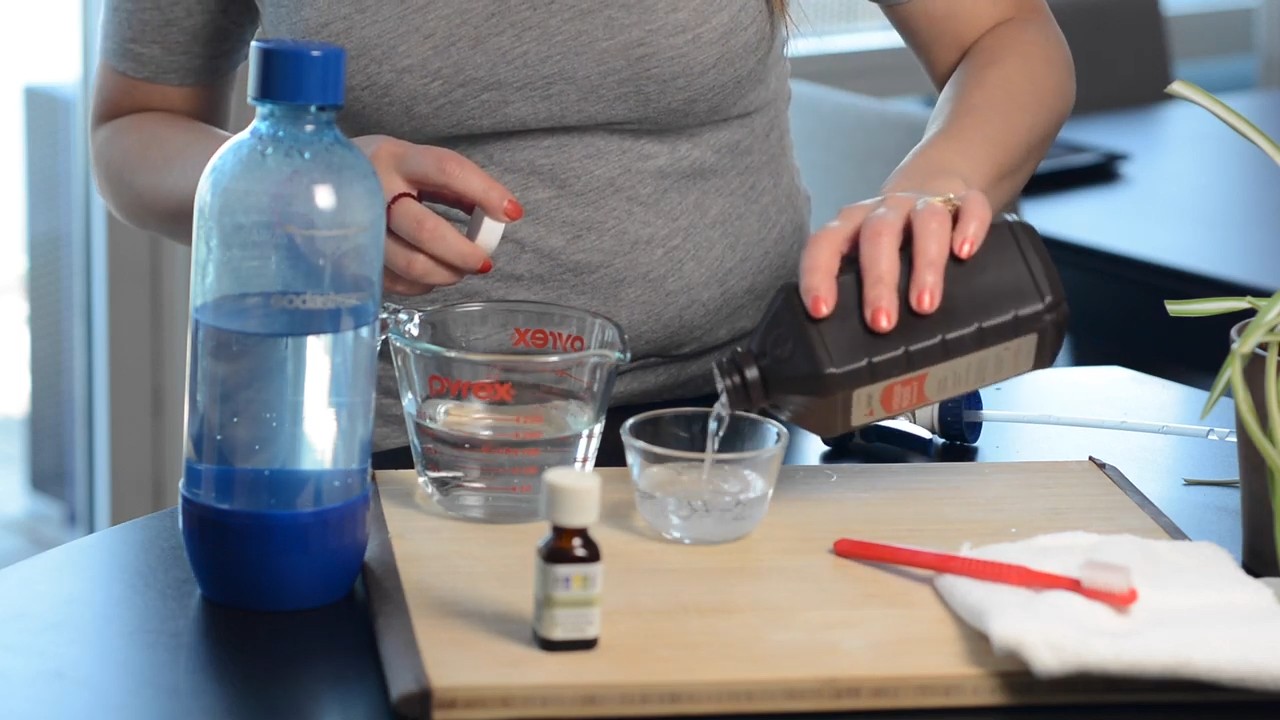
* 1 cup water
* 1 cup 3% hydrogen peroxide
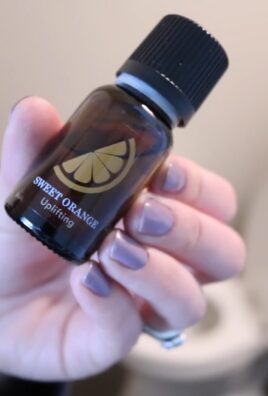
* 10-20 drops of your favorite essential oil (lemon, tea tree, lavender, and eucalyptus are all great choices)
Instructions:
1. Combine ingredients: In a clean spray bottle, combine the water and hydrogen peroxide.
2. Add essential oils: Add your chosen essential oils. The essential oils not only add a pleasant scent but also boost the cleaning power. Lemon, for example, is a natural degreaser.
3. Shake well: Secure the spray nozzle and shake the bottle well to combine all the ingredients.
4. Spray and wipe: Spray the cleaner onto the surface you want to clean and let it sit for a minute or two. Then, wipe clean with a damp cloth or sponge. For tougher stains, let it sit for a bit longer before wiping.
DIY Peroxide Toilet Bowl Cleaner
This cleaner is a simple yet effective way to keep your toilet bowl sparkling clean and fresh.
Ingredients:
* 1/2 cup 3% hydrogen peroxide
* 1/4 cup baking soda
* 5-10 drops tea tree essential oil (optional, for extra disinfecting power)
Instructions:
1. Sprinkle baking soda: Sprinkle the baking soda into the toilet bowl, ensuring it coats the sides.
2. Pour in peroxide: Pour the hydrogen peroxide over the baking soda. You’ll see a slight fizzing reaction, which is perfectly normal and helps to lift stains.
3. Add essential oil (optional): If using, add the tea tree essential oil.
4. Let it sit: Let the mixture sit for at least 30 minutes, or even overnight for stubborn stains.
5. Scrub and flush: Scrub the toilet bowl with a toilet brush and then flush.
DIY Peroxide Grout Cleaner
Grout can be a real pain to clean! This peroxide-based cleaner works wonders on removing mildew and grime.
Ingredients:
* 1/2 cup baking soda
* 1/4 cup 3% hydrogen peroxide
* Old toothbrush or grout brush
Instructions:
1. Make a paste: In a small bowl, mix the baking soda and hydrogen peroxide to form a thick paste.
2. Apply to grout: Apply the paste to the grout lines, making sure to cover them completely.
3. Let it sit: Let the paste sit for at least 15-20 minutes. For heavily soiled grout, you can let it sit for up to an hour.
4. Scrub: Use an old toothbrush or grout brush to scrub the grout lines. You’ll see the grime start to lift.
5. Rinse: Rinse the grout lines with clean water. You may need to use a damp cloth or sponge to remove any remaining paste.
DIY Peroxide Laundry Booster
Hydrogen peroxide is a fantastic natural laundry booster and stain remover. It’s especially effective on white clothes.
Important Note: Always test on an inconspicuous area of colored fabrics first to ensure it doesn’t cause fading.
Instructions:
1. Add to washing machine: Add 1 cup of 3% hydrogen peroxide to your washing machine along with your regular detergent. Pour it directly into the drum or the bleach dispenser.
2. Wash as usual: Wash your clothes as usual.
3. For stain removal: For spot stain removal, apply a small amount of hydrogen peroxide directly to the stain. Let it sit for 10-15 minutes, then blot with a clean cloth. Wash as usual.
DIY Peroxide Mold and Mildew Remover
Mold and mildew can be a serious problem, especially in bathrooms and other damp areas. Hydrogen peroxide is a great natural alternative to harsh chemical mold removers.
Ingredients:
* 3% hydrogen peroxide
* Spray bottle
* Clean cloth or sponge
Instructions:
1. Spray the affected area: Pour the hydrogen peroxide into a spray bottle and spray the affected area thoroughly. Make sure to saturate the mold or mildew.
2. Let it sit: Let the hydrogen peroxide sit for at least 10 minutes. This allows it to penetrate and kill the mold and mildew.
3. Scrub (if necessary): If the mold or mildew is stubborn, scrub the area with a brush or sponge.
4. Wipe clean: Wipe the area clean with a damp cloth or sponge.
5. Repeat if necessary: For severe mold or mildew, you may need to repeat the process.
DIY Peroxide Cutting Board Sanitizer
Cutting boards can harbor bacteria, so it’s important to sanitize them regularly. Hydrogen peroxide is a safe and effective way to do this.
Instructions:
1. Wash the cutting board: Wash the cutting board thoroughly with soap and water.
2. Spray with peroxide: Spray the cutting board with 3% hydrogen peroxide.
3. Let it sit: Let the hydrogen peroxide sit for 5-10 minutes.
4. Rinse: Rinse the cutting board with clean water and let it air dry.
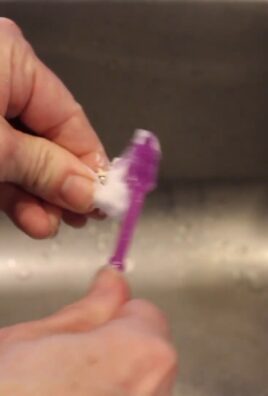
DIY Peroxide Toothbrush Sanitizer
Our toothbrushes can accumulate bacteria over time. Sanitizing them regularly is a good hygiene practice.
Instructions:
1. Rinse the toothbrush: Rinse your toothbrush thoroughly with water after each use.
2. Soak in peroxide: Once a week, soak your toothbrush head in 3% hydrogen peroxide for 5-10 minutes.
3. Rinse again: Rinse the toothbrush thoroughly with water before using it.
DIY Peroxide Fruit and Vegetable Wash
This is a great way to remove pesticides and dirt from your fruits and vegetables.
Ingredients:
* 1/4 cup 3% hydrogen peroxide
* 3 cups water
Instructions:
1. Combine ingredients: In a clean bowl or sink, combine the hydrogen peroxide and water.
2. Soak fruits and vegetables: Soak your fruits and vegetables in the solution for 15-20 minutes.
3. Rinse thoroughly: Rinse the fruits and vegetables thoroughly with clean water before eating.
DIY Peroxide Window Cleaner
Get streak-free, sparkling windows with this simple recipe.
Ingredients:
* 1 cup water
* 1/4 cup 3% hydrogen peroxide
* 1/4 cup white vinegar
* Spray bottle
Instructions:
1. Combine ingredients: In a clean spray bottle, combine the water, hydrogen peroxide, and white vinegar.
2. Shake well: Secure the spray nozzle and shake the bottle well to combine all the ingredients.
3. Spray and wipe: Spray the cleaner onto your windows and wipe clean with a microfiber cloth or paper towel.
Troubleshooting and Tips
* Fading fabrics: Always test hydrogen peroxide on an inconspicuous area of colored fabrics before using it as a stain remover or laundry booster.
* Stubborn stains: For stubborn stains, you may need to repeat the cleaning process or let the cleaner sit for a longer period of time.
* Smell
Conclusion
So, there you have it! Ditching harsh chemicals and embracing the power of natural peroxide cleaners DIY is not just a trend; it’s a conscious choice towards a healthier home and a happier planet. We’ve explored simple yet effective recipes that harness the cleaning and disinfecting prowess of hydrogen peroxide, proving that you don’t need a cabinet full of toxic products to achieve sparkling results.
Why is this DIY approach a must-try? Because it’s cost-effective, customizable, and incredibly versatile. Think about it: you’re saving money by avoiding expensive store-bought cleaners, you’re controlling exactly what ingredients go into your cleaning solutions, and you’re reducing your exposure to harmful chemicals that can irritate your skin, lungs, and even disrupt your endocrine system. Plus, you’re contributing to a more sustainable lifestyle by minimizing plastic waste and reducing your carbon footprint.
But the benefits don’t stop there. The beauty of DIY lies in its adaptability. Feel free to experiment with different essential oils to create your own signature scents. Lavender, lemon, tea tree, and eucalyptus are all excellent choices for their antibacterial and antiviral properties, as well as their delightful aromas. For tougher stains, consider adding a tablespoon of washing soda to your peroxide solution for an extra boost of cleaning power. You can also adjust the concentration of hydrogen peroxide depending on the surface you’re cleaning. Remember to always test in an inconspicuous area first to ensure it doesn’t damage the material.
Variations to Explore:
* Peroxide and Vinegar Power Duo: For a supercharged cleaning experience, try alternating between cleaning with peroxide and vinegar. Never mix them directly, but using them sequentially can be incredibly effective for tackling stubborn grime and mildew.
* Peroxide and Baking Soda Paste: Create a thick paste of peroxide and baking soda for cleaning grout, removing stains from countertops, or even whitening your teeth (use a food-grade peroxide for oral applications and consult with your dentist first).
* Peroxide as a Laundry Booster: Add a cup of hydrogen peroxide to your washing machine along with your regular detergent to brighten whites and remove stains.
We truly believe that once you experience the effectiveness and simplicity of these natural peroxide cleaners, you’ll never go back to conventional cleaning products. It’s a small change that can make a big difference in your health, your home, and the environment.
So, what are you waiting for? Gather your ingredients, mix up a batch of your favorite peroxide cleaner, and get ready to experience the joy of a truly clean and healthy home. We’re confident that you’ll be amazed by the results.
Now, we want to hear from you! Have you tried any of these natural peroxide cleaner recipes? What are your favorite variations? Share your experiences, tips, and tricks in the comments below. Let’s build a community of eco-conscious cleaners and inspire others to embrace the power of DIY! Your feedback is invaluable, and we can all learn from each other’s successes (and even the occasional mishaps!). Let’s make cleaning a little less chore-like and a lot more empowering, one natural peroxide cleaner at a time.
Frequently Asked Questions (FAQs)
Is hydrogen peroxide safe to use for cleaning?
Yes, hydrogen peroxide is generally safe to use for cleaning when used properly. It’s a non-toxic alternative to many harsh chemical cleaners. However, it’s important to remember that it is a mild oxidizing agent and can cause irritation to the skin and eyes. Always wear gloves when handling hydrogen peroxide, and avoid direct contact with your eyes. If contact occurs, rinse thoroughly with water. Also, never mix hydrogen peroxide with vinegar or bleach, as this can create dangerous fumes. Always store hydrogen peroxide in a dark, cool place, away from children and pets.
What concentration of hydrogen peroxide should I use for cleaning?
The most common concentration of hydrogen peroxide available in stores is 3%. This is generally safe and effective for most cleaning tasks. For more stubborn stains or disinfecting purposes, you can use a higher concentration, but be sure to dilute it properly and wear appropriate protective gear. A 6% solution can be used for some cleaning tasks, but it should be handled with extra care. Higher concentrations (above 10%) are typically used for industrial purposes and should only be handled by trained professionals. Always start with a lower concentration and increase it gradually as needed.
Can I use hydrogen peroxide on all surfaces?
No, hydrogen peroxide is not suitable for all surfaces. It can potentially damage or discolor certain materials, such as delicate fabrics, painted surfaces, and some metals. Always test the solution in an inconspicuous area first to ensure it doesn’t cause any adverse effects. Avoid using hydrogen peroxide on natural stone surfaces like marble or granite, as it can etch or dull the finish. It’s generally safe to use on non-porous surfaces like tile, porcelain, and glass. When in doubt, consult the manufacturer’s instructions for the specific surface you’re cleaning.
How long does hydrogen peroxide take to disinfect a surface?
To effectively disinfect a surface with hydrogen peroxide, it needs to remain in contact with the surface for a certain amount of time. The recommended contact time is typically 5-10 minutes. This allows the hydrogen peroxide to kill bacteria, viruses, and other pathogens. After the contact time, you can wipe the surface clean with a damp cloth. For heavily soiled surfaces, it’s best to clean them first before disinfecting with hydrogen peroxide.
Can I add essential oils to my hydrogen peroxide cleaner?
Yes, adding essential oils to your hydrogen peroxide cleaner can enhance its cleaning power and provide a pleasant scent. Many essential oils have antibacterial, antiviral, and antifungal properties that can complement the disinfecting action of hydrogen peroxide. Some popular choices include tea tree oil, lavender oil, lemon oil, and eucalyptus oil. Add a few drops of your favorite essential oil to your hydrogen peroxide solution and shake well before using. Be sure to use high-quality, pure essential oils for the best results.
How should I store my DIY hydrogen peroxide cleaner?
Store your DIY hydrogen peroxide cleaner in a dark, opaque spray bottle. Hydrogen peroxide is sensitive to light and can degrade over time if exposed to sunlight. Keep the bottle tightly sealed and store it in a cool, dry place, away from direct sunlight and heat. Label the bottle clearly with the contents and the date it was made. Keep it out of reach of children and pets. Properly stored, your DIY hydrogen peroxide cleaner should remain effective for several months.
Is it safe to use hydrogen peroxide to clean food preparation surfaces?
Yes, hydrogen peroxide is generally safe to use for cleaning food preparation surfaces. However, it’s important to rinse the surface thoroughly with water after cleaning to remove any residue. Avoid using hydrogen peroxide on surfaces that come into direct contact with food, such as cutting boards, unless you rinse them very well afterwards. For extra safety, you can also use a food-grade hydrogen peroxide solution.
Can I use hydrogen peroxide to clean my toilet?
Yes, hydrogen peroxide can be used to clean your toilet. Pour about half a cup of hydrogen peroxide into the toilet bowl and let it sit for 20-30 minutes. Then, scrub the bowl with a toilet brush and flush. Hydrogen peroxide can help to remove stains, kill bacteria, and freshen the toilet. For tougher stains, you can add a tablespoon of baking soda to the hydrogen peroxide.
How often should I make a fresh batch of my DIY hydrogen peroxide cleaner?
While hydrogen peroxide has a relatively long shelf life, it’s best to make a fresh batch of your DIY cleaner every few months to ensure its effectiveness. Over time, hydrogen peroxide can degrade and lose its potency, especially if it’s exposed to light or heat. Making a fresh batch ensures that you’re using a solution that’s at its peak cleaning and disinfecting power.
What are the benefits of using natural peroxide cleaners DIY over store-bought cleaners?
There are numerous benefits to using natural peroxide cleaners DIY over store-bought cleaners. Firstly, you have complete control over the ingredients, avoiding harsh chemicals, artificial fragrances, and other potentially harmful substances. Secondly, it’s often more cost-effective, as hydrogen peroxide is relatively inexpensive. Thirdly, it’s more environmentally friendly, reducing plastic waste and minimizing your exposure to toxic chemicals. Finally, it’s a fun and empowering way to take control of your cleaning routine and create a healthier home environment.

Leave a Comment