
Perpetual onion harvest at home – sounds like a gardener’s dream, right? Imagine never having to buy onions again, always having fresh, flavorful bulbs ready to spice up your meals. Well, stop dreaming and start doing! This DIY guide is your ticket to an endless supply of onions, grown right in your own backyard (or even on your balcony!).
Onions have been a culinary staple for centuries, with evidence of their cultivation dating back to ancient Egypt. They weren’t just food, though; onions held symbolic and medicinal value. Today, while we might not worship them like the Egyptians did, we certainly appreciate their versatility in the kitchen. But let’s face it, buying onions can add up, and sometimes the quality from the store just isn’t there.
That’s where this DIY trick comes in. I’m going to show you a simple, effective method to achieve a perpetual onion harvest at home. This isn’t just about saving money; it’s about having control over what you eat, reducing your environmental impact, and experiencing the joy of growing your own food. Plus, who doesn’t love bragging rights about their self-sufficient garden? So, grab your gardening gloves, and let’s get started on this exciting journey to onion abundance!
“`html
Grow Onions Forever: A Simple DIY Perpetual Harvest Guide
Hey there, fellow gardening enthusiasts! Ever dream of having a never-ending supply of fresh onions right at your fingertips? Well, dream no more! I’m going to walk you through a super easy DIY method to create a perpetual onion harvest right in your own home. It’s simpler than you think, and the satisfaction of snipping fresh onion greens whenever you need them is truly rewarding.
What You’ll Need
Before we dive in, let’s gather our supplies. This is a pretty low-cost project, which is always a win!
* **Onions:** You can use store-bought onions that have started to sprout (the ones you might normally toss!), or you can buy a bag of onion sets specifically for planting. Yellow, white, or red onions all work great.
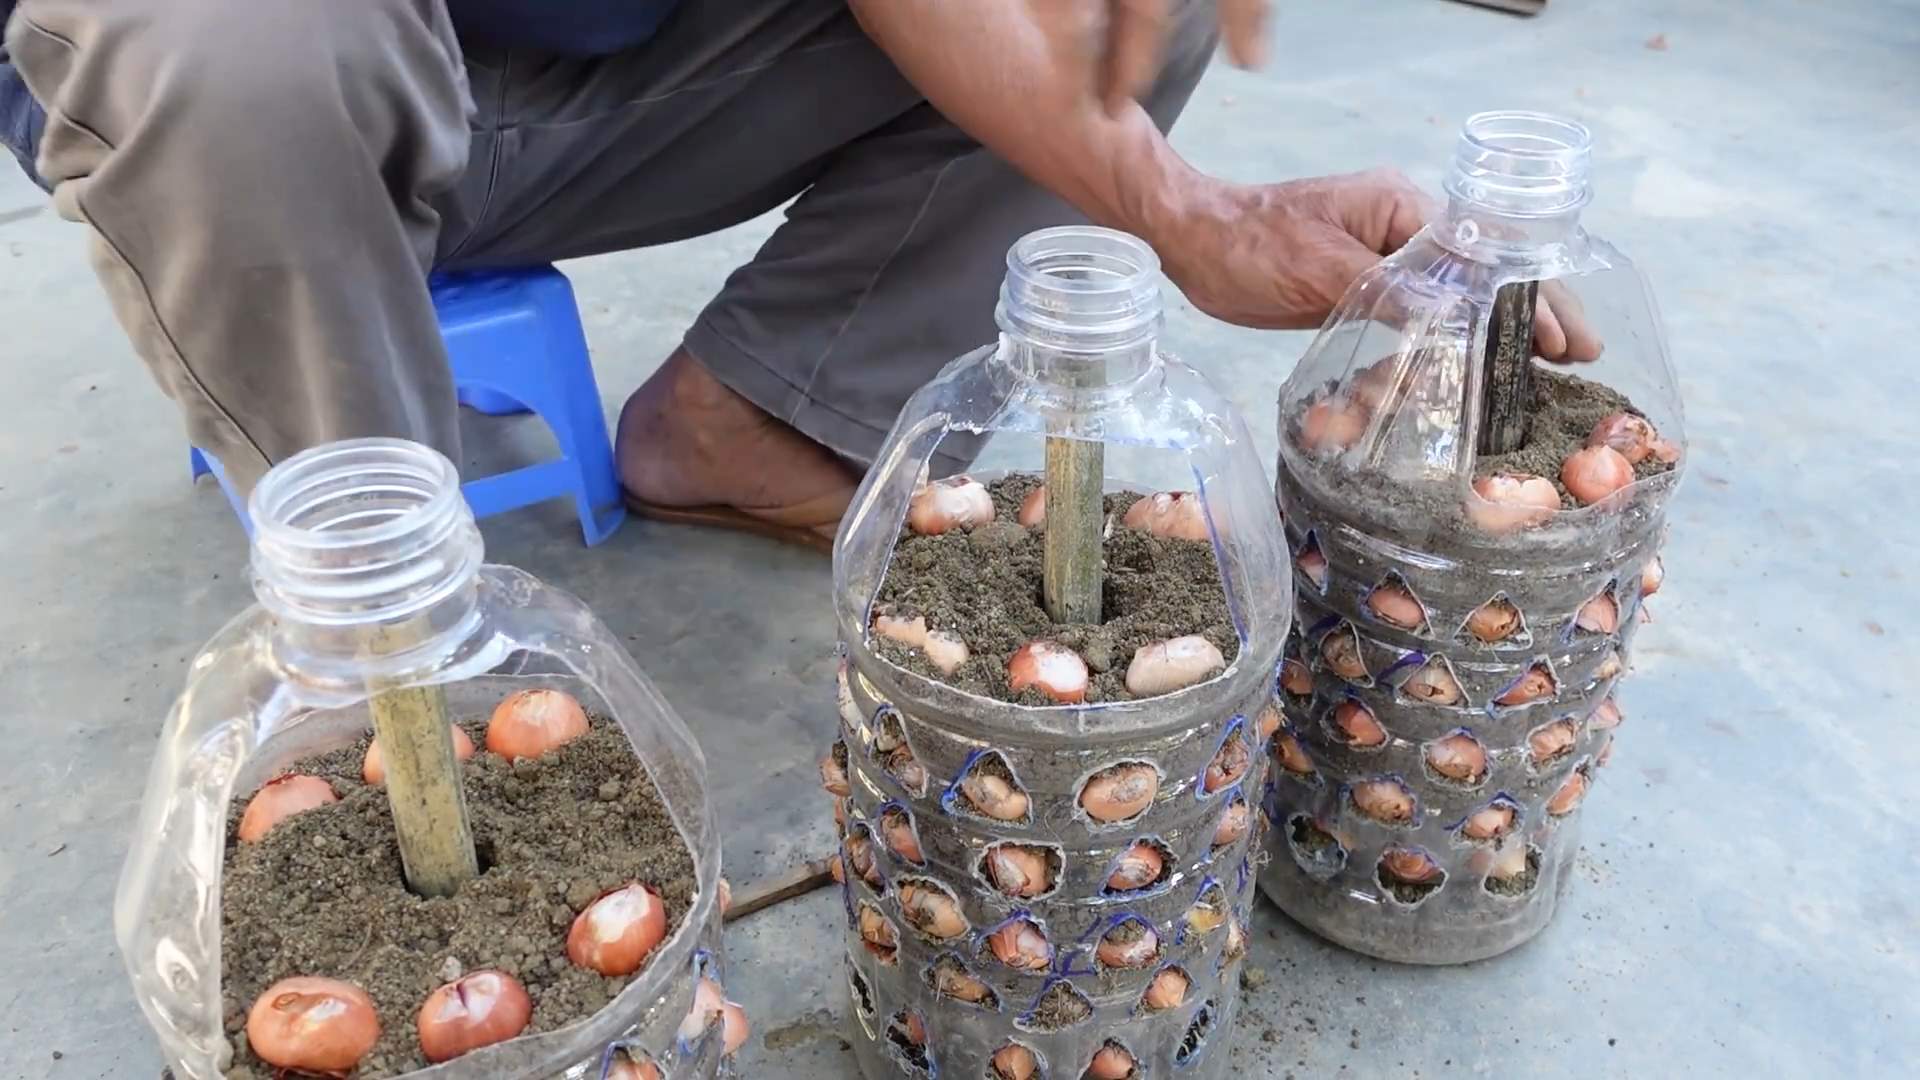
* **Containers:** Choose containers that are at least 6 inches deep. I prefer using recycled plastic containers, old buckets, or even large yogurt tubs. Just make sure they have drainage holes!
* **Potting Mix:** A good quality potting mix is essential for healthy onion growth. Avoid using garden soil, as it can compact and hinder drainage.
* **Watering Can or Spray Bottle:** For gentle watering.
* **Scissors or Kitchen Shears:** For harvesting your onion greens.
* **Optional: Fertilizer:** A balanced liquid fertilizer can give your onions a boost, but it’s not strictly necessary.
Preparing Your Onions
Okay, let’s get those onions ready for their new home!
1. **Inspect Your Onions:** Take a close look at your onions. If you’re using sprouted onions from the store, make sure they’re firm and don’t have any signs of rot. Gently remove any loose, papery skin.
2. **Cut the Onion (Optional):** This step is optional, but I’ve found it can encourage faster growth. Using a clean knife, carefully cut the onion in half, about halfway down from the top (the end with the sprouts). This will expose more of the growing point. If your onion is already sprouting vigorously, you can skip this step.
3. Let the Cut End Dry (Optional): If you cut your onion, let the cut end dry for a day or two before planting. This helps prevent rot. Just leave them out on a plate in a cool, dry place.
Planting Your Onions
Now for the fun part – planting!
1. **Prepare Your Containers:** Fill your containers with potting mix, leaving about an inch of space at the top.
2. **Plant the Onions:** Make a small hole in the potting mix for each onion. Plant the onions so that the top of the onion (where the sprouts are) is just above the soil line. If you cut your onion, make sure the cut side is facing up.
3. **Space Them Out:** Give your onions some room to grow. I usually plant them about 2-3 inches apart.
4. **Water Gently:** Water the potting mix thoroughly, but be careful not to overwater. You want the soil to be moist, not soggy.
Caring for Your Onions
Now that your onions are planted, it’s time to give them some TLC.
1. **Location, Location, Location:** Place your containers in a sunny location. Onions need at least 6 hours of sunlight per day to thrive. A south-facing window is ideal. If you don’t have enough natural light, you can supplement with a grow light.
2. **Watering:** Water your onions regularly, but avoid overwatering. Let the top inch of soil dry out between waterings. Overwatering can lead to root rot. I usually check the soil moisture every other day.
3. **Fertilizing (Optional):** If you want to give your onions a boost, you can fertilize them every few weeks with a balanced liquid fertilizer. Follow the instructions on the fertilizer package.
4. **Rotation:** Rotate your containers regularly to ensure that all sides of the onions receive equal sunlight. This will help them grow evenly.
5. **Pest Control:** Keep an eye out for pests, such as aphids or spider mites. If you spot any, you can try spraying them with insecticidal soap or neem oil.
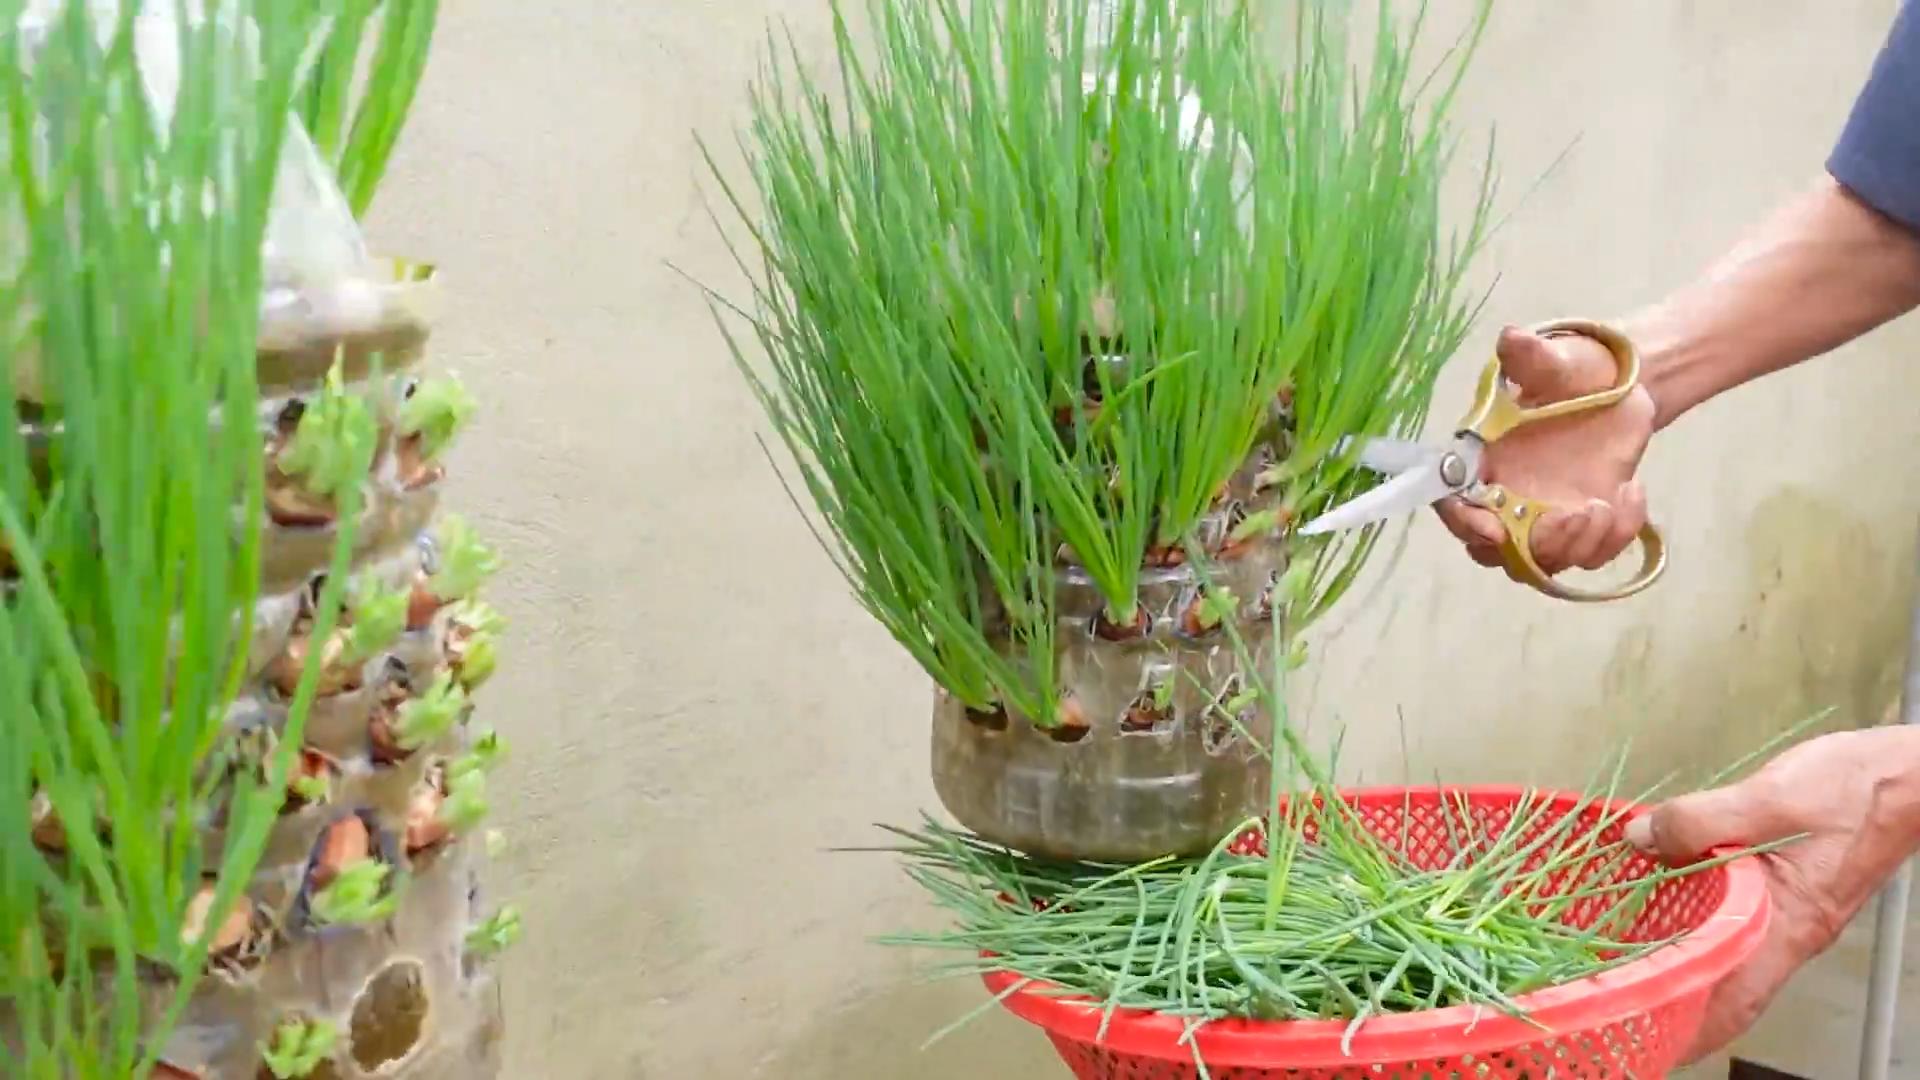
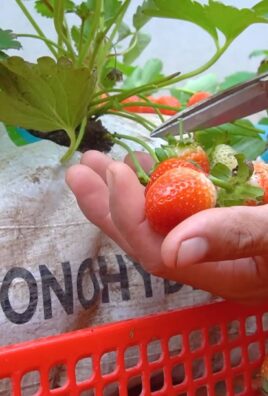
Harvesting Your Onion Greens
This is the best part!
1. **Wait for Growth:** Allow your onion greens to grow to at least 6 inches tall before harvesting.
2. **Snip, Snip:** Using scissors or kitchen shears, snip off the green tops of the onions, leaving about 1-2 inches of green growth. This will allow the onions to continue to grow.
3. **Harvest Regularly:** Harvest your onion greens regularly to encourage new growth. The more you harvest, the more they’ll produce!
4. Enjoy! Use your fresh onion greens in salads, soups, stir-fries, or as a garnish. The possibilities are endless!
Encouraging Bulb Growth (Optional)
While the main focus is on the greens, you can also encourage bulb growth, although it will be limited in a container.
1. **Thinning:** If your onions are crowded, you can thin them out by removing some of the smaller ones. This will give the remaining onions more room to grow. You can eat the thinned onions as scallions.
2. **Hilling:** As the bulbs start to form, you can gently hill up the soil around them. This will help protect them from sunlight and encourage them to grow larger.
3. **Fertilizing:** Use a fertilizer that is higher in phosphorus and potassium to encourage bulb development.
Troubleshooting
Even with the best care, you might encounter a few challenges. Here are some common issues and how to address them:
* **Yellowing Leaves:** This could be a sign of overwatering, underwatering, or nutrient deficiency. Check the soil moisture and adjust your watering schedule accordingly. If the soil is dry, water thoroughly. If the soil is soggy, let it dry out before watering again. You can also try fertilizing with a balanced fertilizer.
* **Slow Growth:** This could be due to insufficient sunlight, poor soil, or lack of nutrients. Make sure your onions are getting at least 6 hours of sunlight per day. If your soil is poor, you can amend it with compost or other organic matter. You can also try fertilizing with a balanced fertilizer.
* **Rotting Onions:** This is usually caused by overwatering. Make sure your containers have drainage holes and avoid overwatering. If you see any signs of rot, remove the affected onions immediately to prevent the rot from spreading.
* **Pests:** Keep an eye out for pests, such as aphids or spider mites. If you spot any, you can try spraying them with insecticidal soap or neem oil.
Extending Your Harvest
To keep your perpetual onion harvest going strong, here are a few tips:
* **Succession Planting:** Plant new onions every few weeks to ensure a continuous supply of greens.
* **Repotting:** After a few months, your onions may become root-bound. Repot them into larger containers with fresh potting mix to give them more room to grow.
* **Dividing:** If your onions have multiplied, you can divide them and replant them into separate containers.
* **Overwintering:** In colder climates, you can bring your onion containers indoors for the winter. Place them in a sunny location and water them sparingly.
Why This Works: The Science Behind the Snipping
The beauty of this method lies in the onion’s ability to regenerate. When you snip off the green tops, you’re not killing the onion. Instead, you’re stimulating it to produce more greens. The onion bulb stores energy, and as long as it has access to sunlight, water, and nutrients, it will continue to send up new shoots. It’s a self-sustaining cycle that provides you with a constant supply of fresh onion greens.
Beyond the Greens: Using the Bulbs
While the primary goal is the greens, don’t completely disregard the bulbs! They won’t grow to the size of a regular store-bought onion, but they will develop into small, flavorful bulbs that you can use in your cooking. Think of them as super-concentrated onion flavor bombs!
When you’re ready to harvest the bulbs, simply pull them out of the soil. They’ll be smaller than what you’re used to, but they’ll pack a punch. Use them in sauces, soups, or anywhere you want a burst of onion flavor.
A Few Extra Tips for Onion Success
* Choose the Right Onions: While any onion can work, I’ve found that green onions (scallions) and shallots tend to be the most productive for this method. They readily sprout and produce a lot of greens.
* Don’t Be Afraid to Experiment: Try different varieties of onions and see which ones perform best in your environment.
* Observe Your Plants: Pay attention to your onions and learn what they need. Are the leaves drooping? Are they turning yellow? The more you observe, the better you’ll
Conclusion
So, there you have it! Transforming kitchen scraps into a perpetual onion harvest is not just a fun experiment; it’s a sustainable, cost-effective, and incredibly rewarding way to bring fresh flavor to your table. We’ve walked you through the simple steps, highlighting how easy it is to coax new life from those onion bottoms you’d normally toss away. This isn’t just about saving a few pennies; it’s about connecting with the food you eat, reducing waste, and enjoying the satisfaction of growing your own.
Why is this DIY trick a must-try? Because it’s a game-changer for any home cook or gardening enthusiast. Imagine never having to run to the store for onions again, knowing you have a steady supply right at your fingertips. Think of the environmental impact of reducing food waste and minimizing your reliance on commercially grown produce. And consider the sheer joy of watching those little onion scraps sprout and flourish into vibrant, usable plants.
But the best part is the versatility. While we’ve focused on green onions, you can adapt this method to other members of the allium family, like shallots or even garlic (though garlic requires a slightly different approach, focusing on planting individual cloves). Experiment with different soil types, try growing them in containers indoors or directly in your garden, and see what works best for your environment. You can even try different varieties of onions to see which ones thrive in your DIY setup.
Don’t be afraid to get creative! Add some companion plants like basil or parsley to your onion patch to deter pests and enhance the flavor. Use the harvested green onions in your favorite recipes, from stir-fries and salads to soups and omelets. The possibilities are endless.
We’re confident that once you try this simple DIY trick, you’ll be hooked. It’s a small change that can make a big difference in your kitchen, your garden, and your overall connection to the food you consume. So, gather your onion scraps, grab some soil, and get ready to embark on your own perpetual onion harvest adventure.
We encourage you to try this method and share your experiences with us! Let us know how it goes, what challenges you encounter, and what successes you celebrate. Share your photos and tips in the comments below. We can’t wait to see your thriving onion gardens! This **perpetual onion harvest** is waiting for you.
Frequently Asked Questions (FAQ)
What kind of onions work best for this method?
Generally, any type of onion with a root end will work, including yellow, white, and red onions. However, green onions (scallions) are particularly well-suited for this method because they readily regrow from their base. When selecting onions, choose those that are firm, healthy, and have visible roots. Avoid onions that are soft, mushy, or show signs of decay. Organic onions are often preferred, as they are less likely to have been treated with chemicals that could inhibit growth. Experiment with different varieties to see which ones thrive best in your specific environment and growing conditions.
How long does it take for the onions to regrow?
The regrowth time can vary depending on several factors, including the type of onion, the growing conditions (light, temperature, humidity), and the quality of the soil. Typically, you can expect to see new green shoots emerging within a few days to a week after planting the onion bottom. Within two to three weeks, you should have a noticeable amount of new growth that you can begin to harvest. Remember that the initial growth will be relatively slow as the onion focuses on establishing its root system. As the plant matures, the growth rate will increase.
How often should I water the onions?
Watering is crucial for successful onion regrowth. The goal is to keep the soil consistently moist but not waterlogged. Overwatering can lead to root rot, while underwatering can stunt growth. A good rule of thumb is to water when the top inch of soil feels dry to the touch. The frequency of watering will depend on the climate, the type of soil, and the size of the container. In hotter, drier climates, you may need to water more frequently. In cooler, more humid climates, you may need to water less often. Check the soil moisture regularly and adjust your watering schedule accordingly.
Can I grow onions indoors using this method?
Yes, you can absolutely grow onions indoors using this method. In fact, it’s a great way to have a fresh supply of green onions year-round, regardless of the weather outside. When growing onions indoors, it’s essential to provide them with adequate light. Place the onions near a sunny window that receives at least six hours of direct sunlight per day. If you don’t have access to a sunny window, you can supplement with artificial grow lights. Also, ensure that the container you’re using has drainage holes to prevent waterlogging.
What kind of soil should I use?
The ideal soil for growing onions is well-draining, nutrient-rich, and slightly acidic. A good potting mix that is specifically formulated for vegetables is a great option. You can also create your own soil mix by combining equal parts of potting soil, compost, and perlite or vermiculite. Compost provides essential nutrients, while perlite or vermiculite improves drainage and aeration. Avoid using heavy clay soils, as they can retain too much moisture and lead to root rot.
How do I harvest the green onions?
Harvesting green onions is simple and straightforward. Once the green shoots have reached a desirable length (typically 6-8 inches), you can begin to harvest them. Use a sharp pair of scissors or a knife to cut the green shoots about an inch above the soil line. Avoid pulling the entire onion out of the soil, as this will prevent further regrowth. The onion will continue to produce new shoots, providing you with a continuous supply of green onions.
Can I regrow onions in water only?
While you can initially sprout onion bottoms in water, they will eventually need to be transplanted into soil to thrive long-term. Growing onions in water alone will provide them with some initial moisture and nutrients, but it won’t provide them with the necessary support and nutrients for sustained growth. The soil provides a stable environment for the roots to anchor and access essential minerals and nutrients.
What if my onions start to rot?
If you notice that your onions are starting to rot, it’s usually a sign of overwatering or poor drainage. Remove the affected onions immediately to prevent the rot from spreading to other plants. Ensure that the container has adequate drainage holes and that the soil is well-draining. Allow the soil to dry out slightly before watering again. You can also try adding some fungicide to the soil to help prevent further rot.
Can I use fertilizer to help the onions grow?
Yes, fertilizing can help to promote healthy onion growth. Use a balanced liquid fertilizer that is specifically formulated for vegetables. Dilute the fertilizer according to the package instructions and apply it to the soil every two to three weeks. Avoid over-fertilizing, as this can burn the roots and damage the plants.
How can I prevent pests and diseases?
To prevent pests and diseases, it’s essential to provide your onions with optimal growing conditions. Ensure that they have adequate light, water, and nutrients. Keep the area around the onions clean and free of debris. You can also use organic pest control methods, such as neem oil or insecticidal soap, to control common pests like aphids and spider mites. If you notice any signs of disease, such as yellowing leaves or spots, remove the affected plants immediately and treat the remaining plants with a fungicide.
Leave a Comment