
Propagate Plants in June? Absolutely! And I’m here to tell you it’s easier than you think. Imagine multiplying your favorite plants without spending a dime, filling your garden with vibrant life, all thanks to a few simple tricks. Sounds too good to be true? It’s not! This month, June, offers the perfect conditions for successful propagation, and I’m going to share my best DIY secrets with you.
The art of plant propagation has been around for centuries. From ancient civilizations using cuttings to cultivate crops to modern gardeners sharing their prized blooms, the desire to expand our green spaces has always been strong. Think about it – every time you admire a friend’s beautiful rose bush, you could be growing your own from a simple cutting!
But why propagate plants in June specifically? Well, the combination of warm temperatures and increased daylight hours creates an ideal environment for root development. This means higher success rates and healthier, faster-growing new plants. Plus, who doesn’t love a good DIY project that saves money and brings a little more green into their lives? In this article, I’ll walk you through easy-to-follow techniques, ensuring you’ll be propagating like a pro in no time. Get ready to transform your garden and impress your friends with your newfound green thumb!

Propagating Plants in June: A Gardener’s Delight!
Hey there, fellow plant enthusiasts! June is absolutely buzzing with life, and that makes it the perfect time to expand your green family through propagation. I’m going to walk you through some of my favorite methods for multiplying your plants this month. Get ready to clone some beauties!
Understanding Propagation Basics
Before we dive into the nitty-gritty, let’s quickly cover the basics. Propagation is essentially creating new plants from existing ones. This can be done through various methods, each suited to different plant types. The key is to provide the right conditions – moisture, warmth, and light – to encourage root development.
Choosing Your Propagation Method
The best method depends on the plant you’re working with. Here’s a quick rundown:
* Stem Cuttings: This is my go-to for many plants, including herbs like rosemary and lavender, as well as succulents, geraniums, and even some shrubs. You’re essentially taking a piece of stem and coaxing it to grow roots.
* Leaf Cuttings: Perfect for succulents like snake plants (Sansevieria) and African violets. You’re using a single leaf to create a whole new plant.
* Division: Ideal for plants that grow in clumps, like hostas, daylilies, and ferns. You’re simply separating the clump into smaller, independent plants.
* Layering: A great option for plants with long, flexible stems, like climbing roses or raspberries. You encourage a stem to root while still attached to the parent plant.
* Water Propagation: A simple and fun method where you root cuttings in water before transplanting them to soil. Works well for pothos, philodendrons, and many herbs.
Materials You’ll Need
No matter which method you choose, you’ll need a few essential supplies:
* Sharp, Clean Pruning Shears or Knife: Sterilize them with rubbing alcohol to prevent disease.
* Rooting Hormone (Optional): This can speed up root development, especially for plants that are difficult to root.
* Potting Mix: Use a well-draining mix specifically formulated for seedlings or cuttings.
* Small Pots or Containers: Choose pots with drainage holes.
* Watering Can or Spray Bottle: For gentle watering.
* Clear Plastic Bags or Humidity Dome (Optional): To create a humid environment.
* Labels: To keep track of what you’re propagating.
Propagating with Stem Cuttings
This is probably the most common and versatile method. Let’s get started!
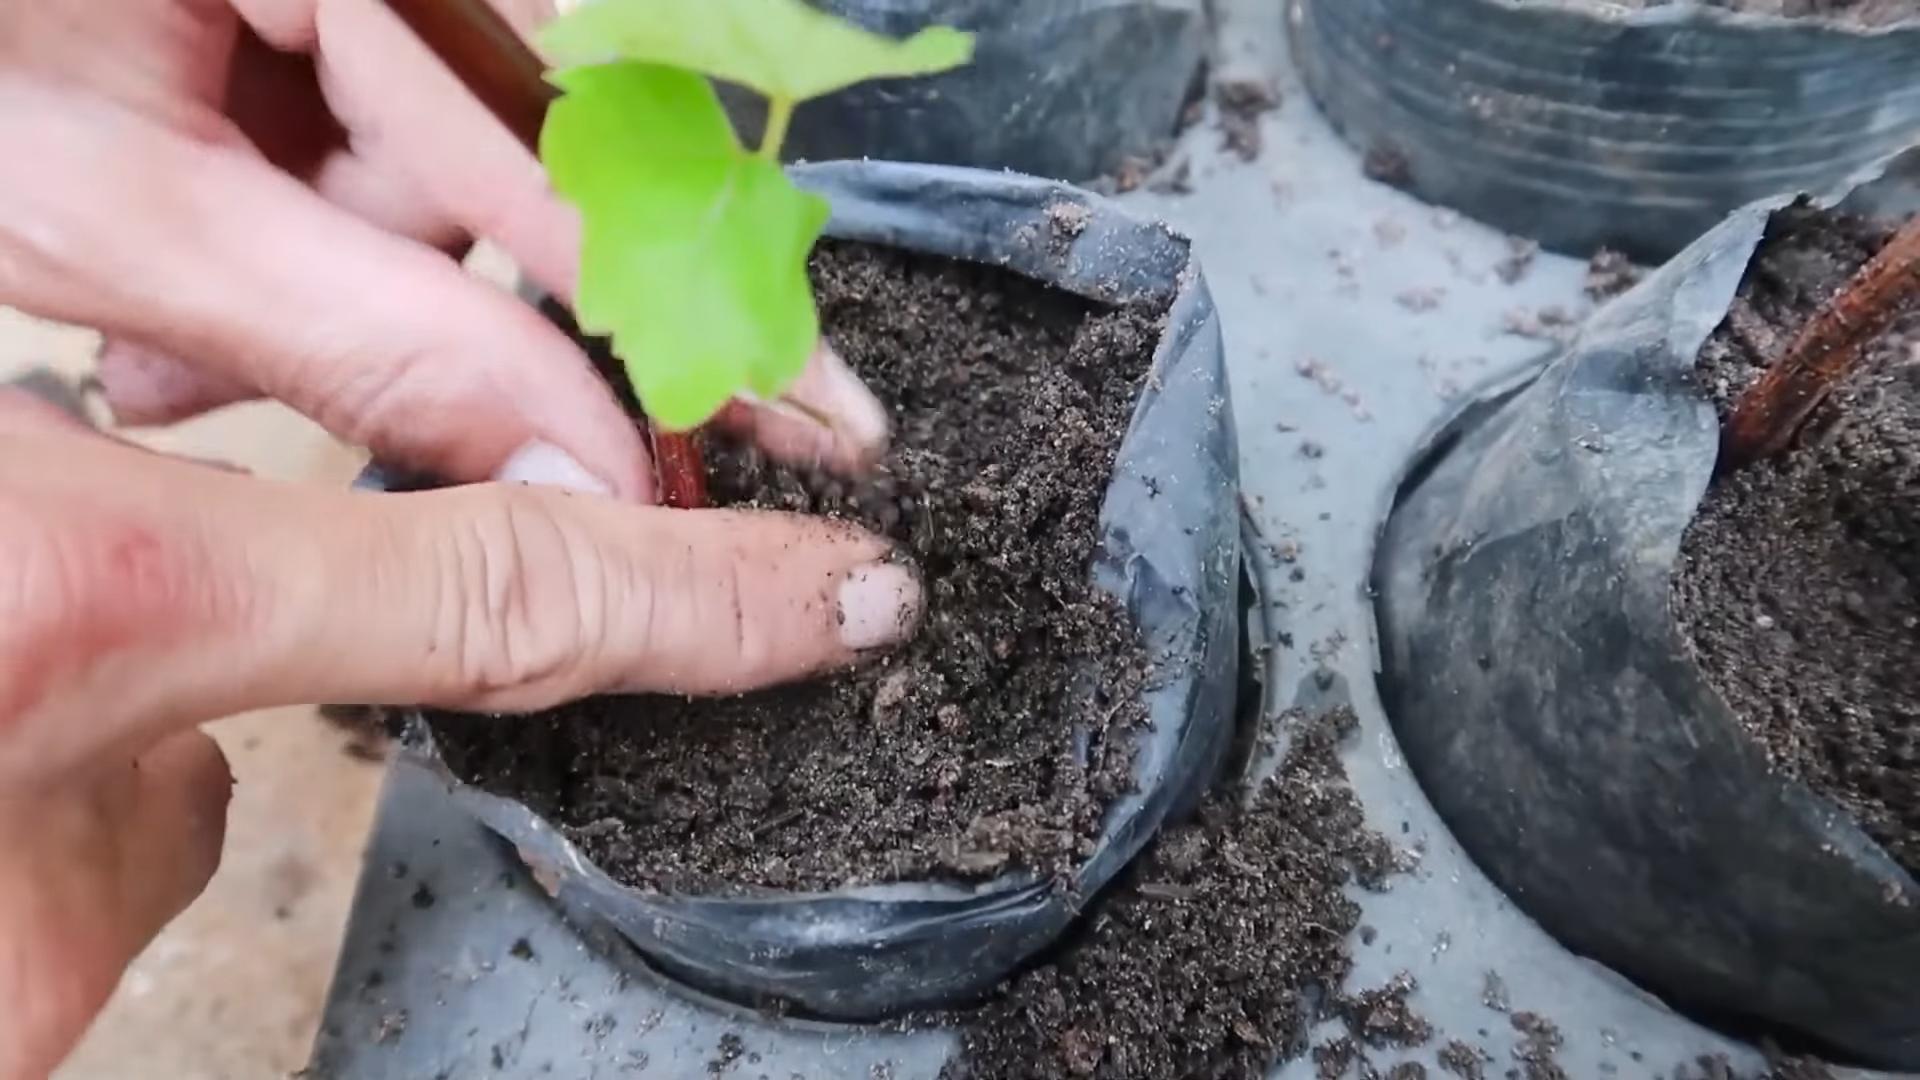
1. Select a Healthy Stem: Choose a stem that’s healthy, vigorous, and free from pests or diseases. Look for stems with several leaf nodes (the points where leaves emerge).
2. Take the Cutting: Using your sterilized pruning shears, make a clean cut just below a leaf node. The cutting should be about 4-6 inches long.
3. Prepare the Cutting: Remove the leaves from the bottom 1-2 inches of the cutting. This will prevent them from rotting when they’re buried in the soil. If the remaining leaves are very large, you can cut them in half to reduce water loss.
4. Apply Rooting Hormone (Optional): Dip the cut end of the stem into rooting hormone powder or liquid. Tap off any excess.
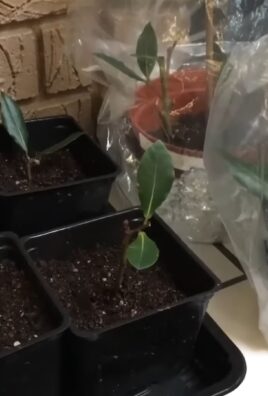
5. Plant the Cutting: Fill a small pot with moistened potting mix. Use a pencil or your finger to create a hole in the soil. Insert the cutting into the hole, making sure that at least one leaf node is buried. Gently firm the soil around the cutting.
6. Water and Cover: Water the cutting gently to moisten the soil. Then, cover the pot with a clear plastic bag or place it under a humidity dome. This will help to create a humid environment that encourages root development.
7. Provide Light and Warmth: Place the cutting in a warm, bright location, but out of direct sunlight. Direct sunlight can scorch the leaves.
8. Monitor and Water: Check the cutting regularly to make sure the soil stays moist but not soggy. Water as needed. Remove the plastic bag or humidity dome for a few hours each day to allow for air circulation and prevent fungal growth.
9. Check for Roots: After a few weeks, gently tug on the cutting. If you feel resistance, it means that roots have formed. You can also gently dig around the base of the cutting to check for roots.
10. Transplant (If Needed): Once the cutting has developed a good root system, you can transplant it into a larger pot or into the garden.
Propagating with Leaf Cuttings
This method is fantastic for succulents and other plants with fleshy leaves.
1. Select a Healthy Leaf: Choose a healthy, mature leaf from the parent plant. Avoid leaves that are damaged or diseased.
2. Detach the Leaf: Gently twist or cut the leaf from the stem. Make sure to get a clean break.
3. Callus the Leaf (For Succulents): Allow the cut end of the leaf to callus over for a few days. This will prevent it from rotting when it’s planted. Simply lay the leaves on a dry paper towel in a well-ventilated area.
4. Plant the Leaf: Fill a small pot with moistened succulent potting mix. Lay the leaf on top of the soil, or gently insert the cut end into the soil.
5. Water and Wait: Water the leaf sparingly. Keep the soil slightly moist, but avoid overwatering.
6. Provide Light and Warmth: Place the pot in a warm, bright location, but out of direct sunlight.
7. Wait for Roots and New Growth: It may take several weeks or even months for roots and new growth to appear. Be patient! Eventually, you should see tiny roots emerging from the cut end of the leaf, followed by small plantlets.
8. Transplant (If Needed): Once the plantlets are large enough, you can transplant them into individual pots.
Propagating by Division
This is the easiest method, in my opinion, and it’s perfect for plants that grow in clumps.
1. Dig Up the Plant: Carefully dig up the entire plant from the ground or its pot.
2. Clean the Roots: Gently remove as much soil as possible from the roots. You may need to use a hose to wash away stubborn clumps of soil.
3. Divide the Plant: Using your hands or a sharp knife, carefully divide the plant into smaller sections. Each section should have its own roots and shoots.
4. Replant the Divisions: Replant each division into its own pot or into the garden.
5. Water and Care: Water the newly divided plants thoroughly. Provide them with the same care as the parent plant.
Propagating by Layering
This method is a bit more involved, but it’s a great way to propagate plants with long, flexible stems.
1. Select a Flexible Stem: Choose a long, flexible stem that can be easily bent to the ground.
2. Prepare the Stem: Remove the leaves from a section of the stem that will be buried in the soil.
3. Bury the Stem: Dig a shallow trench in the soil near the parent plant. Bend the stem down and bury the prepared section in the trench.
4. Secure the Stem: Use a rock or a garden staple to hold the stem in place.
5. Water and Wait: Water the area regularly to keep the soil moist.
6. Check for Roots: After a few weeks or months, check for roots by gently digging around the buried section of the stem.
7. Separate and Transplant: Once the stem has developed a good root system, you can cut it from the parent plant and transplant it into its own pot or into the garden.
Propagating in Water
This is a super simple method, and it’s fun to watch the roots grow!
1. Take a Cutting: Take a stem cutting as described above.
2. Place in Water: Place the cutting in a glass or jar of water. Make sure that the leaves are above the water line.
3. Change the Water Regularly: Change the water every few days to prevent bacterial growth.
4. Provide Light and Warmth: Place the cutting in a warm, bright location, but out of direct sunlight.
5. Wait for Roots: Roots should start to appear within a few weeks.
6. Transplant: Once the roots are about an inch long, you can transplant the cutting into a pot filled with potting mix.
Troubleshooting Propagation Problems
Sometimes, propagation doesn’t go as planned. Here are some common problems and how to fix them:
* Cuttings Rotting: This is usually caused by overwatering or poor
Conclusion
So, there you have it! Propagating plants in June using these simple DIY methods is not just a gardening hack; it’s a gateway to expanding your green family, saving money, and experiencing the pure joy of nurturing new life. We’ve walked you through the easiest and most effective techniques, tailored specifically for the peak growing season of June. The increased sunlight and warmer temperatures create the perfect environment for root development, giving your cuttings the best possible start.
Why is this a must-try? Because it’s incredibly rewarding! Imagine turning a single, healthy plant into a thriving collection, all without spending a fortune at the garden center. It’s also a fantastic way to share your love of plants with friends and family, gifting them cuttings from your own flourishing garden. Plus, propagating allows you to preserve your favorite plants, ensuring their lineage continues for years to come.
But the beauty of plant propagation lies in its adaptability. Feel free to experiment with different methods and plant varieties. For example, if you’re propagating succulents, try using a well-draining cactus mix instead of regular potting soil. For herbs like mint or basil, water propagation is incredibly effective – simply place cuttings in a glass of water until roots develop, then transplant them into soil. You can even try propagating different parts of the plant, such as leaf cuttings for snake plants or stem cuttings for roses.
Don’t be afraid to get creative! Use recycled containers as propagation stations, add rooting hormone to encourage faster root growth, or even create a mini propagation greenhouse using a plastic bag or clear container to increase humidity. The possibilities are endless!
We wholeheartedly encourage you to give these DIY propagation techniques a try this June. It’s a fun, educational, and ultimately fulfilling experience that will deepen your connection to the natural world. And most importantly, don’t keep your success (or even your learning experiences!) to yourself. Share your journey with us! Post photos of your propagated plants on social media using #JunePlantPropagation, or leave a comment below sharing your tips and tricks. We’re eager to see what you create and learn from your experiences. Let’s build a community of plant propagators, sharing our knowledge and passion for all things green! This June, take the leap and discover the magic of plant propagation – you won’t regret it!
Frequently Asked Questions (FAQ)
What types of plants are best to propagate in June?
June is an excellent time to propagate a wide variety of plants due to the favorable growing conditions. Some of the best plants to propagate in June include:
* **Herbs:** Basil, mint, rosemary, lavender, sage, and oregano are all easily propagated from stem cuttings in June. The warm weather encourages rapid root development.
* **Succulents:** Echeveria, sedum, and sempervivum are ideal for leaf or stem cuttings during this time. Allow the cuttings to callous over for a day or two before planting in well-draining soil.
* **Annuals:** Petunias, geraniums, and impatiens can be propagated from stem cuttings to create more plants for your garden.
* **Perennials:** Many perennials, such as hostas, daylilies, and phlox, can be divided in June to create new plants.
* **Shrubs:** Hydrangeas, roses, and butterfly bushes can be propagated from softwood cuttings taken in June.
* **Vegetables:** Tomato suckers, which are the small shoots that grow between the main stem and branches, can be easily rooted in water or soil to create new tomato plants.
How do I choose the right cutting for propagation?
Selecting the right cutting is crucial for successful propagation. Look for healthy, vigorous stems that are free from pests and diseases. Choose stems that are actively growing but not flowering, as flowering can divert energy away from root development. The ideal cutting should be about 4-6 inches long and have several leaves or nodes (the points where leaves emerge). Use clean, sharp pruning shears or a knife to make a clean cut just below a node.
What is the best rooting medium to use?
The best rooting medium depends on the type of plant you’re propagating. For most plants, a well-draining potting mix is a good choice. You can also use a mixture of perlite and vermiculite, or a specialized rooting hormone mix. For succulents, use a cactus mix or a blend of sand and perlite. When propagating in water, use clean, filtered water and change it every few days to prevent algae growth.
How often should I water my cuttings?
Keep the rooting medium consistently moist, but not waterlogged. Overwatering can lead to rot, while underwatering can cause the cuttings to dry out. Check the moisture level daily and water as needed. If you’re using a humidity dome or plastic bag, be sure to vent it regularly to prevent excessive moisture buildup.
How long does it take for cuttings to root?
The time it takes for cuttings to root varies depending on the plant species, the propagation method, and the environmental conditions. Some plants, like basil and mint, can root in as little as a week, while others, like roses and hydrangeas, may take several weeks or even months. Be patient and continue to provide the cuttings with the proper care. You’ll know the cuttings have rooted when you see new growth emerging or when you gently tug on the cutting and feel resistance.
Do I need to use rooting hormone?
Rooting hormone is not always necessary, but it can significantly increase the success rate of propagation, especially for plants that are difficult to root. Rooting hormone contains auxins, which are plant hormones that stimulate root development. To use rooting hormone, dip the cut end of the cutting in the hormone powder or liquid before planting it in the rooting medium.
What is the best location for propagating plants?
The ideal location for propagating plants is a warm, bright spot with indirect sunlight. Avoid direct sunlight, which can scorch the cuttings. A windowsill facing east or north is often a good choice. You can also use a grow light to provide supplemental light. Maintain a consistent temperature of around 70-75°F (21-24°C) for optimal root development.
How do I harden off my rooted cuttings before planting them outdoors?
Once your cuttings have developed a strong root system, it’s important to harden them off before planting them outdoors. Hardening off is the process of gradually acclimating the plants to outdoor conditions. Start by placing the cuttings in a sheltered location outdoors for a few hours each day, gradually increasing the amount of time they spend outside over the course of a week or two. This will help them adjust to the sun, wind, and temperature fluctuations.
What if my cuttings don’t root?
Not all cuttings will root successfully, and that’s perfectly normal. If your cuttings don’t root, don’t be discouraged! Try again with fresh cuttings, making sure to follow the proper propagation techniques. Experiment with different rooting mediums, rooting hormones, and environmental conditions to see what works best for you. Plant propagation is a learning process, and with practice, you’ll become more successful over time.
Can I propagate plants indoors year-round?
While June offers optimal conditions for propagation, many plants can be propagated indoors year-round with the right care. Providing adequate light, warmth, and humidity is key to successful indoor propagation. Use grow lights to supplement natural light, maintain a consistent temperature, and use a humidifier or humidity dome to increase humidity levels. With proper care, you can enjoy the rewards of plant propagation throughout the year.
Leave a Comment