
Purple Sweet Pepper Container gardening is a fantastic way to bring vibrant color and delicious flavor right to your doorstep! Have you ever dreamed of harvesting your own beautiful, deep purple peppers, perfect for adding a touch of elegance to your salads and stir-fries? Well, you’re in the right place! This DIY guide will unlock the secrets to successfully growing these unique peppers in containers, even if you have limited space or a less-than-green thumb.
Container gardening, in general, has a rich history, dating back to ancient civilizations who used pots to cultivate plants for food and decoration. Today, it’s experiencing a massive resurgence as more and more people seek to connect with nature and enjoy fresh, homegrown produce. But growing purple sweet pepper container plants can be tricky, and that’s where this article comes in. I’m going to share my tried-and-true tips and tricks to help you avoid common pitfalls and maximize your yield.
Why bother with growing your own purple sweet peppers? For starters, store-bought peppers often lack the freshness and flavor of homegrown varieties. Plus, you have complete control over the growing process, ensuring your peppers are free from harmful pesticides. But more importantly, growing your own food is incredibly rewarding! There’s nothing quite like the satisfaction of nurturing a plant from seed to harvest and enjoying the fruits (or, in this case, vegetables!) of your labor. So, let’s dive in and discover how to create your own thriving purple sweet pepper container garden!
DIY: From Grocery Store Pepper to Thriving Plant!
Hey there, fellow plant enthusiasts! Ever looked at a beautiful, vibrant purple sweet pepper in the grocery store and thought, “I wish I could grow that?” Well, guess what? You absolutely can! It’s easier than you might think, and I’m here to guide you through the entire process. We’re going to turn that single pepper into a flourishing plant, right in your own home or garden. Let’s get started!
What You’ll Need
Before we dive in, let’s gather our supplies. This is crucial for a smooth and successful pepper-growing adventure.
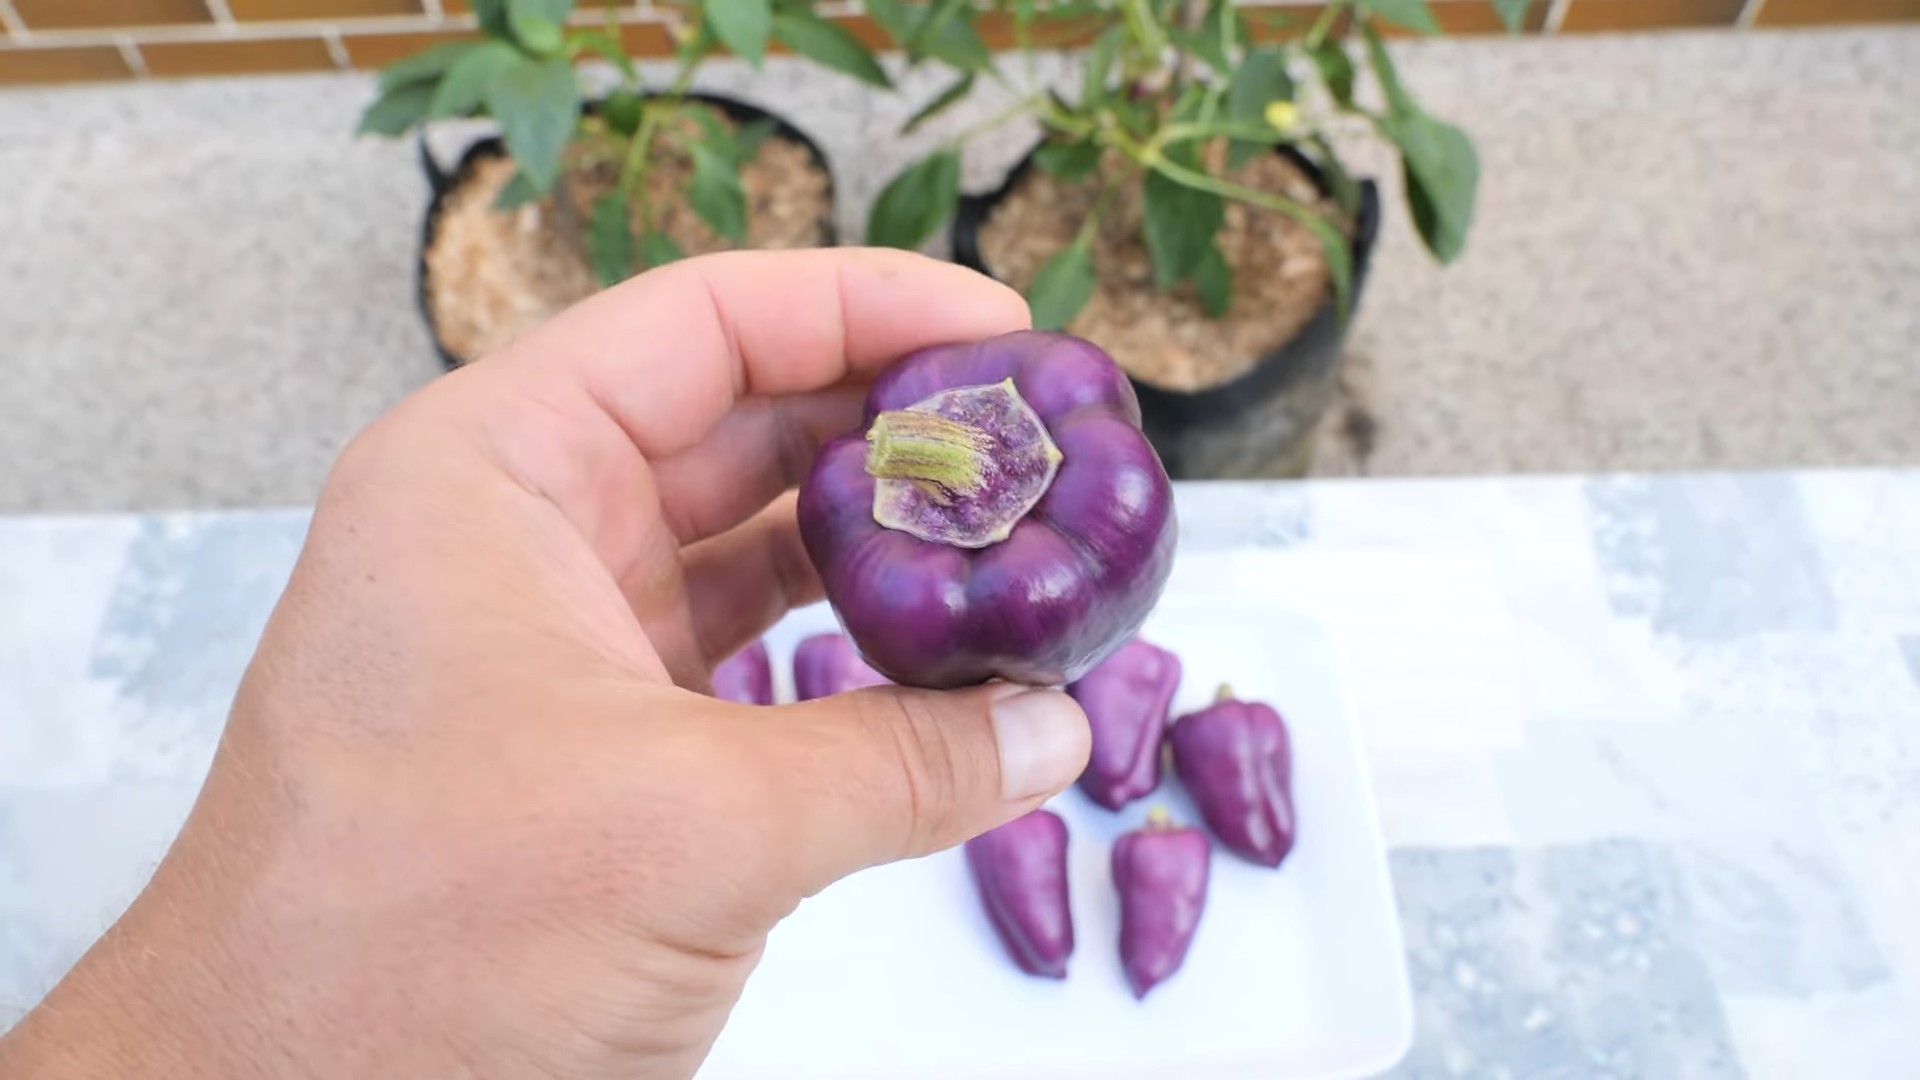
* A Purple Sweet Pepper: Choose one that looks healthy, ripe (deep purple color), and free from blemishes. Organic is always a plus!
* Paper Towels: For sprouting the seeds.
* A Small Container with a Lid: A plastic food container or even a ziplock bag will work perfectly.
* Seed Starting Mix: This is specifically formulated for seedlings and provides the right nutrients and drainage.
* Small Pots or Seedling Trays: For transplanting the sprouted seeds.
* Larger Pots or a Garden Bed: For the final planting location.
* Watering Can or Spray Bottle: For gentle watering.
* Grow Lights (Optional): If you don’t have a sunny spot, grow lights can be a lifesaver.
* Fertilizer: A balanced fertilizer for vegetables.
* Gardening Gloves: To keep your hands clean.
* Small Knife or Scalpel: For carefully extracting the seeds.
Phase 1: Seed Extraction and Sprouting
This is where the magic begins! We’re going to carefully extract the seeds from our pepper and get them ready to sprout.
1. Prepare Your Workspace: Lay down some paper towels to protect your surface. Gather your pepper, knife, and small container.
2. Cut Open the Pepper: Carefully slice the pepper open. I usually cut around the stem and then pull the pepper apart.
3. Extract the Seeds: You’ll see a cluster of seeds inside. Gently scrape them out with your knife or your fingers. Try to separate them as much as possible.
4. Clean the Seeds (Optional): Some people recommend rinsing the seeds to remove any pulp. I’ve had success both with and without rinsing, so it’s up to you. If you choose to rinse, gently rub the seeds under cool water and then pat them dry.
5. Prepare the Sprouting Container: Dampen a paper towel with water. It should be moist but not soaking wet.
6. Place the Seeds on the Paper Towel: Spread the seeds evenly on the damp paper towel. Give them a little space so they don’t clump together.
7. Cover the Seeds: Fold the paper towel over the seeds, or place another damp paper towel on top.
8. Seal the Container: Place the paper towel with the seeds in your small container and seal it with the lid. This will create a humid environment that’s perfect for sprouting.
9. Find a Warm Spot: Place the container in a warm location, ideally around 70-80°F (21-27°C). A kitchen counter or a spot near a radiator works well. Avoid direct sunlight at this stage.
10. Check Regularly: Check the seeds every day or two. Make sure the paper towel stays damp. If it starts to dry out, lightly mist it with water.
11. Wait for Sprouts: In about 5-14 days, you should see tiny roots emerging from the seeds! This is so exciting! Once the roots are about 1/4 inch long, they’re ready to be planted.
Phase 2: Planting the Sprouted Seeds
Now that our seeds have sprouted, it’s time to give them some soil and let them grow into seedlings.
1. Prepare Your Seedling Pots: Fill your small pots or seedling trays with seed starting mix. Gently pat it down to remove any air pockets.
2. Make a Small Hole: Use your finger or a pencil to create a small hole in the center of each pot, about 1/4 inch deep.
3. Carefully Transfer the Sprouts: This is the trickiest part! Gently pick up each sprouted seed with tweezers or your fingers. Be very careful not to damage the delicate roots.
4. Plant the Sprouts: Place the sprout in the hole, root-side down. Gently cover the roots with seed starting mix.
5. Water Gently: Use a spray bottle or watering can to gently water the soil. Be careful not to overwater, as this can cause the seedlings to rot.
6. Provide Light: Place the pots in a sunny location or under grow lights. Seedlings need plenty of light to grow strong. If using grow lights, keep them a few inches above the seedlings and provide about 14-16 hours of light per day.
7. Keep the Soil Moist: Check the soil regularly and water when the top inch feels dry.
8. Monitor Growth: Watch your seedlings grow! In a few weeks, they should develop their first true leaves (the leaves that look like miniature pepper leaves).
Phase 3: Transplanting and Growing to Maturity
Once your seedlings have grown a bit larger and have a few sets of true leaves, it’s time to transplant them into larger pots or your garden bed.
1. Harden Off the Seedlings (If Planting Outdoors): This is an important step to acclimate your seedlings to outdoor conditions. For about a week before transplanting, gradually expose them to more sunlight and wind each day. Start with an hour or two and gradually increase the time.
2. Prepare Your Planting Location: Choose a location that gets at least 6-8 hours of sunlight per day. If planting in pots, choose pots that are at least 12 inches in diameter. If planting in a garden bed, make sure the soil is well-drained and amended with compost or other organic matter.
3. Dig a Hole: Dig a hole that’s slightly larger than the root ball of your seedling.
4. Carefully Remove the Seedling: Gently remove the seedling from its pot. If the roots are tightly bound, gently loosen them with your fingers.
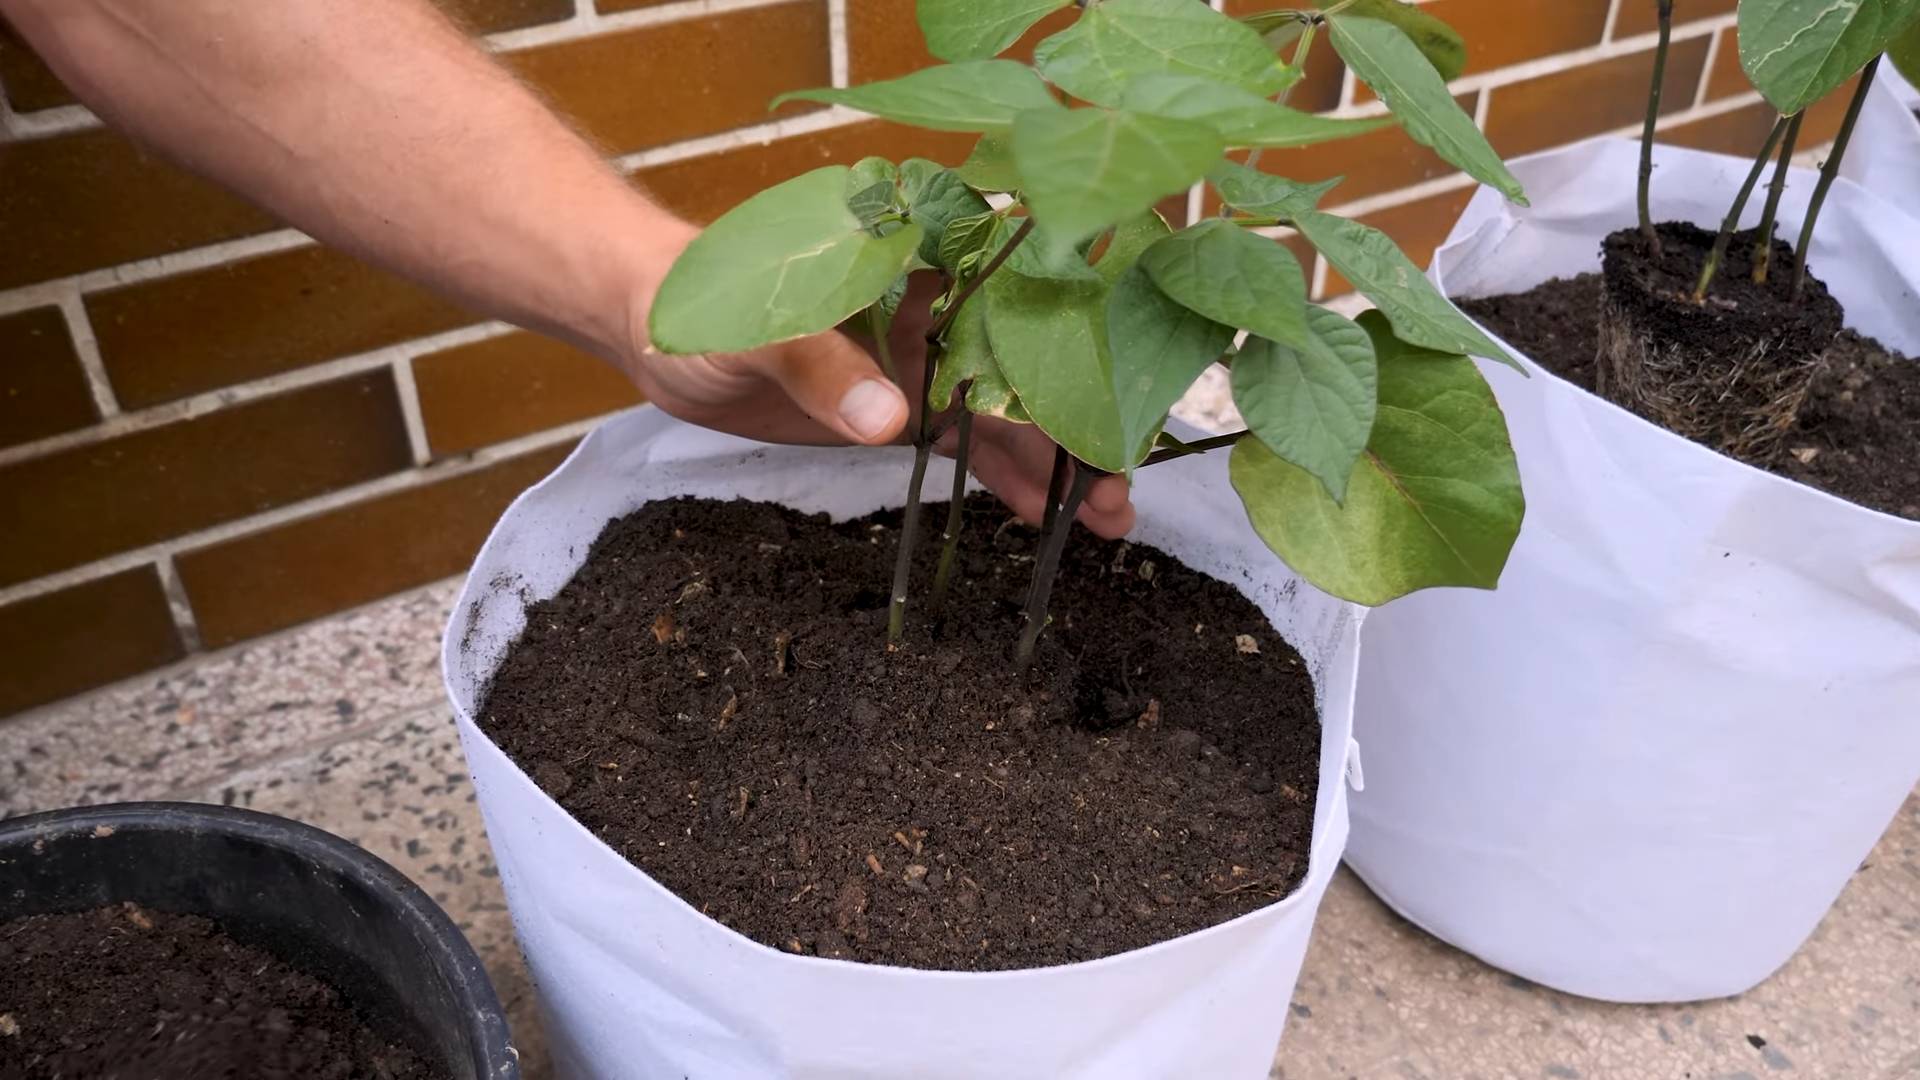
5. Plant the Seedling: Place the seedling in the hole and cover the roots with soil. Gently pat the soil down.
6. Water Thoroughly: Water the seedling thoroughly after planting.
7. Fertilize Regularly: Peppers are heavy feeders, so fertilize them regularly with a balanced fertilizer. Follow the instructions on the fertilizer package. I like to use a liquid fertilizer every couple of weeks.
8. Provide Support (Optional): As your pepper plant grows, it may need support to prevent the branches from breaking under the weight of the peppers. You can use stakes or a tomato cage.
9. Water Regularly: Water your pepper plant regularly, especially during hot, dry weather. Peppers need consistent moisture to produce well.
10. Watch for Pests and Diseases: Keep an eye out for pests and diseases. Common pepper pests include aphids, whiteflies, and spider mites. Common diseases include blossom end rot and fungal infections. Treat any problems promptly.
11. Harvest Your Peppers: Your purple sweet peppers will be ready to harvest when they are fully colored and firm to the touch. Use a sharp knife or scissors to cut the peppers from the plant.
Tips for Success
* Start Early: Start your seeds indoors 6-8 weeks before the last expected frost.
* Use Quality Seed Starting Mix: This will provide the right nutrients and drainage for your seedlings.
* Provide Plenty of Light: Seedlings need plenty of light to grow strong.
* Don’t Overwater: Overwatering can lead to root rot.
* Fertilize Regularly: Peppers are heavy feeders and need regular fertilization.
* Be Patient: Growing peppers from seed takes time and patience. Don’t get discouraged if you don’t see results immediately.
* Choose the Right Variety: Make sure you’re growing a purple sweet pepper variety that’s suited to your climate.
* Consider Companion Planting: Basil, marigolds, and onions are good companion plants for peppers.
* Protect from Frost: Peppers are sensitive to frost, so protect them if frost is predicted.
* Enjoy the Process! Growing your own peppers is a rewarding experience.
Troubleshooting
* Seeds Not Sprouting: Make sure the seeds are kept warm and moist. Try a different batch of seeds.
* Seedlings Leggy: Seedlings are not getting enough light. Provide more light or move them closer to the light source.
* Leaves Turning Yellow: Could be
Conclusion
So, there you have it! Transforming an ordinary container into a thriving purple sweet pepper haven is not only achievable but incredibly rewarding. We’ve walked you through the simple steps, highlighting the benefits of this DIY project – from cost savings and environmental consciousness to the sheer joy of nurturing your own food source.
Why is this DIY trick a must-try? Because it empowers you to take control of your food supply, even with limited space. Imagine plucking fresh, vibrant purple sweet peppers right from your balcony or patio, knowing exactly where they came from and what went into growing them. The taste difference alone is worth the effort! Store-bought peppers simply can’t compare to the flavor and freshness of homegrown produce. Plus, you’re reducing your carbon footprint by minimizing transportation and packaging waste.
Beyond the practical advantages, this project offers a therapeutic connection to nature. Tending to your purple sweet pepper container garden can be a relaxing and fulfilling hobby, providing a sense of accomplishment as you watch your plants flourish. It’s a fantastic way to de-stress and reconnect with the natural world, even in the midst of a busy urban life.
Looking for variations? Absolutely! Consider experimenting with different container sizes and materials. While we’ve focused on repurposing existing containers, you can also use grow bags or even build your own raised beds. For a more decorative touch, paint your container with vibrant colors or add trellises for your pepper plants to climb. You can also companion plant with herbs like basil or oregano to deter pests and enhance the flavor of your peppers. Another variation is to try different varieties of purple sweet peppers. Some are smaller and more compact, perfect for smaller containers, while others are larger and more productive.
Don’t be afraid to get creative and personalize your purple sweet pepper container garden to suit your own preferences and space. The most important thing is to get started and enjoy the process.
We wholeheartedly encourage you to try this DIY trick and experience the satisfaction of growing your own delicious purple sweet peppers. It’s a simple, sustainable, and incredibly rewarding project that anyone can undertake.
Once you’ve embarked on your purple sweet pepper growing journey, we’d love to hear about your experiences! Share your photos, tips, and challenges in the comments below. Let’s build a community of container gardeners and inspire others to embrace the joy of homegrown produce. What kind of container did you use? What growing medium worked best for you? Did you encounter any unexpected challenges, and how did you overcome them? Your insights can help other aspiring gardeners succeed.
So, grab a container, some soil, and a purple sweet pepper seedling, and get ready to embark on a flavorful adventure! Happy gardening!
Frequently Asked Questions (FAQ)
What kind of container is best for growing purple sweet peppers?
The ideal container should be at least 12 inches in diameter and 12 inches deep to provide ample space for the roots to grow. Repurposed containers like large buckets, plastic bins, or even old tires can work well, as long as they have drainage holes. Terra cotta pots are also a good option, but they tend to dry out faster than plastic containers. Consider the material’s durability and ability to retain moisture when making your choice. Dark-colored containers can absorb more heat, which can be beneficial in cooler climates but may overheat the soil in hotter regions.
What type of soil should I use for my purple sweet pepper container?
Avoid using garden soil directly in your container, as it can become compacted and poorly drained. Instead, opt for a high-quality potting mix specifically formulated for container gardening. These mixes typically contain a blend of peat moss, perlite, and vermiculite, which provide good drainage, aeration, and water retention. You can also amend your potting mix with compost or other organic matter to improve its fertility and nutrient content. A slightly acidic to neutral pH (around 6.0 to 7.0) is ideal for purple sweet peppers.
How often should I water my purple sweet pepper plants in a container?
Watering frequency will depend on several factors, including the size of your container, the type of soil you’re using, the weather conditions, and the growth stage of your plants. Generally, you should water your purple sweet pepper plants whenever the top inch of soil feels dry to the touch. Water deeply until excess water drains out of the drainage holes. Avoid overwatering, as this can lead to root rot. During hot, dry weather, you may need to water your plants daily, while in cooler, wetter weather, you may only need to water them every few days.
How much sunlight do purple sweet peppers need?
Purple sweet peppers thrive in full sun, which means they need at least 6-8 hours of direct sunlight per day. Choose a location for your container that receives plenty of sunlight throughout the day. If you live in a particularly hot climate, you may need to provide some afternoon shade to prevent the plants from overheating. If you don’t have access to a sunny outdoor space, you can also grow purple sweet peppers indoors under grow lights.
What kind of fertilizer should I use for my purple sweet pepper plants?
Purple sweet peppers are heavy feeders and require regular fertilization to produce a bountiful harvest. Use a balanced fertilizer with an NPK ratio of 10-10-10 or 14-14-14. You can also use a fertilizer specifically formulated for tomatoes or peppers. Start fertilizing your plants a few weeks after transplanting them into the container, and continue fertilizing them every 2-3 weeks throughout the growing season. Follow the instructions on the fertilizer label for proper application rates.
How do I prevent pests and diseases from affecting my purple sweet pepper plants?
Regularly inspect your plants for signs of pests or diseases. Common pests that affect purple sweet peppers include aphids, spider mites, and whiteflies. You can control these pests by spraying your plants with insecticidal soap or neem oil. Diseases such as blossom end rot and fungal infections can also affect purple sweet peppers. To prevent blossom end rot, ensure that your plants receive consistent watering and calcium. To prevent fungal infections, provide good air circulation around your plants and avoid overhead watering.
When can I harvest my purple sweet peppers?
Purple sweet peppers are typically ready to harvest about 60-80 days after transplanting. The peppers will turn a deep purple color when they are fully ripe. You can also harvest them when they are still green, but they will be less sweet. To harvest, simply cut the peppers from the plant using a sharp knife or pruning shears.
Can I grow purple sweet peppers indoors?
Yes, you can grow purple sweet peppers indoors, but you will need to provide them with adequate light and warmth. Place your container near a sunny window or under grow lights. You will also need to pollinate the flowers manually, as there will be no bees or other insects to do it for you. Use a small paintbrush to transfer pollen from one flower to another.
What are some common problems when growing purple sweet peppers in containers?
Some common problems include blossom end rot (caused by calcium deficiency), aphid infestations, and fungal diseases. Consistent watering, proper fertilization, and good air circulation can help prevent these issues.
Can I save seeds from my purple sweet peppers to plant next year?
Yes, you can save seeds from your purple sweet peppers, but keep in mind that the resulting plants may not be true to type, especially if the peppers were cross-pollinated with other varieties. To save seeds, allow the peppers to fully ripen on the plant. Then, remove the seeds and dry them thoroughly before storing them in an airtight container in a cool, dark place.
Leave a Comment