
Rooting bay leaves might sound like a culinary quest reserved for seasoned gardeners, but trust me, it’s a surprisingly achievable DIY project that can bring the fragrant essence of the Mediterranean right to your backyard! For centuries, bay leaves have been prized not only for their distinct flavor in soups, stews, and sauces, but also for their purported medicinal properties and symbolic significance – representing victory and honor in ancient Greece and Rome.
But why bother with the effort of rooting your own bay leaves when you can easily buy them at the store? Well, imagine the satisfaction of harvesting fresh, aromatic leaves straight from your own plant, knowing you nurtured it from a simple cutting. Plus, commercially grown bay laurel often lacks the intense flavor of homegrown varieties. This DIY trick is perfect for anyone looking to expand their herb garden on a budget, propagate a beloved bay laurel from a friend, or simply enjoy the rewarding experience of creating something beautiful and useful with their own hands. I’m going to show you how easy it is to start rooting bay leaves and enjoy the fruits (or rather, leaves!) of your labor.
This guide will walk you through the entire process, from selecting the right cuttings to providing the optimal conditions for root development. Get ready to unleash your inner gardener and embark on this exciting propagation adventure!
Propagating Bay Laurel: A DIY Guide to Rooting Bay Leaves
Okay, so you love cooking with fresh bay leaves, right? And maybe you’re tired of buying them dried or constantly running to the store. Well, guess what? You can actually grow your own bay laurel tree from cuttings! It’s not the easiest thing in the world, but with a little patience and the right technique, you can totally do it. I’m going to walk you through the whole process, step-by-step, so you can have your own little bay leaf factory in your backyard (or even on your balcony!).
What You’ll Need
Before we dive in, let’s gather our supplies. Having everything ready beforehand will make the whole process much smoother. Here’s what you’ll need:
* A healthy bay laurel tree to take cuttings from: This is the most important part! Make sure the tree looks healthy and vigorous. Avoid taking cuttings from trees that look stressed or diseased.
* Sharp, clean pruning shears or a knife: Cleanliness is key to prevent infections. Sterilize your tools with rubbing alcohol or a bleach solution (1 part bleach to 9 parts water).
* Rooting hormone: This isn’t strictly necessary, but it significantly increases your chances of success. I recommend a powdered rooting hormone for ease of use.
* Rooting medium: You have a few options here. I’ve had success with a mix of perlite and vermiculite (equal parts), or you can use a well-draining potting mix specifically designed for seed starting. Avoid using garden soil, as it can harbor diseases.
* Small pots or containers: Choose pots that are about 3-4 inches in diameter. Make sure they have drainage holes!
* Clear plastic bags or a humidity dome: This will help create a humid environment, which is crucial for rooting.
* Spray bottle with water: For misting the cuttings.
* Labels and a permanent marker: To keep track of your cuttings.
* A warm, bright location: Indirect sunlight is best. Avoid direct sunlight, which can scorch the cuttings.
Taking the Cuttings
This is where the magic begins! The timing is important. The best time to take bay laurel cuttings is in late spring or early summer, when the tree is actively growing.
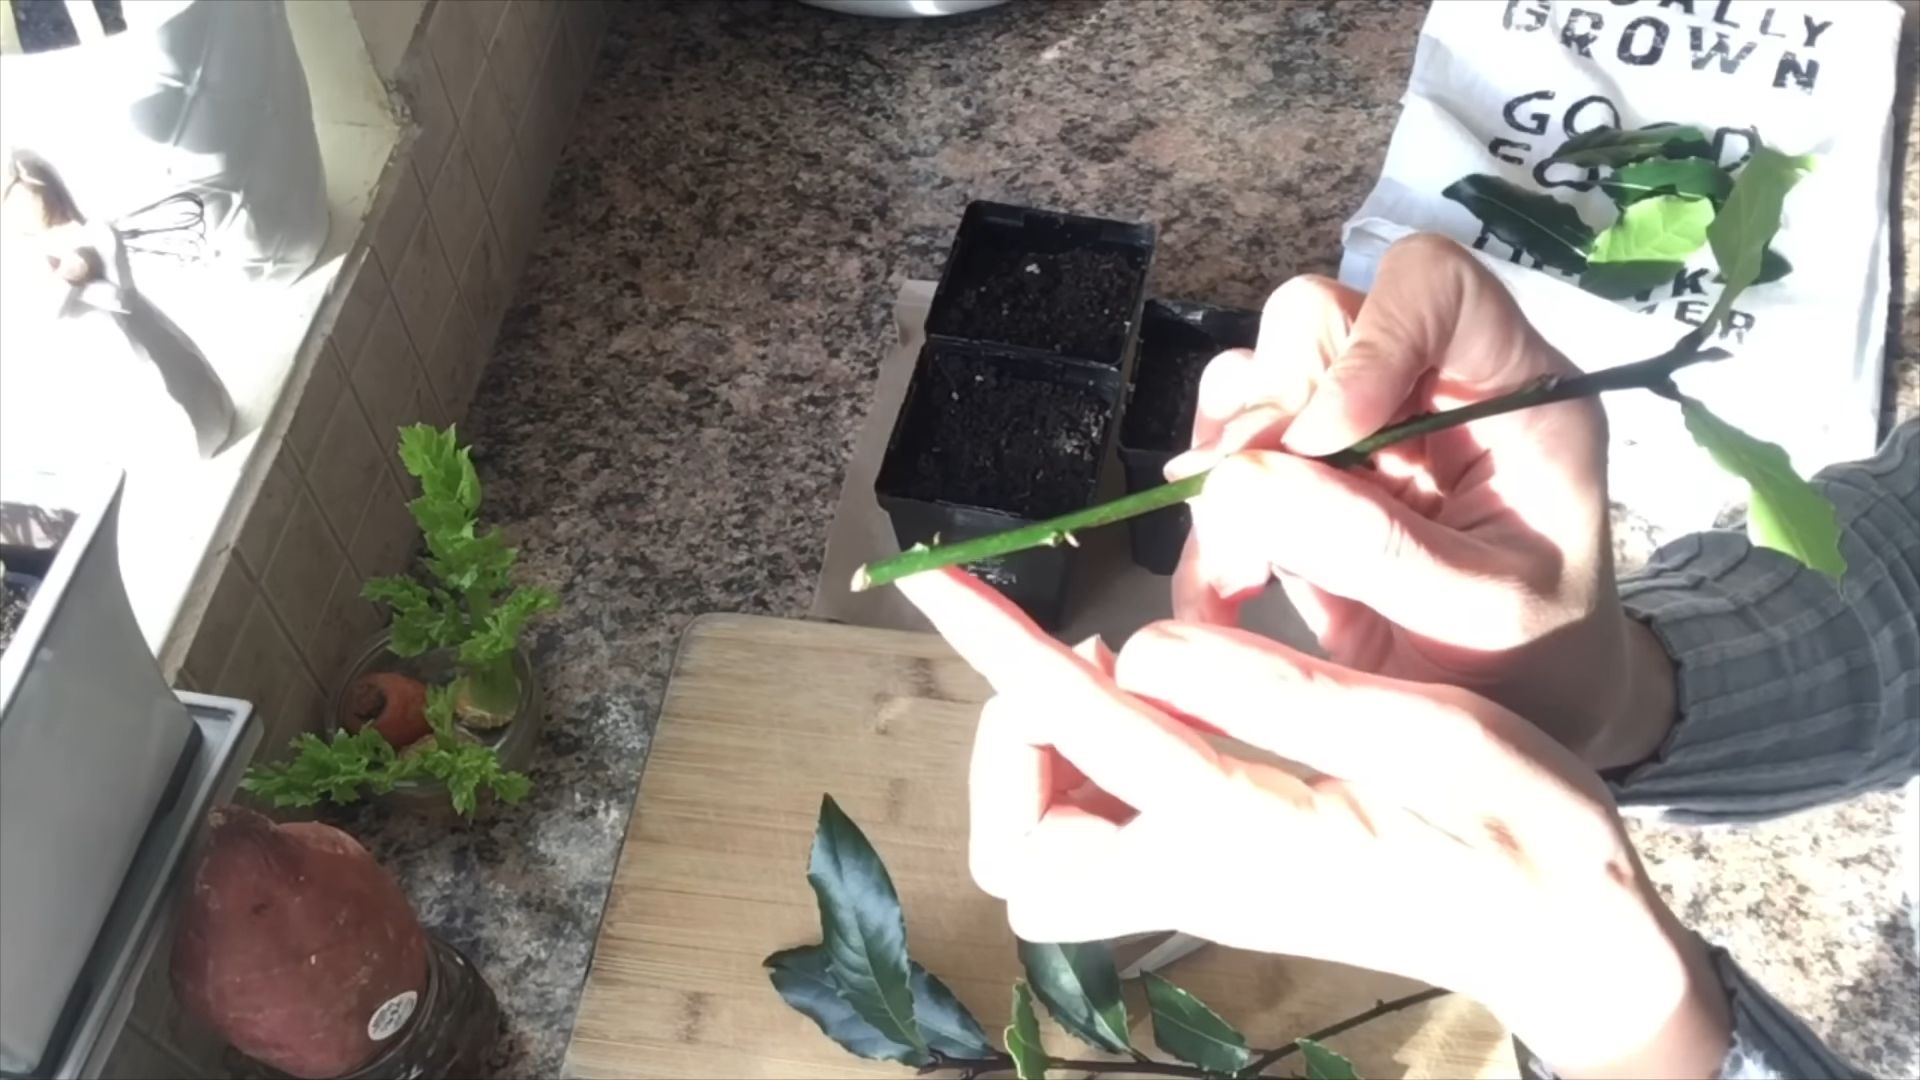
1. Choose your cuttings: Look for healthy, semi-hardwood stems that are about 4-6 inches long. These are stems that are neither too new and green nor too old and woody. They should be from the current year’s growth.
2. Make the cut: Using your sterilized pruning shears or knife, make a clean cut at a 45-degree angle just below a leaf node (the point where a leaf grows from the stem). This angle increases the surface area for root development.
3. Remove the lower leaves: Strip off the leaves from the bottom 1-2 inches of the cutting. This will prevent them from rotting in the rooting medium and also encourages root growth.
4. Prepare the cutting: Gently scrape the bark on one side of the bottom inch of the cutting. This will expose the cambium layer (the layer just beneath the bark), which is where the roots will emerge.
5. Apply rooting hormone: Moisten the bottom inch of the cutting and dip it into the rooting hormone powder. Tap off any excess powder.
Planting the Cuttings
Now it’s time to get those cuttings into their new homes!
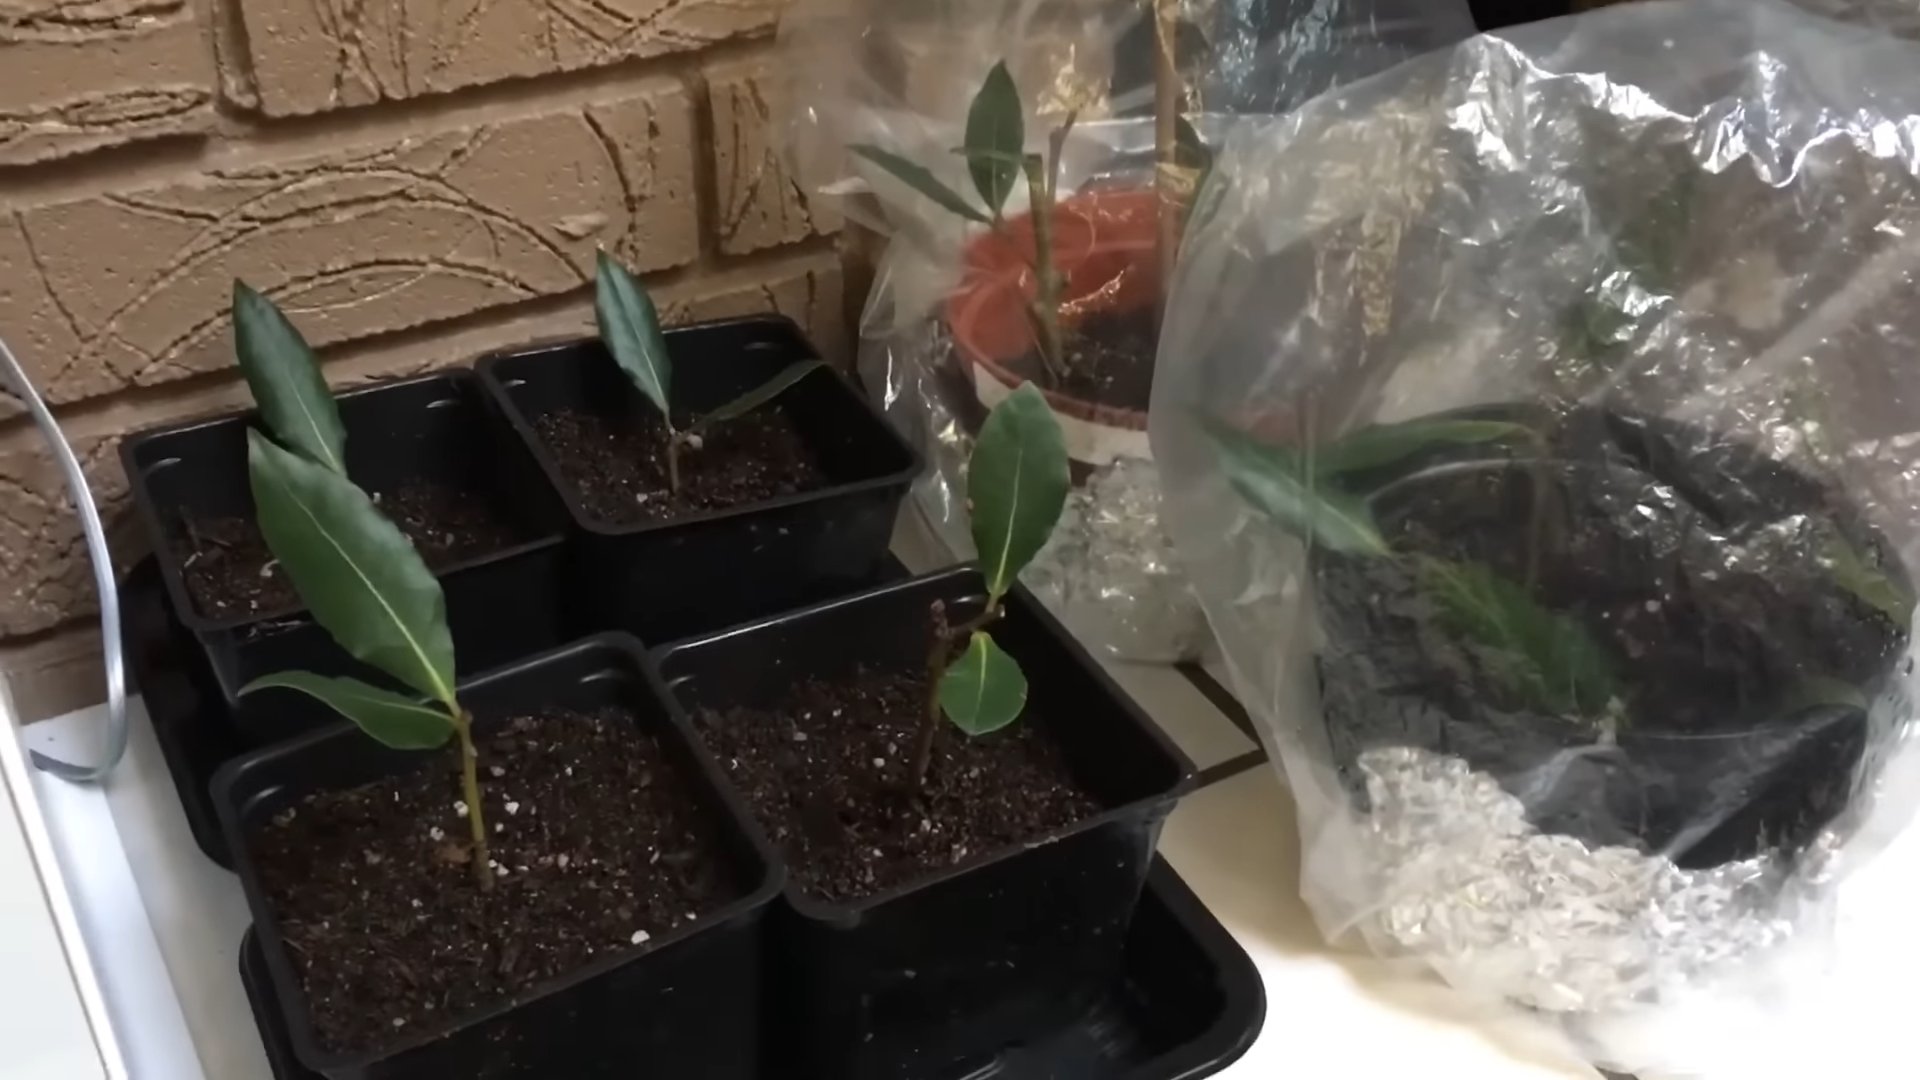
1. Prepare the pots: Fill your pots with the rooting medium, leaving about an inch of space at the top. Moisten the medium thoroughly, but don’t let it get soggy.
2. Plant the cuttings: Use a pencil or your finger to make a hole in the rooting medium. Gently insert the cutting into the hole, making sure the bottom inch is buried.
3. Firm the soil: Gently firm the rooting medium around the cutting to provide support.
4. Water the cuttings: Lightly water the cuttings to settle the rooting medium.
5. Create a humid environment: Place the pots inside clear plastic bags or under a humidity dome. This will help maintain high humidity, which is essential for rooting. If using plastic bags, make sure the bags don’t touch the leaves. You can use skewers or straws to prop them up.
6. Label the cuttings: Label each pot with the date and type of cutting. This will help you keep track of your progress.
Caring for the Cuttings
This is where patience comes in. Rooting can take several weeks, or even months, so don’t get discouraged if you don’t see results right away.
1. Provide indirect sunlight: Place the cuttings in a warm, bright location that receives indirect sunlight. Avoid direct sunlight, which can scorch the leaves.
2. Maintain humidity: Keep the humidity high by misting the cuttings with water every day or two. If you’re using plastic bags, open them up for a few minutes each day to allow for air circulation and prevent mold growth.
3. Water carefully: Keep the rooting medium moist, but not soggy. Water when the top inch of the medium feels dry to the touch.
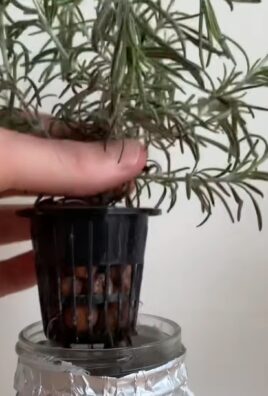
4. Check for root development: After a few weeks, gently tug on the cuttings to see if they have rooted. If you feel resistance, that means roots have formed. You can also gently remove a cutting from the pot to check for root growth.
5. Harden off the cuttings: Once the cuttings have rooted, gradually acclimate them to lower humidity and brighter light. Start by removing the plastic bags or humidity dome for a few hours each day, gradually increasing the time over a week or two.
6. Transplant the cuttings: Once the cuttings are well-rooted and hardened off, you can transplant them into larger pots filled with well-draining potting mix.
Troubleshooting
Sometimes, things don’t go as planned. Here are a few common problems you might encounter and how to fix them:
* Cuttings rotting: This is usually caused by overwatering or poor air circulation. Make sure the rooting medium is well-draining and that you’re not overwatering. Increase air circulation by opening the plastic bags or humidity dome more frequently.
* Cuttings drying out: This is usually caused by low humidity. Make sure the cuttings are in a humid environment and that you’re misting them regularly.
* Cuttings not rooting: This could be due to a number of factors, such as poor quality cuttings, lack of rooting hormone, or improper environmental conditions. Try taking cuttings from a different part of the tree, using rooting hormone, and ensuring that the cuttings are in a warm, humid environment.
Tips for Success
Here are a few extra tips to help you succeed in rooting bay laurel cuttings:
* Take multiple cuttings: Not all cuttings will root, so it’s a good idea to take several cuttings to increase your chances of success.
* Be patient: Rooting can take several weeks, or even months, so don’t get discouraged if you don’t see results right away.
* Provide consistent care: Consistent care is key to success. Make sure the cuttings are in a warm, humid environment and that you’re watering them carefully.
* Don’t give up: Even if your first attempt fails, don’t give up! Try again with different cuttings or a different rooting medium.
Final Thoughts
Rooting bay laurel cuttings can be a rewarding experience. It takes a little time and effort, but the satisfaction of growing your own bay laurel tree is well worth it. Plus, you’ll have a constant supply of fresh bay leaves for all your culinary creations! Good luck, and happy gardening!
Conclusion
So, there you have it! Rooting bay leaves might seem like a botanical challenge reserved for seasoned gardeners, but with a little patience and this straightforward method, you can cultivate your own thriving bay laurel plant from a simple leaf. Why is this a must-try? Because beyond the satisfaction of nurturing life from scratch, you gain access to a constant supply of fresh, aromatic bay leaves, far superior in flavor to their dried counterparts. Imagine the depth of flavor you can add to your soups, stews, sauces, and braises, all thanks to your own homegrown bay leaves.
This DIY trick isn’t just about saving money; it’s about connecting with nature and understanding the magic of propagation. It’s about reducing your reliance on store-bought herbs and embracing a more sustainable lifestyle. Plus, a bay laurel plant makes a beautiful and fragrant addition to any garden or windowsill.
Looking for variations? Experiment with different rooting mediums. While we’ve highlighted the water propagation method, you can also try rooting bay leaves directly in a well-draining potting mix. Just ensure the soil remains consistently moist but not waterlogged. Another variation involves using rooting hormone to encourage faster root development, although it’s not strictly necessary. You can also try different types of bay leaves, although the common bay laurel (Laurus nobilis) is the most readily available and easiest to root.
Don’t be discouraged if your first attempt isn’t successful. Rooting bay leaves can take time, and patience is key. Remember to provide indirect sunlight, maintain consistent moisture, and avoid extreme temperatures. The reward of a flourishing bay laurel plant is well worth the effort.
We wholeheartedly encourage you to give this DIY trick a try. It’s a rewarding experience that will not only enhance your culinary creations but also deepen your appreciation for the natural world. Once you’ve successfully rooted your bay leaves and have a thriving plant, we’d love to hear about your experience! Share your tips, tricks, and photos in the comments below. Let’s build a community of bay laurel enthusiasts and spread the joy of homegrown herbs. Happy rooting!
Frequently Asked Questions (FAQ)
Why should I bother rooting bay leaves when I can just buy them dried?
That’s a valid question! While dried bay leaves are convenient, fresh bay leaves offer a significantly more intense and nuanced flavor. The volatile oils responsible for the characteristic aroma and taste degrade over time during the drying process. Fresh bay leaves impart a brighter, more vibrant flavor to your dishes, elevating your culinary creations to a new level. Plus, the satisfaction of growing your own herbs is an added bonus! Rooting bay leaves also allows you to control the quality and source of your herbs, ensuring they are free from pesticides and other unwanted chemicals.
How long does it take for bay leaves to root?
Patience is crucial when rooting bay leaves. It can take anywhere from 4 to 8 weeks, or even longer, for roots to develop. The exact timeframe depends on various factors, including the temperature, humidity, and the health of the leaf cuttings. Don’t be discouraged if you don’t see roots immediately. Just continue to provide the right conditions, and eventually, you should see progress. Regularly change the water every few days to prevent bacterial growth and ensure the cuttings have access to fresh oxygen.
What kind of water should I use for rooting bay leaves?
It’s best to use filtered or distilled water for rooting bay leaves. Tap water often contains chlorine and other chemicals that can inhibit root growth. If you only have access to tap water, let it sit out in an open container for 24 hours to allow the chlorine to evaporate before using it for rooting.
What is the best time of year to root bay leaves?
The best time of year to root bay leaves is typically in the spring or early summer, when the plant is actively growing. During these months, the plant has more energy and is more likely to produce roots. However, you can attempt to root bay leaves at other times of the year, as long as you provide the right conditions.
How do I know if my bay leaf cutting is not going to root?
Unfortunately, not all bay leaf cuttings will successfully root. If the leaf cutting starts to turn brown or black, or if it becomes mushy, it’s likely that it’s rotting and won’t root. It’s important to remove any dead or decaying leaves from the water to prevent the spread of bacteria.
Can I root bay leaves directly in soil?
Yes, you can root bay leaves directly in soil. However, the success rate may be lower compared to water propagation. If you choose to root in soil, use a well-draining potting mix and keep the soil consistently moist but not waterlogged. You can also cover the pot with a plastic bag or humidity dome to create a humid environment, which can help encourage root growth.
Do I need to use rooting hormone?
Rooting hormone is not essential for rooting bay leaves, but it can help to speed up the process and increase the success rate. If you choose to use rooting hormone, dip the cut end of the leaf cutting in the hormone powder or liquid before placing it in water or soil.
What kind of light do bay leaf cuttings need?
Bay leaf cuttings need bright, indirect sunlight. Avoid placing them in direct sunlight, as this can scorch the leaves. A north-facing window or a spot with filtered sunlight is ideal.
How do I care for my rooted bay leaf plant?
Once your bay leaf cutting has developed a strong root system, you can transplant it into a pot with well-draining potting mix. Bay laurel plants prefer full sun to partial shade and well-drained soil. Water regularly, allowing the soil to dry out slightly between waterings. Fertilize occasionally with a balanced fertilizer. Bay laurel plants can be grown indoors or outdoors, depending on your climate. If you live in a cold climate, bring your plant indoors during the winter months.
My rooted bay leaf plant is growing slowly. What can I do?
Slow growth can be due to several factors, including insufficient light, poor soil, or lack of nutrients. Ensure your plant is receiving adequate sunlight and is planted in well-draining soil. Fertilize regularly with a balanced fertilizer. You can also prune your plant to encourage bushier growth.
Can I use the leaves from my rooted bay leaf plant right away?
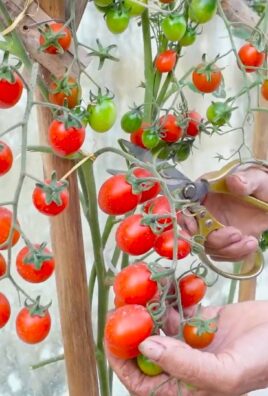
It’s best to wait until your bay leaf plant is well-established before harvesting leaves. Allow the plant to grow for at least a year before harvesting any leaves. When harvesting, choose mature leaves from the lower part of the plant.
Is rooting bay leaves worth the effort?
Absolutely! While it requires patience, rooting bay leaves is a rewarding experience that provides you with a constant supply of fresh, flavorful herbs. It’s also a sustainable and cost-effective way to grow your own herbs. Plus, a bay laurel plant makes a beautiful and fragrant addition to any garden or home. The superior flavor of fresh, homegrown bay leaves will undoubtedly enhance your culinary creations.
Leave a Comment